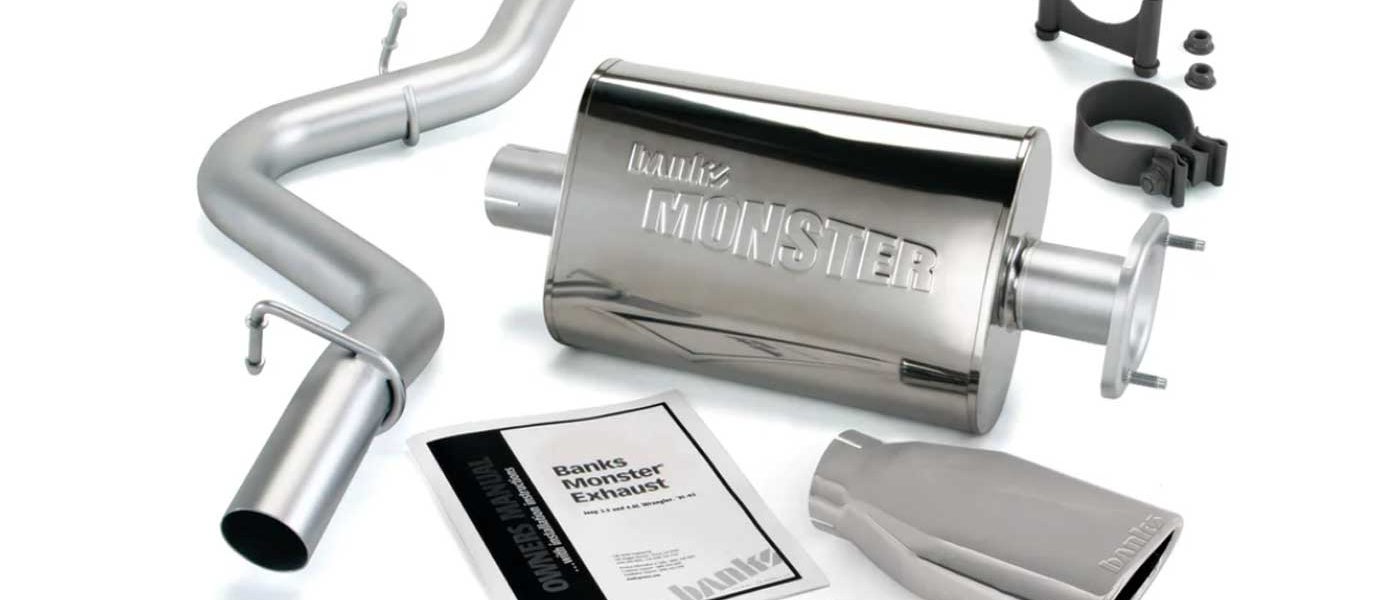
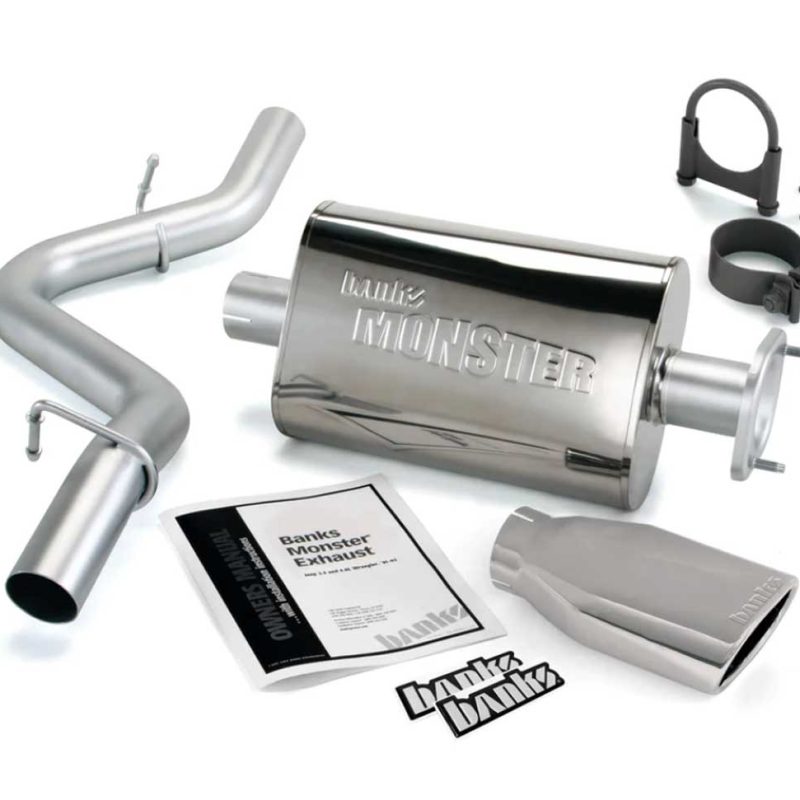
96435 Monster Exhaust for 1991-2006 Jeep
INSTALL INSTRUCTIONS
Part #s
51312, 51313, 51314, 51315
Banks Monster Exhaust® System
Jeep 4.0L I-6 Models:
1991-95 Wrangler (YJ)
1997-06 Wrangler (TJ)
2004-06 Wrangler Unlimited
Jeep 2.5L I-4 Models:
1997-03 Wrangler (TJ)
Please read through the following instructions thoroughly before starting your installation. If you have any questions please visit our Support Page.
Tools Required
• 1⁄4” and 3⁄8” drive ratchets with inch and metric sockets and 1⁄4” and 3⁄8” drive extension
• Inch and metric combination or open-end wrenches
• Standard screwdriver
• Standard and needle-nose pliers
• Clean shop towels or rags
Highly Recommended Tools & Supplies
• Inch-pound and foot-pound torque wrenches
• Compressed air source and hose
• Air pressure regulator
• Penetrating oil or light lubricant spray
• Reciprocating saw
General Assembly
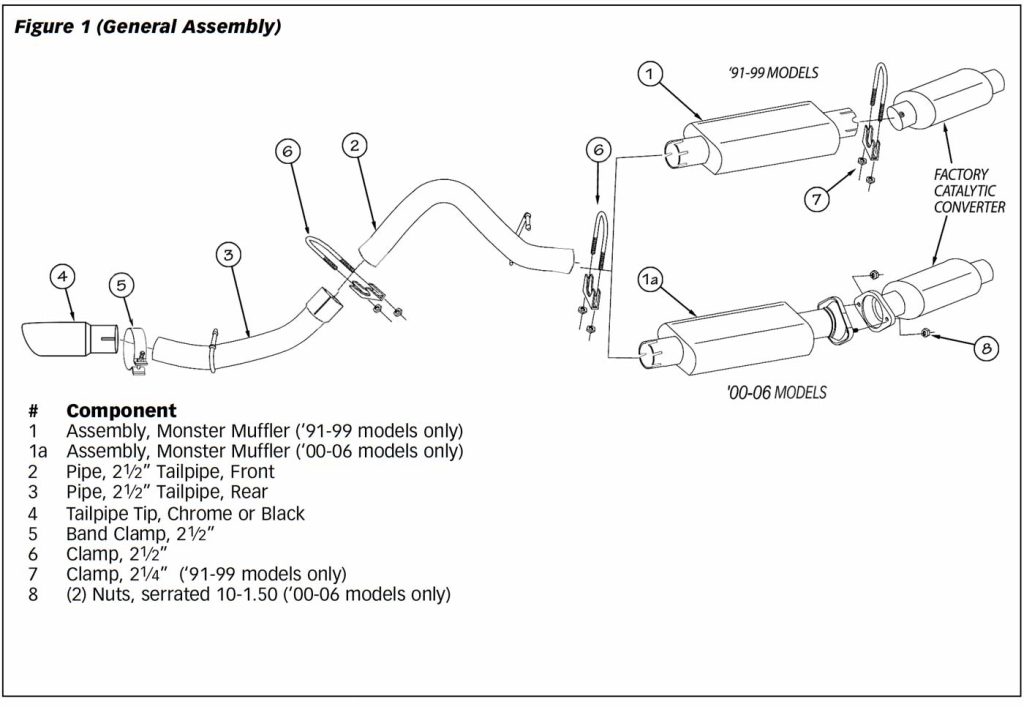
Kit 51311 – Part List for 1991-95 Jeep Wrangler (4.0L)
Kit 51312 – Part List for 1997-99 Jeep Wrangler (2.5-4.0L)
Kit 51313 – Part List for 2000-03 Jeep Wrangler (2.5-4.0L)
Kit 51314 – Part List for 2004-06 Jeep Wrangler (4.0L)
Kit 51315 – Part List for 2004-06 Jeep Wrangler Unlimited (4.0L)
General Installation Practices
Installation Instructions
1. Raise the vehicle on a hoist or safety stands to provide access to the exhaust system.
2. For 2000-05 models, remove the 10-mm hardware from the catalytic converter and muffler connection. For all other models, loosen and remove the clamp that connects the factory muffler to the catalytic converter. An oxyacetylene torch may be useful at the muffler and catalytic converter connection. (If applicable, be sure to remove the oxygen sensor on the catalytic converter before operating the torch.)
3. Remove the hanger pins from the rubber hangers at the rear of the tailpipe. (Spray lubricant will ease hanger removal.) Remove the muffler and tailpipe from the vehicle. Cutting the tailpipe may ease the removal process.
4. Install the Banks Monster muffler onto the catalytic converter. Be sure the exhaust inlet is facing toward the catalytic converter. For 2000-05 models, loosely install the supplied 10-mm hardware onto the catalytic converter and muffler studs. For all other models, position the muffler so that it is straight and level with the vehicle. Loosely install the supplied 21⁄4” clamp onto the muffler and catalytic converter connection (see Figure 1).
5. Install a supplied 21⁄2” clamp onto the muffler outlet. Install the front tailpipe over the rear axle housing into the outlet of the muffler. Connect the front tailpipe hanger pins to the factory rubber hangers. Loosely tighten the 21⁄2” clamp on the muffler outlet. Install a supplied 21⁄2” clamp onto the front tailpipe oulet. Install the rear tailpipe inlet into the front tailpipe outlet. Connect the rear tailpipe hanger pins to the factory rubber hangers. Loosely tighten the supplied 21⁄2” clamp in between the rear and front tailpipe pieces.
6. Install the supplied 21⁄2” band clamp about a 1⁄2 “ on the rear of the tailpipe tip (so that the clamp rests on the rear tailpipe cutouts). Slip the 21⁄2” polished tailpipe tip over the rear tailpipe. The tailpipe tip should be completely pressed onto the rear tailpipe.
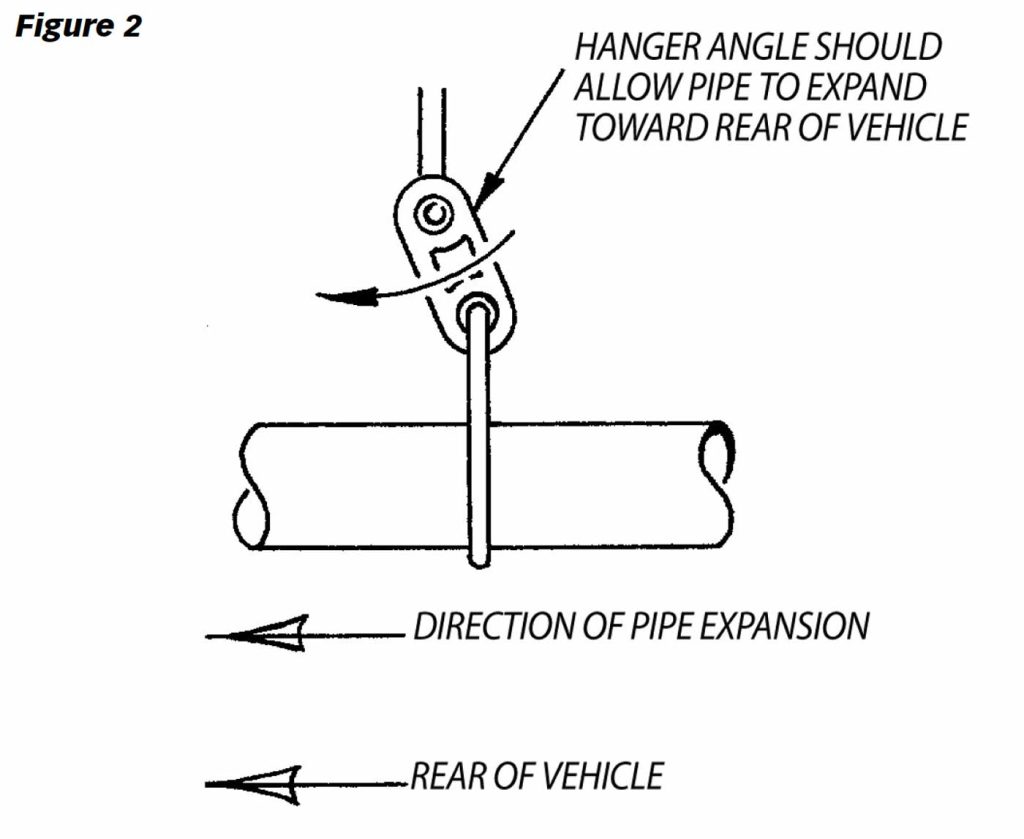
7. Position all the exhaust components such that all the hanger pins are parallel with the frame pins and all exhaust tubing is located properly. Lightly tighten clamps to maintain position. The tailpipe tip should be position 1-2” below the bottom edge of the vehicle body. All hangers should be hanging slightly forward to allow for heat expansion of the exhaust tubing (see Figure 2).
8. With everything positioned properly, torque the 10-mm hardware (on 2000-05 models) and clamps to 25-30 ft-lbs.
9. Reconnect the battery. Start the vehicle and listen for exhaust leaks. Tighten the clamps as necessary. Whenever possible, tack-welding slip connections to prevent disengagement is recommended.

The vehicle exhaust may smoke upon initial start-up. This is normal, as grease used in the tube bending process burns off the pipes.
10. Your Banks Monster Exhaust system contains two (2) Banks Power decals. For a clean factory look, it is recommended that the decals are placed above the ”4.0L” emblem on the passenger and driver-side front fenders.