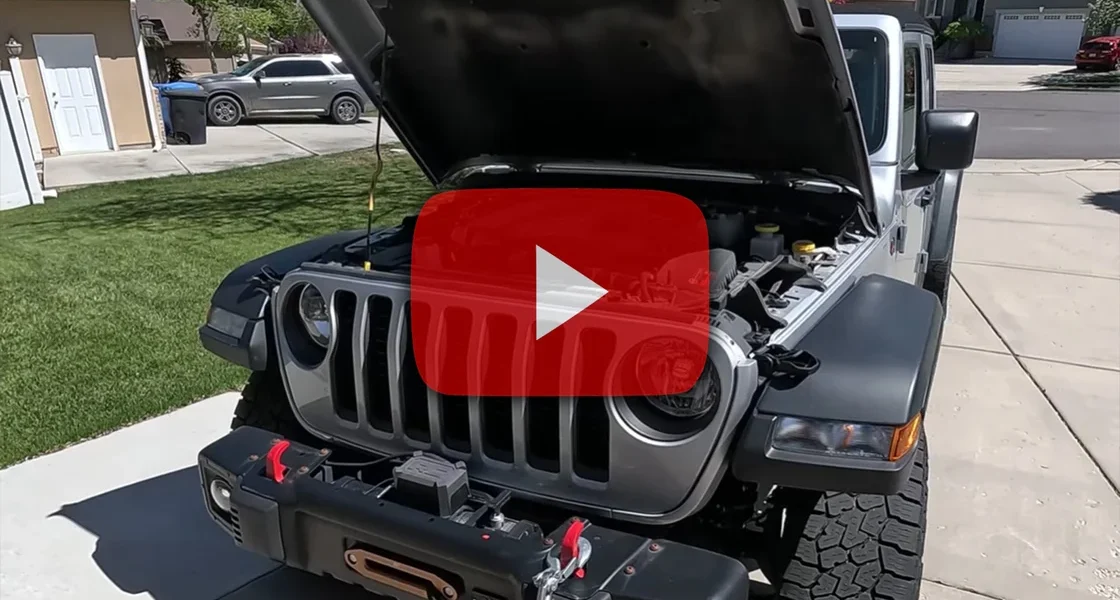
Power and MPG Gains: Jeep Gladiator Upgraded with Derringer and PedalMonster
“This thing is a whole different vehicle!” exclaims the hot of Gear Jammer Garage after installing a Derringer tuner,PedalMonster, iDash, and Stealth Pod Gauge Mount in his 2023 diesel Jeep Gladiator. After chronicling the installation process, he took off to test his Jeep with the Derringer set to level 6 (the highest) and with the Pedalmonster set to level 10 on TRACK mode (the most aggressive).
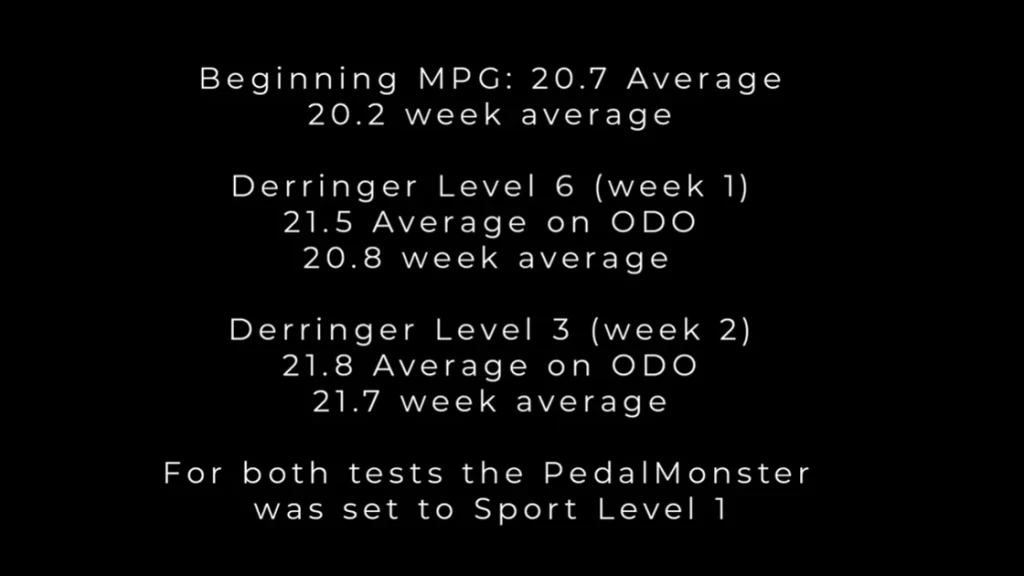
Even though the PedalMonster and the Derringer aren’t advertised as adding MPG, he decided to test to see if the duo would affect his mileage. Although these tests were rudimentary, he did conduct them using his real-world weekly drive. He found that while the Banks parts added power, they didn’t compromise his mileage. In fact, just on his weekly drive, he was noticing extra MPG. With only two weeks of driving and seeing bonus mileage, just think of what he’ll be getting over time or on his trips?

Full Video Transcript
00:01 [Music] hey welcome to Gear Jammer Garage Today I’m working on my Jeep Gladiator here It’s a 2023 Eco Diesel and I’ll be installing the Banks Power Daringer and the Pedal Monster So this is the stuff that Banks sent me here This is the pod to mount it on the pillar Part number 63371 This is a pedal
00:47 monster There’s a part number And this is the daringer and the eye dash There’s a part number for that So I’m going to start under the hood Come back to this stuff here We’ll come back to this here as well There a couple of connectors I got to put under the hood This is one of them
01:39 Cool It comes with zip ties I like that Let’s open this up here This goes inside of the truck You unplug the connector going to the gas pedal throttle pedal whatever You hook this up to that and then the one that’s in the truck to here So this whole system is pretty much it just goes in line and it
02:14 uh does what it does and tells the Jeep’s computer to make decisions and you get more power So I’m going to open this all up then we’ll go under the hood and we’ll start All right First thing we’ll do disconnect the battery and we’ll take the engine cover off All right next step is we’re going
02:43 to take off this charger cooler There’s a metal clip there and a metal clip down here And then this just comes off And then we’re going to take this foam out as well To take this out all you got to do is pry these metal clips up and they get locked in this plastic part
03:05 And then this hose just slides out I’m not going to completely remove this I’m just kind of kind of going to kind of turn it out of the way It go It It went there And then I’m going to take this foam out You got to remove this thing here And then the foam will come out All
03:56 right All right So now I could get the foam out of the way so I could see in there There’s a bolt down there that I can’t reach over here in the corner But this the front of the engine right you see that silver thing that’s the fuel pressure uh the fuel pressure rail and just like a tube And it’s got
04:16 all these little silver fuel lines coming out that go to the injectors But that tube that rail runs back And on the back of it there’s a sensor That’s the fuel pressure one that you got to get to The other one is the uh MAP sensor and it’s that guy right there So there’s the intake right
04:42 underneath it right there That’s it So you got to unplug that Now I’m laying over the top of the engine That fuel pressure rail is right here and it goes under this Let me see That’s it right there I don’t know if you can see it on through the camera right there That’s it So you got to unplug
05:18 that It’s a little tight but it can be done And then the other one is right there right underneath the intake elbow So there’s that little red clip you got to undo The sensor comes out And then that guy Let me stick the camera in there That guy right there And then there’s a Let me see
05:51 It’s right there Just follow the the fuel rail It’s under there It’s right there And you can see it from the front It’s right there It’s just all the way on the back of it So you take this elbow off It’s two T30 bolts And then it lifts right up What I did I moved this positive battery
06:15 cable out of the way It goes on this stud here And then there’s another stud here It’s this one This one goes here I took that off Also just kind of move the positive out of the way And then with the stud gone you can move this heater hose a little bit This is one of the ones that you’re
06:39 going to have to hook up the banks to This is the temperature sensor that was hooked up to the elbow And then the fuel pressure that you need is that one right there This one This one right here So it has a little red tab underneath You got to take that off I’ll go get a pick to do that and then plug
07:08 all the stuff back in and then put everything back together So I ended up taking off the charger cooler because you got to really get in there and it’s in the way That’s a lot of work just to make these two connections here But here’s one I got to hook this up to the map And then
07:37 there see you can see that there there is the fuel pressure one down there And then this is the the banks Well this is the original one That’s the banks And this is the harness So I did take off the elbow that that’s right there to the turbo and move some of this stuff out of the
08:08 way So I’m going to reassemble all that And then this is an automatic but there should be a hole somewhere over here for the clutch pedal That might be it right there I’ll go under the dash and look around and see where can we pass with the wire that’s got to go in there
08:36 The daringer stays out here So this doesn’t need to go over there We’ll mount the daringer in here somewhere I’m going to reassemble all of that and then we’ll come back We’ll figure this out It’s a lot of swearing that’s going to go on when you do this It’s not hard
08:57 but it is It’s like very tedious Very tedious work So let me get all this back together and then we’ll continue So I got us all this back together It just goes back together the same way when you took it apart I ran the wire for the daringer here under this and the connectors here
09:18 So I’ll get the daringer and then there’s a this goes to the daringer and then daringer has another wire that goes inside of the cab to the eye dash So I’ll go to that I look around underneath and see where I could run the wire through It’ll probably be through there So that plastic cap that’s
09:38 there you could pop it off drill your hole and run the wire through there Getting it back in might be a little tricky I’m going to see if the little neighbor kid can come and help me get his little hand in there and push it in If not then I’ll figure something out But that’s where I’m at right now
10:00 So that plastic panel that goes here just just pull on and it’ll snap off It has six of these clips There’s one two three and then three on the other side I’ll show you There just these clips that hold it in Now everything we’re doing here with the bank stuff is in
10:22 line I can’t get in here So just like under the hood that uh connector on top of the gas pedal has to come out And then my wire is coming through that hole Kid’s not home so I can have him help me But I’m not going to let that stop me We’ll just keep working Right Right
10:47 there That right there You unplug it and plug it in in line with the uh pedal commander So I’ll do that next And then I’ll figure out how I’m going to run the wires up cuz the pod’s going to go in here This cover down here is the same as the one that used to be here It just kind of pops out like that
11:11 And there’s two 10 mm bolts here and here Uh the banks comes with the new screw that you use to mount this This panel comes off pretty easy There’s one two three five clips that you got to pop out And then you can run the wire behind this Once you have this piece off you’ll see the wires
11:38 sticking out right here And you could kind of grab them and then keep bringing them up You will have to drill a hole here the same way that you did on that other plastic part and then run the wires behind this panel I’ll be putting this back [Music] here and then make all my
12:01 connections So this isn’t very hard but it is really really tedious work So almost done here I got the eye dash installed I ran the wires behind this panel here And then the pedal monster is right here I zip tied it Zip tied some of these wires out of the way This might
12:22 show a little bit but it’s not a big deal I’ll put this cover back on and then we’ll fire it up for the first time All right we’re all done down here Let’s close the hood Fire this thing up for the first time All right here we go Oh it fired right up That’s doing its thing All
13:24 right I guess this is the power level Well it fired right up Before I start messing with it and before I drive it I just wanted to point this out The truck’s got 35,000 mi on it and it averages 20.7 MPG I went on a trip last week and put almost 4,000 miles on it and it averaged 22
13:58 This is my MPG for the week I did 221 miles 20.2 And this is since I changed the oil 20.8 So I’m going to reset this and then I’ll see if this gives me better or worse mileage Well I’m going to play around with it I’ll reset it again because I know I’m going to get on
14:22 it and it’s going to kill the mileage But uh after I play around with it I’ll reset this again And then we’ll come back and see if this adds MPG or not cuz they don’t advertise it for that They advertise it for power only And when you have power you get on it And because you’re getting
14:41 on it all the time you lose MPG So I’ll play with it today And then starting tomorrow I’ll drive like a normal person And I’ll report back in one week So I installed this yesterday Drove around a little bit at level six and the uh pedal monster uh like track mode level level
15:07 10 It thing this thing is uh it’s a whole different vehicle So I turned it down to the pedal monster [Music] is see here It’s on sport mode level 10 The Darren is at level six which is the highest it goes One thing you do need to do before you could use the pedal monster you got to go to
15:40 settings Let me see here Where was it bank modules I think is what it is Yeah Then we go to pedal monster I have it mode sport mode level 10 I don’t know if that comes out And you do need to calibrate the uh the pedal So you just click this You do it with the engine off You put
16:15 You hit start and then it tells you to hold it to the ground You hit okay let it go hit okay and then it’ll calibrate the uh the pedal position sensor which is what it’s working with So so far I’m still averaging 20 Since yesterday I’ve driven 10 miles I’m at 12.8 But I have been getting on it
16:47 and been messing around with it So we’ll wait a week and we’ll come back and then I’ll see what these numbers look like So it’s Monday I’m on my way to work I changed the pedal monster to sport level one It’s a little too sensitive It’s stop and go traffic at sport level 10 and I’m at 17
17:20 MPG So we’ll run this all week We’ll see what happens Today’s Tuesday This is my Tuesday commute The Jeep does feel a lot more powerful than before [Music] So it’s been a week I just filled up That’s what the truck is averaging That’s what I averaged for this trip which was the this week since
18:45 last Saturday when I installed the banks And this is what I averaged since I changed my oil So I’m going to change my oil tomorrow And I’ll try this again in level three cuz this week I had it all on level six So I’ll change the oil I’ll set this to level three and then we’ll try this test
19:07 one more week and we’ll see what kind of mileage it gets Today’s Tuesday week two Daringer level three is the current MPG I’m getting so far So this is the end of the second week I have the Daringer set at level three Those are my miles That’s the MPG I got Then one thing that’s pretty cool that
19:53 you could change pages on here and have different gauges Hopefully that comes out I know the GoPro sucks at zoom And one thing you got to do before you start using it let’s see You got to go to banks modules pedal monster and then you got to go to here to calibrate So it’s pretty cool It does
20:39 make a big difference on power So hope that helps you out Thanks for watching guys See you guys next time
Related Source
•Explore Banks Power’s Derringer tuners for Jeep
•Check out the PedalMonster throttle booster
•Browse more insider Jeep upgrades