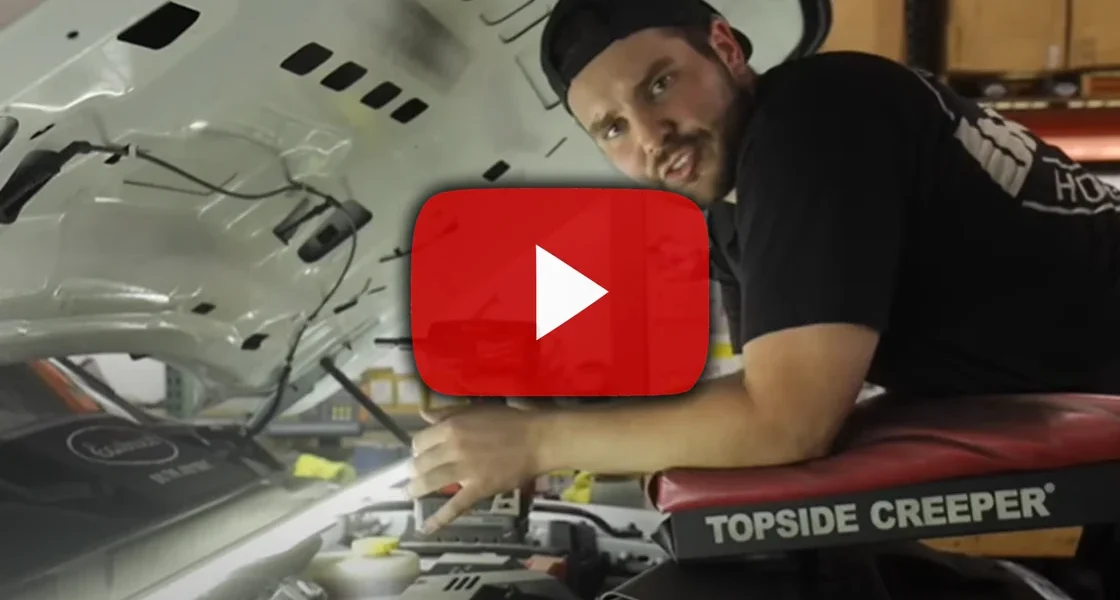
Diesel Mechanic Chooses Banks

Full Video Transcript
00:24 oh what’s up guys and welcome back or to the channel we got a special one for you today as you can see there’s something different sitting right here this is obviously a fifth gen cumin I believe it is a 2022 as you can see this thing is completely completely stock now these
00:51 new fifth gen have a slew of things that people are you know on edge about one of them being the grid heater bolt now that attains to all 67s and honestly 59s for that matter we’re going to take care of that today along with letting this thing breathe as much as they can these fifth
01:09 gen don’t like aftermarket intakes too much or aftermarket filters this new platform is just full of different you know nooks and crannies of things that are just very interesting however we got A banks cold air intake going on this today dry filter non-oiled we don’t want
01:27 any interference with the sensors here and causing it to flick any lights on we don’t want that next thing we’re going to do is we are getting rid of um one this intake horn the grid heater we’re doing grid heater delete and getting the banks monster ram intake horn installed
01:43 on this truck we’re going to go through the whole process obviously you guys know deleting the grid heater is somewhat of a process and a lot of you are interested in tackling it and doing it uh I’m going to show you how to do that and um we’ll get it done right now
01:60 okay so like I said we’re doing the cold air intake from Banks and the monster ram from Banks there’s a lot and I’m I’m just saying there is a lot of products on the market that do this similar function get rid of your grid heater give you a new intake horn um and all
02:16 that Banks has hours and hours of R&D into their stuff they got all their proven results Dino tested ready to go there’s a reason why this is priced the way it is compared to others including um Quality within that um like like you like I’ve said I’ve used Banks product
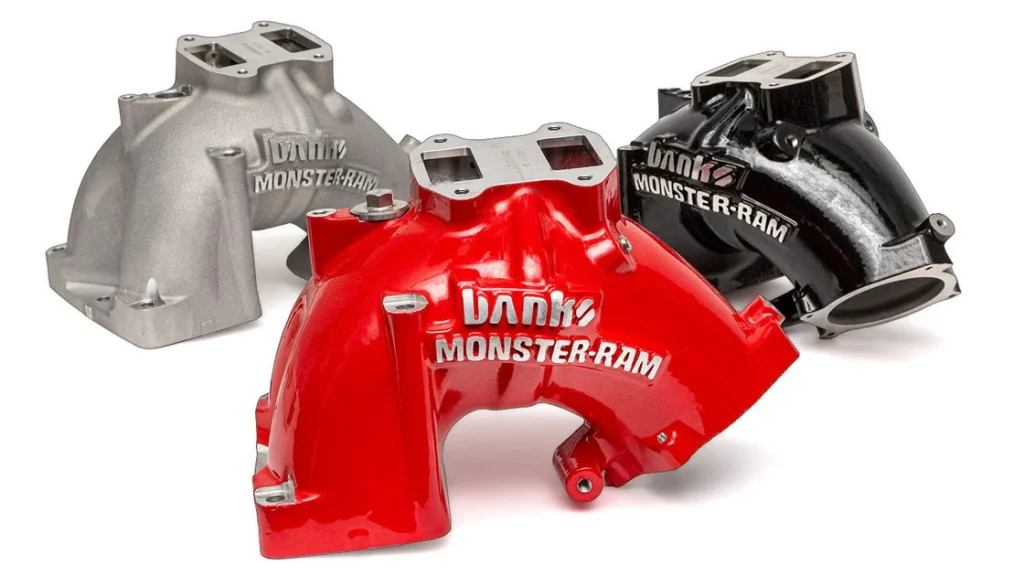
02:37 since I was 16 years old and I haven’t been let down once so that says a lot all right this box has our monster ram intake horn in it it’s just Raw it’s going to look good underneath there um no powder coat no nothing it also comes in red red or black and you can also
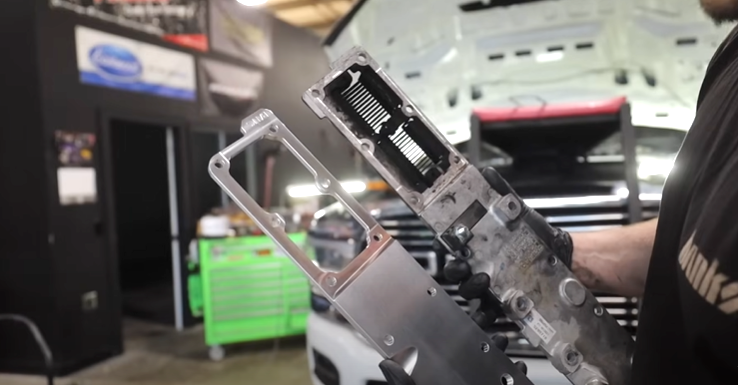
02:53 take this intake horn yourself and powder coat it any color you want here is the uh intake horn horn obviously you guys can see 50 state compliant this thing is just all around literally beautiful wow look at that amazing Machining that thing looks great we’ll show you a difference but
03:16 look at how much air that thing can suck I’ll show you the stock one you’ll be you’ll be real confused if uh you haven’t seen it before with the uh intake horn there here is the heater delete and the gasket for that and then in this bag here is your new um coil heater for the intake
03:38 horn this horn this intake horn is going to allow your truck to almost flow 73 lbs a minute which is crazy stocks about 41 and on top of that we’re adding the cold air intake to this truck so it’s going to flow a ton more air um more efficient better throttle response um
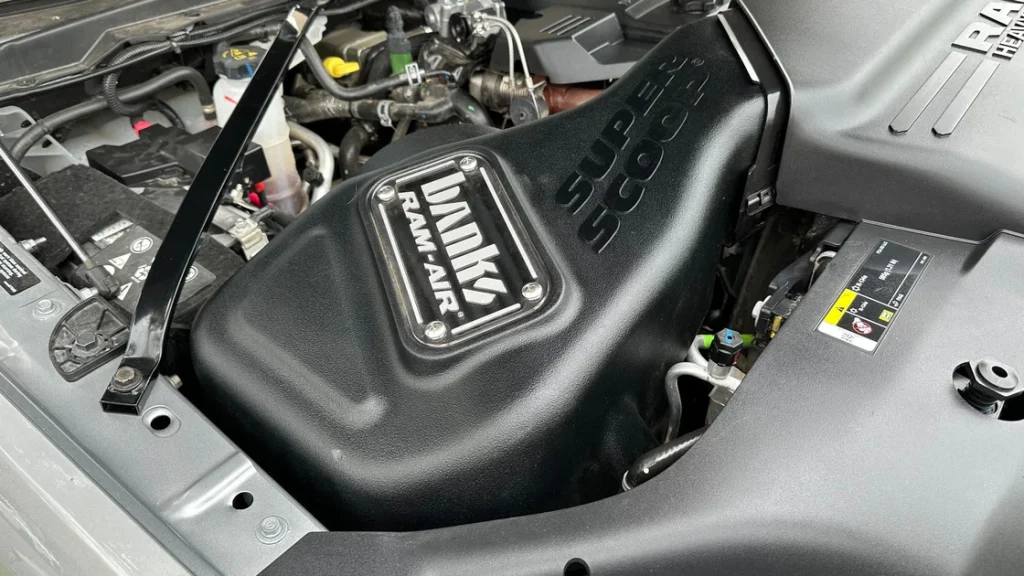
03:57 you’re going to get a lot of benefits um when you upgrade your truck truck with just these two things you don’t even have to add any tuning you don’t have to add anything else these things are impressive and then in this box here here we have the Ram cold air intake very simple not
04:15 much to it comes with all your boots hoses license plate if you want it and more instructions oh my gosh this thing is massive well anyways guys that’s everything we’re going to get installed today let’s get digging on this show you the whole process this is super simple
04:35 this is a little bit more complicated but um it’s going to turn out sick and I’m definitely going to be worth it all right so we’re going to do the intake horn first because the uh cold air intakes a little bit easier first thing you got to do is take off this this plate now on my truck my fourth gen
05:01 I have the um first gen intake horn and it still fits underneath um this plastic however this time with a second gen and the uh EGR all mounted on top this um this beauty this beauty plate is um no longer of use so we’re going to remove that for 8 mm pull your dipstick
05:32 out take this cover off and then honestly while you’re at it you just put the dipstick put it back in there all right next thing we got to do is get this um valve cover off really panel tool there’s a couple wiring harnesses pop them off now that this is is moved you got access to all of the uh 8 mm
06:18 nuts all right you got to take your oil cap off take your valve cover pull your valve cover up like this you have access to your um EGR crossover bracket and the um this is also what held that OEM plate in decorative piece take these out remove your bracket bolts back in
06:52 there if you guys are doing this to a truck that has 50 60 plus thousand miles this one only has about 20 um getting close in there don’t forget to change your crank case filter um don’t forget that always got to do that proper maintenance Next Step here literally put your valve cover um or
07:12 your crane case cover back on okay so now this EGR crossover tube there’s a bracket on the front 8 mm you got to take it off got a flex head ratchet kind of tucked in there down by the side and uh you can break it free this one is not the fastest bolt to get out but take your time it’ll
07:50 come you’ll get this little bolt out and then this bracket here you can slide it down and uh you’re just going to remove it okay so now that we got all that situated we got to take this EGR crossover tube off there’s a gasket here and there’s a gasket here don’t let them
08:10 fall we got to take this sensor out we can start doing that by popping this plug out of the throttle body heat shield there there’s this and then we actually got to take that heat shield off there’s a 13 mil up there and then a 10 down down here this sensor is plugged into
08:43 here unplug it and then this is a 19 mm let’s see how 20,000 Mi of EGR does to this sensor completely black already nice all right then uh like I said on this side of the crossover tube there’s a gasket in here don’t let that fall okay so on this side you’re going
09:16 to take the EGR crossover tube lift up you’re going want to take this clamp off and makes you grab that gasket okay so after the EGR crossover tube is out we got to work on obviously removing the EGR valve itself and then the intake horn uh to do that a lot of things need unplugged we’re going
09:41 to start here with our act actually our grid heater um itself the the little bolt is down or the little nuts down there going to take that off there’s also harness Clips onto your dipstick to hold that and onto this over here older models Maybe zip tied these can pop
10:02 out down here it’s into that bracket and then over here you should be good once we disconnect that nut there’s a 10 mil on that zip that off detach it from uh all the clips you can see and you can put this out of the way but that is what activates your grid heater there another harness here
10:29 attached to your your dip stick you can also then remove your dip stick on the back of your intake horn and EGR valve you got this this harness unplug this one and then down here unplug that map sensor on the back of the throttle valve okay so here on top of the intake
10:52 horn you can do this now or later really but this this will remove your EGR valve these four bolts and then uh there’s your EGR valve we got one gasket here and then we’ve got this other gasket still right there so just make sure these don’t fall anywhere and you can take this off this
11:23 harness and then there should be a 13 and a 10 right here oh God that’s one of the uh intake horn bolts okay so now that we got all that done it’s time to get the intake horn up and out 11 mil down here break it free from the Boost tube Slide the Boost tube off the intake horn
12:02 now we’re left with 5 10 ms right here on the intake horn itself we’ll be able to get this out and then we can start getting the rail out to access these back to a little easier you can pull this vent off just like that okay so now your intake horn is loose you can slide it underneath the
12:29 fuel fuel lines there and pick this up this is um first of all here’s the factory size hole compared to the banks one we’ll compare that in a second but here is 23,000 M of EGR use on this thing this thing is getting caked caked already okay so here’s your grid heater
12:48 guys put a rag in any open holes we’re going to be getting this off in a second so um once we open this we’ll close it off but um protect those things here we got to take off this foam thing and a couple more harnesses this back vent tube and we’ll be able to access the
13:05 fuel rail here we’re going to unplug our crank case vent sensor here you can take this harness start moving it out of your way so you can get this foam piece out okay after you get that um little rubber piece out out covering the rail you’ve got two these injector harness things
13:35 left okay so now that we got this whole mess of just everything unplugged that’s absolutely absurd we’re left here with our fuel rail there’s a sensor in the back sensor in the front um and then obviously your six highpressure fuel lines we’re got to break them loose here the first fuel line
14:01 in the row is actually going to get replaced by one that Banks made so the big intake horn can fit in here so we won’t need to reuse injection line number one but the rest of them we will so start taking these off one by one and the feed line over here okay and then with the banks
14:20 kit they give you these little red caps so each time you take off a line gives you a little cap and the same thing over here so you can cap each one of these off keep the dust out another thing you want to note is you don’t want to loosen up these feed tubes on accident so be
14:38 very careful if you want to take a mark and Mark it so it doesn’t rotate cuz this is a two-piece um system the injection line goes into the injector feed tube so make sure that doesn’t rotate um as you’re loosening this because the injector feed tube becomes loose then you’ll have a uh fuel
14:58 leak in inside the tube and that’s not good the third injection line goes to the fourth spot as it curls around okay so the number six injection line you’re supposed to loosen it get it out of the way now the back the one that connects to the injector feed tube that
15:28 part in the is surrounded by a bracket now if you took the crank case cover off the valve cover off the gasket all that got down to The Rocker Box and did that you have a significantly better approach angle to get that fuel line off so if you’re building a motor and doing it all
15:46 at once it’s significantly easier to get the injection lines off there’s just a bracket that tucks in there and holds it in there pretty tight so I if you’re not doing all of this it’s going to be difficult to loosen that backward one just in general just to give you guys a
16:02 you know a fair warning but here we have the three things the three bolts off the rail loose we can lift it up here the rest of everything we have to do here is um pretty much take out this grid heater plate you can lift up on the rail here you can grab the whole heater plate just
16:33 like that okay so here’s the whole um intake Plum and grid heater for your 67 cumin as you can see the lead attaches here comes down here this nut right here along with this nut right here um is your you know is your problem um either one of these nuts what happens is I’m
16:56 assuming it either grounds this thing out or puts a positive charge to it or it’s already I don’t know what but then that’ll make this thing glow red hot but what happens is this nut ends up welding itself to this um thing at some point from the electricity and it just snaps
17:14 off and then that’s when your motor sucks it in bounces it around on a piston and you got to rebuild your whole motor same thing over here this one 20,000 Mi everything looks good intact no issues here but um that’s the thing with this people are going to say oh it
17:31 doesn’t happen if you don’t use grid heaters or you’re in a warm climate not the case people have got this in Texas California all those places it’s not just that I don’t know what’s going on or what kind of over or sends an over voltage to this to weld itself um apart
17:50 but um I don’t know I don’t know the little coil um heater in the intake is definitely going to keep this nut from getting sucked in and um destroying this motor okay so as you guys can see here here’s factory look at how much air um really is restricted especially by that
18:20 grid heater you’re getting I mean a good amount of flow however obviously taking that out of there opening that hole up a little bit it’s going to suck a lot more air all we got to do is uh transfer the sensor over and we can start putting this back in okay so now that we got the plate gasket
19:13 all that in there we got the fuel rail and all that bolted down what we’re going to do is we’re going to torque all of the bolts to the plate to spec I think it was like 41 ft-lbs I got to double check but um something around there or I don’t know but we’re going to
19:28 torque all those down to spe and then um we’re going to start putting the fuel lines back on from uh back to front and it should be pretty simple and it should be a lot quicker than taking it off okay so fuel lines are 41 ft-lbs and the grid heater bolts are about 20 ftlb so I was
19:47 a little off on that but yeah 20 ftlb on the intake heater and then 41 ftlb on the fuel line go through we’re going to torque them all down all right and because we’re installing that monster ram remember that Banks they have their own number one um injector feed line here it comes in the
20:26 small parts kit and it install that one instead of the OEM one because if you install the OEM One the uh intake is not going to work tucks in there just like that no issues and it’ll clear the monster ram okay so now we got to take the throttle valve off the uh OEM intake horn and also map
21:12 sensor but uh we’re going to zip this off with the new gasket on the bank gives you ahahahahah all right guys well there you have the monster RAM installed the Gen 2 other than that we we got to knock out this uh cold air intake real quick we got to get the box off the tube off the banks one
22:34 will fit all up in here and connect to the uh scoop and um I think the only thing else we got to do on this really is take out these sensors here we’re going to swap out that tube and box for uh this tube in box okay and don’t forget um these I wonder I don’t even think you could take
22:58 these out of here the directional Muffler in there I don’t know if you could see that but this thing is extremely restrictive I mean it’s I I think that’s supposed to muffle the turbo noise and some other things but you’re cutting off flow and all that in there um as well so it’ll be good
23:16 getting that out okay so on the fourth gen Rams they have the active air box that has that air flap in it on this one they just give you a scoop that’s pretty cool I’m glad they got rid of that active airbox that was a complete waste all right so there you guys have
23:58 it you got the Banks Gen 2 monster ram um intake horn installed along with the banks Ram Air cold air intake on this beautiful fifth gen cumings um like honestly even to this day um I still think fourth gen rain Supreme um we we may we may Venture into this one day but
24:20 um there’s a lot of new stuff on this a lot of updated things a lot of extra stuff even since the 4th gen and I just find it I just find it silly so this fifth gen is going to breathe significantly better just that intake horn itself is going to up you know upgrade this truck from being able to
24:36 flow 41 lb a minute to like over 70 lb a minute which is incredible so that plus this this thing is going to is going to breathe give you better throttle response a little bit of MPGs and more efficiency overall so this thing’s going to operate a lot better than Factory
24:52 allowed it to Let’s fire this thing up shouldn’t sound much different but might get some turbo sounds now okay you can definitely hear the turbo 10 times more you can also um you can feel it 100% from when I drove this before till now um you can feel the throttle resp it literally I mean it’s
26:30 just it’s just there now before it kind of like you know got itself into going it just goes now that’s actually very impressive no tune no nothing just volon um sounds better more efficient and um it definitely uh it definitely drives so much better so guys there you have it if you guys
27:17 are interested in anything from Banks power if you guys need those for your trucks or anything else shoot me an email down below I can get you set up with anything from Banks power and more actually if you guys want anything or need anything let me know and I can get
27:30 it shipped straight to you other than that guys we got a lot of stuff coming especially a lot more stuff coming for banks on our third gen build that’s coming we just got to finish up this Bronco over here and that’s going to be happening very soon as well now that the
27:47 lift in this area is open we got to do some rearranging here because it’s getting lifted so if you guys enjoyed this video shoot a thumbs up if you haven’t been here before please get down click subscribe drop me a comment if you haven’t already take care guys and I’ll see you in the next one
Ryan Mayer’s latest video has him working on a bone-stock 2022 Ram 2500. “These 5th gens have a slew of things that people are on edge about,” explains Ryan. “One of them is the grid heater bolt that affects all 6.7L engines. We also need to get this thing to breathe as much as we can.” In his video, the self-taught Diesel mechanic explains the grid heater issue and how the Banks Monster-Ram is the answer that will ensure the truck stays on the road, and not in the shop due to the melted bolt dropping into the engine.
“People are going to say that it’s not going to happen if you don’t use the grid heater or that you’re in a warm climate. That’s not the case! People have this problem in Texas, California, and all those warmer places.”
Finishing the install with the Ram-Air Intake, Ryan adds, “This truck is going to flow a ton more air, be more efficient, and have better throttle response. You’re going to get a lot of benefits when you upgrade your truck with just these two things. You don’t have to add any tuning, you don’t have to add anything else. These things are impressive!”
After a short test drive Ryan reports with a grin. “You can hear the turbo. And the power? You can feel it. Just a couple of add-ons, no tune, better sound, more efficiency. It definitely drives so much better.”
For another example of how the Monster-Ram helped prevent costly engine damage, read Monsterous Peace of Mind to see how one Ram 3500 owner avoided grid heater bolt failure with a similar upgrade.