iDash Keeps an eye on Billy White’s Ford F-150 Project Truck
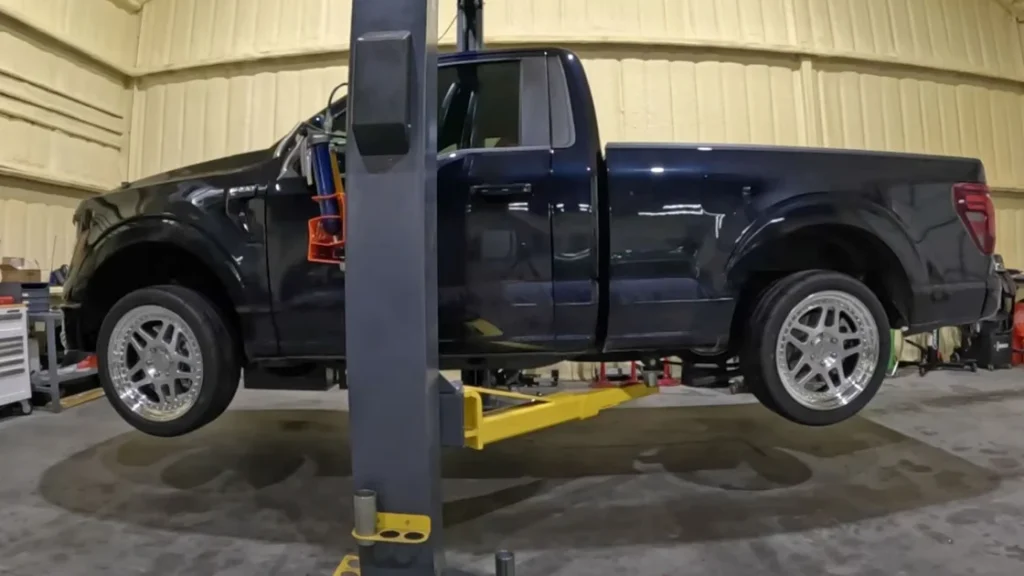
Billy White shows, via Texas 93, a very quick install of an iDash and Stealth Pod in his project truck, all of which goes flawlessly. He’s done a lot of work on his Ford F-150 5.0L 4×4. Now with his iDash, he can monitor his supercharged monster while of the road, or making passes at the drag strip.
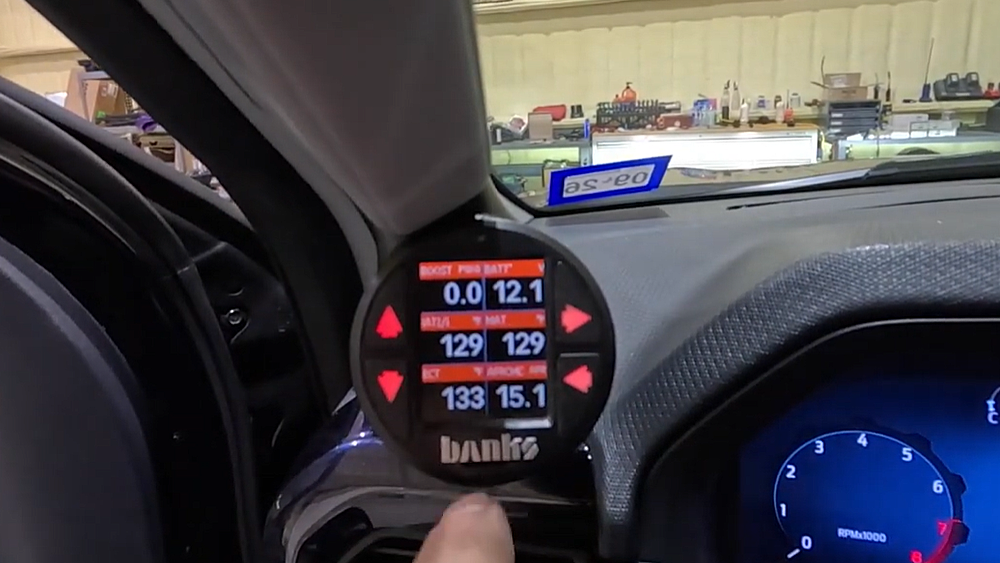
“Right now I’ve six gauges displayed on the iDash. I’ve got boost, battery, intake air temp, manifold air temp, engine coolant, and AFR. Once I get it tuned, I’ll put the fuel system on here, and this thing can also display Ethanol content!”

Full Video Transcript
00:11 Hey everyone, welcome back to the channel. Now, on today’s episode, we’re going to be installing a gauge pod from Banks for the Idash gauge. Now, we’ve already actually done the install. So, this was actually done in the vibrations uh when I was trying to figure out all
00:25 the vibration stuff. So, uh, I actually already installed the eye dash gauge pod. Uh, I was going to put it in that video, but I decided to pull it out and make it its own video instead. Uh, so that’s actually already been done. Uh, so we before we cut to the video, um, if
00:41 you would please go ahead and subscribe, hit that like and notification bell, and share this out to everyone you know. Uh, that would help us uh grow the channel, get everyone involved, uh, keep the car community alive. Now, on this episode, uh, we go went ahead and installed the,
00:58 um, gauge pod onto the A-pillar and then also the gauge itself. So, again, I’ve already done this, uh, but I went ahead and instead of putting it in the vibrations video, I pulled it out to have its own video. Um, also, by the time you see this, I’m not going to be
01:12 here this week. I’m going to be out of town for the entire week. Uh, so just to get some content up for y’all, uh, this will be released Sunday, uh, like I usually do, just that I won’t be here this that previous week to do any work on the truck. So, uh, that’s why we’re
01:27 going to do this video this week. Um, but so things that we got coming up, um, is we do have the header and converter install videos coming up. Uh, I do have that planned. Um, we also are going to have our chiller kit um installed hopefully next week is what I’m
01:46 planning. Uh, that’s all going to depend on Jay um at JF Fab uh Performance. Um, he’s actually going to be doing the install for me with Kurt from Forest Induction Interch. So, they’re going to be installing that. I’m going to be recording uh and they’re going to be
02:01 doing the step by step. Um, hopefully I can get them to narrate it. If not, I’ll do a voice over or I’ll try to narrate it while they’re doing the installation. Uh, but we do have that coming up uh for next week. Hopefully, we can get that done. Uh, maybe do a custom uh
02:18 transcooler as well. So, maybe get a video out on that. Um, additionally, um, and then we also have um, from MFP, I think it’s MFP, let me see. Yeah, MFP. Uh, we got this crank support. Now again of course I always have issues with companies not giving me stuff or giving
02:42 me the proper uh items but uh we are missing the most important part which is the actual uh support ring with the bearing in here. So this is supposed to sit inside here. So this goes in the center. You got your hole and you have your crank bolt that goes through here.
02:59 This will sit in the center of this. And then this is supposed to have a bracket around it with a bearing on it as well. And we don’t have that. And we didn’t get that in the box. So, um, we’ve reached out to Coyote’s Direct, uh, who I bought this from to see if they are
03:18 going to go ahead and get me the part that I need or if, um, MFP is going to be the one getting me the part that I need. So, uh we’ll figure out um once we hear back from Coyotes Direct on uh what direction that we need to go, but seems like everything everyone’s missing parts
03:38 or parts are not right or something’s wrong. It’s just it’s starting to kill me though. Um so, uh let’s go ahead and uh get to the video though. Uh we’re going to go ahead and actually install something this week. Uh, it’s going to be small. So, it’s just going to be this Banks uh
03:54 gauge pod, which is going to hold our eye dash gauge uh that I took out of my ZL1. So, um if you want to install this, I think this will hold um air motive gauges and everything else. Anything that’s the same diameter. Um so, I’m going to go with back with the Banks uh
04:11 eye dash that I already had uh since that gives me everything honestly that I’m going to want to uh monitor anyways. So, very first thing. So, this kit will come with the gauge, going to get an Allen wrench, stepped drill bit, got a cap socket, and then also some um dikes
04:33 or some wire cutters. Um so, the first thing we’re going to do is we’re going to take our trim panel pieces and we’re going to come in here and pull down enough of this uh weather stripping to expose the A-pillar so that way we can get to this and then take this out.
04:56 Um next we’re going to come in here into this side panel and pop it out. So that way we have access and we can run our wiring harness down here and down down down through here into our uh OBD2 port. So next thing we’re going to do is we’re need to access the handle um which we are
05:27 going I don’t know if you can see but it’s got a little bitty hole right here. So you’re going to get a pick in there and that’ll release this cover that goes along here itself. And that way we can access the bolts to be able to pull out the A-pillar. All right. So you just kind of
05:58 pull that and see it releases that. So you got some more clips in there. So just carefully remove it. And then you have your bolt exposed here and one down there. So you got two bolts to take out. So let’s get those taken out. All right. And these are going to be 10 mm.
06:35 All right, once we get those two bolts out, should be able to pop the panel down, get it out, and then just remove the wiring harness to the speaker. And now it’s out. So now we just have to modify this trim piece right here to get the gauge in. All right. So now the next thing we’re going
06:60 to do is we’re going to take the step drill bit that they provided and we are going to open up this hole right here. So it’s the lower hole on the lower bolt um connection point closest to the uh speaker that’s in the A-pillar. So it’s this middle one right here. We’re going
07:17 to enlarge to 18 mm to feed the wire through there. So, um, this gauge pod slips in behind the here. And as you can see, it overlaps, so it is going to cover up that hole. Um, and also, just so you know, Banks does make paint that matches your interior. Um, so if you
07:41 want to get that from them, you can. Um, I didn’t really care, so I’m just going to leave mine black. U, but that is something that you can do cuz they do have paint on their website. So, let’s get this taped up so we can mark the 18 mm uh plunge point and then we will drill
07:57 that out and we’ll move on to the next step. Get that marked. Get this in the drill and then we will get this set to the lower setting and then we will drill this out. And you need to make sure that you are drilling at a straight angle. Okay, now that we’ve got the hole
08:22 drilled for the cable to go through, um the uh cut off uh nips um tool that they gave. Um what we’re going to do with this is if you can see this line right here, uh this is this back side. So this is where you pulled off and got the uh uh pick in there to pull that off. We’re going to
08:47 take this and cut this at the line. All right. Now that we got that piece off, uh, we can get this installed with the gauge pod back on the truck. Okay. Actually, before we get the A-pillar back in there, I forgot we need to get the cable, the OBD2 cable ran up inside here.
09:39 So, we are going to pull this up through here and then lay it up on the dash. Okay, now that we got that slid up there, we can take our speaker cable and get that plugged back in. And then we will take our eye dash cable and run it through that hole that we just made with the steps drill bit.
10:38 And then we’re going to place the A-pillar back in the truck. All right. All right. So, the next thing that we’re going to do is we’re going to run the cable through the pod. And then that way we can get this situated where it’s supposed to go. And then we are going to take our cap
11:22 socket and get it up inside here. All right. There was one thing I forgot to tell you. And before this gets completely bolted up, you’re going to need to get the 10 mm bolt in there first. And then you can start getting this done. All right. Then we can finish up getting the gauge pod bolted in.
11:57 All right. Once we have the gauge pod bolted down, we can get the weather stripping put back up and then get the uh cover put back up back up on this corner. All right, got that in. Then we can get our gauge and install that as well. So, one thing I do as well is to check
12:25 to make sure if this is going to be loose at all. Actually, that’s pretty solid. All right. Once we have the gauge pod and the gauge installed, the next part is going to be just installing the O2 or the uh OBD2 port connection. So, it’s going to be underneath here. That white connection
13:11 right there. Just going to plug this up. And then actually probably need to move the slack out of there. Let me pull this out again. All right, let’s get all this slack and then get some zip ties and zip tie that stuff up. All right. Now that we got that zip tied, we’ll get this back on here.
14:20 All right. So, we got the eye dash installed. Let’s get the car or truck on. You can see what we got going on on the eye dash. We would set it before. I kind of played around with it for a minute. Set it up in here. So, right now I’ve got six um gauges on here. So, you can I think select up to
14:53 eight, I believe. So, one through eight is how many you can do. So, I’ve got boost um battery um intake air temp, manifold air temp, uh engine coolant temp, and AFR on mine right now. So, uh, once these things can be tuned, then I will put a fuel system on here, and this
15:13 can also read E content as well. So, that way I can get an E content reading out of this thing as well. Um, so that’s going to do it for uh this episode. All right, guys. So, that will go ahead and wrap up today’s episode. Um now again like I said uh we’ll be getting to the
15:32 um chiller system um and also crank support headers and torque converter here shortly. Um just obviously like I said out this past week. Uh so not really able to do anything on the truck. So we will get to more um more involved installs here shortly um in the next couple of weeks. So uh with all that
15:54 being said, thanks for watching. If you would, please go ahead and subscribe, hit that like and notification bell, and uh share this out to everyone you know. And we will check you on the next one.
Related Sources
Explore Banks Power’s iDash
See Banks Power’s Stealth Pod solutions
Browse Banks Power insider stories