97732 Ford Stealth Pod Installation Guide
INSTALL INSTRUCTIONS
Part #s
63365, 63368
Gauge Pod
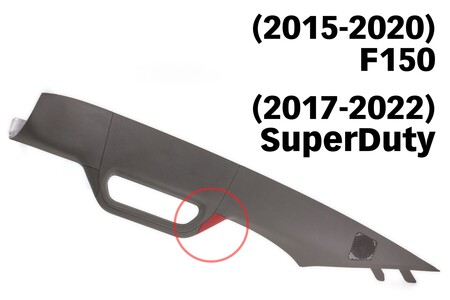
2015-2020 Ford F-150
2017-2022 Ford Super-Duty (F-250, F-350, F-450)
Please read through the following instructions thoroughly before starting your installation. If you have any questions please visit our Support Page.
Part Numbers 63365 & 63368
Fits the A-Pillar below commonly found in the following vehicles:
• 2015-20 F150
• 2017-2022 Super Duty
Installation Video
Note: If you’ve chosen to paint the pods yourself, please visit bankspower.com/paint to get perfectly matched spray paint. No primer is needed just three to four light coats.
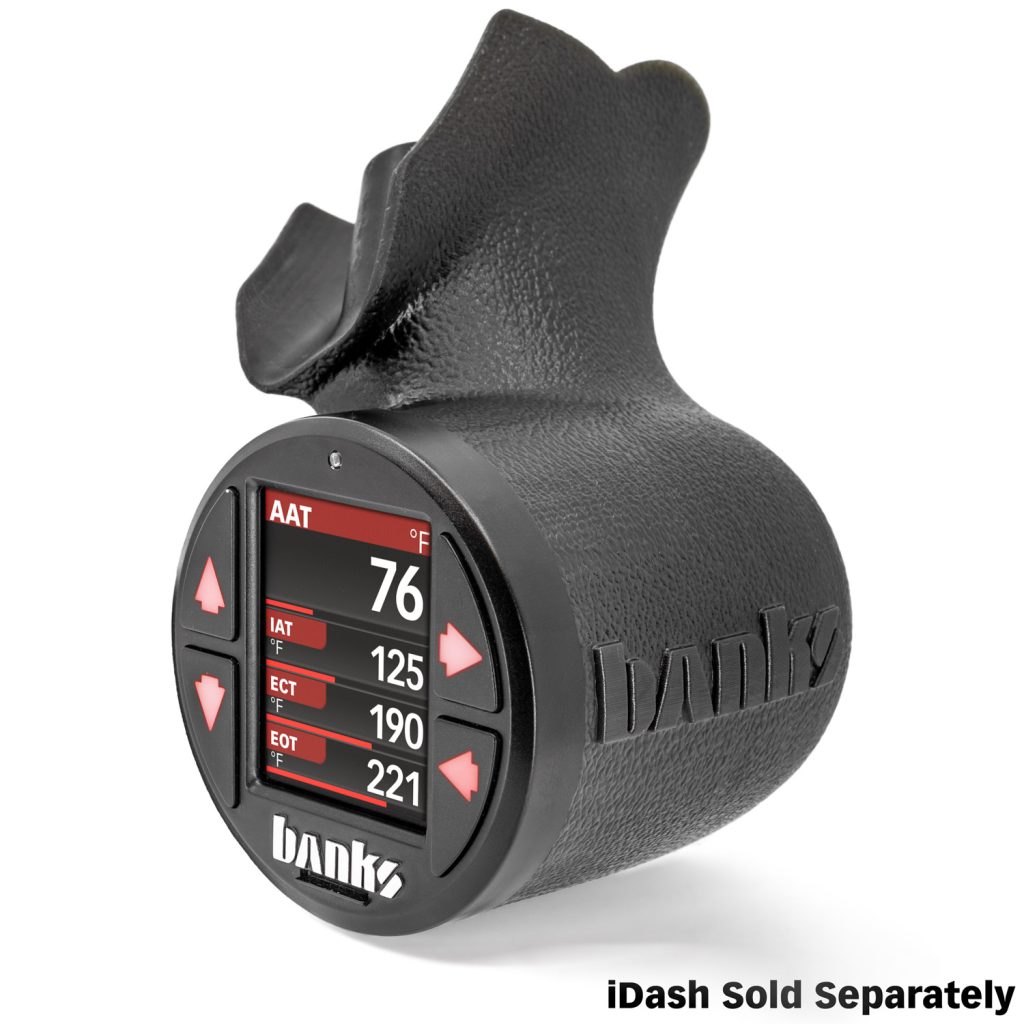
What’s Included
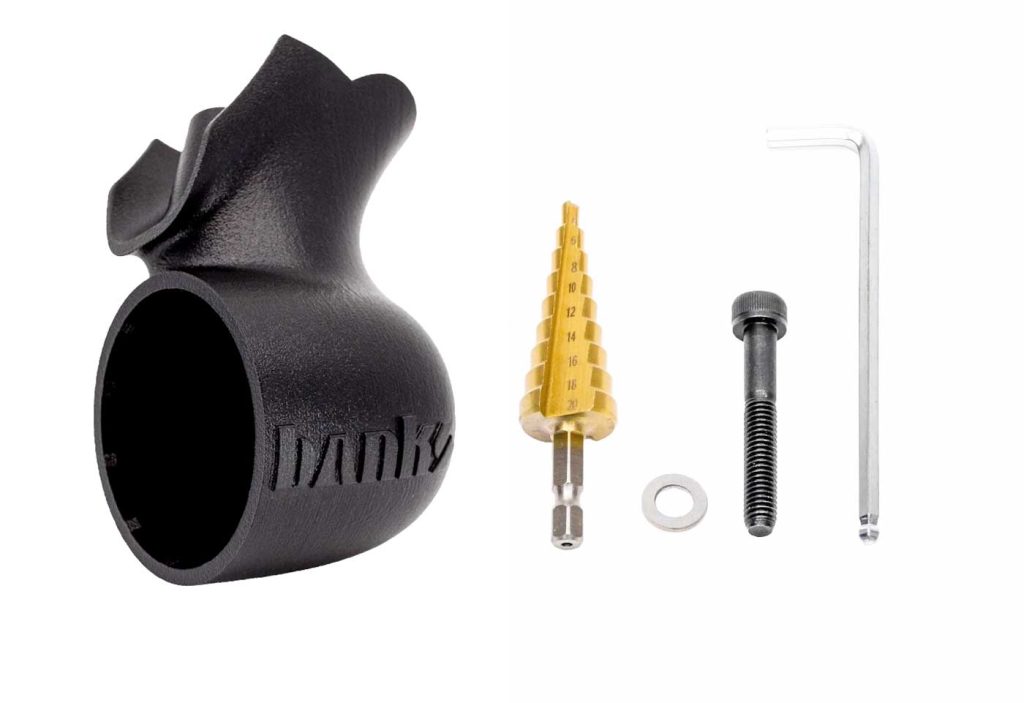
- iDash Stealth Pod
- Step Drill Bit
- Washer
- Socket Head Cap Screw
- 5mm Hex Key
If anything is missing, please call us at 800-601-8072 immediately!
Tools Required
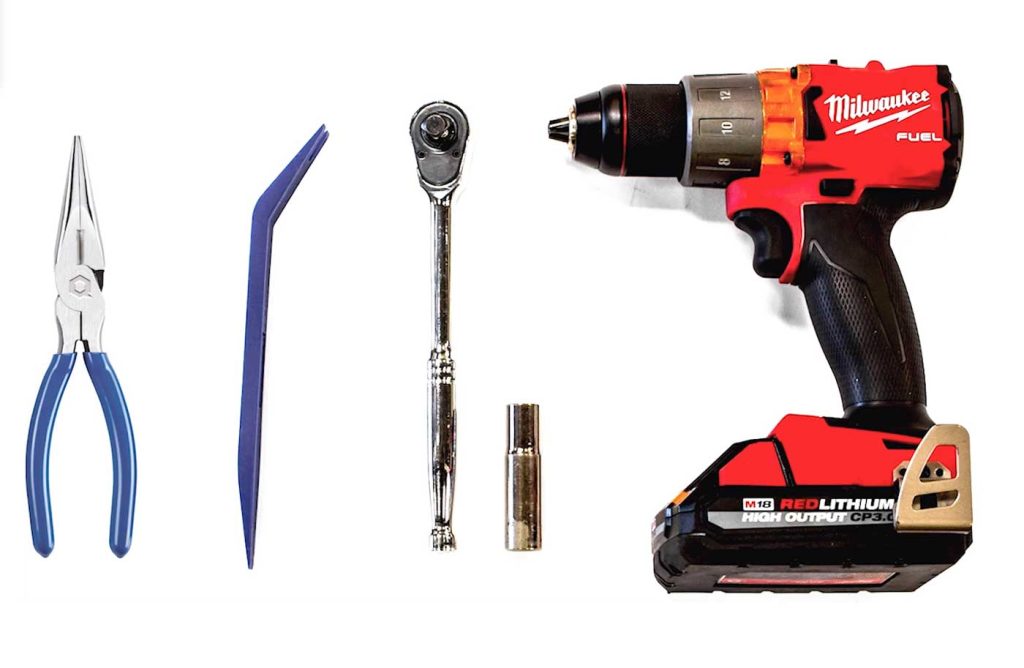
- Needle Nose Pliers
- Plastic Pry Tool
- Socket Wrench
- 10mm Socket
- Drill
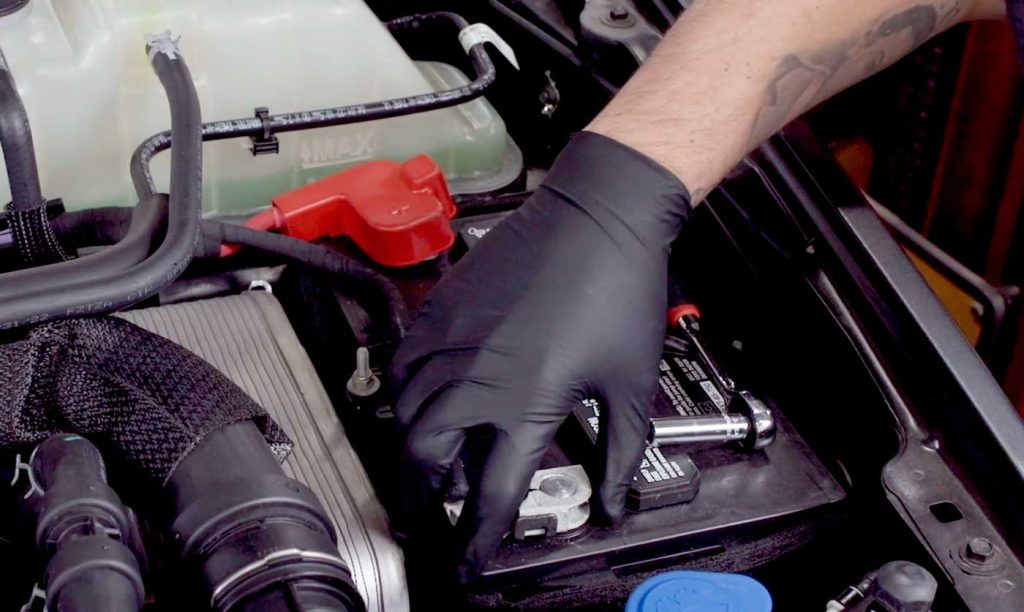
1. Before starting the installation, use your 10mm socket to remove the terminal and disconnect both batteries.
This is important because you’ll be working near an airbag and you don’t want it to go off.

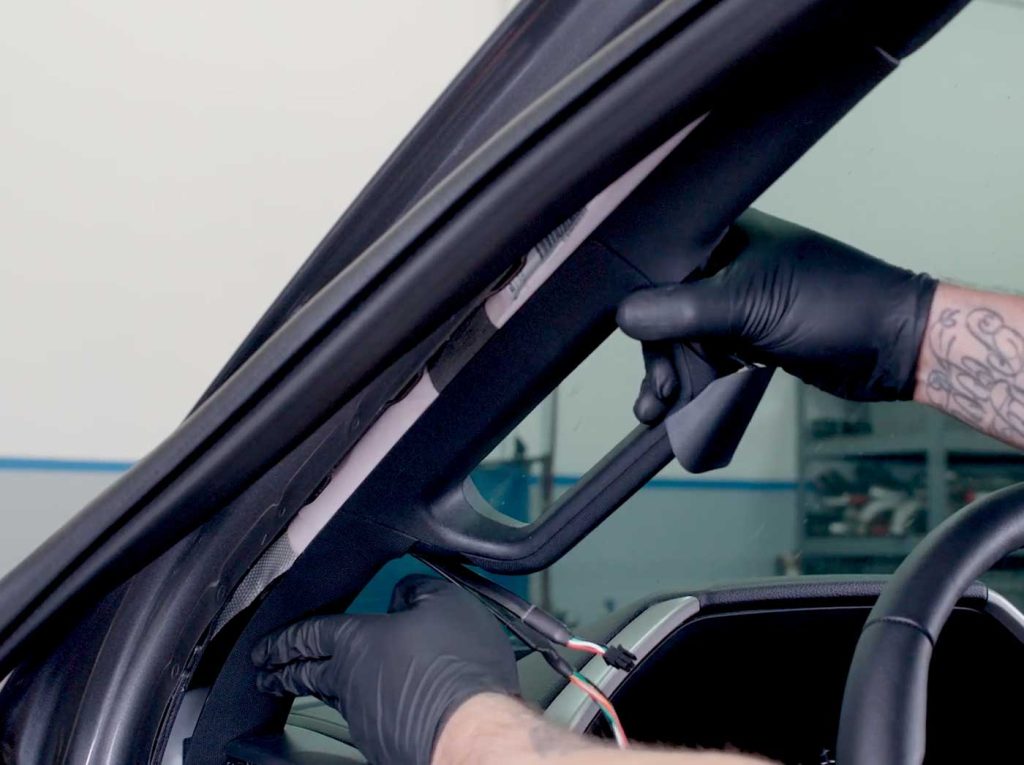
2. Pull off about three feet of the weather stripping from just below the dashboard to the top of the A-pillar.
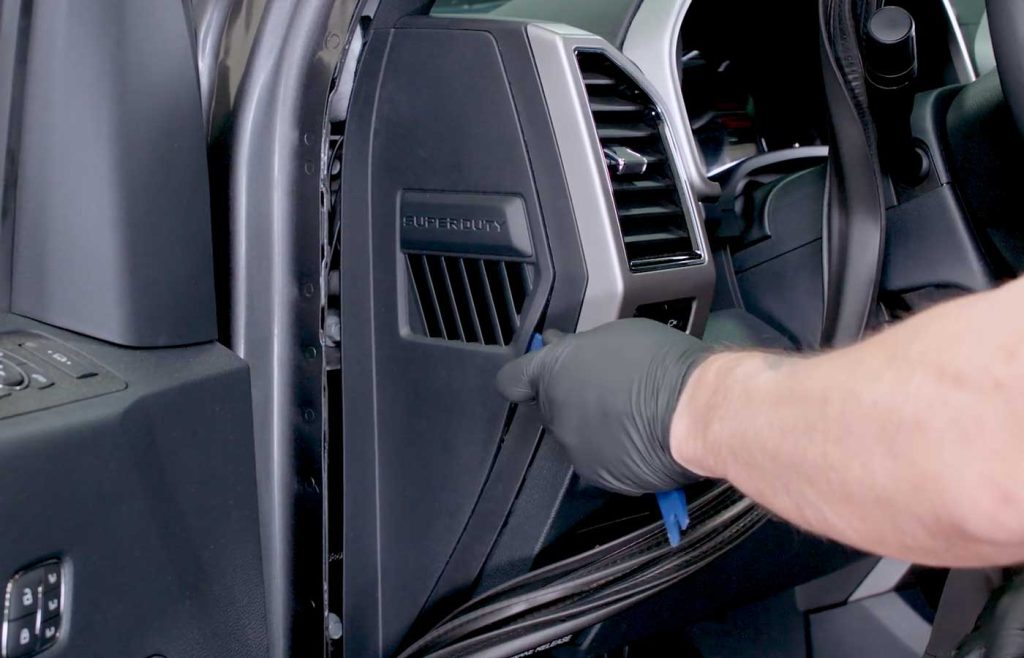
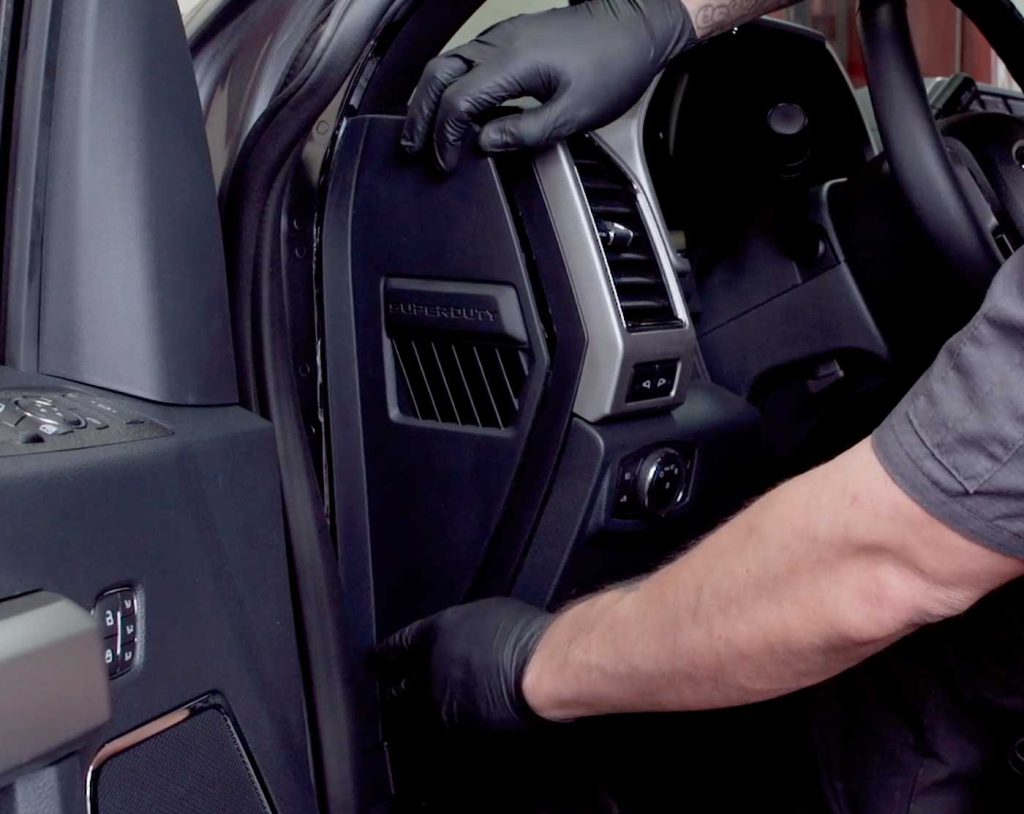
3. Remove the side dash panel with the pry tool.
Start at the bottom and then use your fingers to gently pull the panel off.
4. Pry off the plastic covers that hide the bolts which secure the pillar to the frame.
Beware: Use a plastic pry tool, If you use a screwdriver, it could leave a mark on the soft plastic.
5. With the 10mm socket, remove the two bolts.
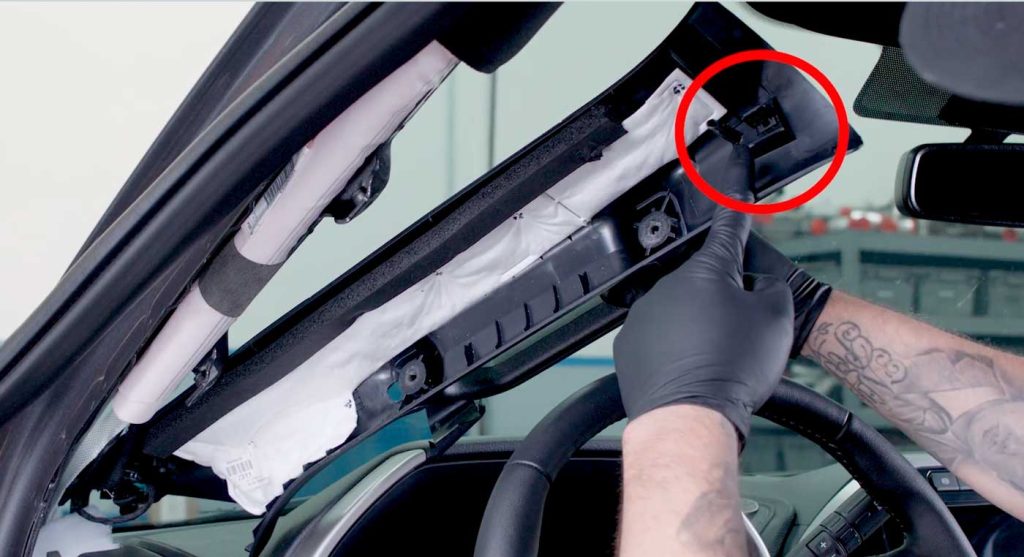
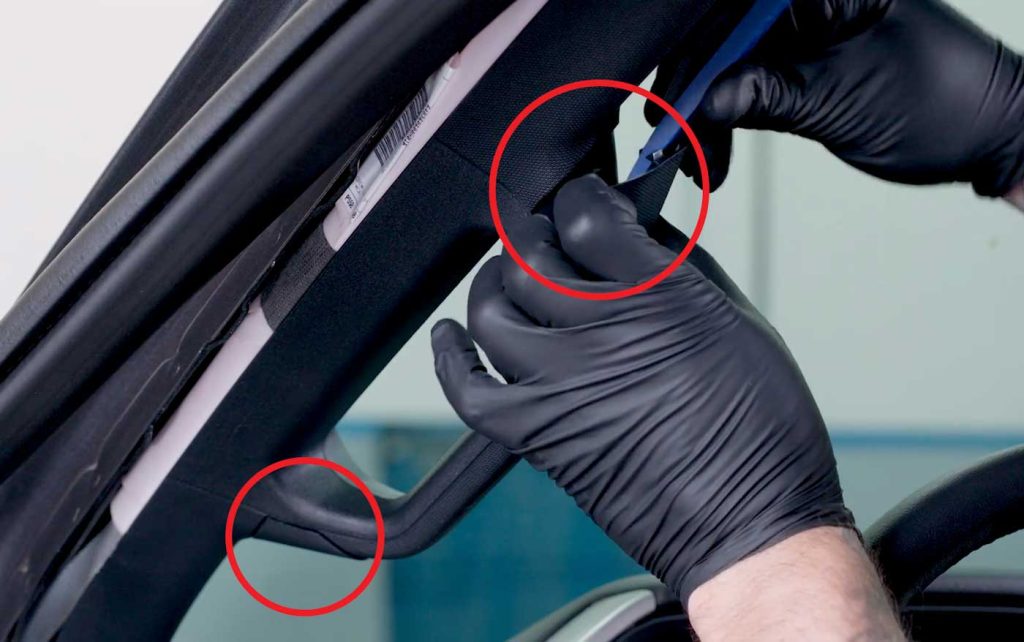
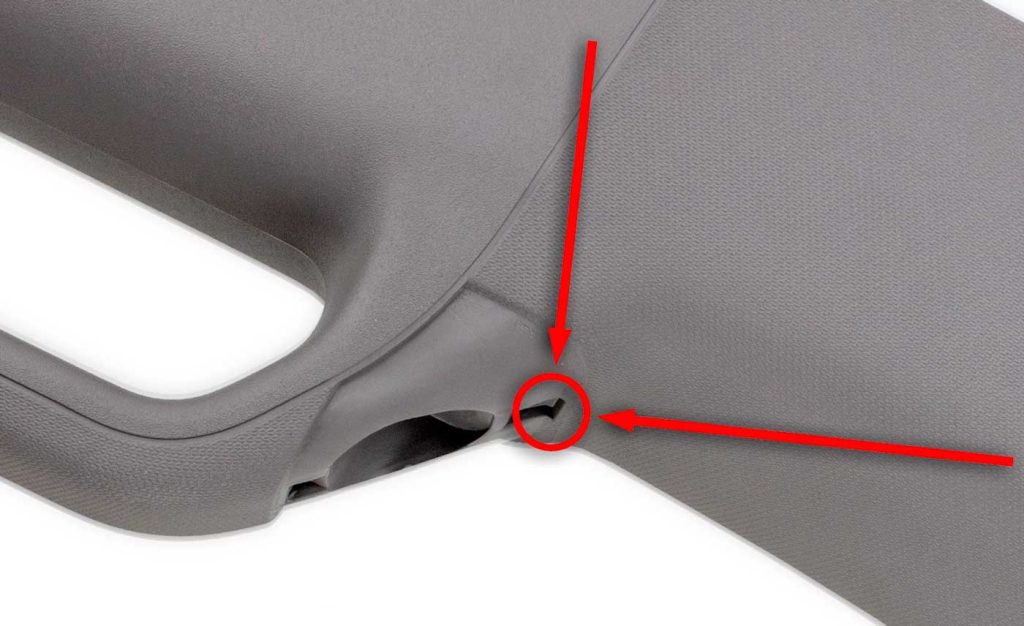
There is a plastic snap molded to the pillar, right behind the grab handle.
This is holding the pillar in place. Using some elbow grease, give it a firm pull to dislodge it from the clip.
Please Note:
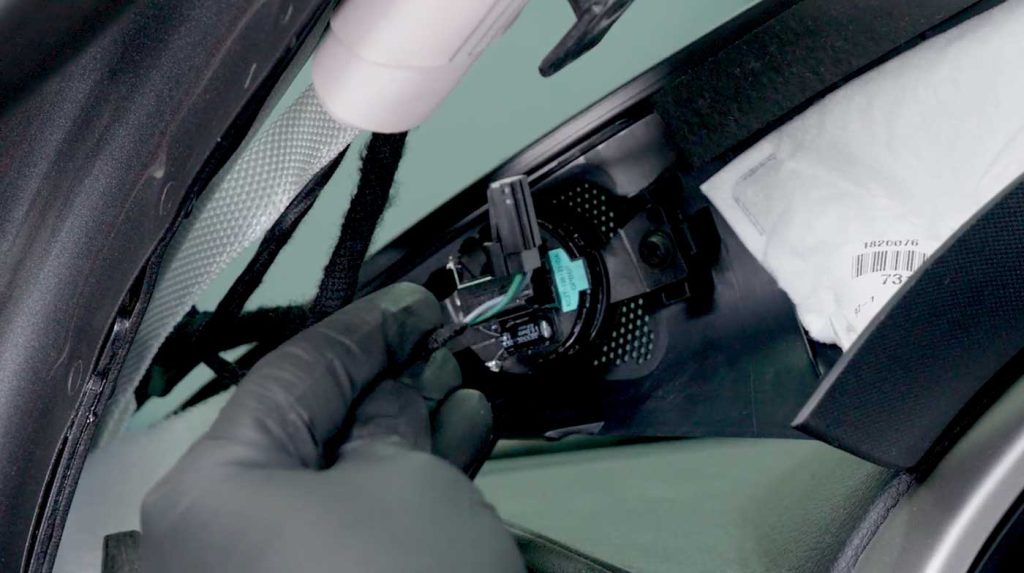
If your pillar has a small speaker, simply depress the clip to unclip it.
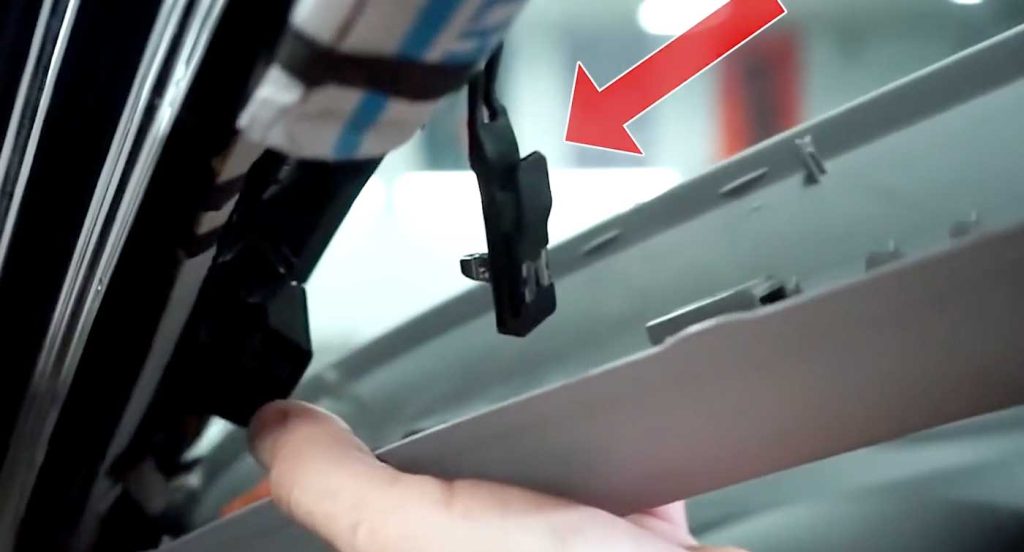
Some trucks have an airbag retaining strap.
If your truck does, simply slide the clip off of the trim piece before sliding the trim from the truck.
IMPORTANT NOTE: DO NOT DRILL THE PILLAR MOUNT ON THE TRUCK!
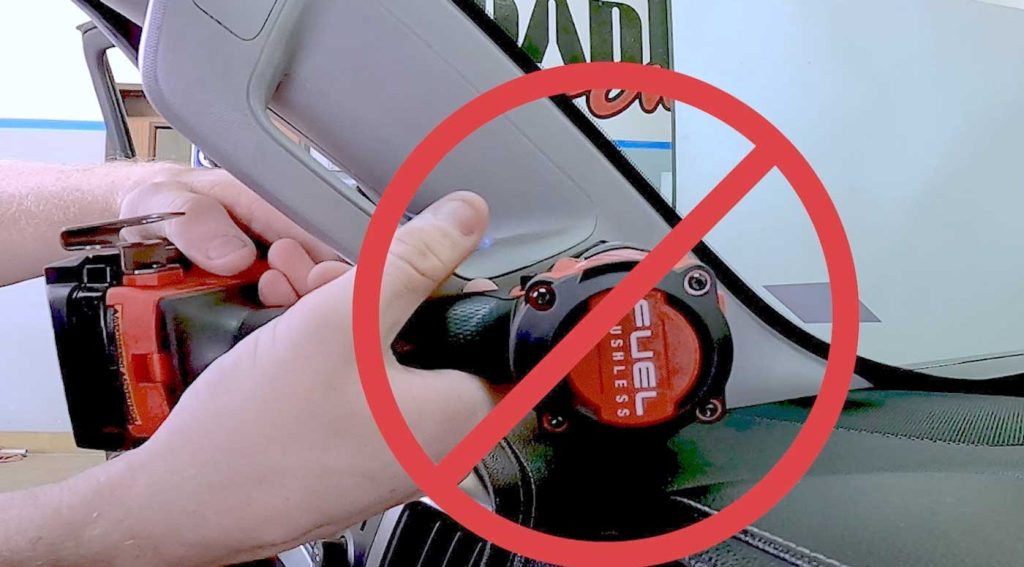
Do not attempt to drill the iDash cable mounts into the pillar while installed on the truck.
Doing so can result in permanent damage to your side curtain airbag.
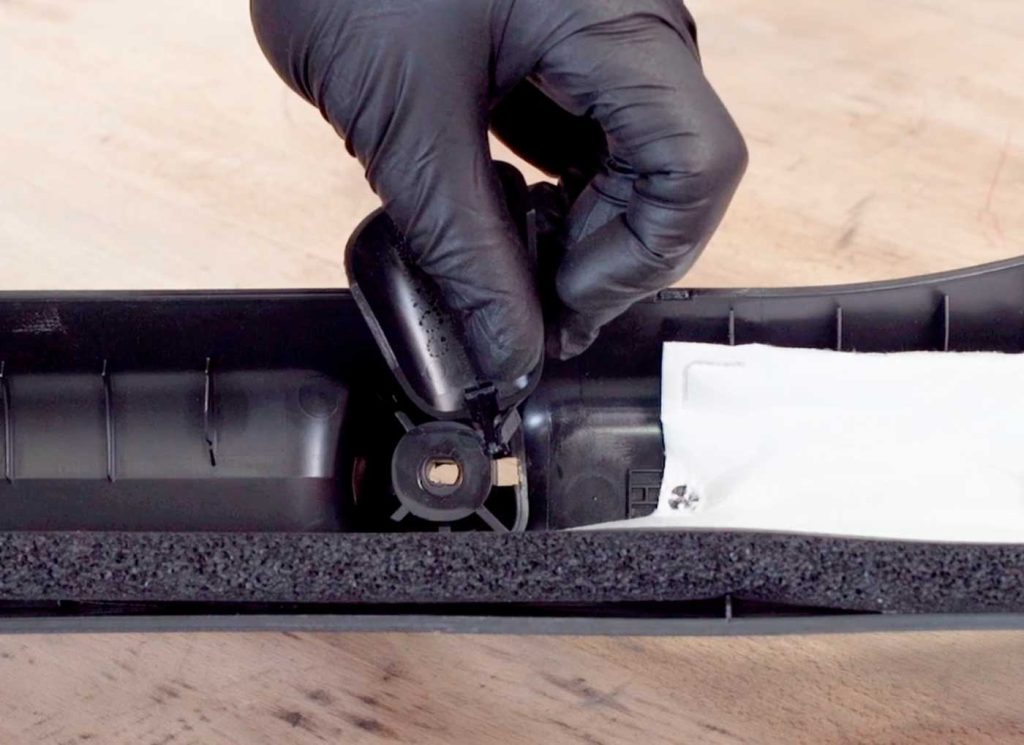
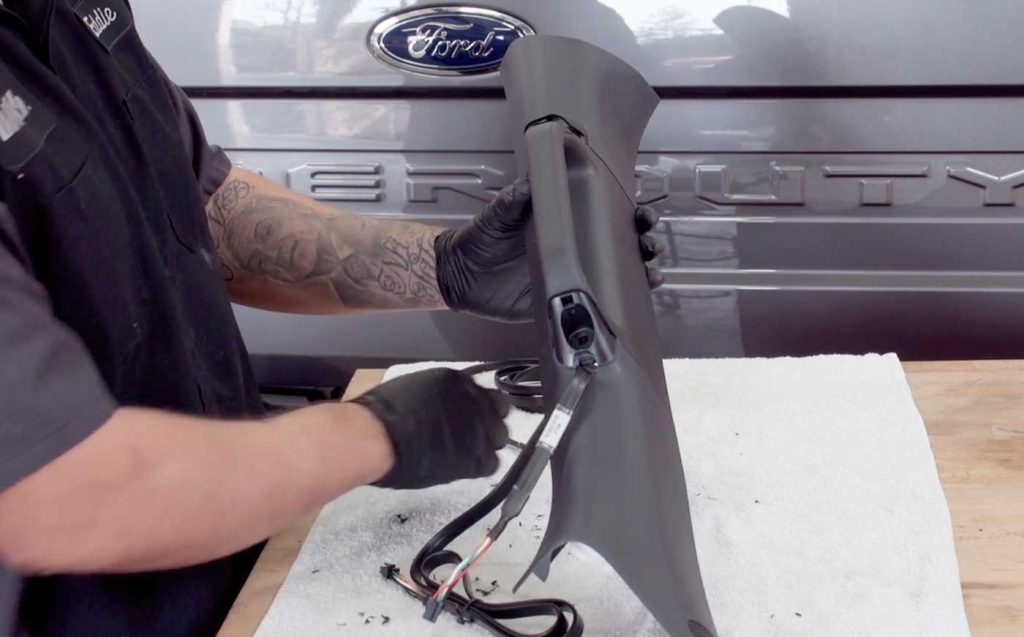
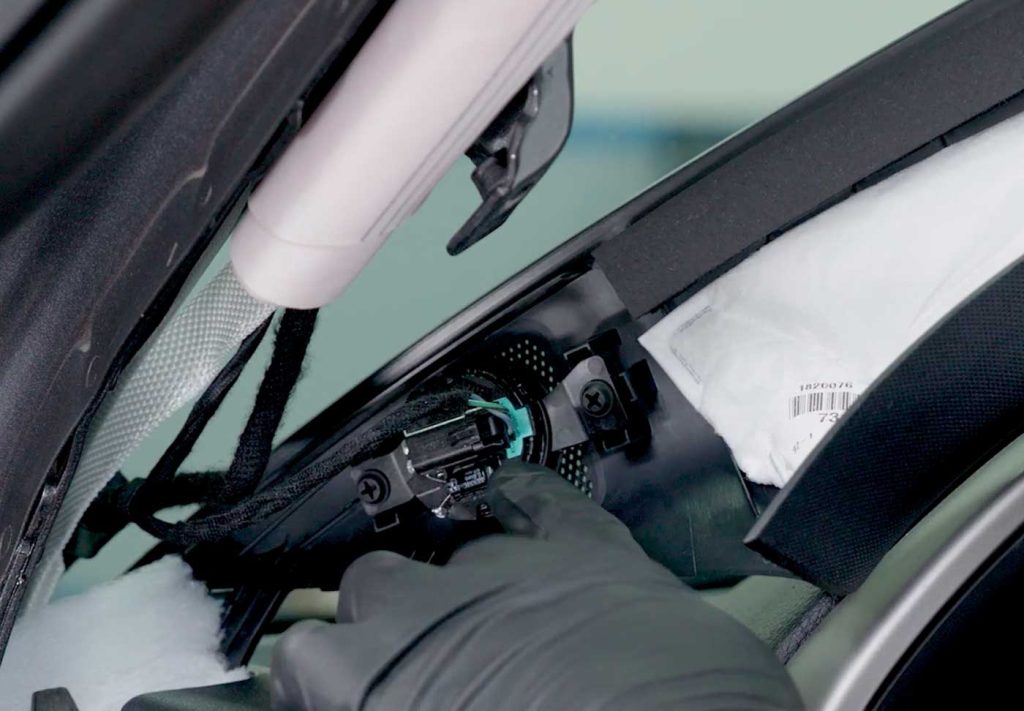
1. Take a pair of needle nose pliers and remove the plastic bolt cover from the lower of the two bolt holes.
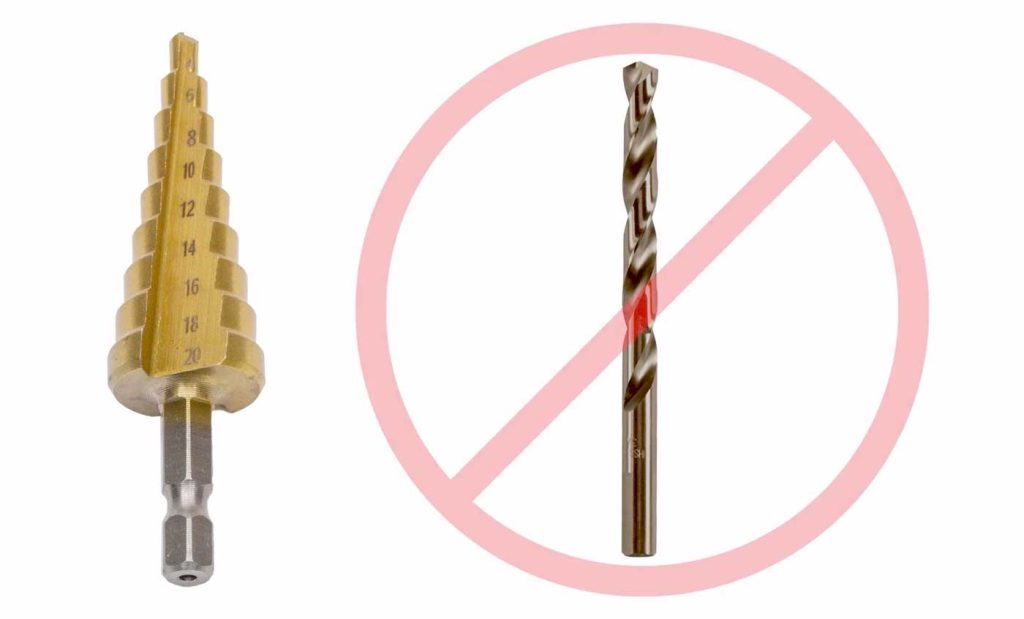
2. Put the step drill bit on your drill.
We provide the step bit because regular drill bits chew up the plastic.
If you have a variable-speed drill (which most of you do) use the slowest setting.
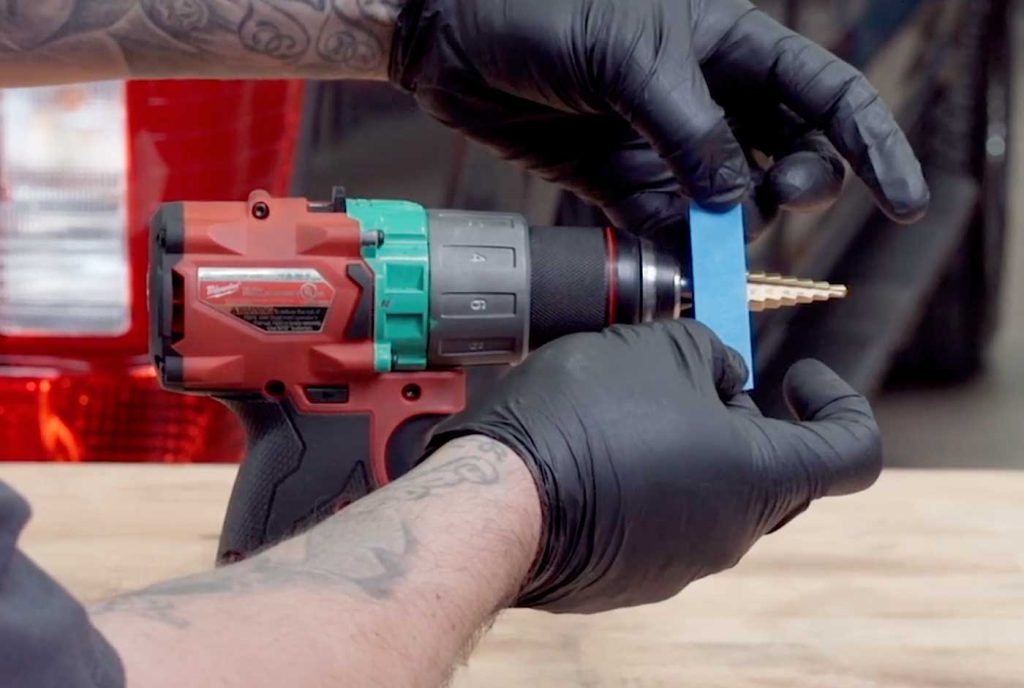
3. Tape the 18mm mark
Use blue painter’s tape so you don’t drill past that.
Before you begin drilling the cable access hole:
Stop and double-check that you’re about to drill the hole in the correct place. The Stealth Pod will go through the bolt below the grab bar.
4. The iDash cable will go through the hole just beneath the pod mount.
Don’t worry, the Stealth Pod is designed to cover up the hole created for the cable access.

5. Place the pillar mount face down on top of a towel on your workbench.
This will help prevent slipping while drilling.
Remember, the plastic is soft and cuts like butter. Plus, you only get one shot at this, so please ensure you’re drilling in the correct spot!
A 16mm hole will accommodate a single cable, but if you have two data cables you will want to open it up to the 18mm step.
6. Pass one cable through at a time if you have multiple cables.
If you just have an iDash, you will only have one cable. But if you have a Derringer, you will have two cables.
7. Loosely reinstall the A-pillar handle with your cables passed through the hole you drilled.
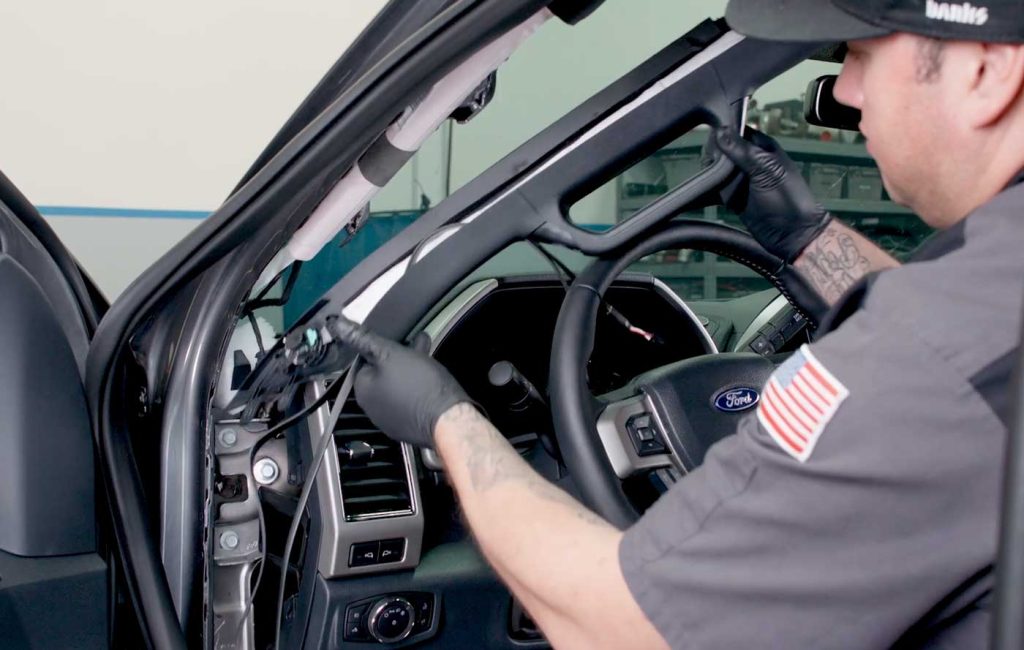
8. Route the cables down the metal A-pillar and through the side of the dashboard.
9. Bring the cable all the way down to the OBD-II receptacle.
If your A-pillar has a speaker, go ahead and reconnect it at this time.
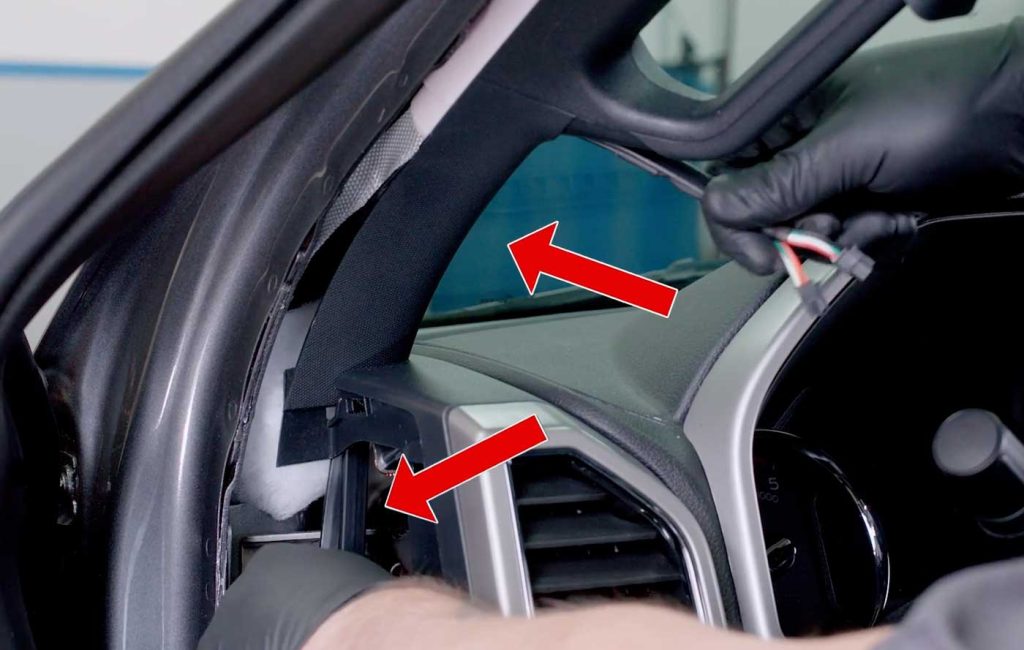
10. Slide your a-pillar back into place
Once you’re happy with the fit, snap the retaining clip back in place.
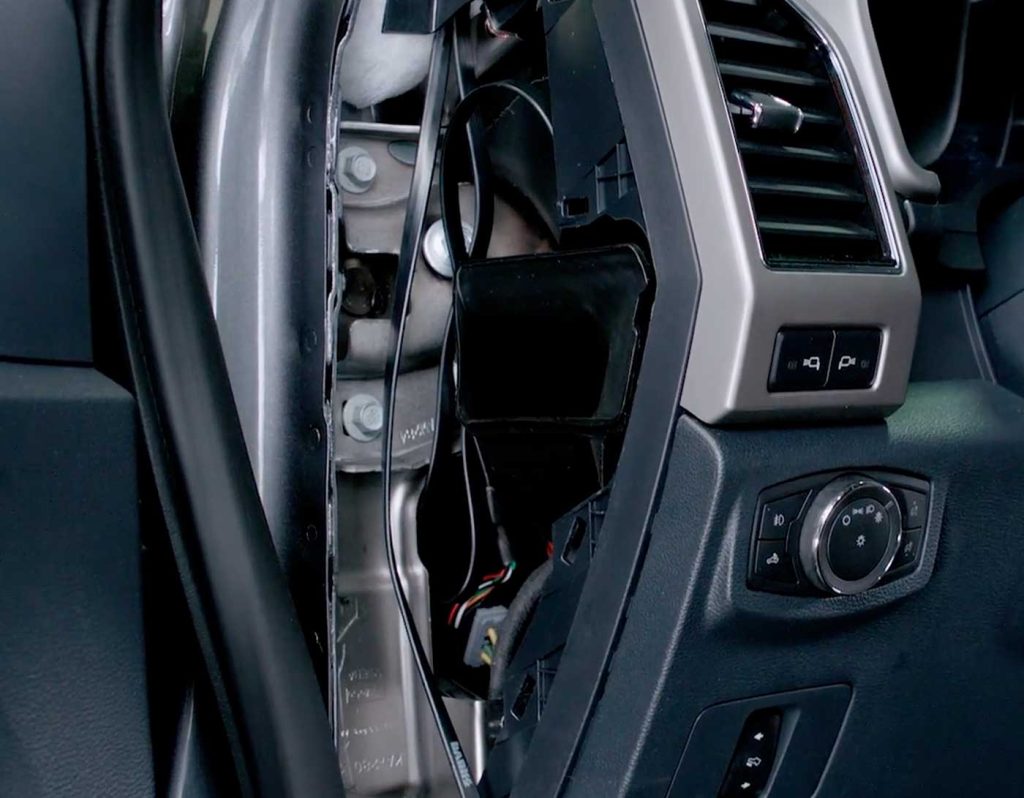
11. If you have extra cable, tuck it behind the fuse panel.
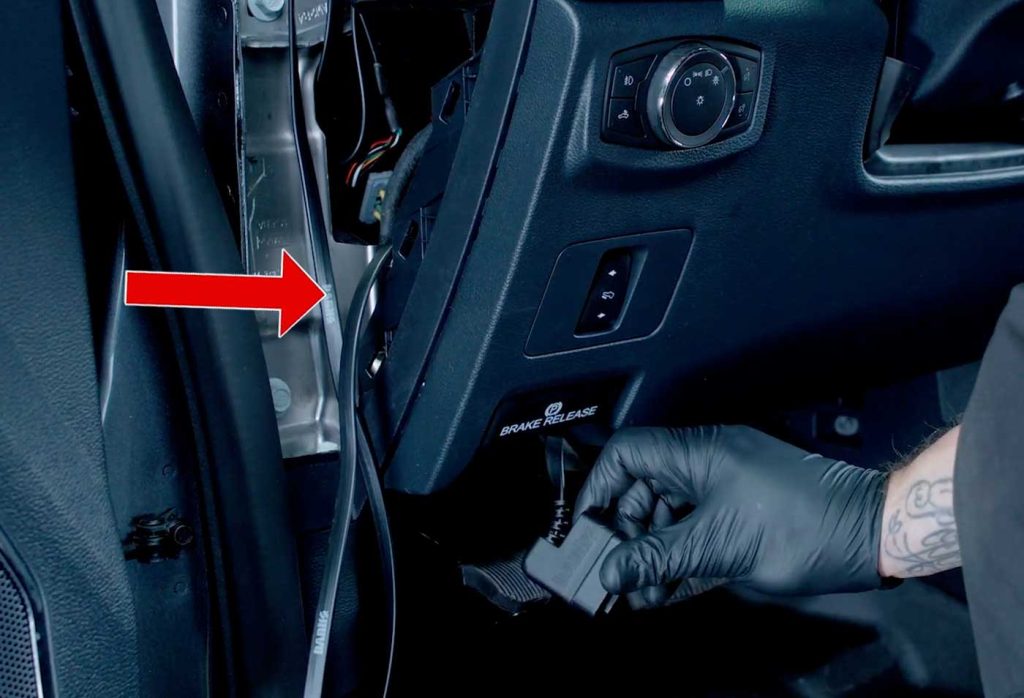
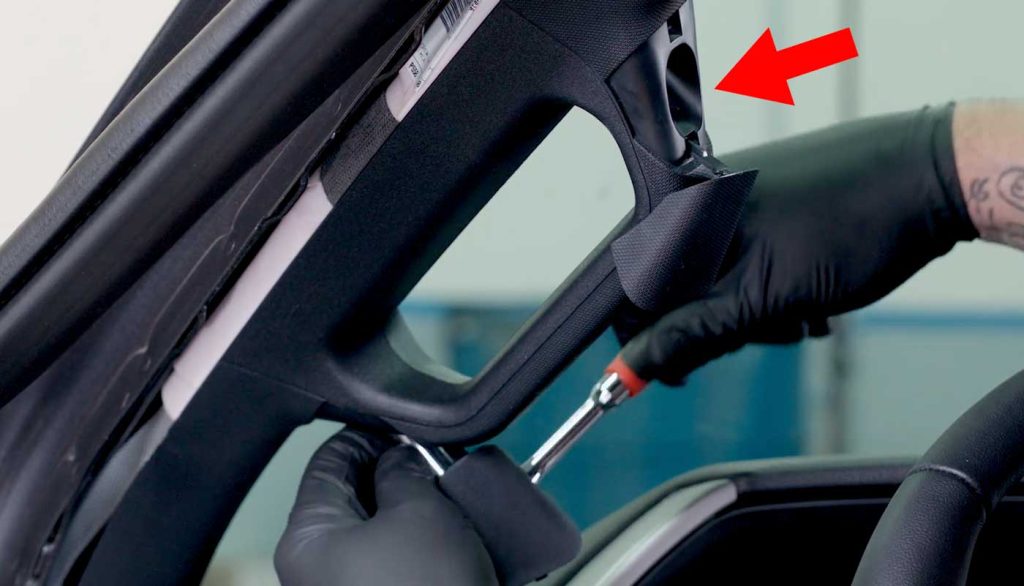
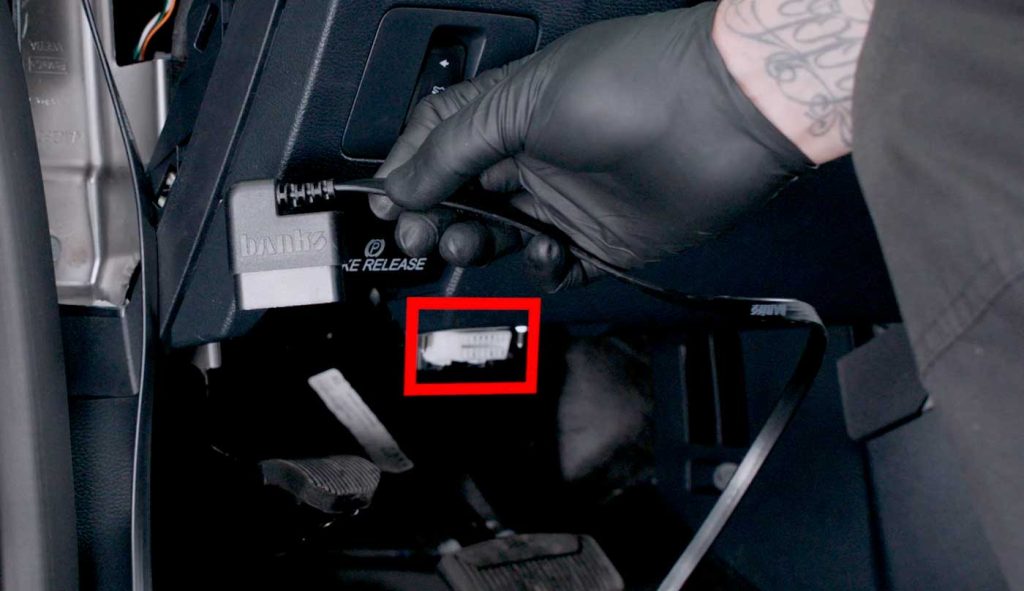
12. Route your OBD-II cable.
Run it through the side just below the fuse panel and feed it out the opening below the brake release.
Now it’s time to install the Banks Stealth Pod

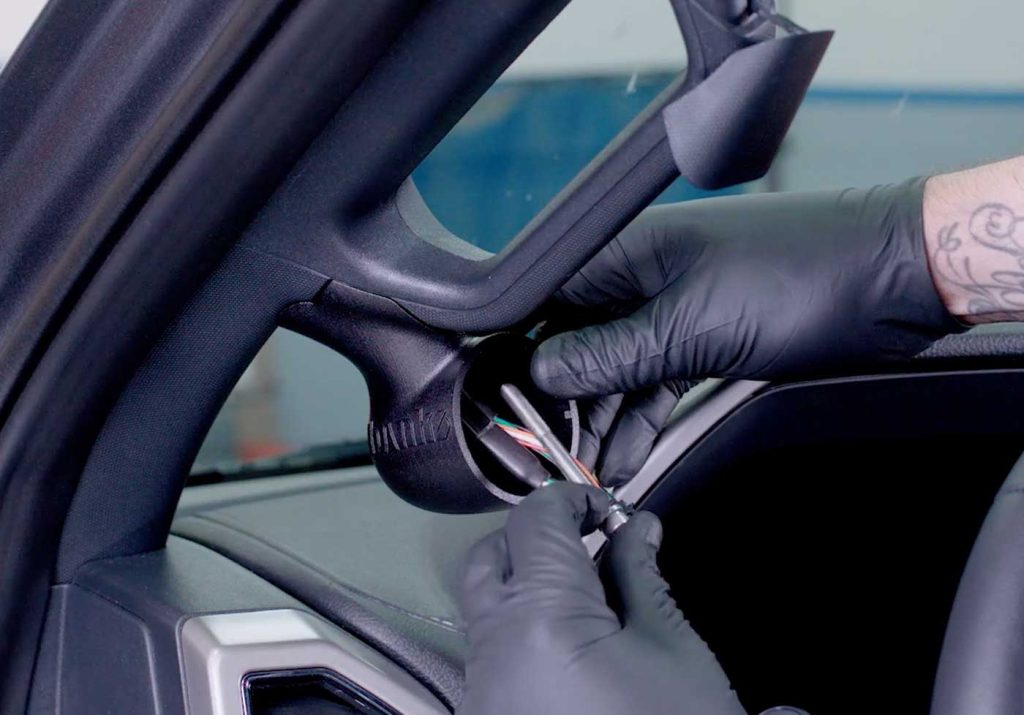
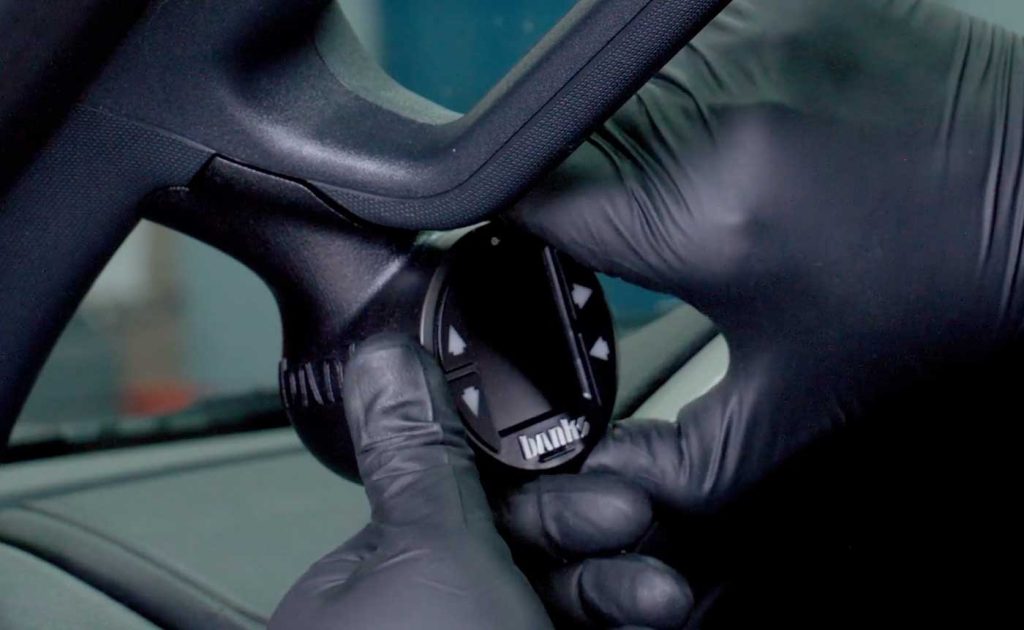
1. Run the cable(s) through the hole on the back of the Banks iDash Stealth Pod.
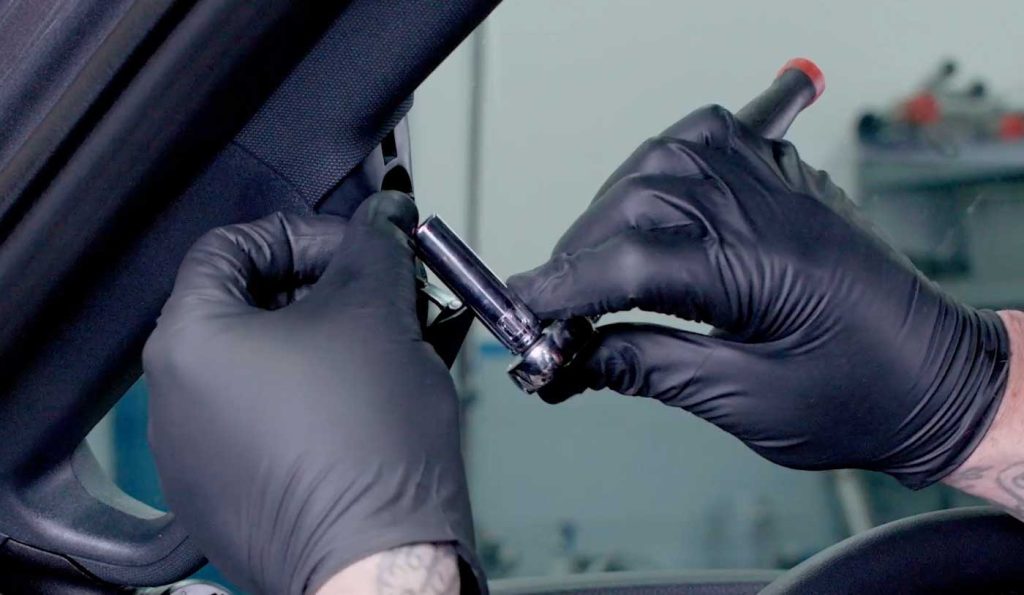
2. Hold the pod in place and insert the supplied bolt and washer.
Start it by hand, but then tighten it using the supplied 5mm hex key.
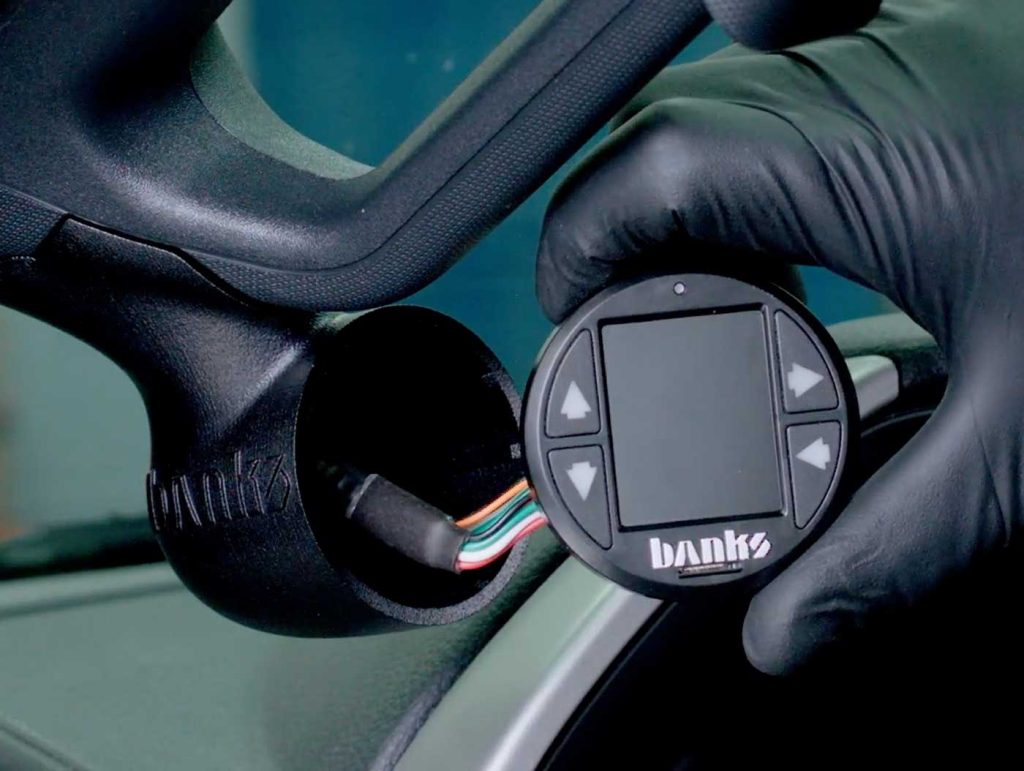
3. Connect the cables to the back of the iDash.
Take care to route the wires into the hole of the pillar as you go.
The goal is to leave just enough slack to pull the iDash back out if ever needed.
4. Reinstall the top 10mm bolt using the socket wrench.
Then reinstall the plastic cap that hides the bolt.
5. Snap the fuse panel back on.
Then push the weather stripping back into place.
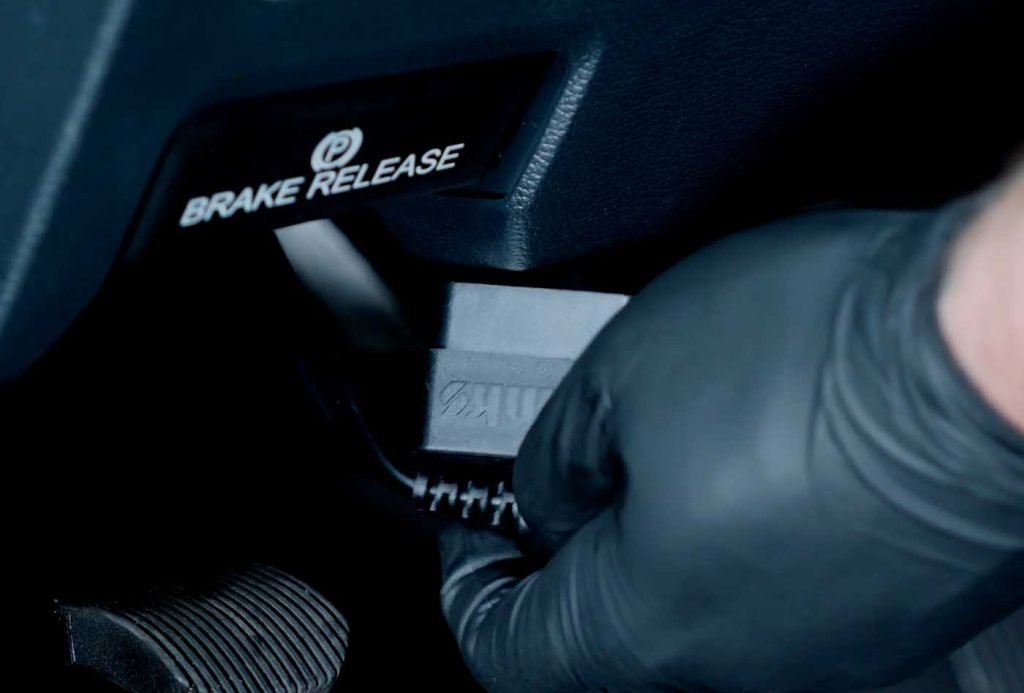
6. Plug in the OBD-II connector.
7. Eyeball the Banks logo on your iDash and make sure it’s not crooked.
8. Reconnect both negative terminals on your batteries, fire up your truck, and enjoy!