


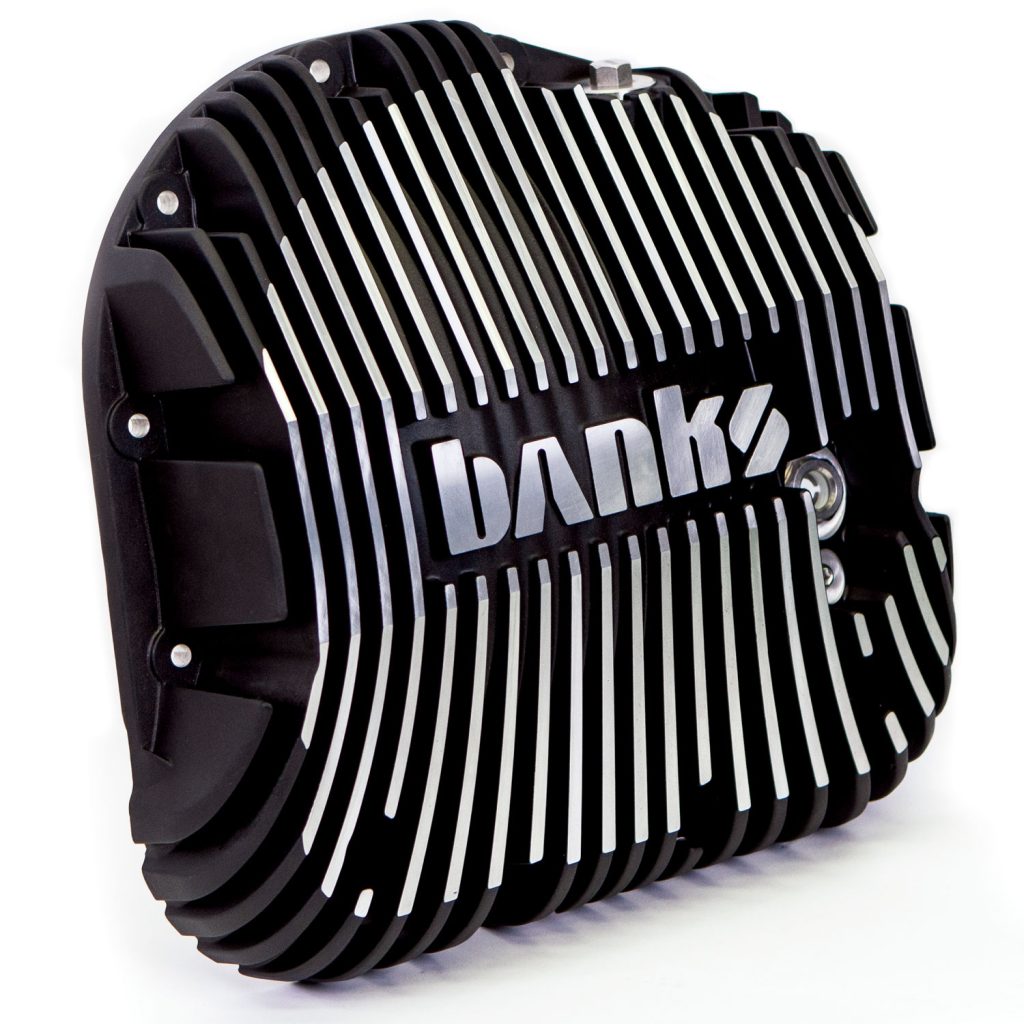
97709 Banks Sterling Rear Differential Cover

General Installation Practices
1. Before starting work, familiarize yourself with the installation procedure by reading all of the instructions.
2. Disconnect the negative (ground) cable from the battery (or batteries, if there are two) before beginning work.
3. When raising the vehicle, support it on properly weight-rated safety stands, ramps, or a commercial hoist. Follow the manufacturer’s safety precautions. Take care to balance the vehicle to prevent it from slipping or falling. When using ramps, be sure the front wheels are centered squarely on the topsides; put the transmission in park; set the hand brake; and place blocks behind the rear wheels.
⚠️ CAUTION! ⚠️
Do not use floor jacks to support the vehicle while working under it. Do not raise the vehicle onto concrete blocks, masonry, or any other item not intended specifically for this use.
4. During installation, keep the work area clean. Do not allow anything to
be dropped into the rear differential while performing the installation, as foreign objects will cause immediate damage upon start-up.
General Assembly
| Item # | Description | Part # | QTY |
|---|---|---|---|
| 1 | Differential Cover | 19254 (raw), 19244 (black), 19264 (black ops) | 1 |
| 2 | Magnetic Drain Plug 12mm | 13249 | 1 |
| 3 | Stainless Steel FIll Plug | 13277 | 1 |
| 4 | Sight Glass | 13251 | 1 |
| 5 | Stainless Steel Hex Head Bolt | 91233 | 12 |
| 6 | 1/8 NPT Plug | 13251 | 1 |
| 7 | Viton O-Ring | 13271 | 1 |
Rear Differential Cover Installation
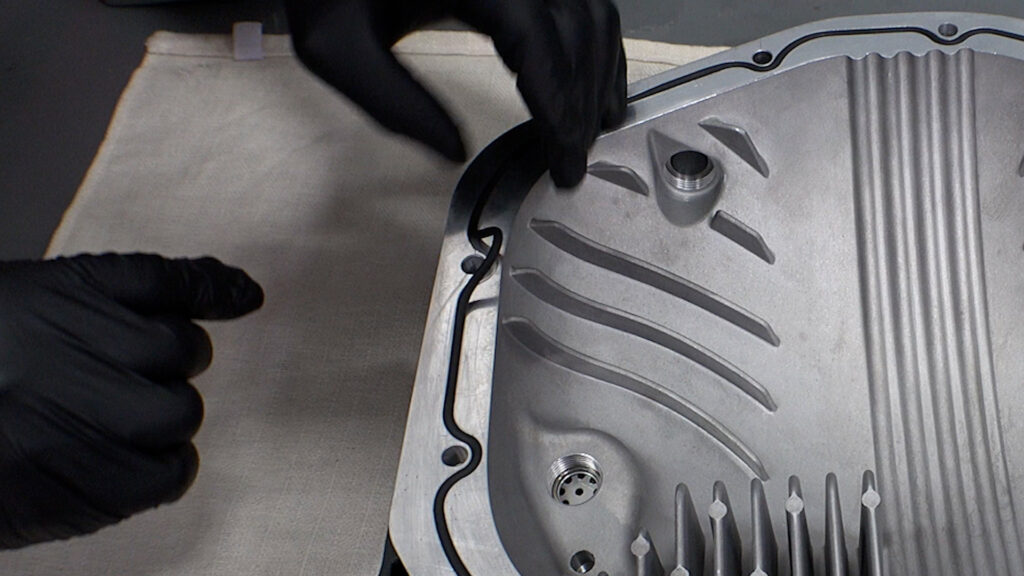
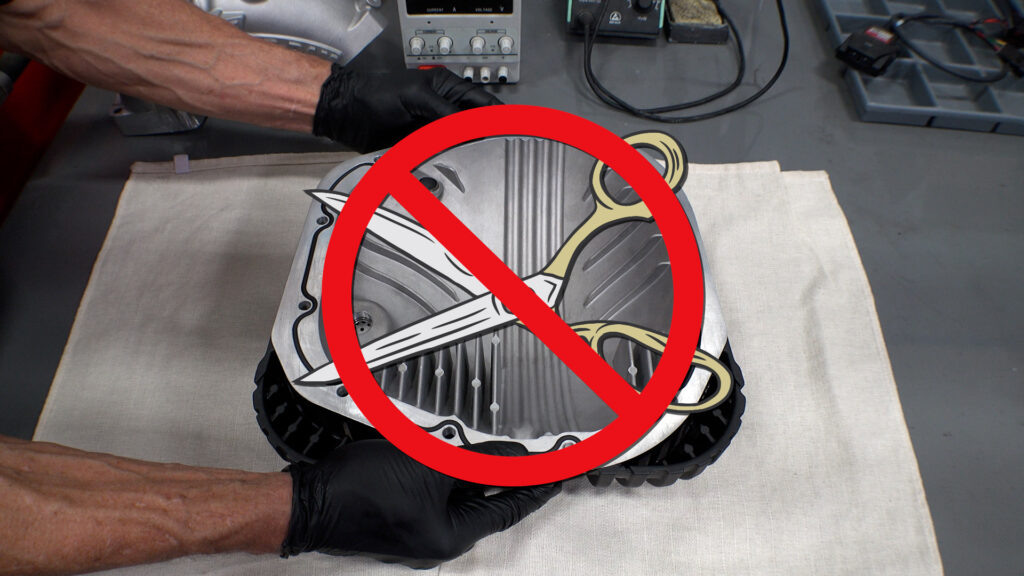
- Prepare Ram-Air diff cover by installing the O-ring. (See figure one.) Apply a bit of oil to the O-ring to help with the install. Slide the O-ring through your fingers to evenly disperse the oil. Be careful not to damage the O-ring. If you find the O-ring to be slightly too long, take your time and walk the excess around the circumference of the cover. You’ll slowly work the excess length into the groove as shown in the video. DO NOT CUT THE O-RING! (See figure two.) Cutting the O-ring will result in a leak.
2. If the fill plug came pre-installed, remove it. You’ll put it back after filling the differential with gear lube. (See figure three.)
3. Position an oil pan under the diff cover to catch fluids drained during installation. Drain the oil from the differential.
4. If the differential has a drain plug, remove the drain plug using a 3/8″ square drive and allow the fluid to fully drain from inside the axle housing. If no drain plug is equipped, open the cover partially from the bottom and allow fluid to drain before removing the cover.
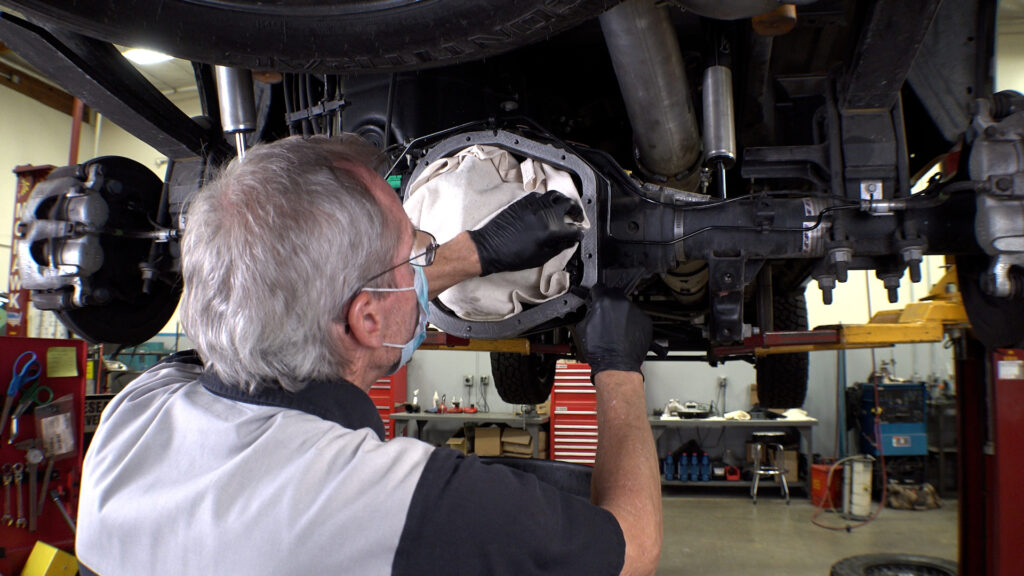
- Clean and inspect the axle housing sealing surface. It should be flat and free of all debris, rust, residue, and sealant to ensure a proper O-ring. (See figure four.)
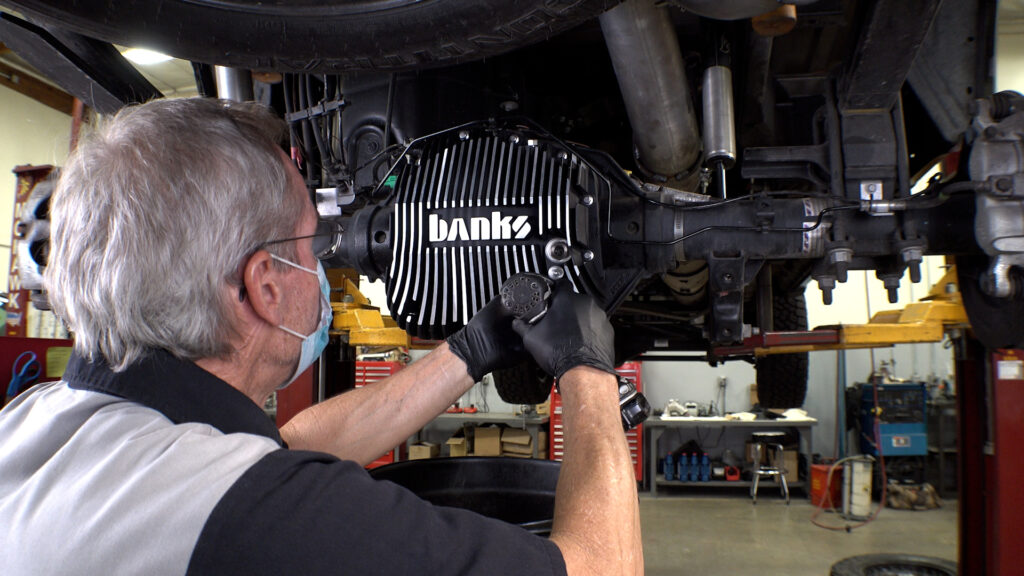
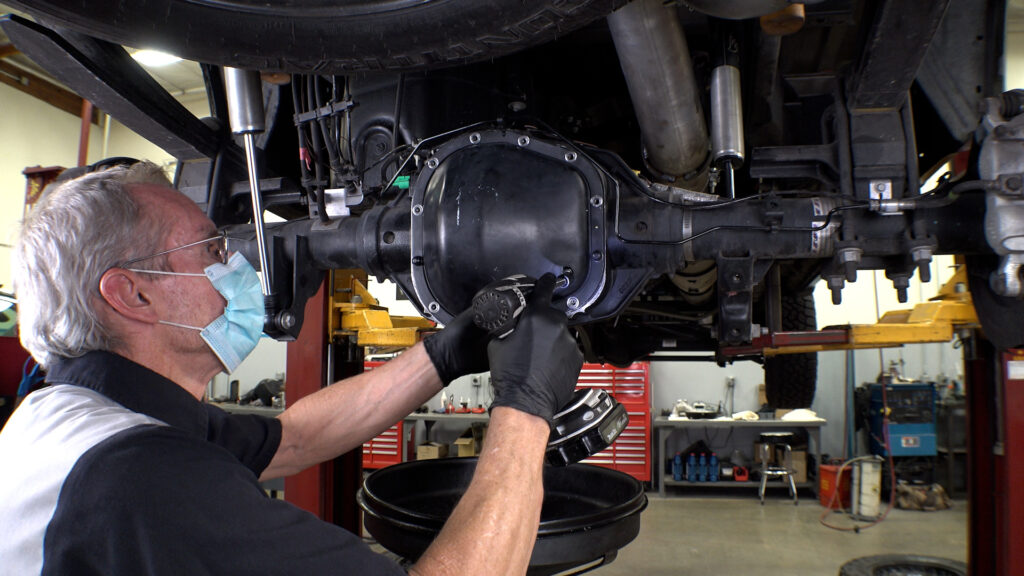
- Install the Banks cover using the included 5/16” bolts. Apply a small amount of thread locker on the bolts. Torque the bolts to 12 lb/ft (16 Nm) using a 3/8” socket. (See figure five.)
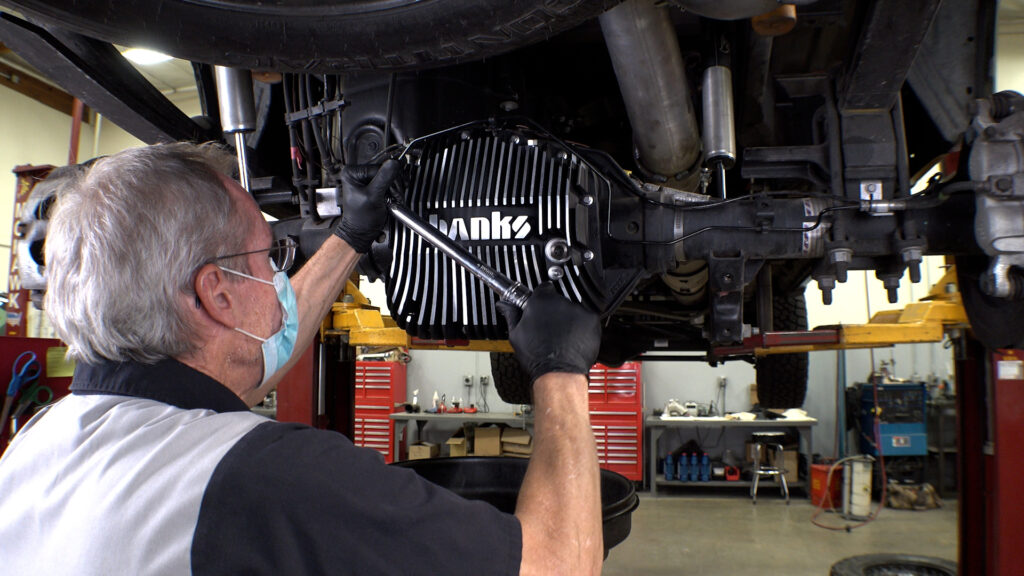
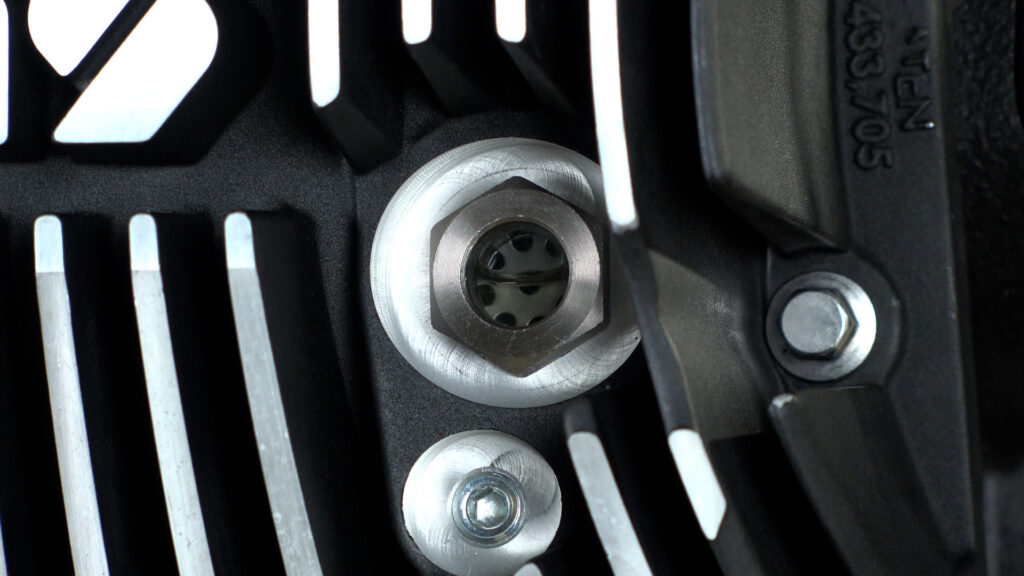
- Install the sight glass using a 24mm socket. (See figure six.) If the sight glass is already installed, make sure that it is tight and secure. Do not use a torque wrench as you will damage the O-ring.
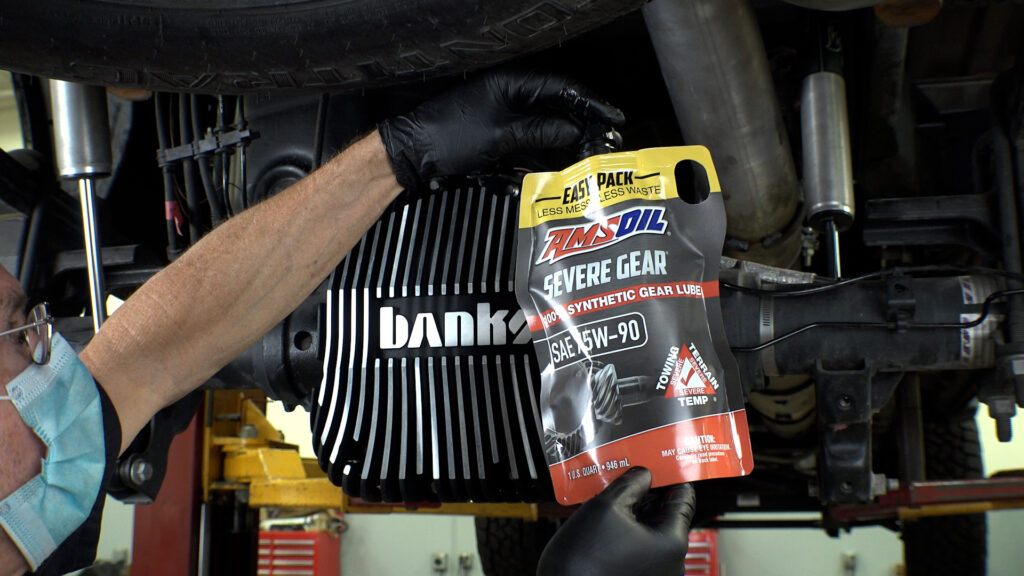
- Fill the differential housing with the manufacturer’s specified amount and type of lubricant (refer to your vehicle’s owner’s manual) using a funnel or the new convenient AMSOIL Easy Packs. (See figure seven.) The fluid level should be at the center of the sight glass when the vehicle is parked on level ground. (See figure 8.)
Note: The fluid level may not appear in the center of the sight glass if the vehicle is parked on a hill, the chassis is raised by a jack or lift, or the suspension has been modified. The modifications affect the angle of the differential housing. This Ram-Air cover fits a wide range of Ford trucks with differing heights and wheelbases. Therefore, it’s possible that the factory-specified amount of lubrication will be above the center of the sight glass. This is NORMAL. Remember the main purpose of the sight glass is to check the fluid’s condition (color).
- Install the fill plug using a 14mm socket. Do not use a torque wrench as you can damage the O-ring.
- Clean up any spilled oil and check for any leaks around the cover, fill/drain plugs, and sight glass.