Banks Monster Exhaust Upgrade for Jeep Cherokee XJ
“There comes a time when enough is enough,” confesses Al on his new YouTube channel. “My exhaust sounded like a belt-fed m60 (machine gun). I was one cold start away from getting a stern talking to from suburban law enforcement, and that’s where the stainless Banks Monster Exhaust system came in.” What follows is a humorous chronicle of one man’s journey to replace the failed, rusty experiment of an exhaust system on his 2001 4.0L Jeep Cherokee XJ.

Full Video Transcript
00:00 Sometimes life gets in the way and you have to put off addressing problems on the ’90s box you choose to daily at everyone else’s expense to the point you start decreasing property values in your neighborhood. You do what you can with the time you’ve got, but there comes a
00:13 time where enough is enough. My exhaust sounded like a belt-fed M60 and I was one cold start away from a stern talking-to from suburban law enforcement. And that’s where the stainless Banks system came in. You’re here because you’re a) comparing exhaust notes to choose a
00:28 muffler and/or b) because you like being shown and not told how to do things. I relate to you. So, this video has all of that. But I suggest watching the whole thing first because it fills the gaps other videos left open enough for my installation to go south. I couldn’t
00:45 even trust the written instructions. Don’t install chronologically to this video because I’ll go over the installation of the Banks Monster cat-back exhaust for my ’01 Cherokee without glossing over the mistakes I made to keep you from making yours. So, let’s get into it. [Music]
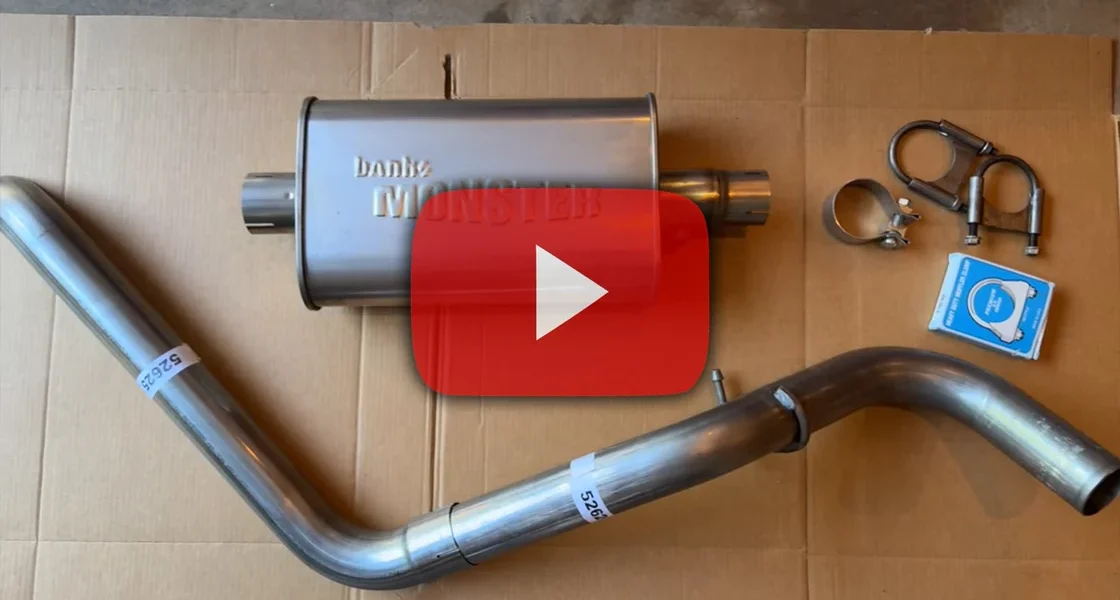
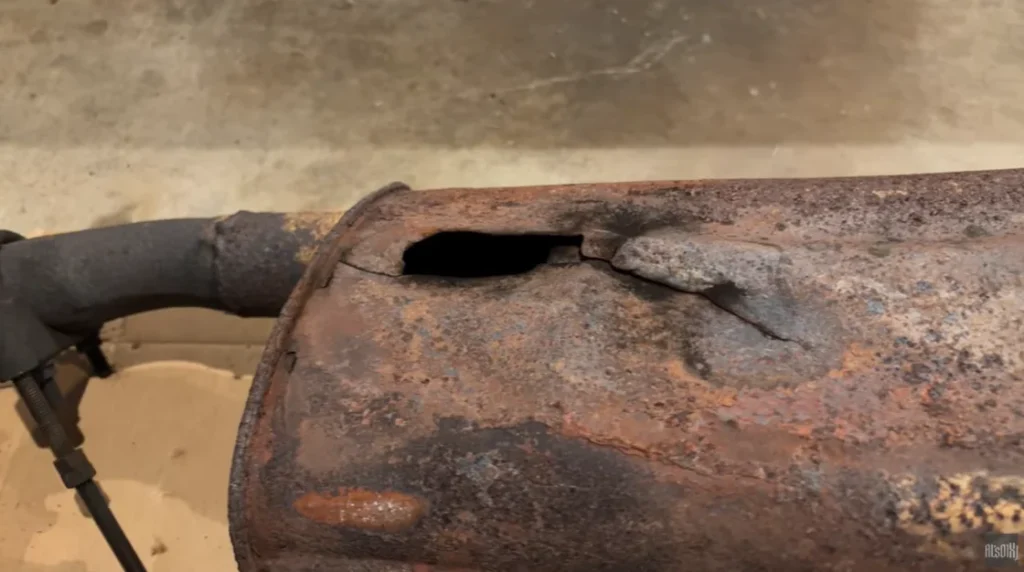
01:12 In what had to be the hottest and boggiest weekend in suburban Philadelphia history, it was time to hang out near some hot pipes. The Banks Monster Kit is a handsome one, and in that it’s stainless steel, comes with everything you need if you do it right, and will do better over salty winters
01:27 than this aluminized steel turd. My muffler was welded to the cat, so there was no removing it without slicing it off. So, I started disassembling and saying goodbye to a freak show I’d been willfully ignoring. Started sizing things up, and based on other videos and
01:40 the written instructions that came in the kit, a cut about here felt right. So, I taped it up to mark my cut based on where the muffler inlet lined up with the cat’s outlet, just like the other guys did. And I gave myself a couple eighths of an inch above what the kit’s
01:55 instructions suggested to be a thorough little boy scout about it. But the measure-twice-and-cut-once method doesn’t go far enough when everyone’s XJ is a little different and you’re probably not the first one to molest what you’re molesting on it. If your old muffler is welded to your cat like mine
02:10 was, cut it at the weld and then assess a second cut after test fitting the whole system. And I didn’t get far before I found that the welded hanger on the pre-bent pipe was way off from where it belonged in the rubber hanger on the Jeep. So again, if the old one’s welded,
02:25 cut at the weld and go from there, because from the looks of what was left on mine, it would have been pretty near perfect length for an ego less bruised and a lot less work to rectify my botch job. So, I had to get that length back somehow. Soldiering on, I started
02:40 installing what I could, starting with filing down that rough edge so it would accept the new muffler. And the 2¼ inlet matches right up to your factory 2¼ cat outlet with a satisfying bottom-out. Tap the muffler to the cat with a hammer and a 2×4 and lightly install
02:57 the 2¼ clamp that comes in the kit. And it’s always a good idea to dress those threads up with some anti-seize. Don’t torque this all the way down just yet—we just want it clamping a little bit to keep the muffler from backing off during the rest of the preliminary assembly. Next day, I hit
03:13 AutoZone for this adapter, thinking it would give me some lost length back from my bad cut. But I misunderstood how these actually work—gave me about a ¼ inch at best. The next best thing was this length of stainless pipe, so it was time to figure out how much of it I was going to
03:29 waste. We were about 2½ inches short of the appropriate hanger position, so I measured and marked this pipe to give me as close to that as possible, subtracting the length of the flared ends and adding about ¼ inch of wiggle room. Again, just to be clear, you don’t have to go
03:46 through all of this if you didn’t cut something too short like I did. Things get pretty linear after this point. And if anything, these are just some basic skills for when adjustments are needed to any exhaust system. This type of band clamp is used to clamp an existing slip joint, and it’s the
04:01 last extra piece I had to add to the kit to fix my mistake. So, I start to reassemble the system since I now have everything I need. A pinch of WD in the rubber hanger will help the welded one pop in easier. I slide the pipe extension we made into the outlet, followed by the Banks pre-bent pipe
04:17 with the welded hanger. I’ll put it into the rubber hanger that it now reaches. And look at that—we achieved the length we needed for that angle to be sufficient. I could probably cut another inch, but let’s take our own advice and test-fit the rest. Extra extension or
04:29 not, this Banks-provided clamp goes on your muffler outlet. It’s a duplicate of the other provided U-bolt clamp that’ll go on your tailpipe. And just like before, you want to tighten this up—just not all the way. I follow suit with the band clamp used to complete the
04:42 extension’s joint, making sure it seats on the lip of the slip joint inside. The tailpipe portion comes next, and we’ll adjust it to clear our gas tank heat shield. We’ve got some adjustability here, and we’ll torque the kit’s supplied band clamp just enough once we get the angle we need to clear
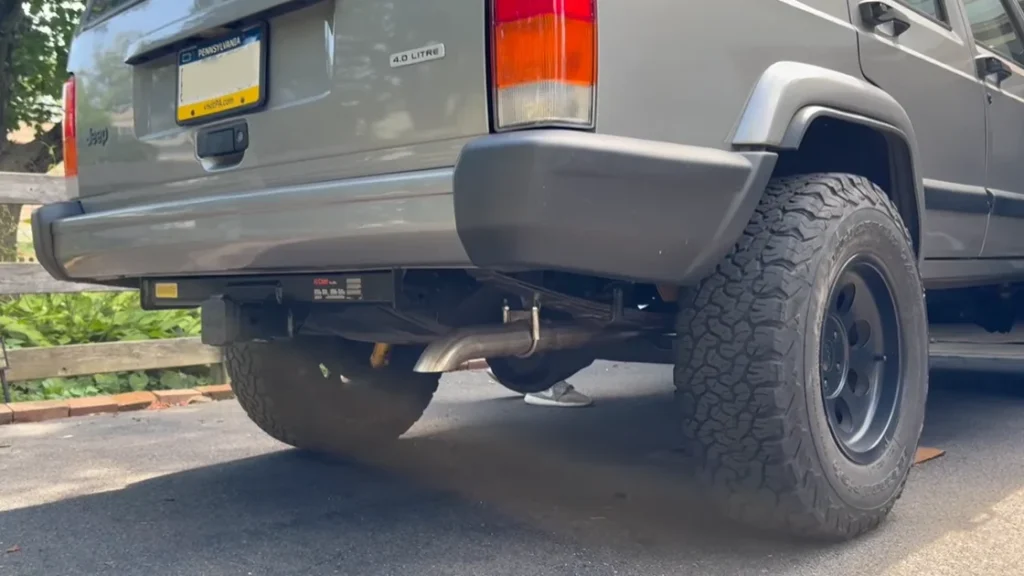
05:00 the heat shield. The tailpipe hangs down lower than I thought it would, but that’s just because my aftermarket hanger is old and its mounting hardware is loose. It’ll all snug upward a little when we torque it all down. Now that everything’s fitted, angled, and
05:13 moderately tightened, we go joint to joint starting from the cat toward the tailpipe and torque it all down for real—going for symmetry on these two-nut U-bolt clamps to get an even squeeze around the whole pipe. I recommend orienting the clamp at the tailpipe upside down like this because it looks
05:28 better and reclaims some clearance back there. But now we’ve got to make sure there’s no leaks, which is another thing other videos gloss over. You should do this before the pipes get too hot, but just test the areas with your hand, feeling for air escaping at every joint
05:40 you clamped. And you want to feel all around the circumference. A small piece of paper will help you see any leaks and determine which joints need their clamps adjusted for a nice airtight installation. If needed, this stuff can finish the job, too, and I’ll link it below.
05:58 Leaving leaks in the system can rob performance, impact exhaust notes, and actually speed up erosion, so we want to make sure to shore all that up 100%. And I can’t wait to hear how all this sounds. But first, I put virtually everything I use in, on, and around my
06:11 XJ in my storefront link in the description—from detailing to off-road recovery to modifications that make the XJ better. I put everything here that I and fellow owners have success with to filter out all the other junk. Using the links in the description to fill the
06:24 gaps in your gear or even just as inspo helps me out and keeps this party going. I’m thrilled about how much it’s helped folks over the years and I hope it helps you, too. Anyway, here’s how this bad girl sounds. [Music] [Music] The note is a little deeper and only slightly louder than stock, which is
07:10 exactly what I was going for. Not to bring up my nickname in college, but deep, loud, and throaty is for V8s. And if you want that sound out of a 4.0, you might have chosen the wrong vehicle. The performance gains from this kit really just depend on what your butt dyno tells
07:24 you, so I won’t get into that. Anyway, I hope this video helped fill some gaps for everyone and that my mistakes have been educational. And quick reminder—you’re a poser if you use the sticker before you’re done. [Music]
From chopping off too much of his stock exhaust to saving it all with an extension pipe (and some finagling), we’re guided through pretty much exactly what not to do when installing an exhaust system, and how to fix it. The satisfying result of installing the Monster Exhaust: “The note is a little deeper and only slightly louder than stock, which is exactly what I was going for.”