Banks Dual Heater and Billet Heater Upgrade Kit Installation and Wiring Diagrams
INSTALL INSTRUCTIONS
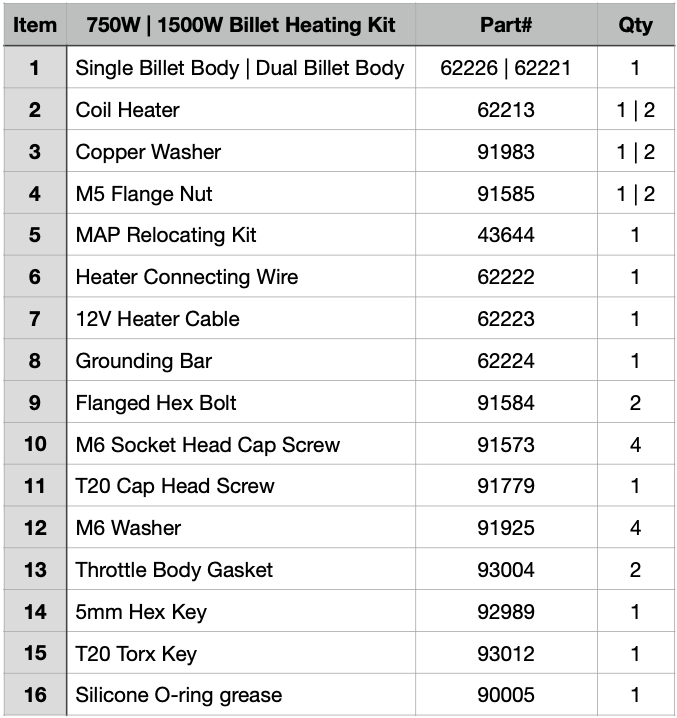
Part #s
42807, 42809, & 42830
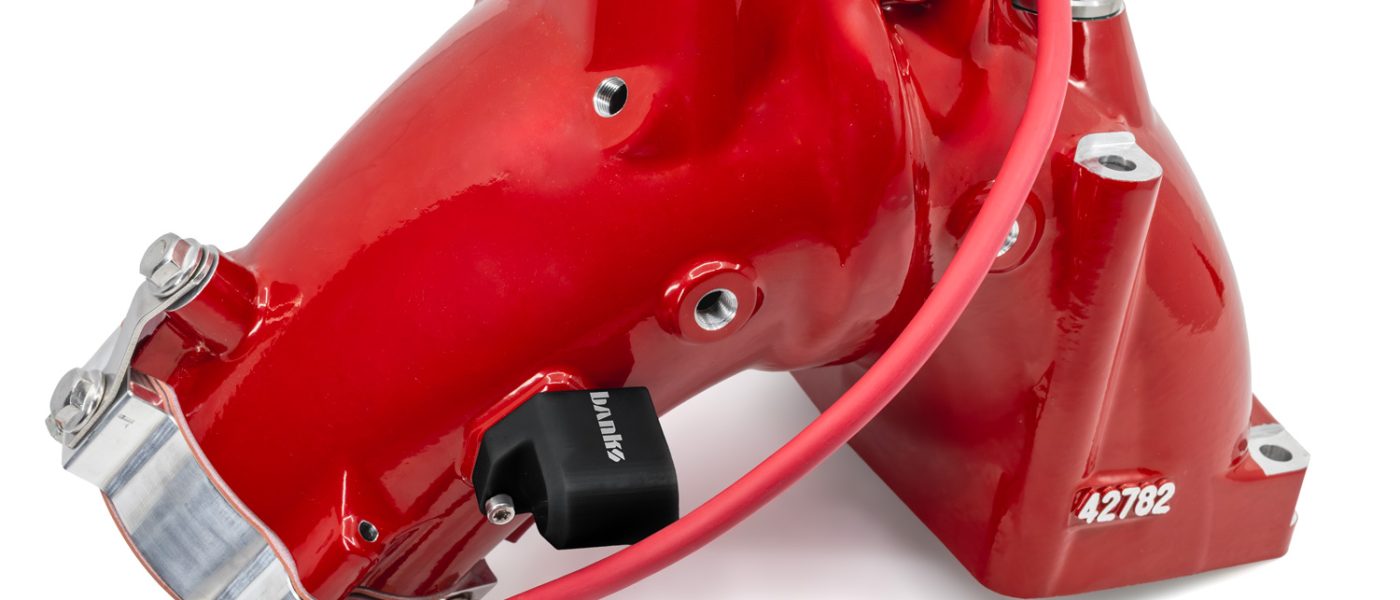
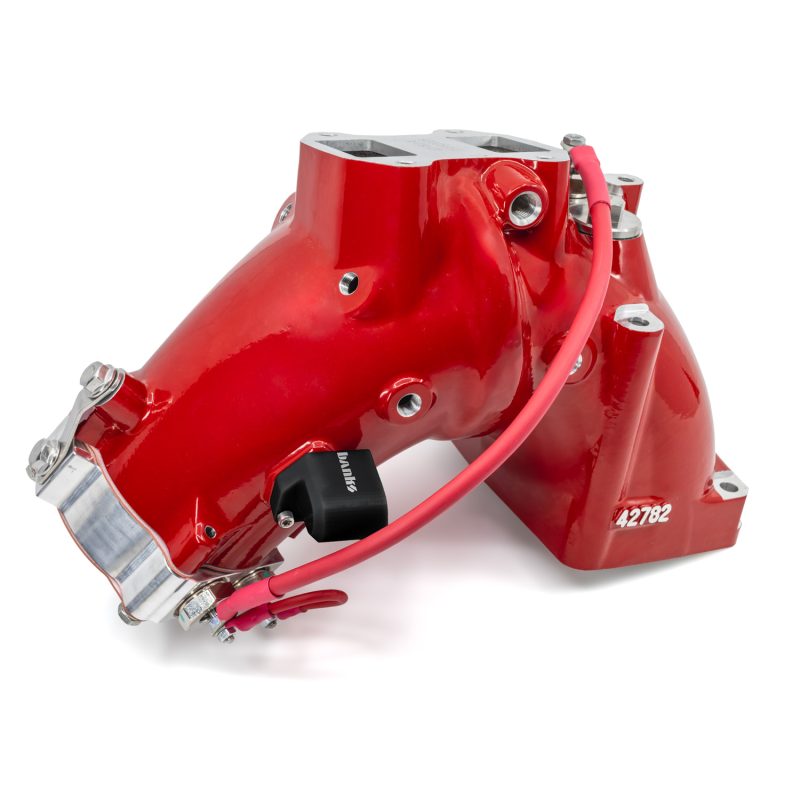
Banks Ram-Air® Intake System 2007.5-2024 Dodge/RAM 2500-5500 6.7L Diesel
Please read through the following instructions thoroughly before starting your installation. If you have any questions please visit our Support Page.
Below is the step-by-step install guide.
A quick start wiring diagram and notes regarding throttle deletes are at the end of this page.
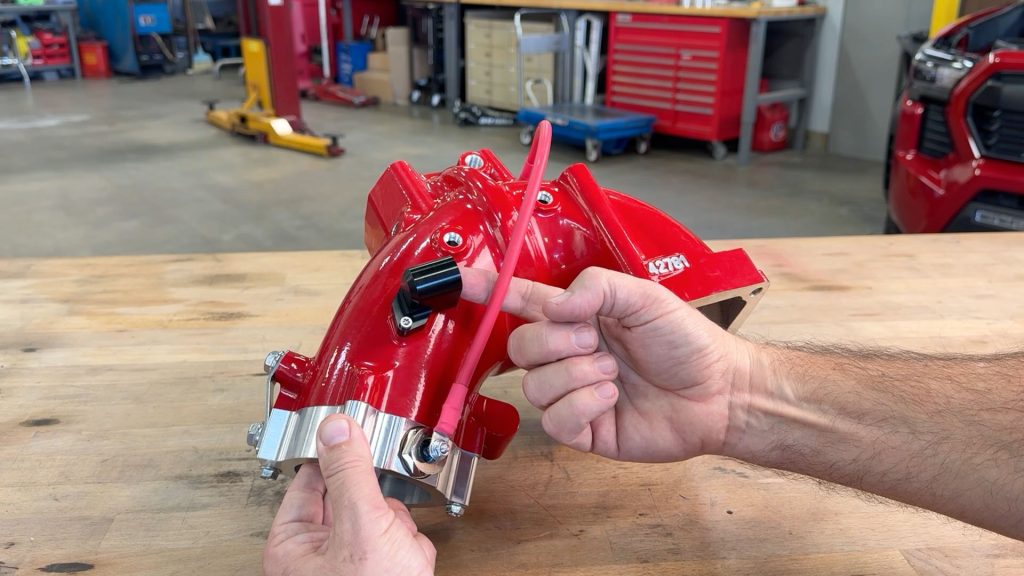
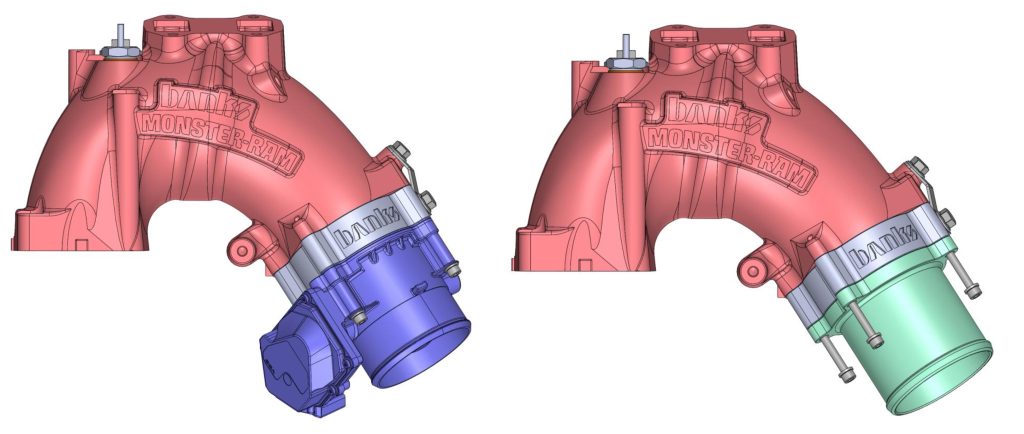
Billet Heater Install Guide
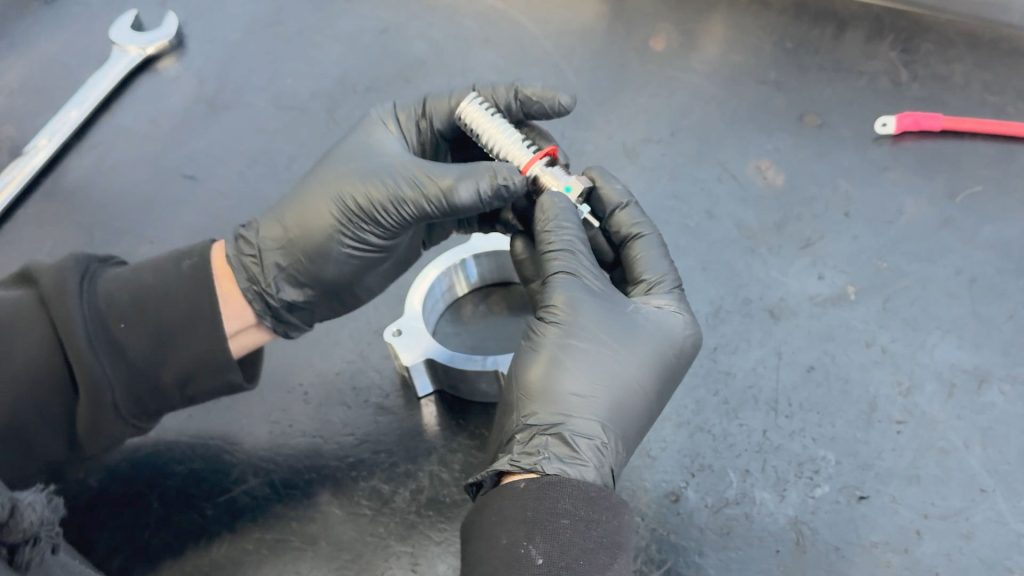
1. Copper washer
Slide the copper washer onto the coil heater(s) before installation.

2. Install coil heater(s)
Start threading them in by hand
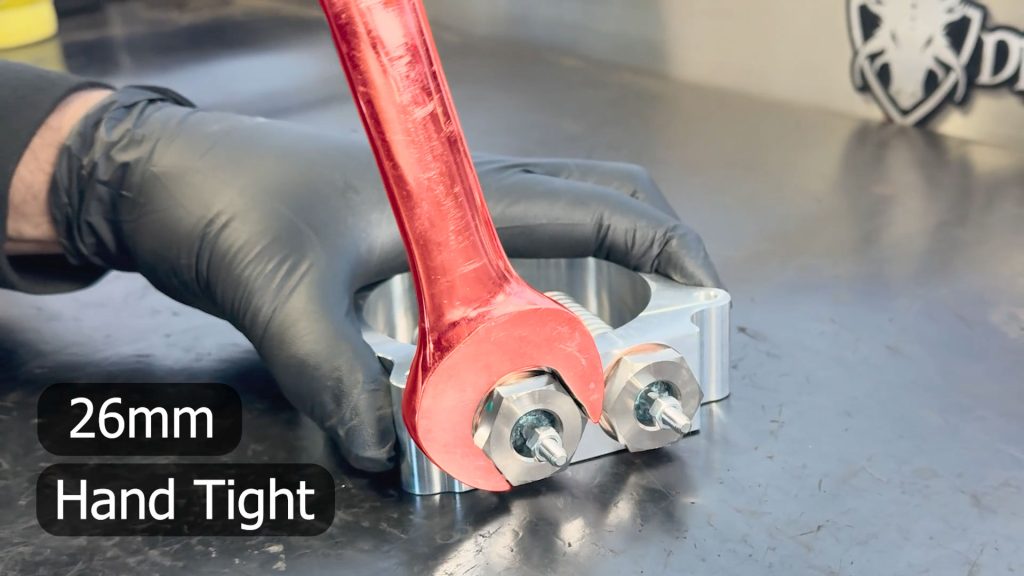
3. Tighten coil(s)
Use a 26mm wrench and hand-tighten. Don’t over-torque them.
4. Thread the heater nuts down first
This will expose all the threads for the next step.
5. Threadlocker
Apply a drop of blue thread locker to each of the coils.
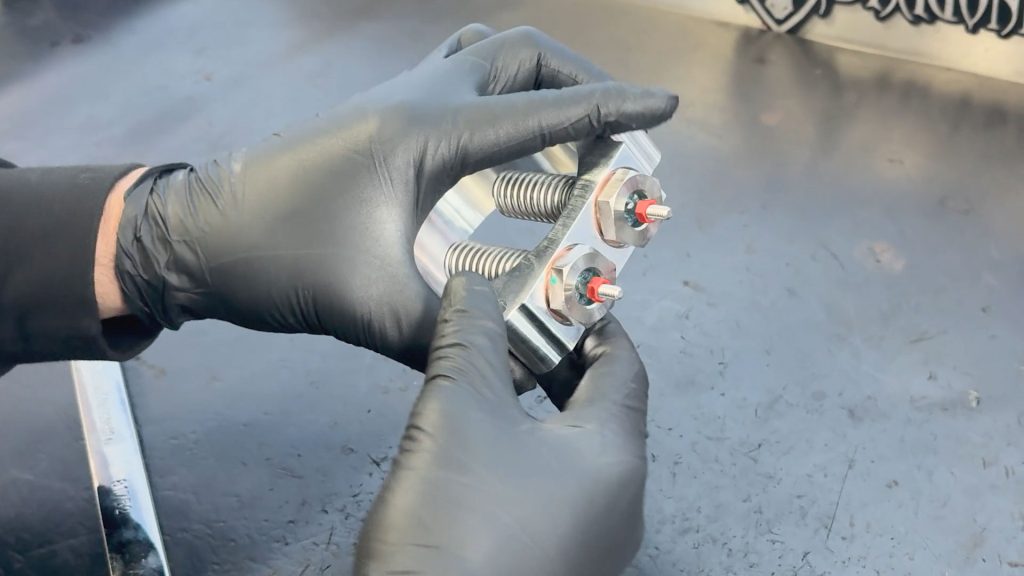
6. Thread the heater nut(s) back up
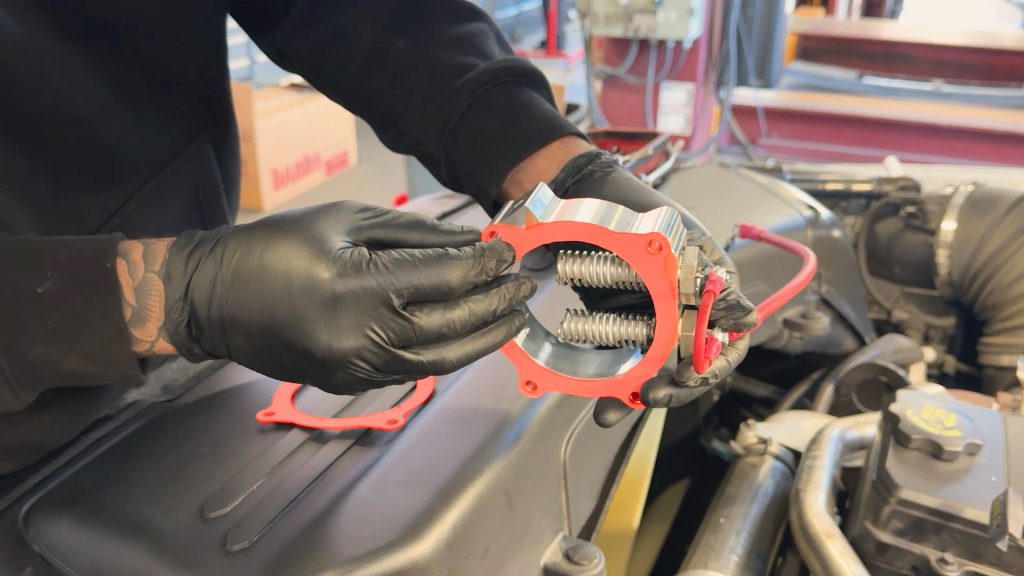
Expose 2 threads from the bottom to give enough space between the heater post and the coil body.
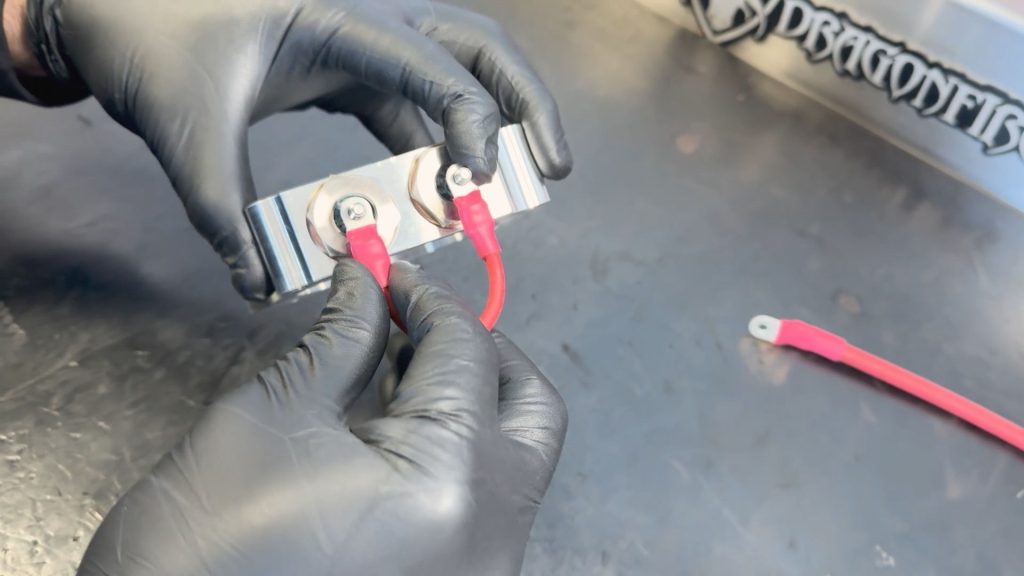
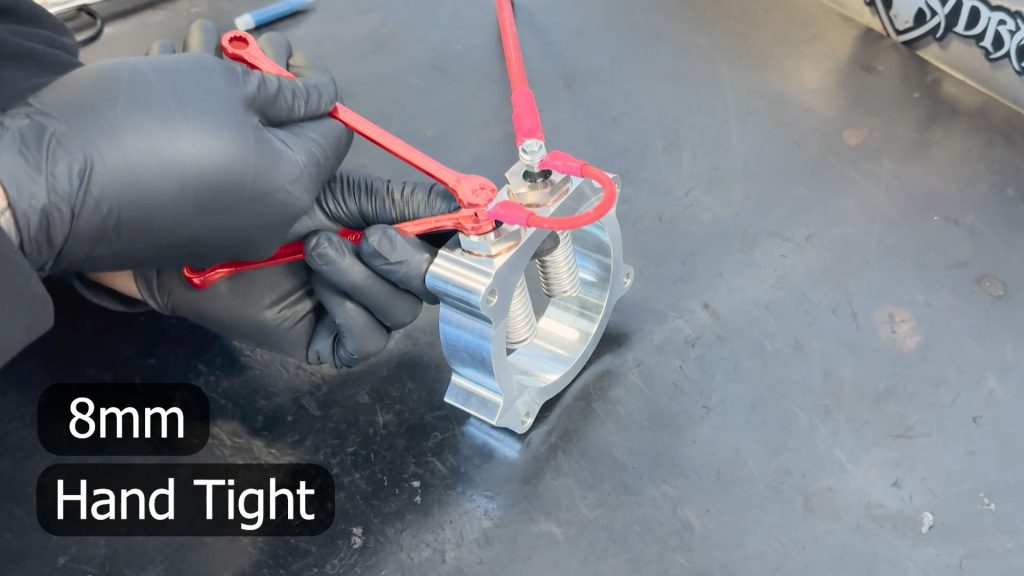
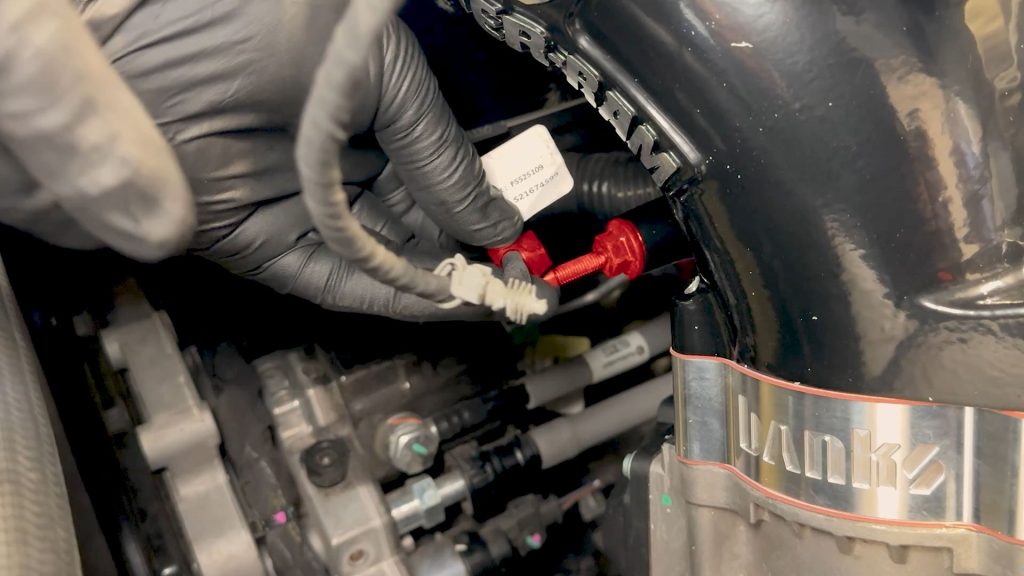
7. Heater connection wire (1500W Kit)
For 1500W kits, bend the small red wire into a U shape to connect the two coils together.
8. Wire orientation
Be sure the connection wire loops away from the engine. If you can see the Banks logo, the wire should look like a smily face.
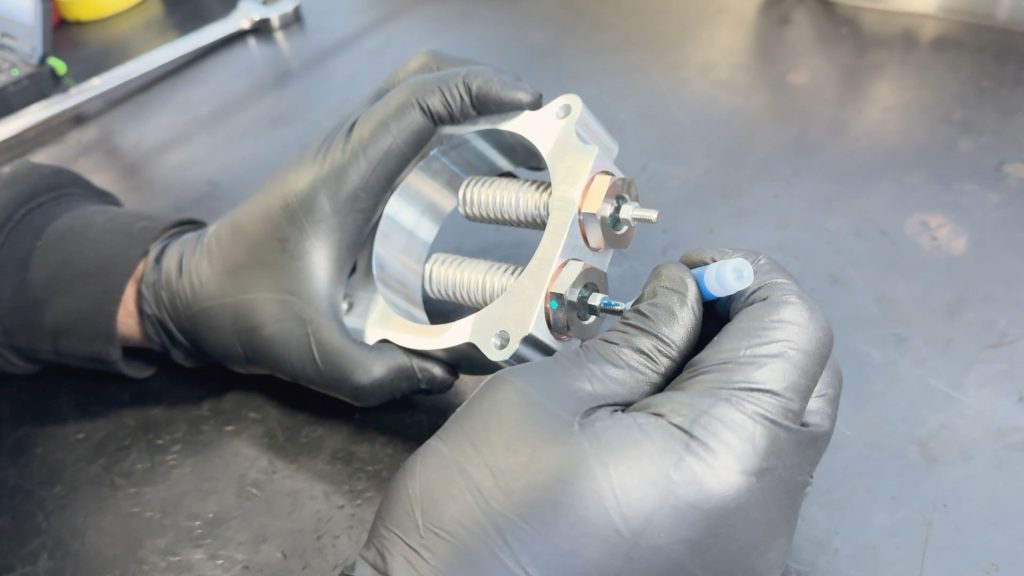
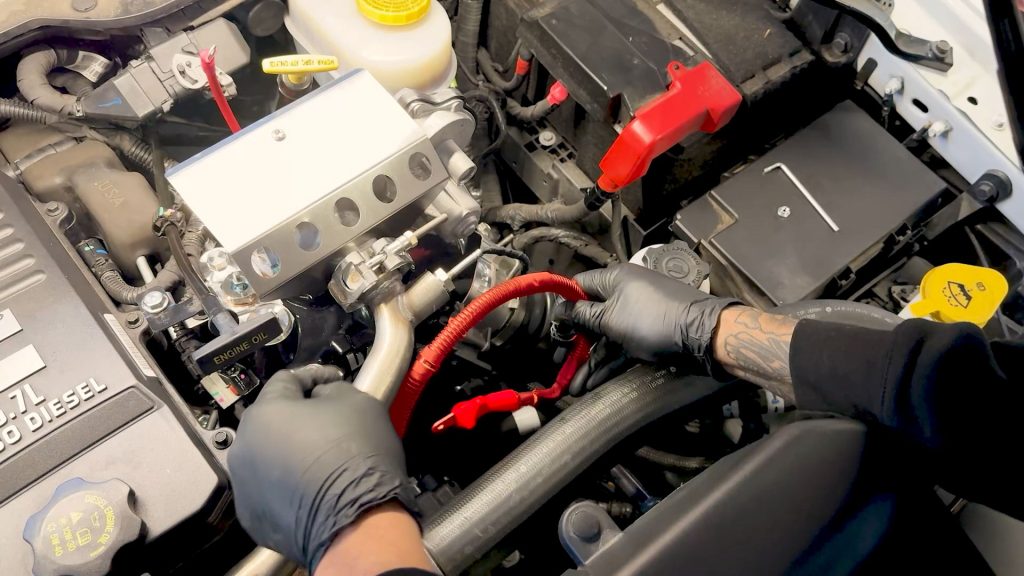
9. Heater cable
Stack the thicker heater cable on top of the smaller wire.
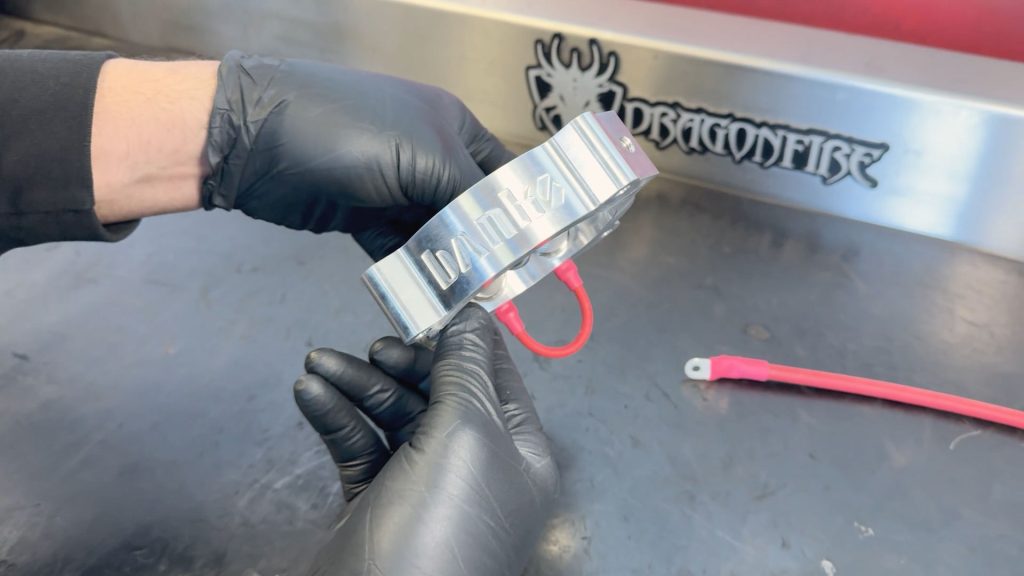
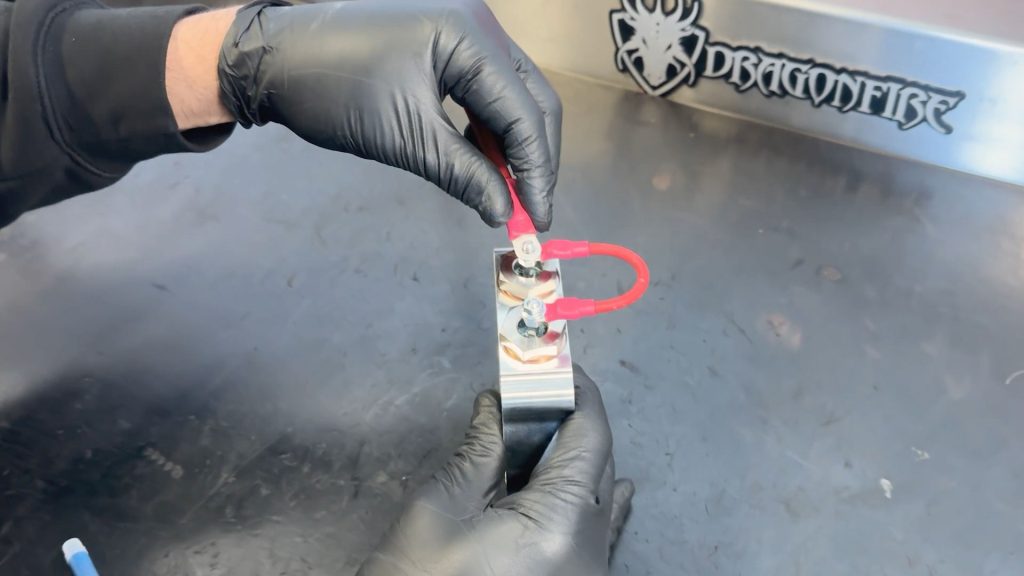
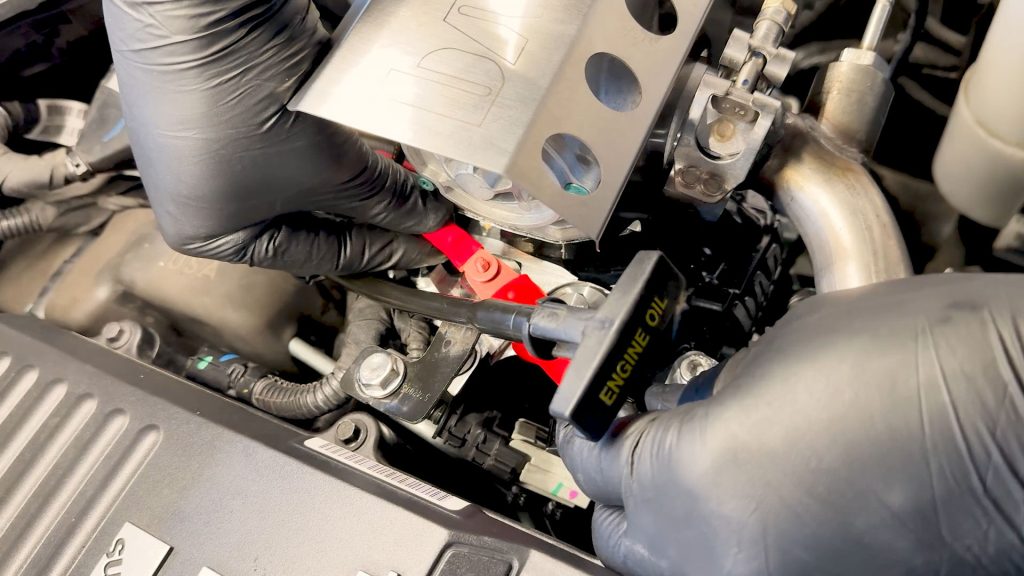
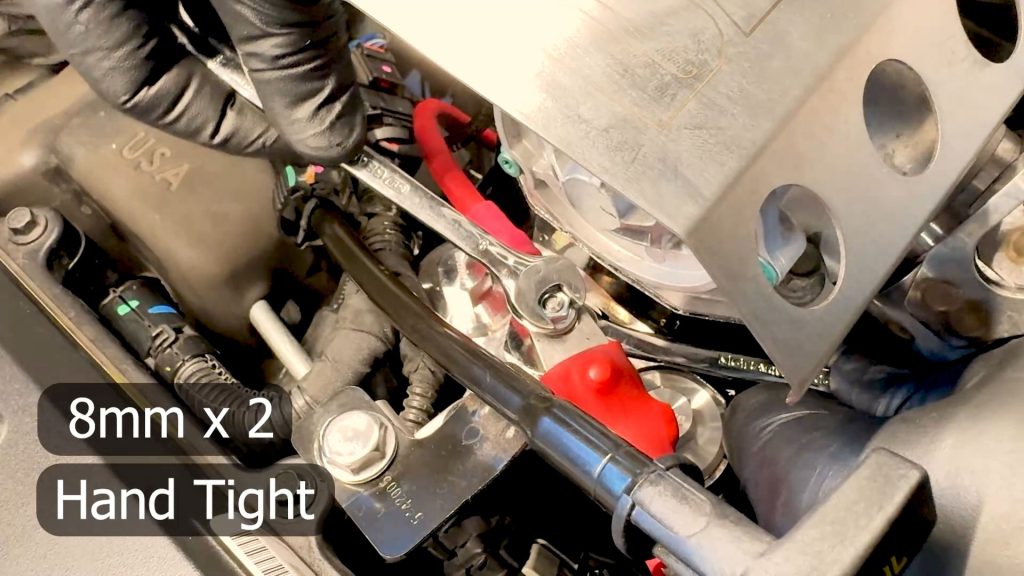
10. Tighten heater(s)
With two 8mm wrenches. Singe the two nuts together while holding the lower nut stationary.
Failure to hold the lower nut stationary can damage the coil heater by breaking the post free from the ceramic insulator.
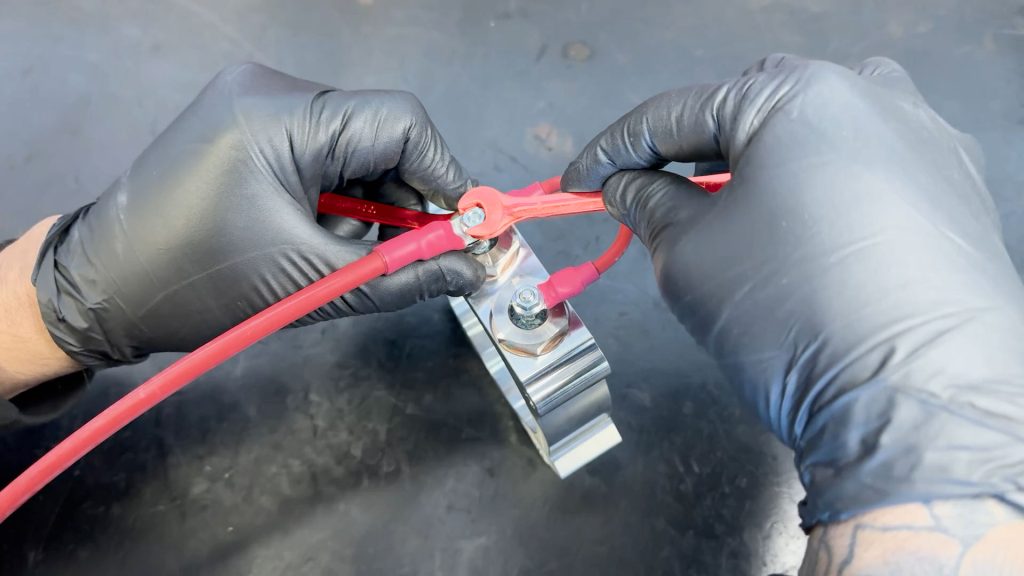
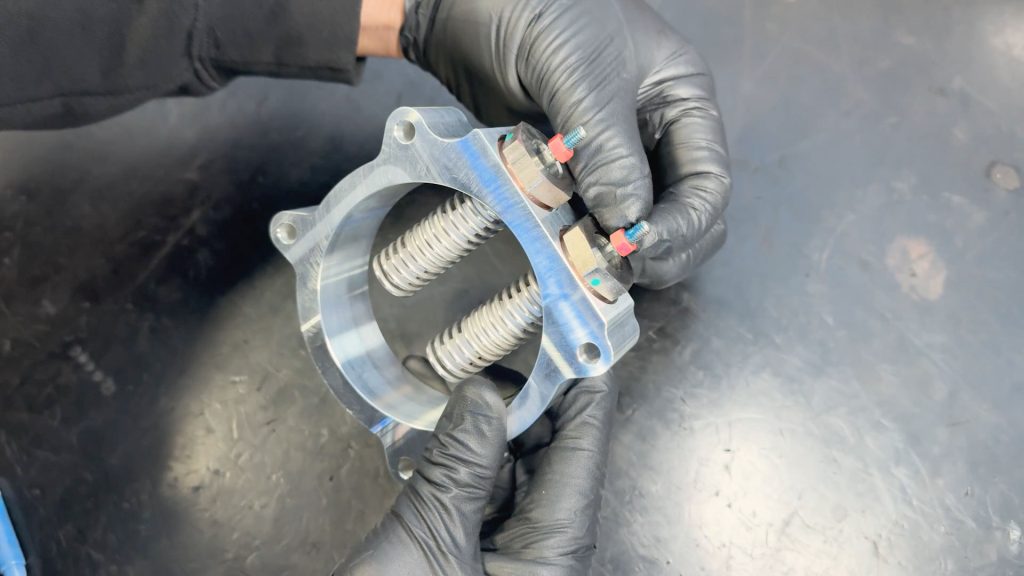
11. Heater cable orientation
Tighten the larger heater cable so that its pointing away from the looped wire.
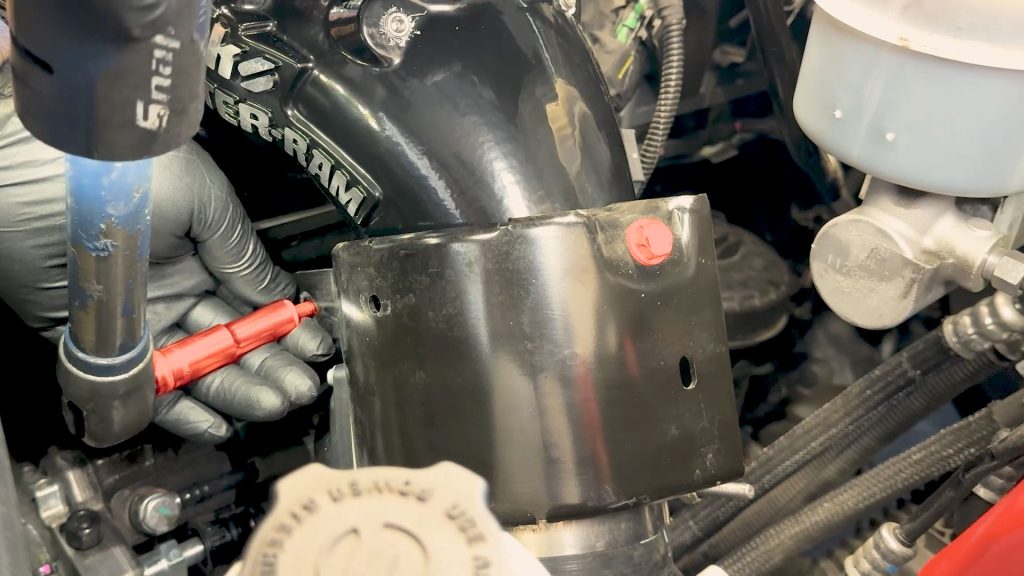
12. Remove 12V power lead
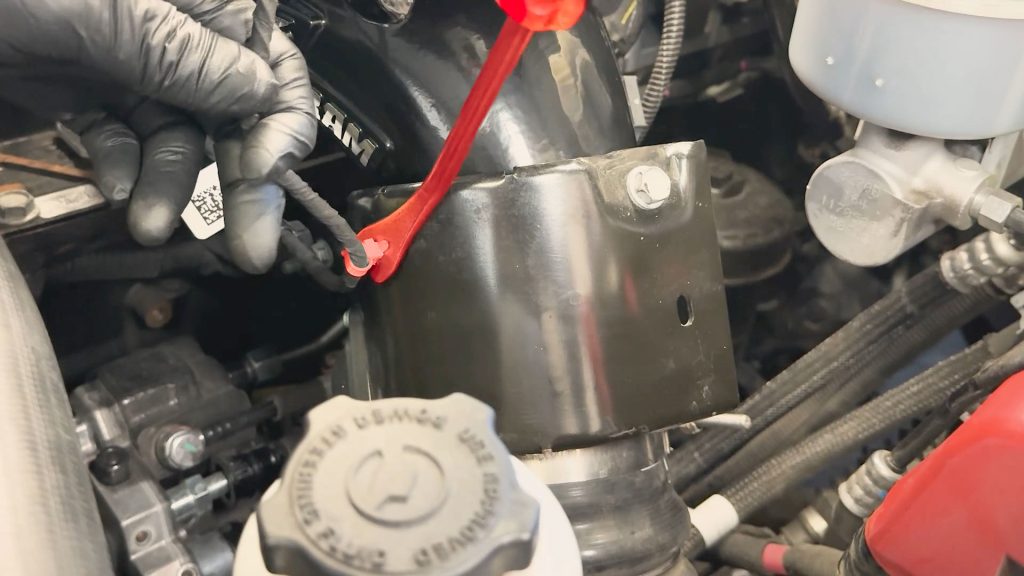
13. Cable tie
Free the wire harness from the throttle heat shield.
14. Throttle heat shield
With a 10mm socket, remove the bolts that secure the heat shield.
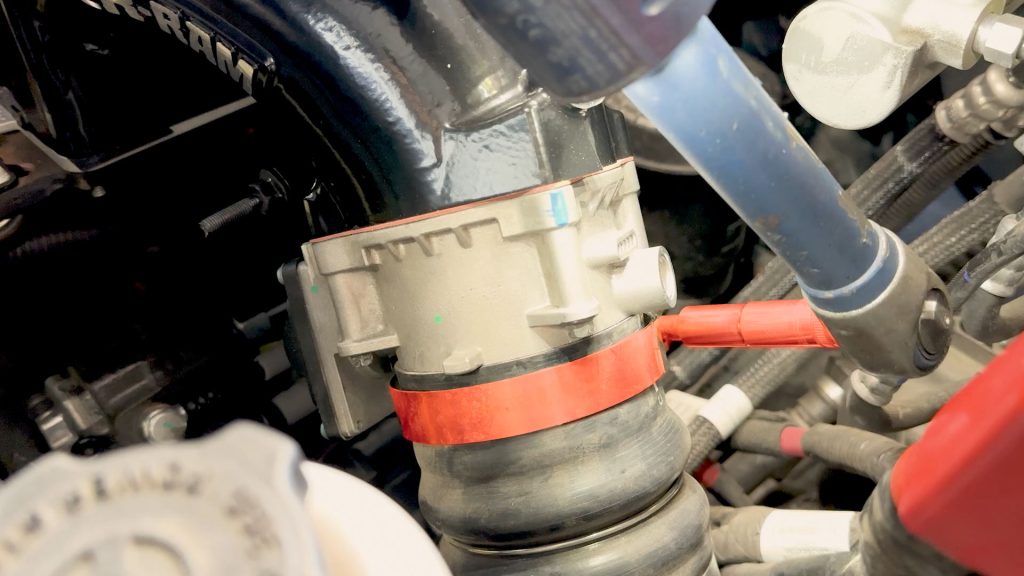
15. Free boost tube
With a 10mm socket, remove the clamp that holds the boost tube on.

16. Throttle Body
Reach around the back side, slide the locking tab over and unplug the throttle valve.
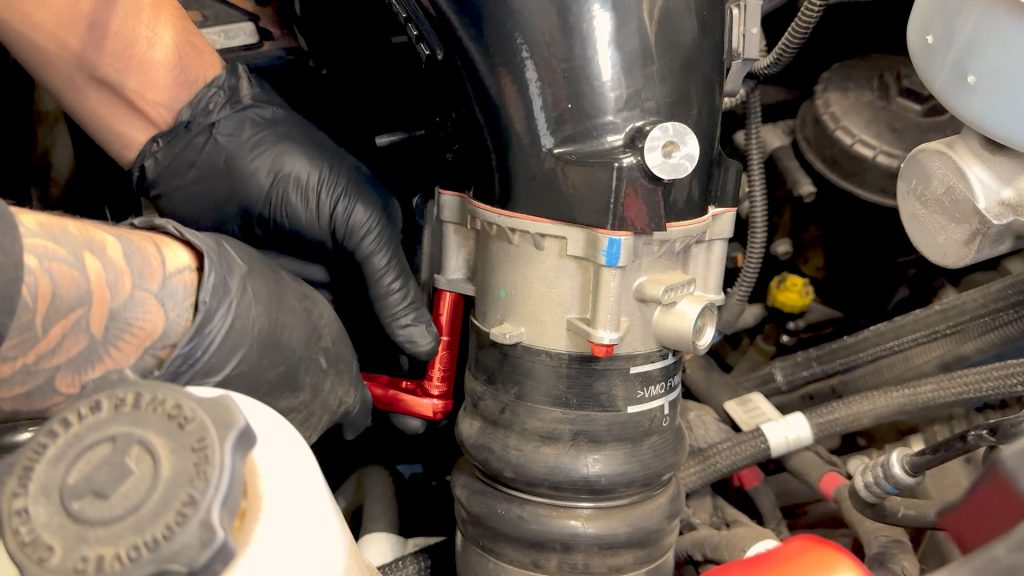
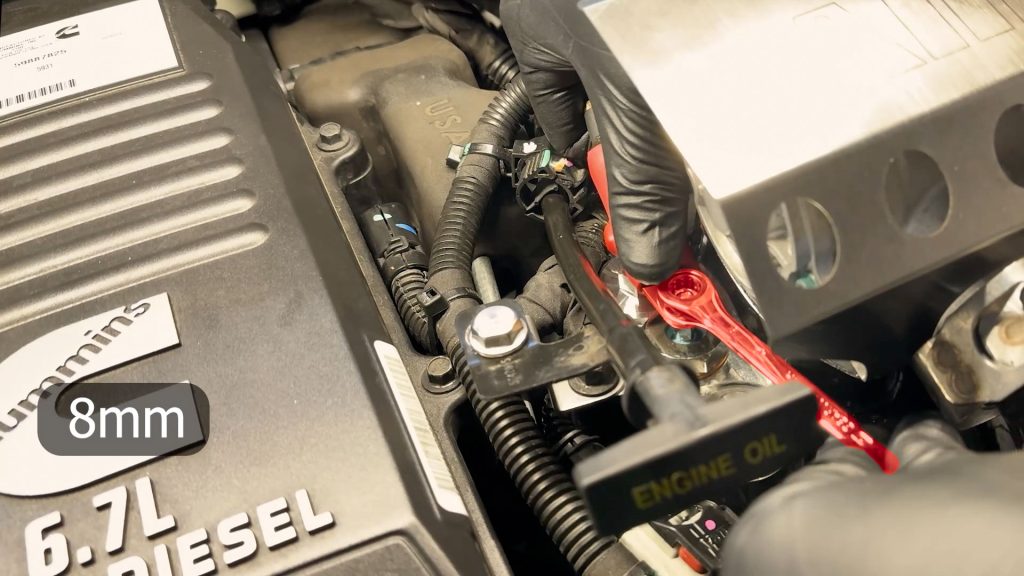
17. Unbolt Throttle
With an 8mm socket, unbolt the 4 bolts that secure the throttle.
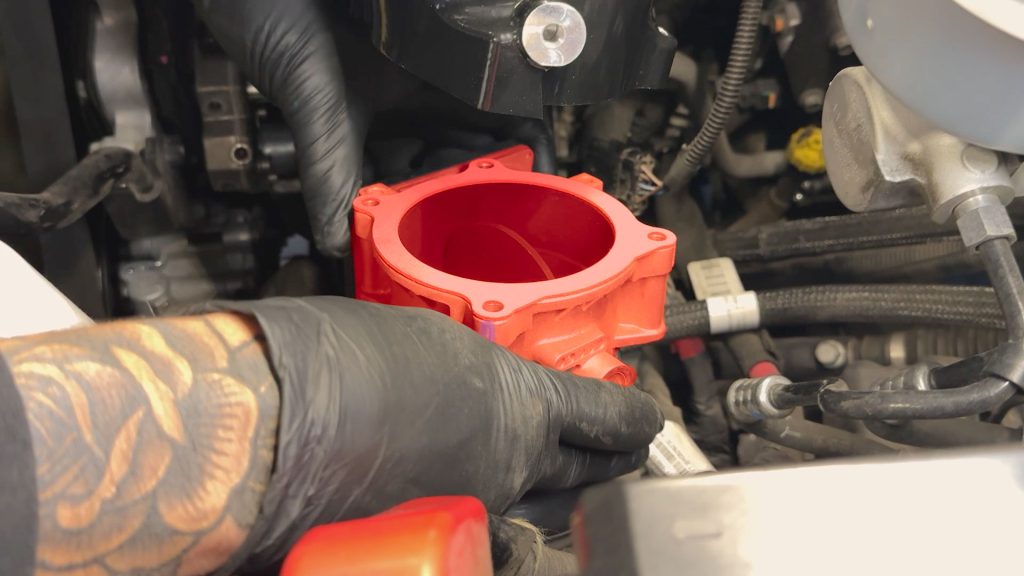
18. Pull the throttle free from the Monster-Ram.
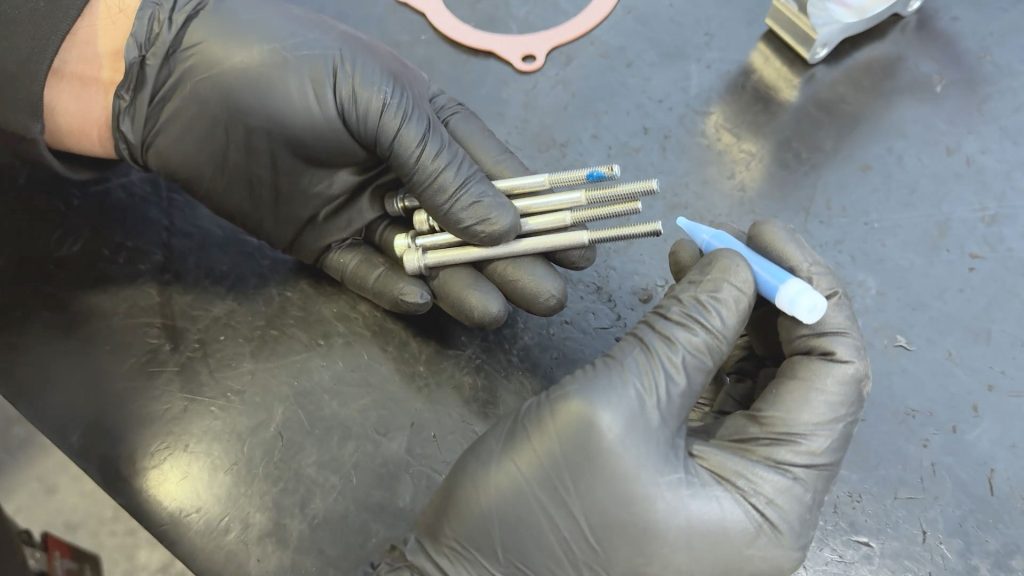
19. Thread locker
Apply a drop of thread locker to each of the Banks supplied long bolts
20. Gaskets
Line up the two supplied gaskets onto both side of the billet heater.
21. Bolt the billet heater on
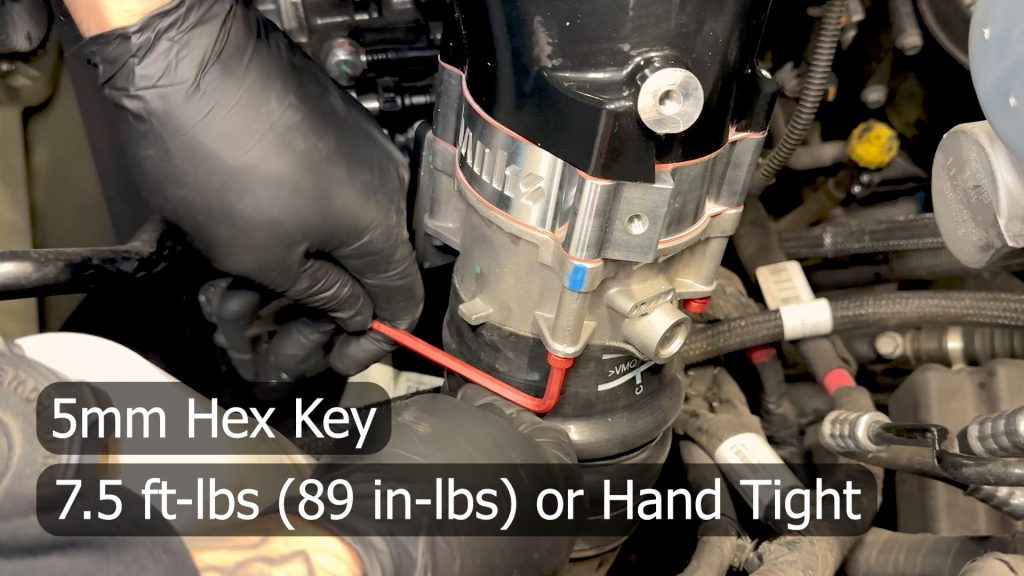
Slide the longer bolts through the throttle and billet heater. Start threading them by hand, then snug them down with the supplied 5mm hex key.
Do not over-torque and break the bolts.
22. Boost tube clamp
Wrap the clamp back around the throttle.
23. Secure the clamp
Use a deep sock and snug it down.

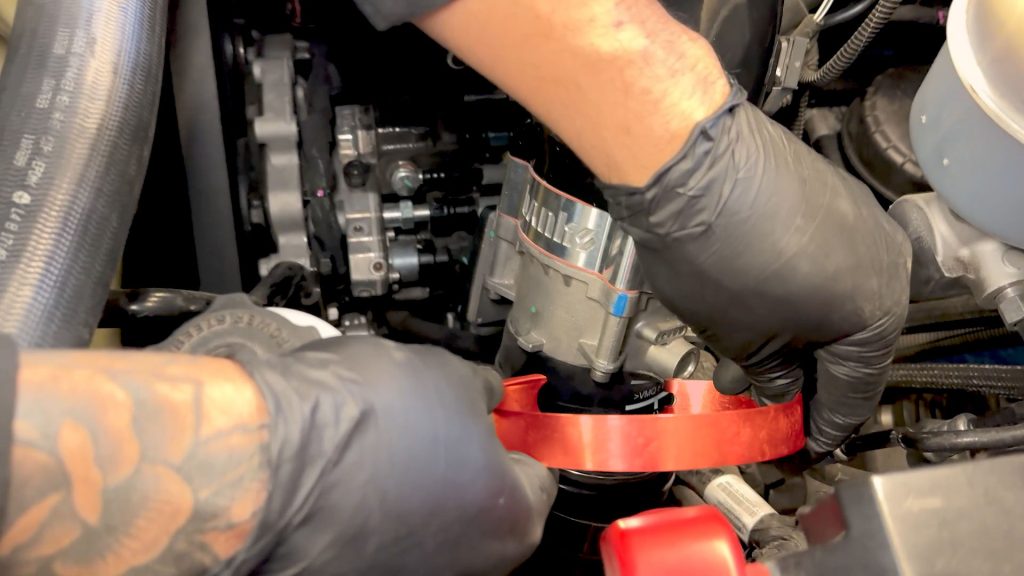
24. Grounding bar
Grab the 2 bolts and the grounding bar. When installed the rounded end will point towards the Monster-Ram

25. Torque Grounding Bar
With a 13mm socket, toreque top 12 ft-lb.
26. Cable Tie
Re attach the wire harness to the stud under the Monster-Ram.
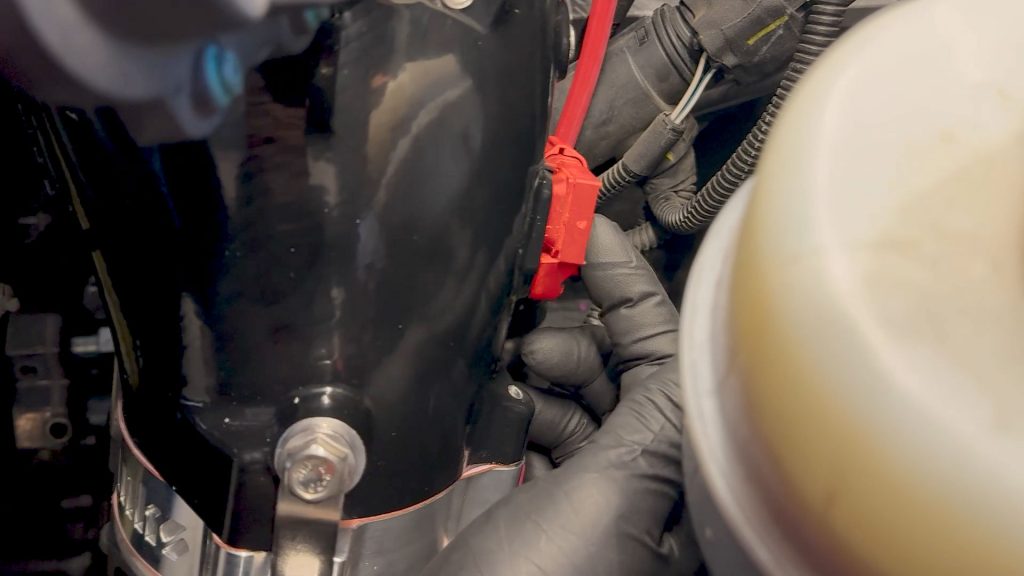
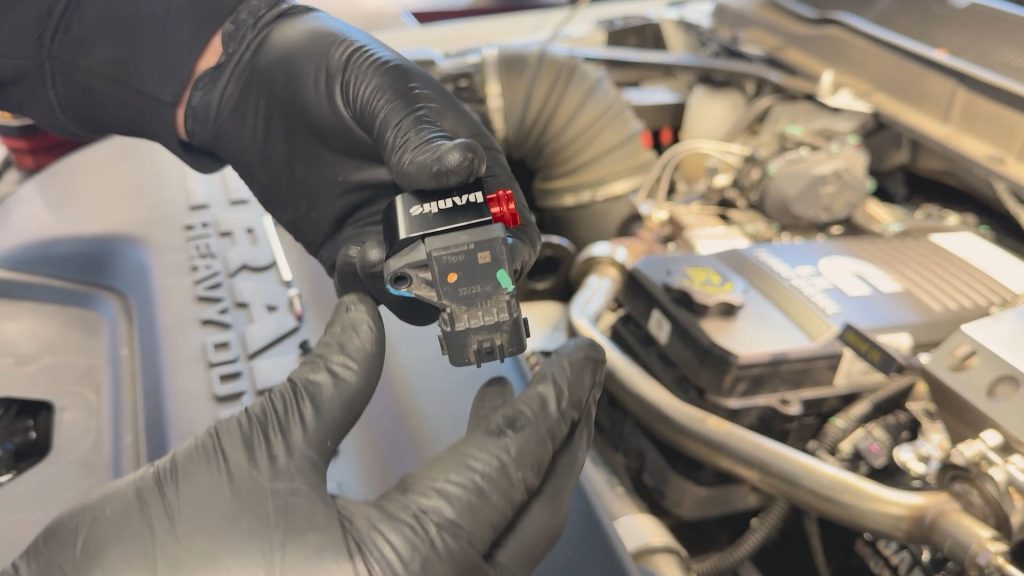
27. MAP sensor
Locate and unplug the MAP sensor.

28. MAP sensor
Depress the tab and unplug it.
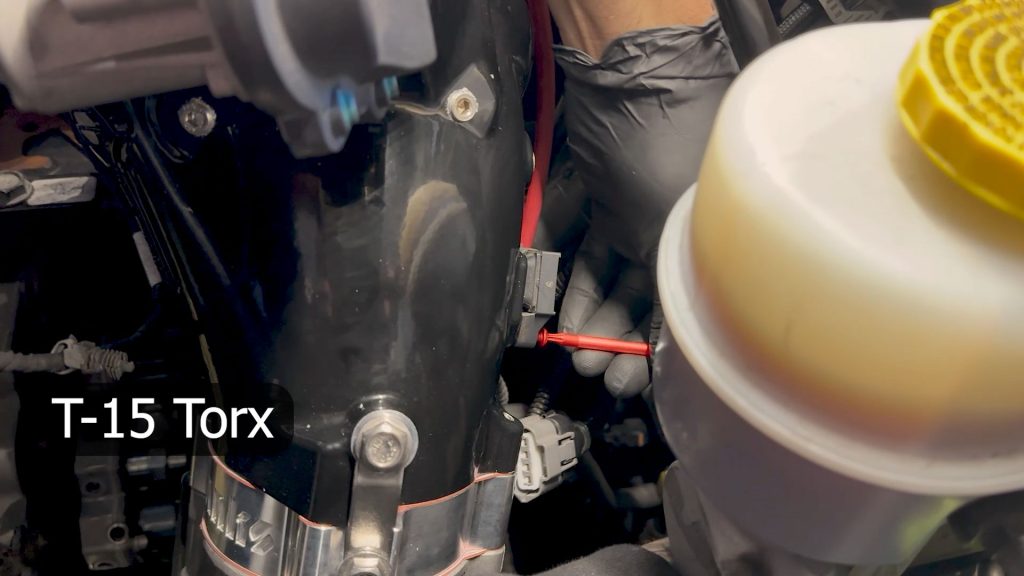
29. Map sensor
With a T-15 Torx, remove the MAP sensor from the Monster-Ram
Note: The Included MAP relocation kit is for use with a Banks Monster-Ram with a billet heater kit and will not fit stock intake horns.
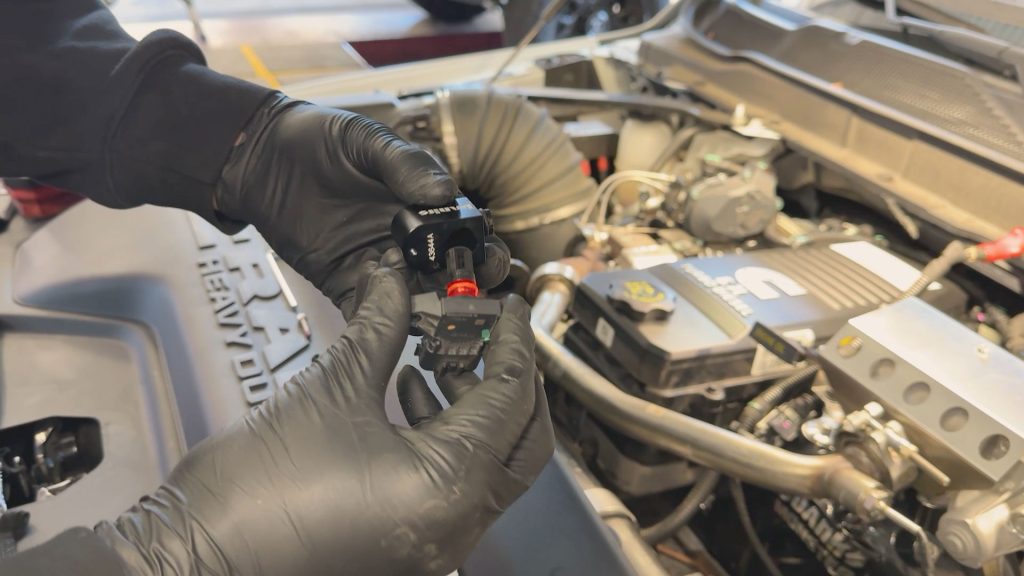
30. Lubricate O-ring
Apply some silicone lubricant to the MAP sensor O ring
31. Lubricate O-ring
Also apply some lubricant to the o ring on the MAP relocation block.

32. Secure MAP sensor
Use the supplied T-15 screw and secure the MAP sensor to the relocation block.
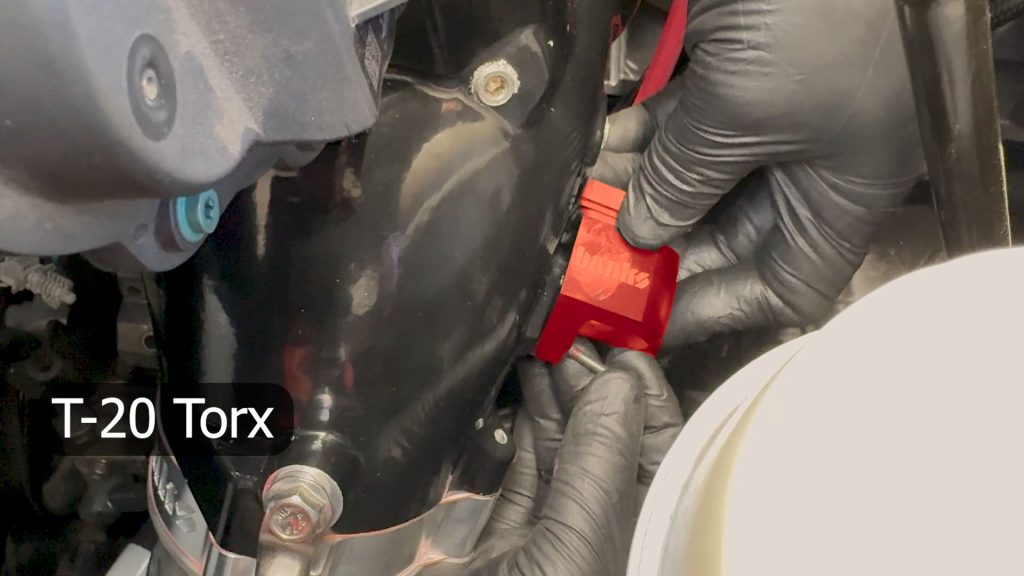
33. Install MAP sensor block
Reinstall the MAP sensor and relocation block. Secure it with the T-20 torx screw.
34. Install MAP sensor block
Snug it down with the supplied T20 key
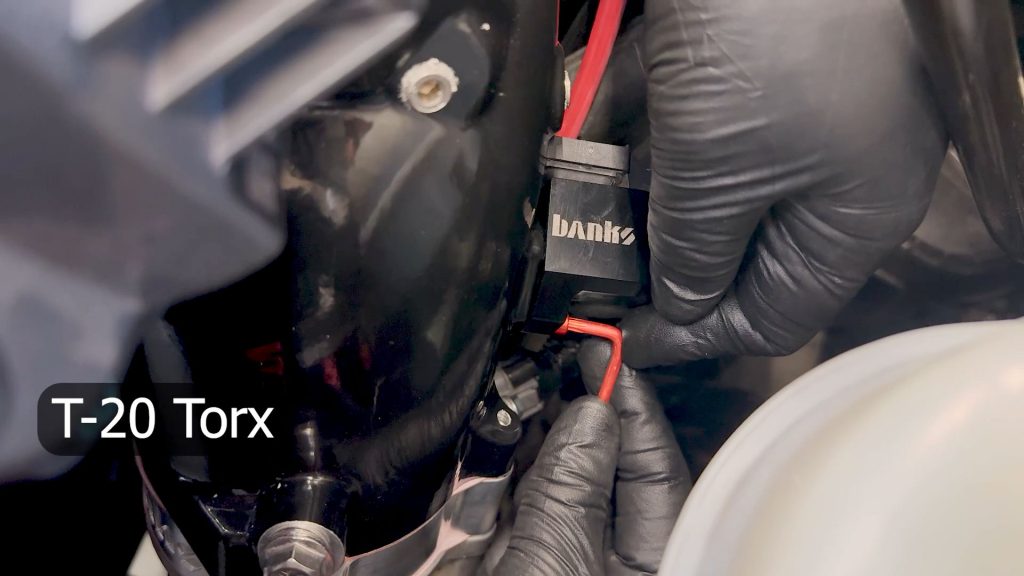
35. Harness routing
Route the MAP sensor harness underneath the larger heater cable.
36. Harness routing
Wire the MAP sensor harness under the power cable like this.
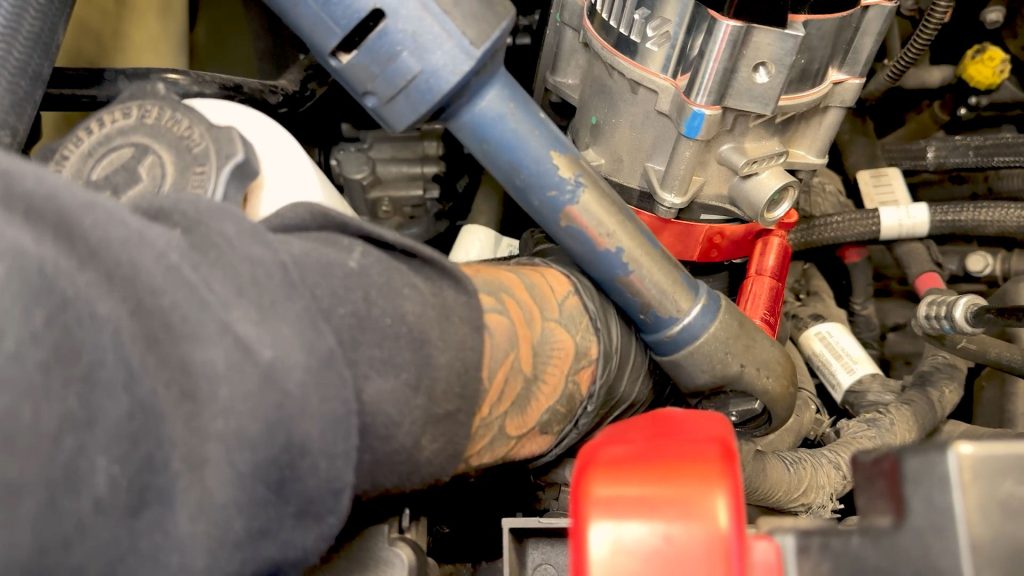
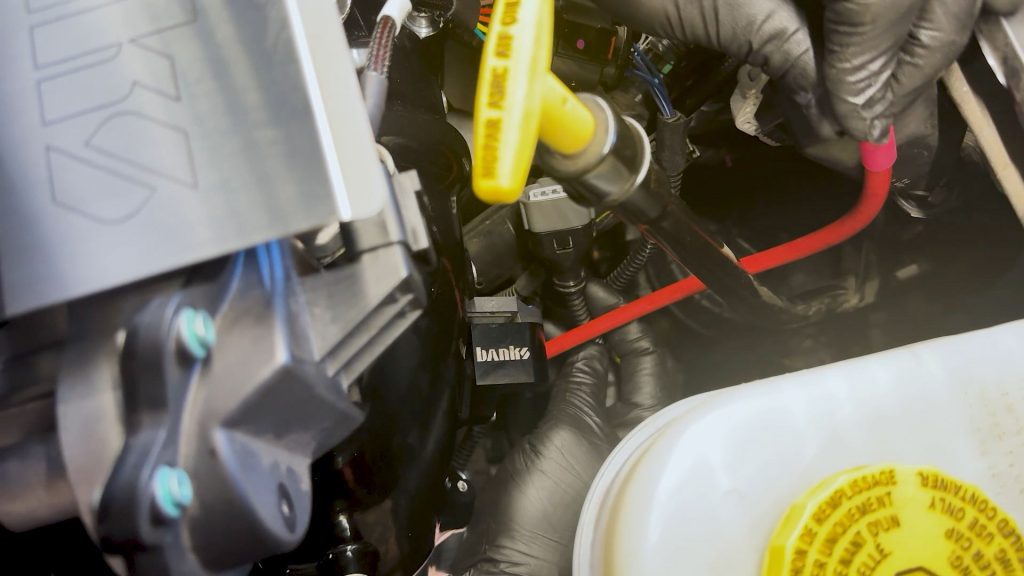
37. Loop the 12V heater cable
Free the 12V harness from its cable ties to position it towards the front of the truck. Loop the extra out of the way.
38. Install heater cable
Put the factory 12V heater coil down first, and stack the Banks heater cable on top.
39. Cinch the power cables together
With one 8mm wrench on the bottom, and the one on top, chinge the two together.
40. Harness Cleanup
Secure any loose wires with a zip-tie.

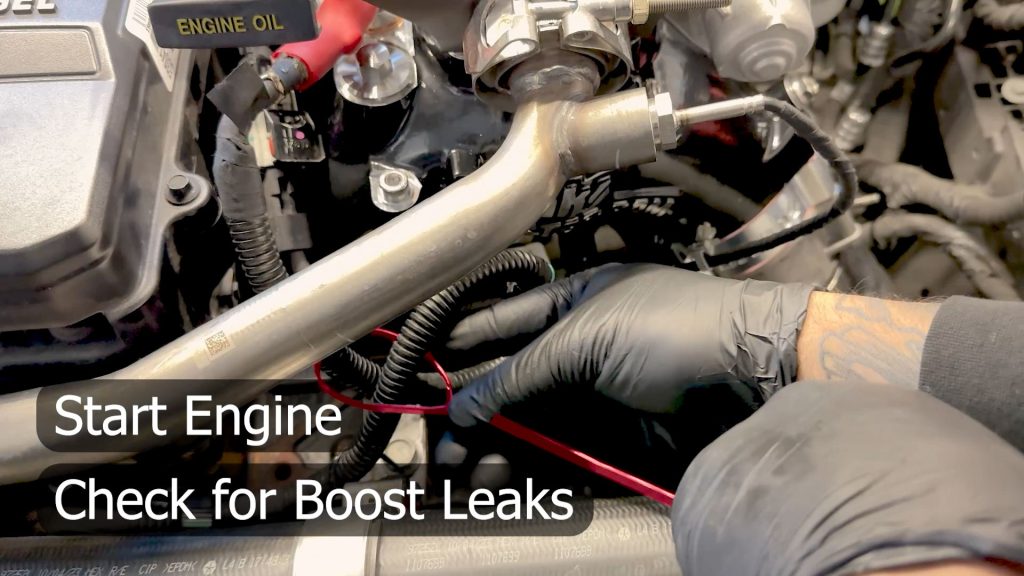
41. Start and Check
Start the engine and check for any boost leaks.
Throttle Delete Accommodation
If the throttle valve has been deleted, the supplied M6 screws will likely be too long. For proper thread engagement into the Monster-Ram, you will need 43mm plus the thickness of the throttle delete flange.
M6 screws are typically sold in 5mm length increments. If your required length ends in a 3, round down. If it ends in a 4, round up. Use the equation below to determine the length of screws required.
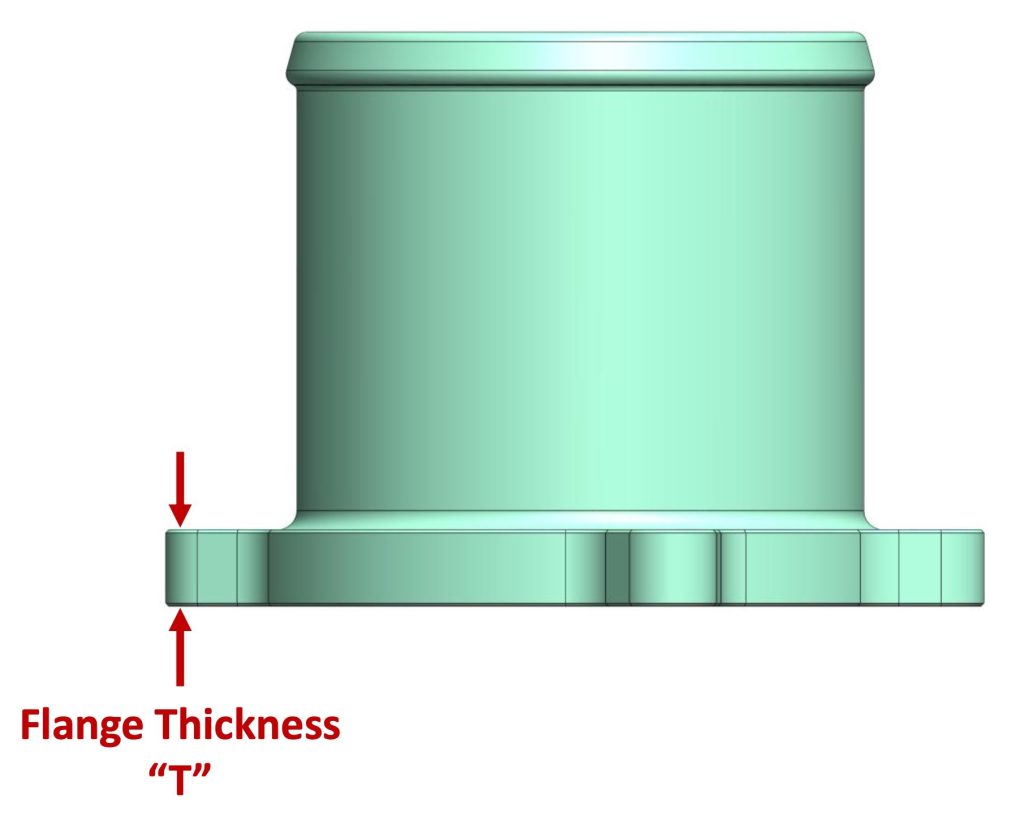
Corrected Screw Specification
M6 x 1.0 x L
L = 43mm + T
Example
If: flange thickness T = 12mm
Length = 43mm + 12mm = 55 mm
New screw spec: M6 x 1.0 x 55mm
Quick Start Wiring Diagrams
The following diagrams show the recommended wiring layout for connecting an additional coil heater to your dual heat-capable Monster-Ram or bolting on a Banks Billet Heater.
Your heating kit will include either a thick or thin red connecting wire, depending on which upgrade heater kit you’ve purchased. For clarity, these diagrams are color-coded as shown below.
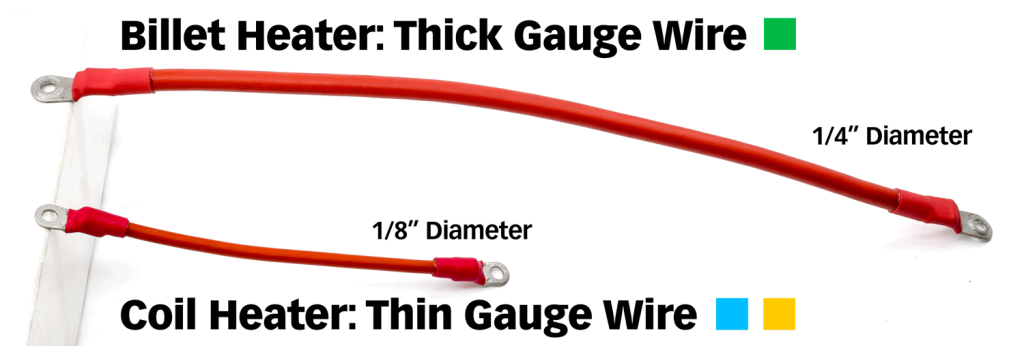
Only one coil heater should ever be connected to the end of a thin gauge wire, and no more than two coil heaters should ever be connected to the end of the thick gauge wire.
Quad Heater Coil Note: Installing four coil heaters may exceed the rated capability of the vehicle’s heater circuit. This is not a recommended configuration, and any such installation is undertaken at the owner’s risk.
Dual Heater In Banks Monster-Ram
+12V (From Relay/Solenoid) – 1st Heater
Thin Gauge Wire – 2nd Heater
Wire the 2nd heater in series after the 12V lead via the thin gauge wire.
Single Heater In Banks Monster-Ram + 1500W Billet Heater
+12V (From Relay/Solenoid) – 1st Heater
Thick Gauge Wire – 2nd Heater
Thin Gauge Wire – 3rd Heater
Wire the 2nd heater in series via the thick gauge wire, and the 3rd heater in series via the thin gauge wire.
Dual Heater In Banks Monster-Ram + 750W Billet Heater
+12V (From Relay/Solenoid) – 1st Heater
Thick Gauge Wire – 2nd Heater
Thin Gauge Wire – 3rd Heater
Wire the 2nd and 3rd heaters in parallel with one thin wire on top of the Monster-Ram, and the larger gauge wire to the Billet Heater.
Wiring the 2nd and 3rd heaters in series through the thin gauge wire will exceed the thin wire’s current rating.
Tri Heater In Banks Monster-Ram
+12V (From Relay/Solenoid) – 1st Heater
Thin Gauge Wire – 2nd Heater
Thin Gauge Wire – 3rd Heater
Wire the 2nd and 3rd heaters in parallel with their own thin gauge wires.
Wiring the 2nd and 3rd heaters in series will exceed the current rating for the first thin gauge wire.
Quad Heater Coil Note: Installing four coil heaters may exceed the rated capability of the vehicle’s heater circuit. This is not a recommended configuration, and any such installation is undertaken at the owner’s risk.
Dual Heater In Banks Monster-Ram + 1500W Billet Heater
+12V (From Relay/Solenoid) – 1st Heater
Thick Gauge Wire – 2nd Heater
Thin Gauge Wire – 3rd Heater
Thin Gauge Wire – 4th Heater
Wire the 2nd heater with the thick gauge wire, and the 3rd heater in series with the thick gauge wire. The 4th heater is wired in parallel with the 1st heater by the thin wire.
Note: This arrangement draws a nominal current of 250 amps, which may exceed the rated capability of the vehicle’s heater circuit. We do not recommend this configuration and any such installation is undertaken at the owner’s risk.
Wiring all 4 heaters in series through the thin gauge wire will exceed the thin wire’s current rating.
Tri-Heater In Banks Monster-Ram + 1500W Billet Heater
Configuration Not Permitted
Using 5 heaters will exceed the factory electrical system’s capacity, overload the heater relay, damage the vehicle’s electrical system, and risk a fire. This is not a permitted configuration.