


97696 Banks PedalMonster with iDash Configuration
Note: If you do not have an iDash and will be using the PedalMonster in a standalone configuration, go to Section 4 on the PedalMonster installation home page.
Section 1: Starting Installation
1. Power off the vehicle and open the driver’s door. Leave the vehicle alone for a minimum of 10 minutes prior to installing the PedalMonster to ensure the vehicle system is asleep to avoid setting off Check Engine Light.
Some cars have a proximity system that is triggered if a transponder car key is within a certain distance of the vehicle. Place the proximity car key a minimum of 10 feet away to prevent the vehicle electronics from powering on.
If the vehicle does not go to sleep, it’s best to disconnect the battery or batteries. This will eliminate a check engine light as a result of disconnecting the accelerator pedal.
2. Locate the connector at the top of the accelerator pedal. While some connectors face the driver, others may face up toward the dash or to the left.
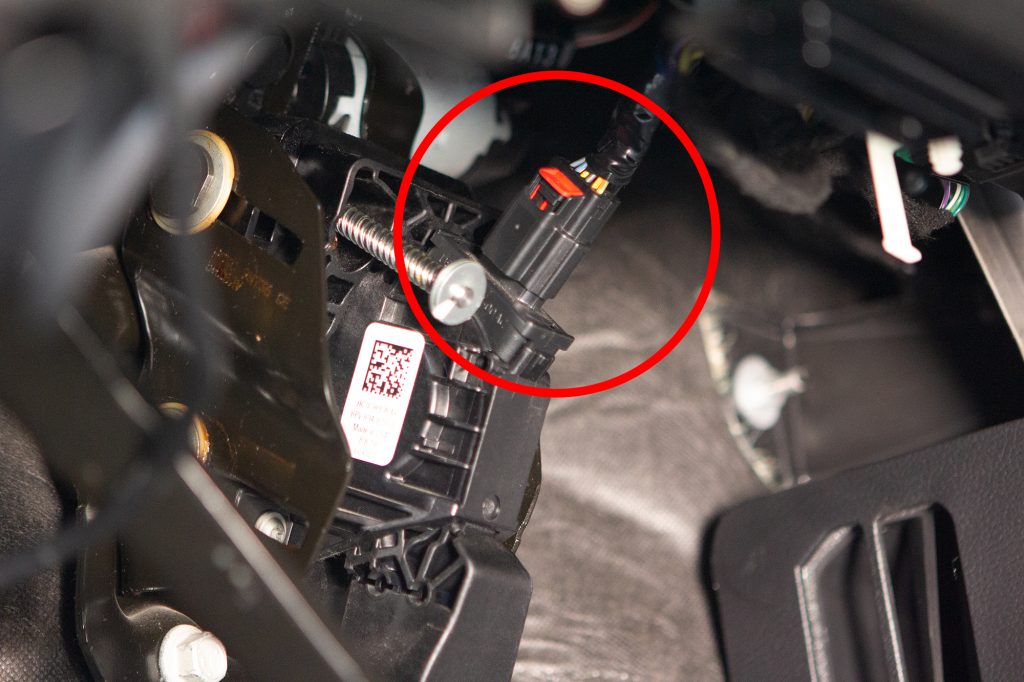
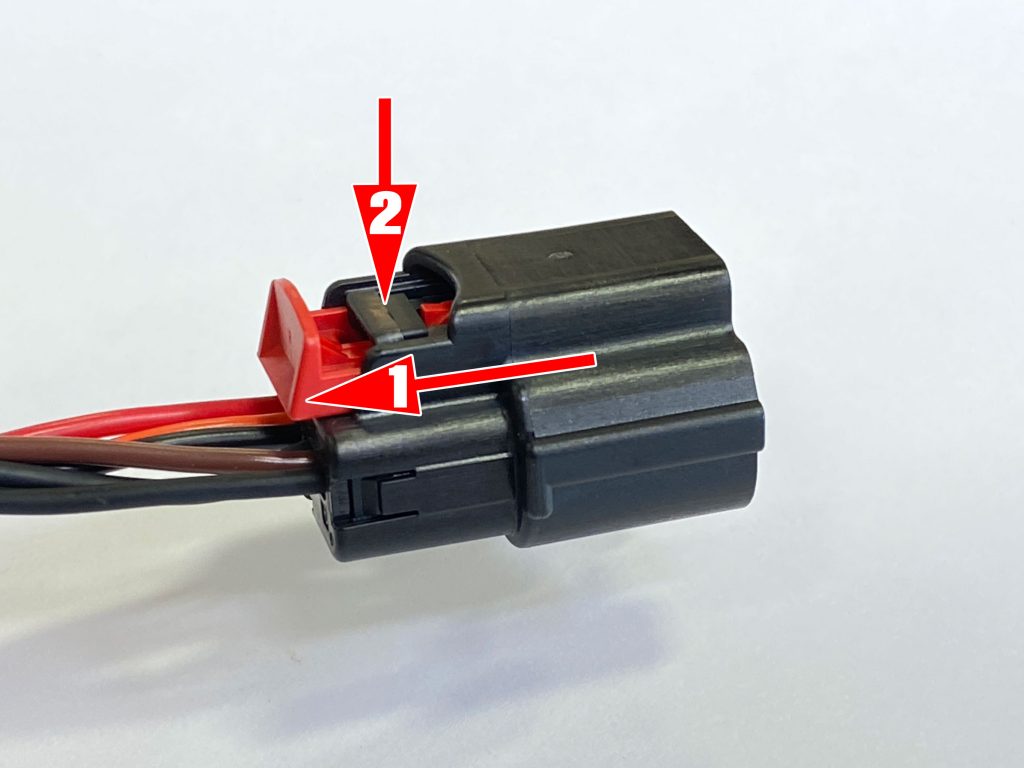
3. If the connector has a locking tab, slide the locking tab outwards to unlock. This will expose a black plastic button you will pinch to unlatch. Remove the connector from the accelerator pedal.
Below are three common pedal connectors. Most manufacturers use a slide lock to ensure the connector doesn’t accidentally get kicked loose.
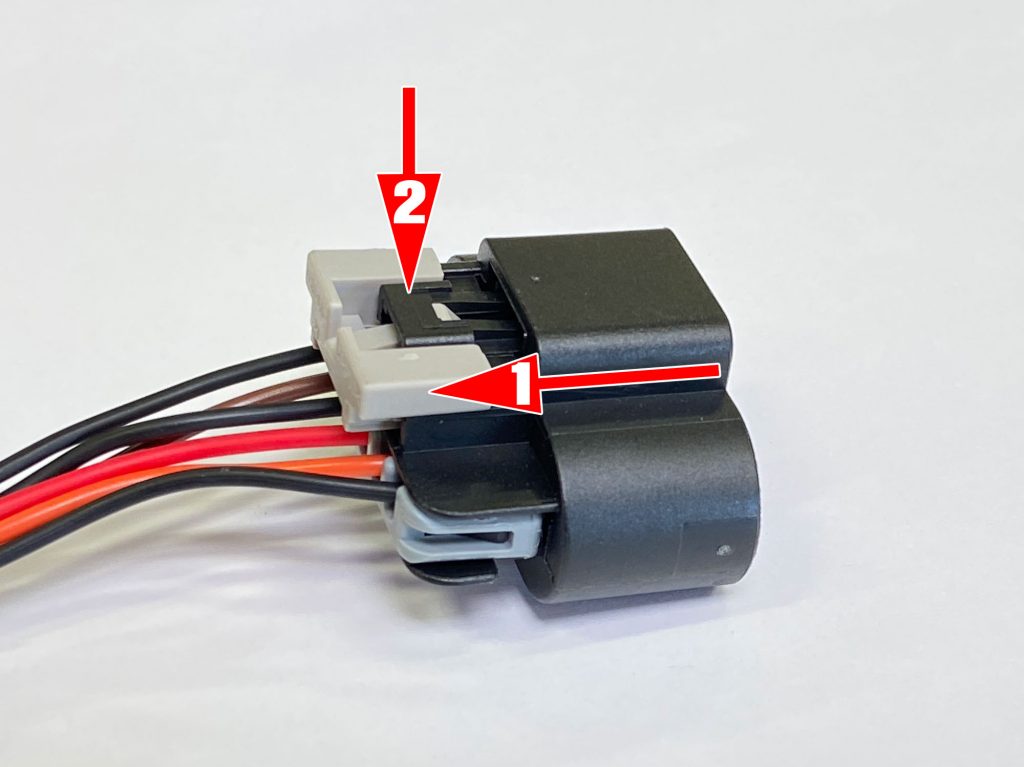
Example 1:
Slide-out grey lock approx 1/8″. Squeeze the black tab. This will release the connector.
Example 2:
Slide out grey lock approx 1/8″. Squeeze the black tab. This will release the connector.
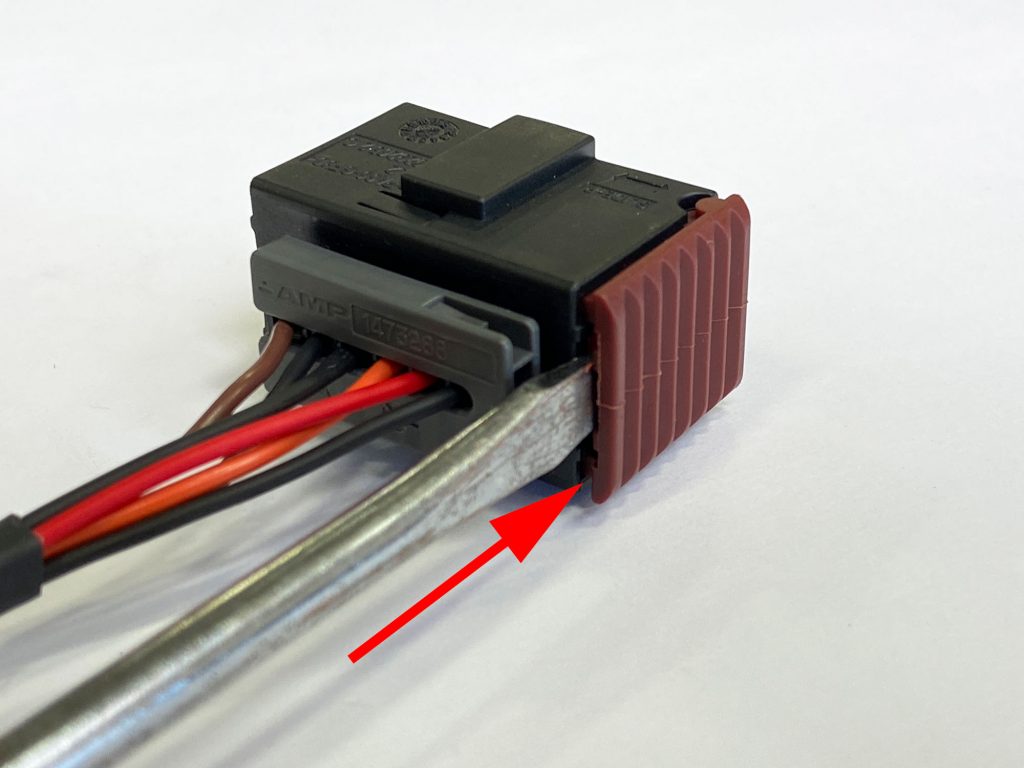
Example 3:
Insert small flat-blade screwdriver or pick tool.
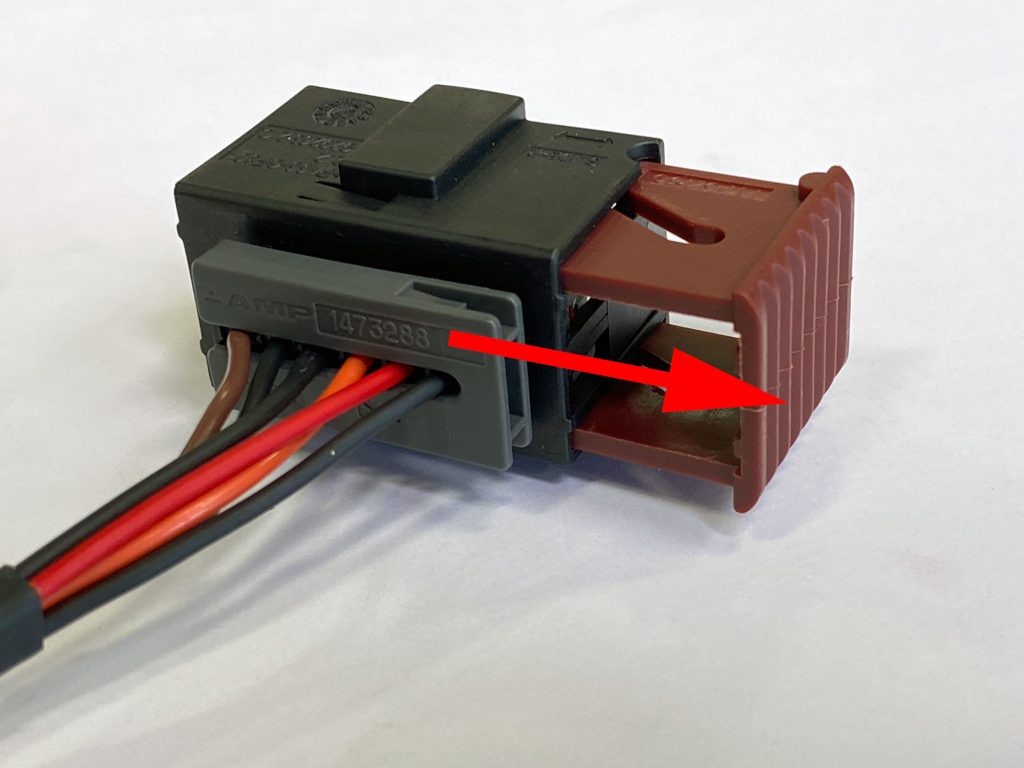
Example 4:
Remove tool and slide out the locking mechanism about 1/2″ with your fingers.
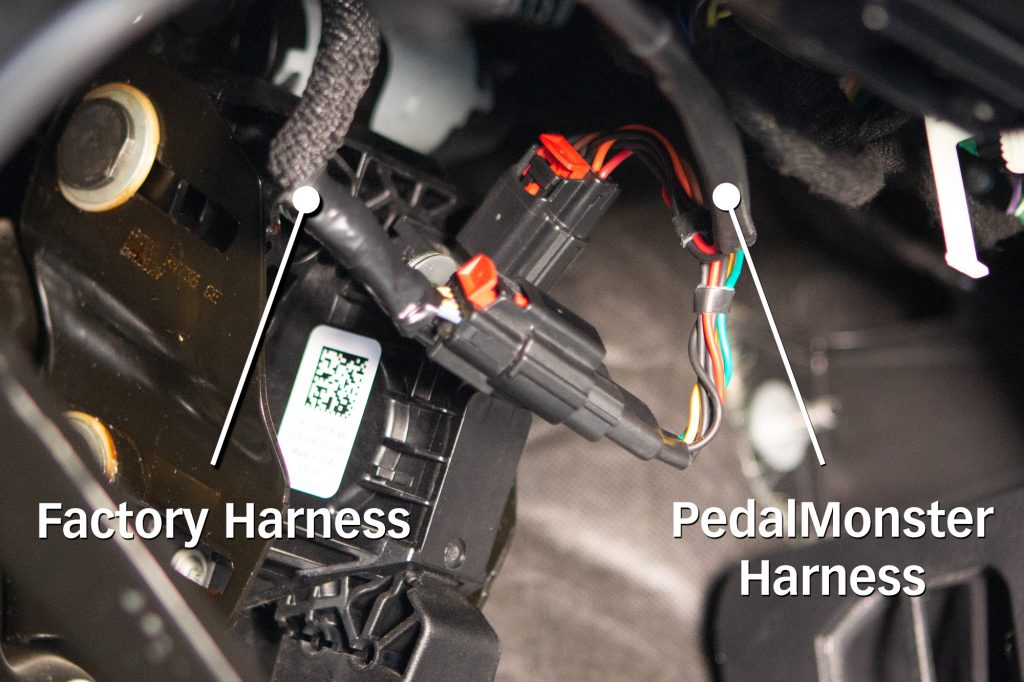
4. Connect the female PedalMonster plug to the accelerator pedal. Connect the male PedalMonster connector to the vehicle’s female connector. Ensure both male and female connectors on the PedalMonster module are securely connected to the vehicle’s connectors.