97768 | Banks Boost Tube Upgrade Kit for 2024-2026 Toyota Tacoma/4Runner/Land Cruiser 2.4L
INSTALL INSTRUCTIONS
Part #s
26012
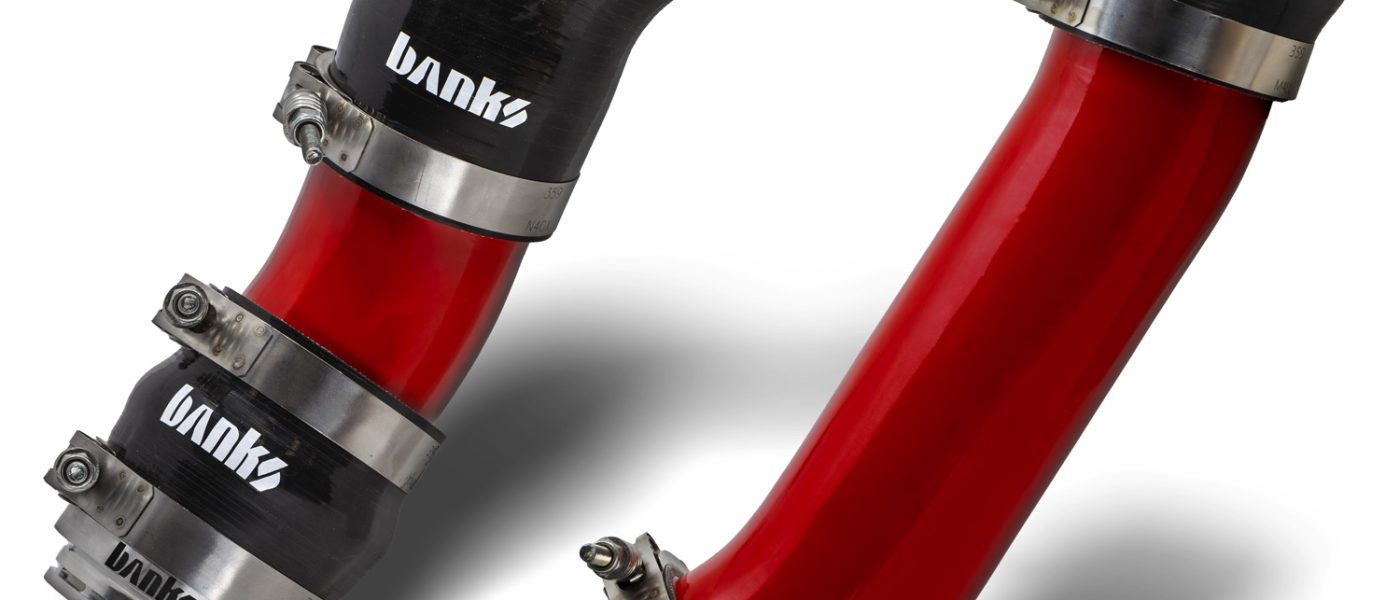
Banks High-Flow Boost Tubes
2024-2026 Toyota Tacoma 2.4L
2024-2026 Toyota Land Cruiser 2.4L
2025-2026 Toyota 4Runner 2.4L
Please read through the following instructions thoroughly before starting your installation. If you have any questions please visit our Support Page.
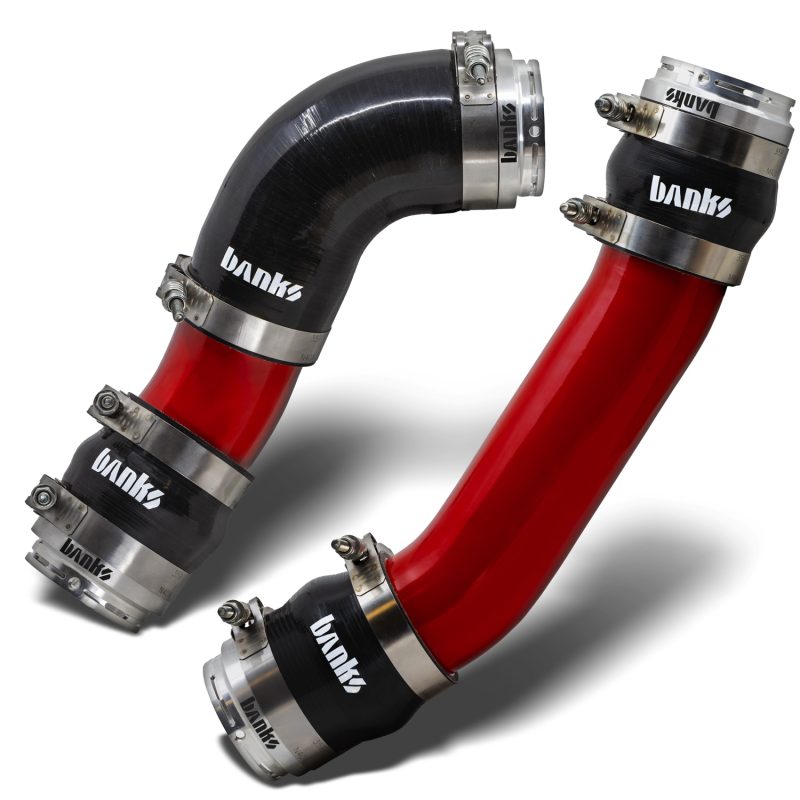
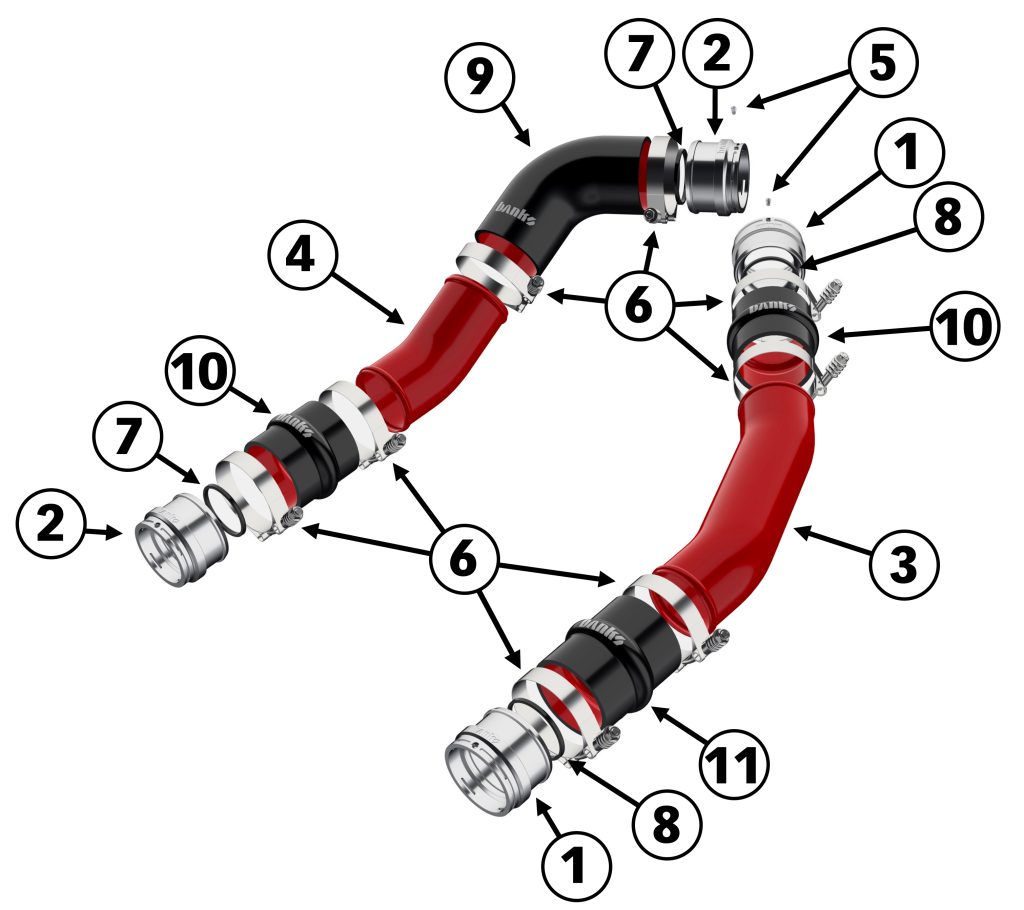
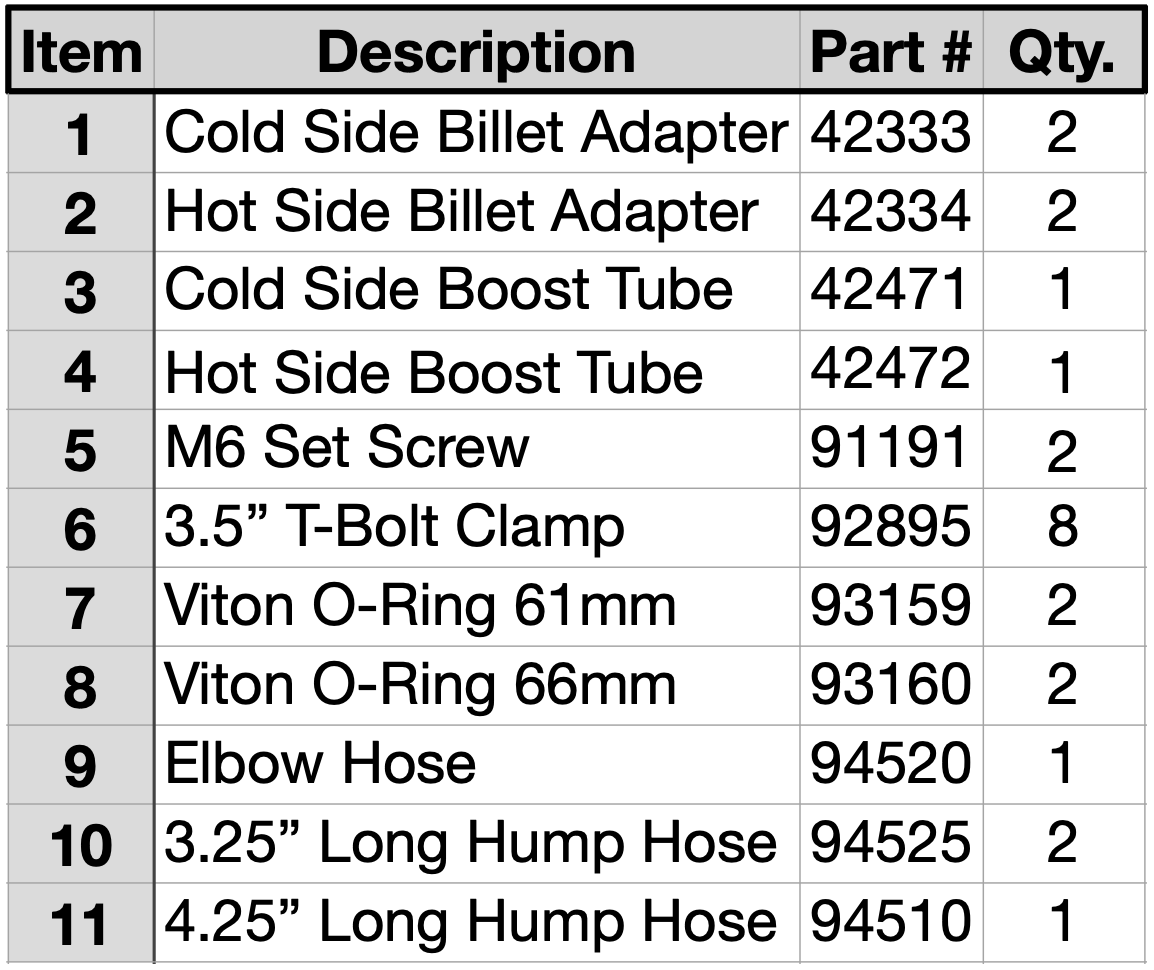
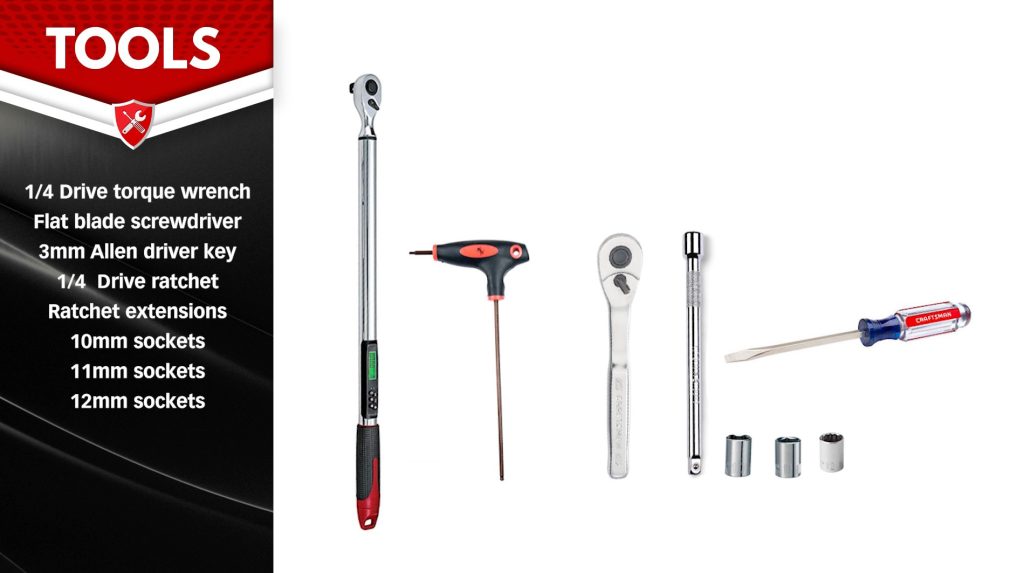
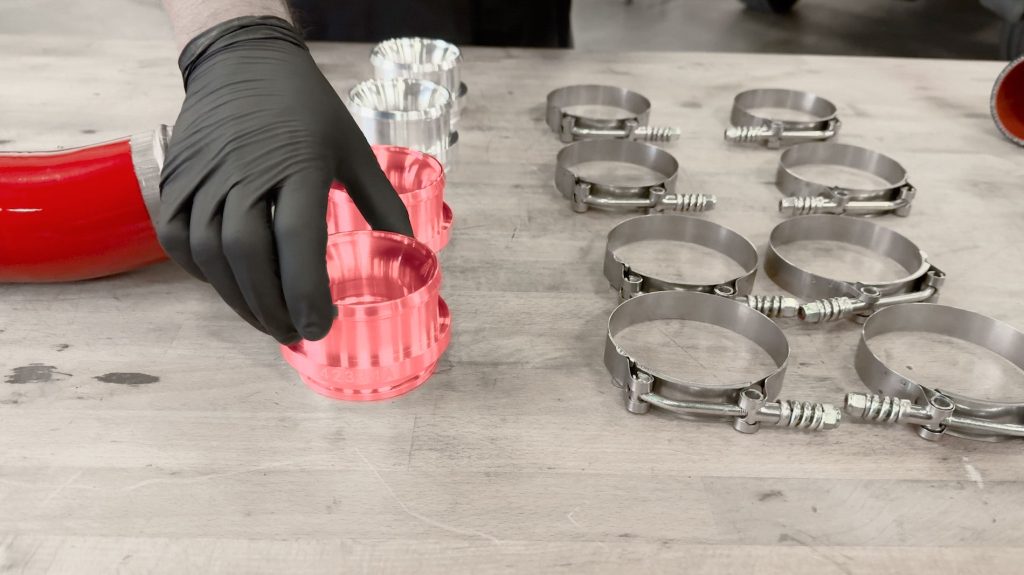
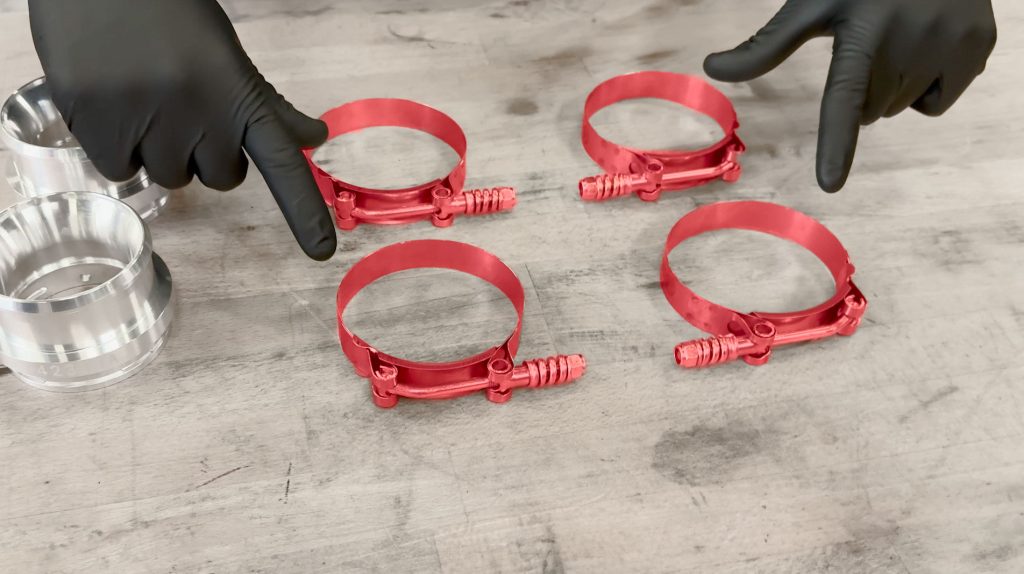
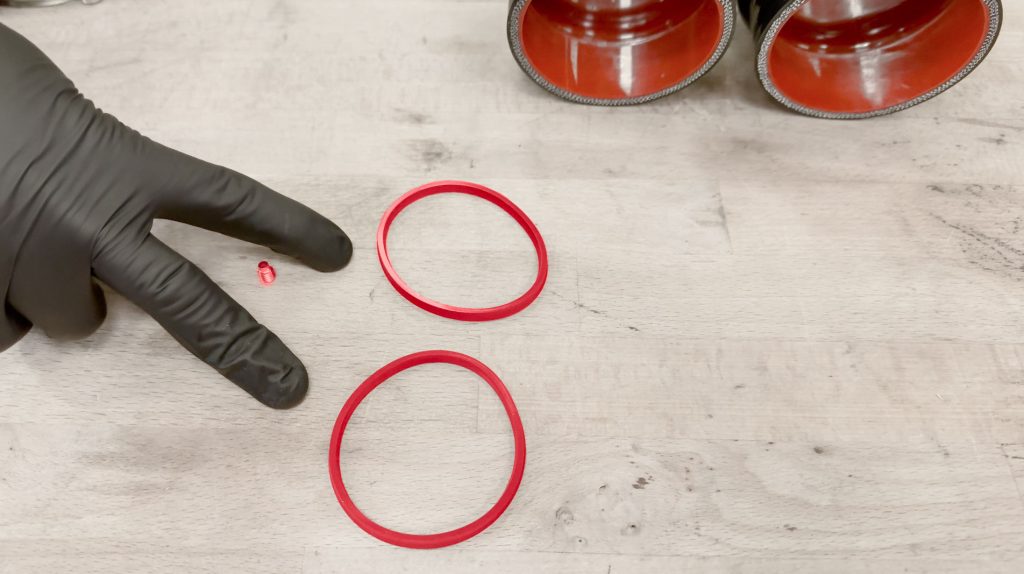
Bill of Materials
ATTENTION: Boost-Tube & Billet Couplers
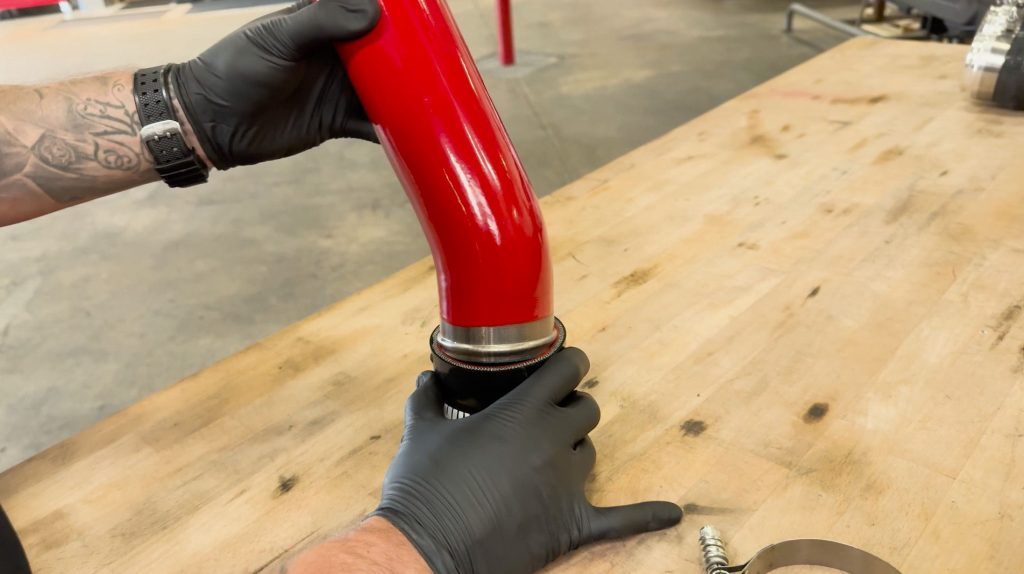
When installing the boost tubes to the billet couplers, first be sure the bead of the tube clears just into the hump section of the hose. Then pull back about a quarter inch so that the bead is now securely pressed into the inside of the hose while providing a 3/4″ gap between the end of the tube and the billet coupler.
This is to prevent the bead from wiggling free and crashing into each other as the engine is running.
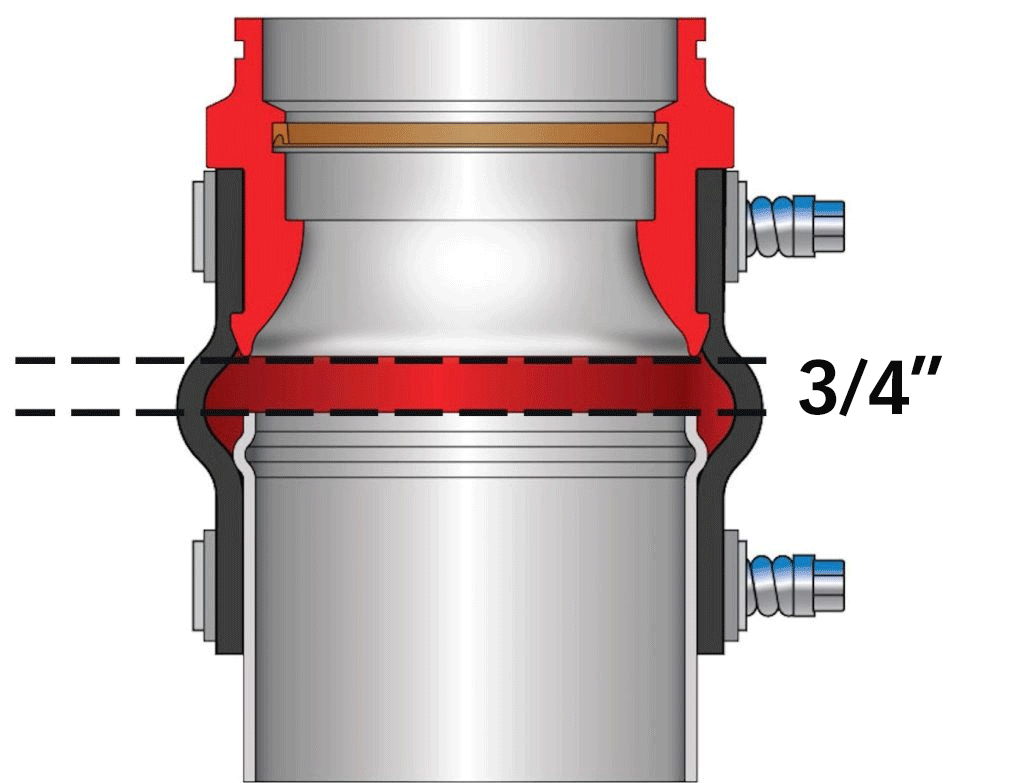
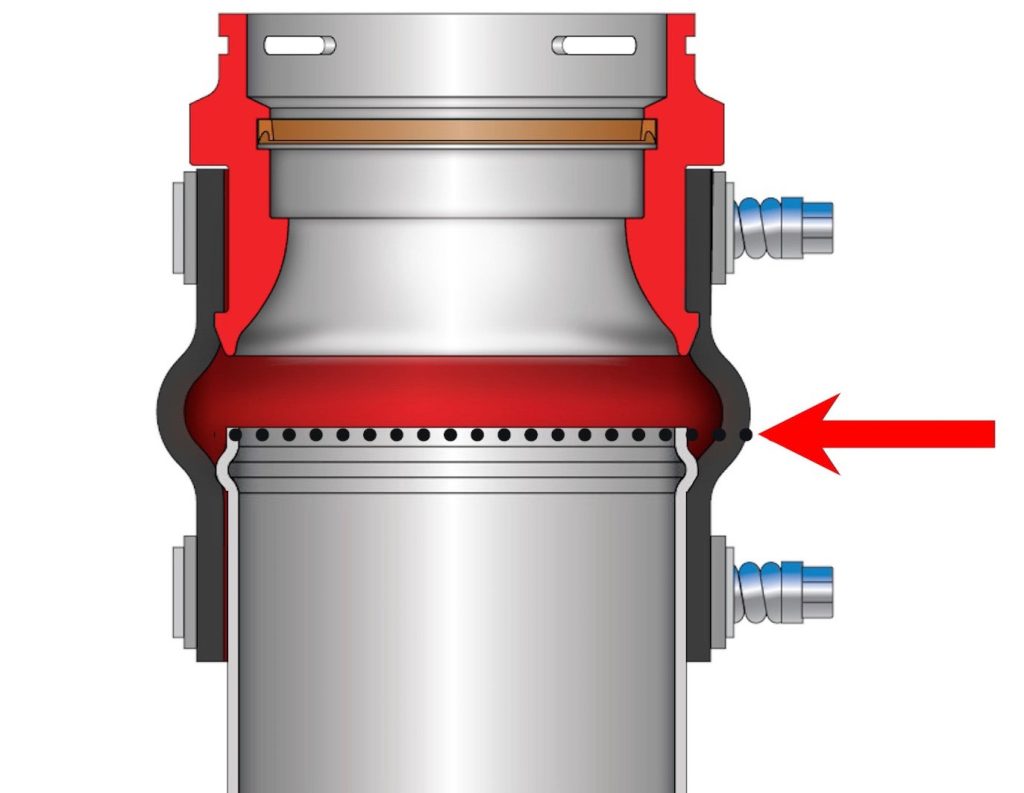
When securing the T-bolt clamps, be sure they are straight and flat around tube and hose, and not clamping down directly on-top of the boost tube beads.
General Installation Practices

Stock Hot Side Removal
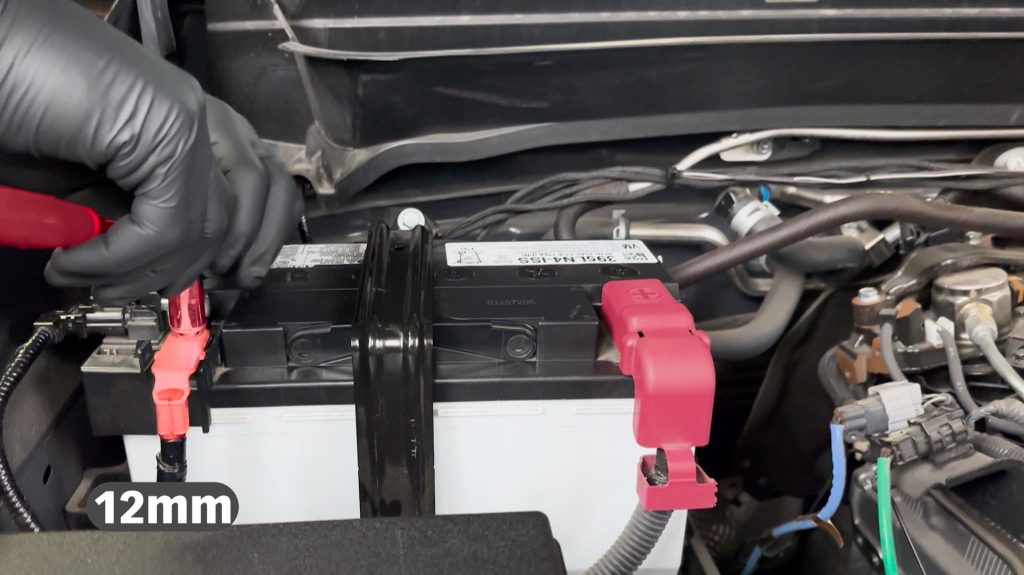
1. With a 12mm socket, remove the negative lead from the battery.

2. Next, locate the airbox; the top will be removed to provide access to the Hot Side of the Charge Air Cooler.
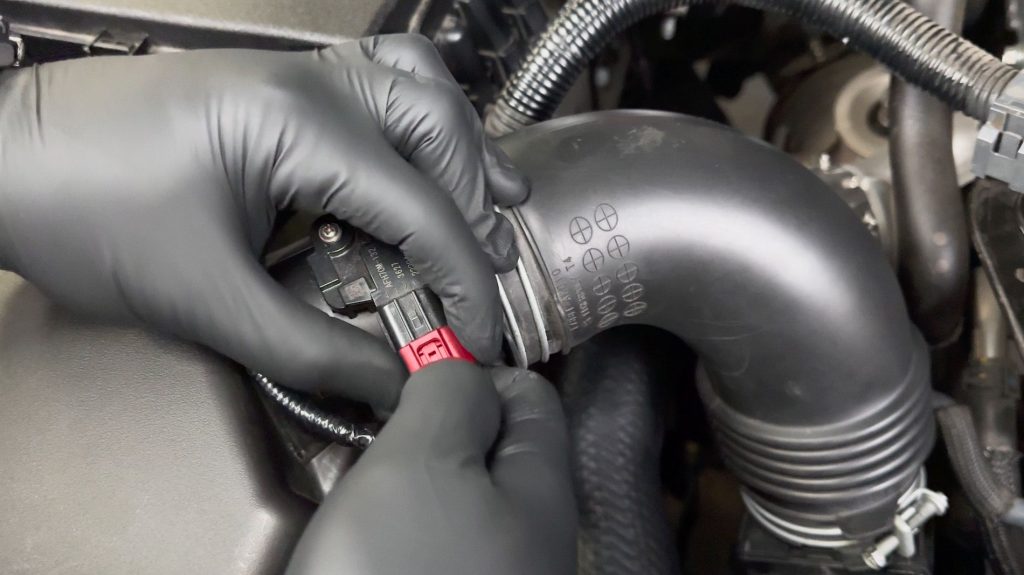
3. Unplug the Mass Air Flow sensor.
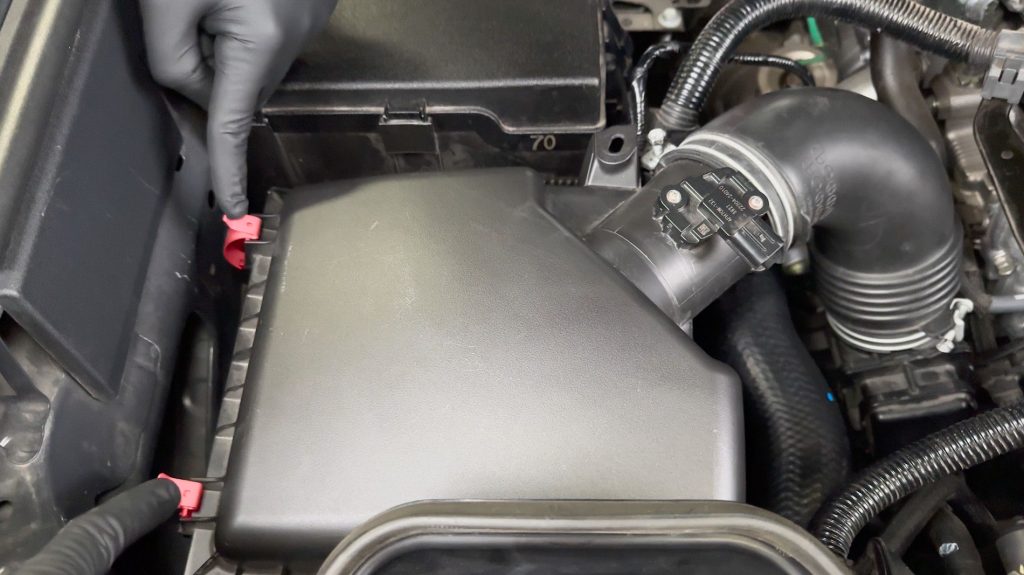
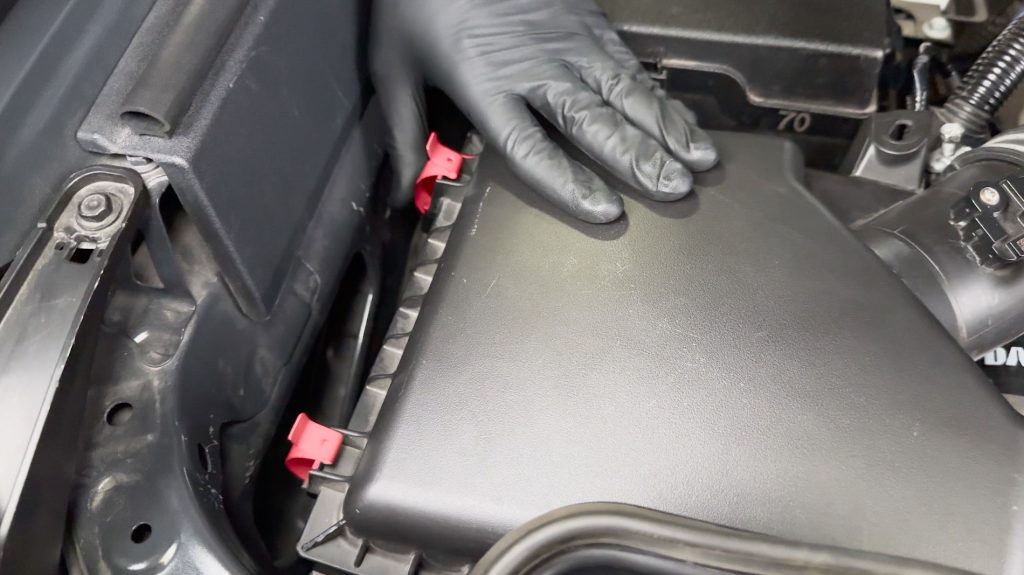
4. Pop these two clips free.
5. With a 10mm socket, loosen the clamp between the airbox and the resonated turbo inlet.
6. Lift the airbox lid and tube up and out of the engine bay. Set it aside from now.
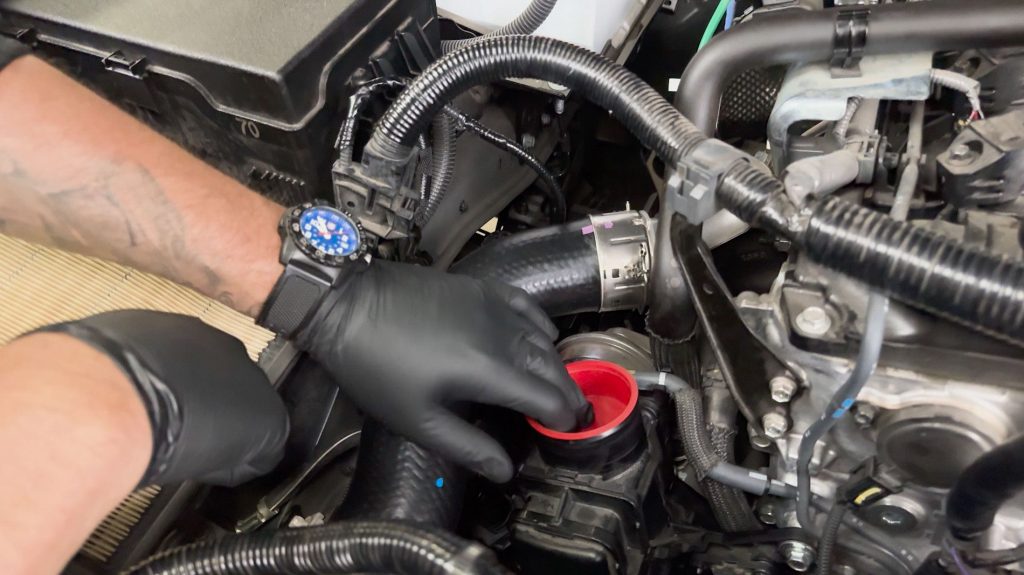
With a rag or plug, cover the resonated turbo inlet to prevent any debris from entering.
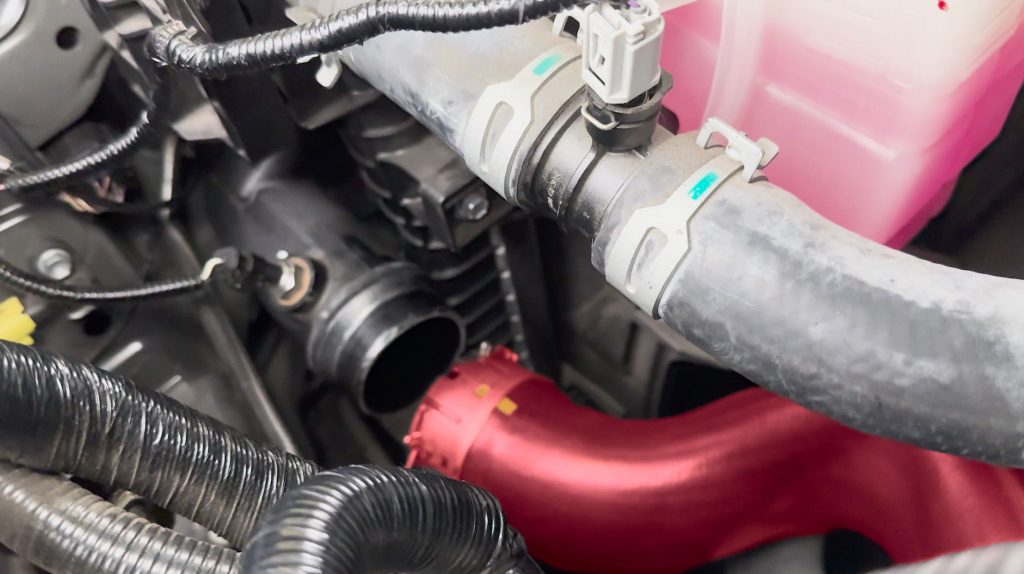
You can now see the OEM Hot Side Boost Tube.
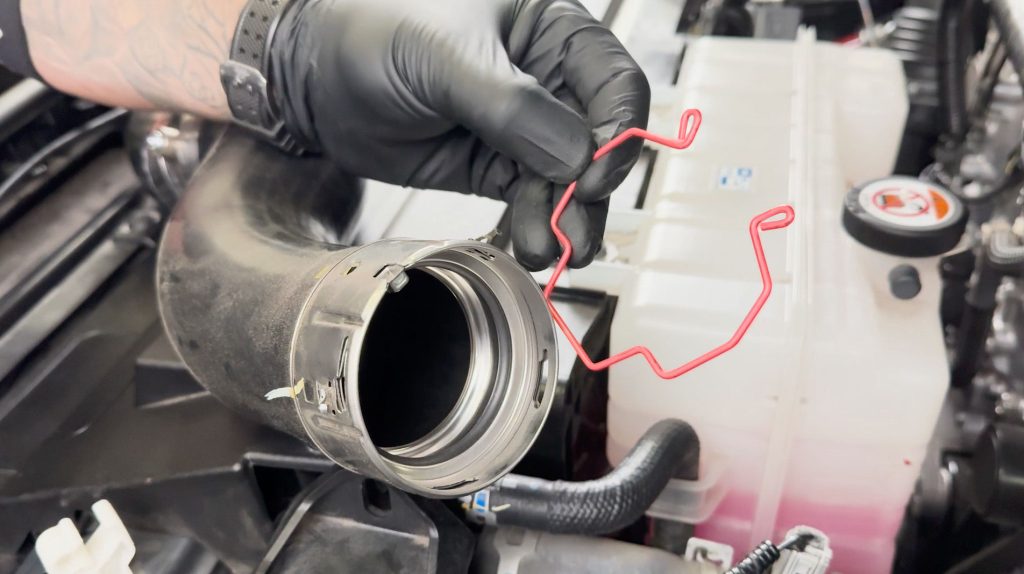
8. Repeat this step on the other end of the Hot Side Boost Tube.
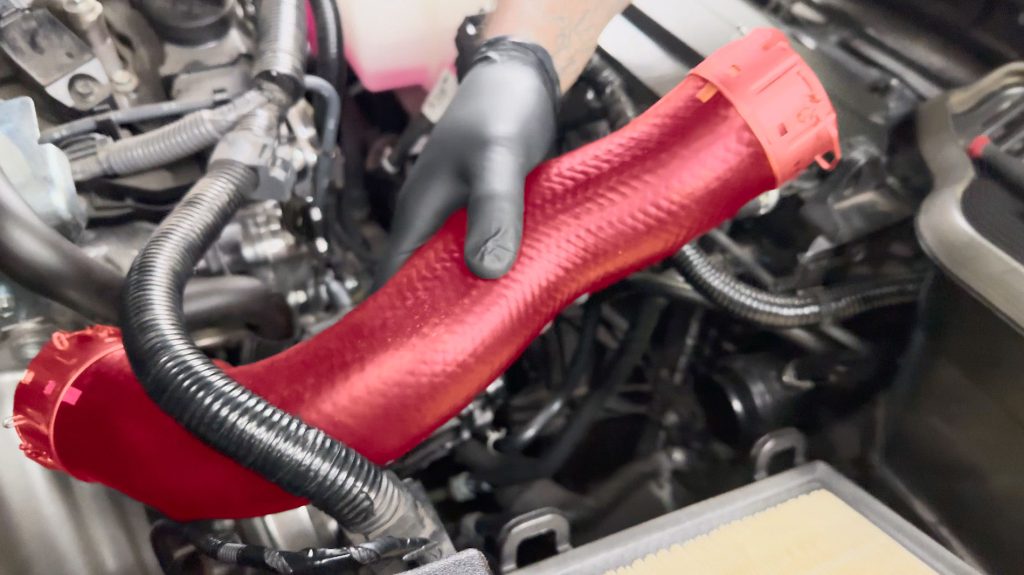
9. Then lift the OEM Hot Side Boost Tube up and out of the truck.
Banks Hot Side Boost Tube Prep
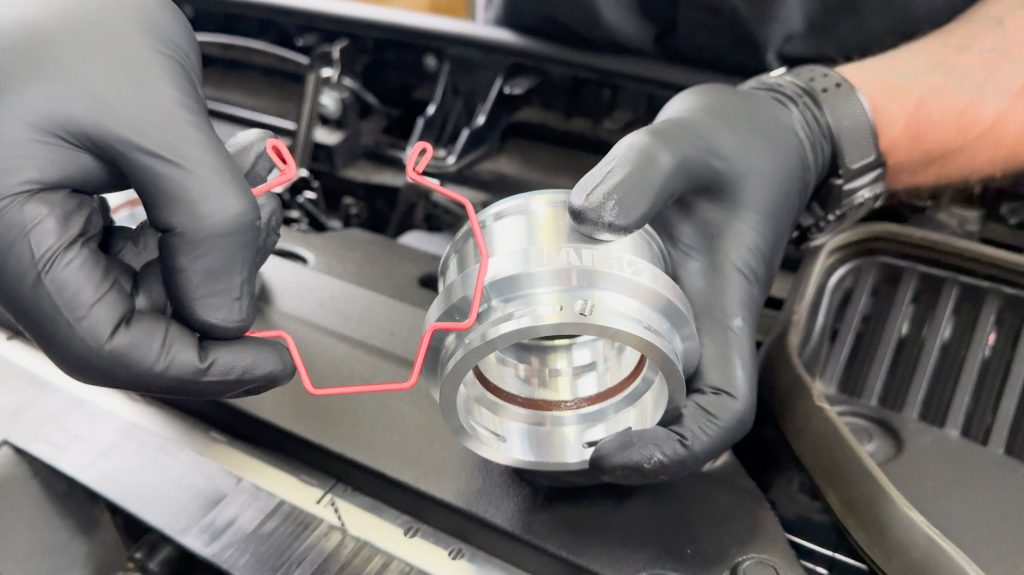
The two OEM locking rings will be transferred to the Banks Boost Tubes.
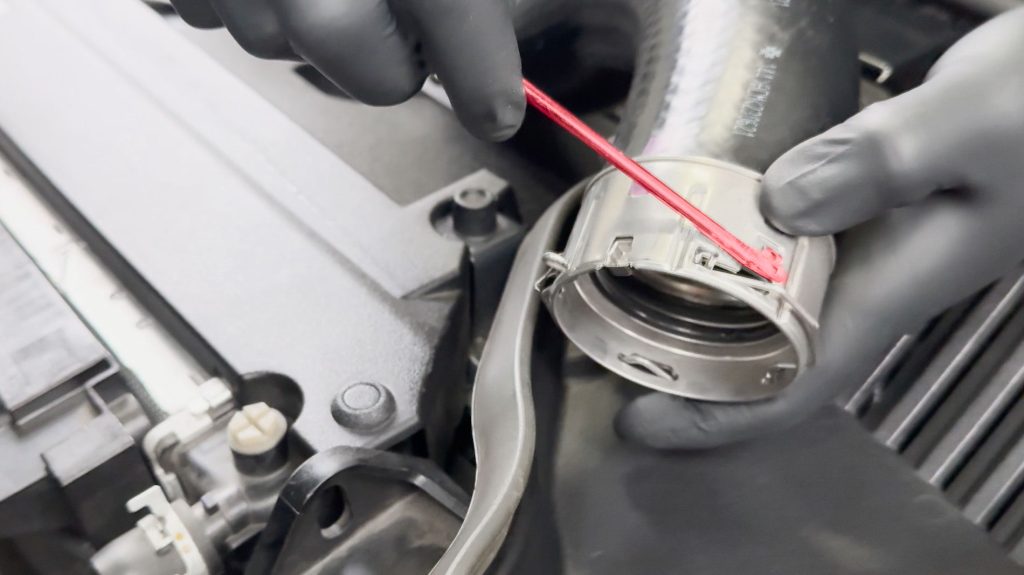
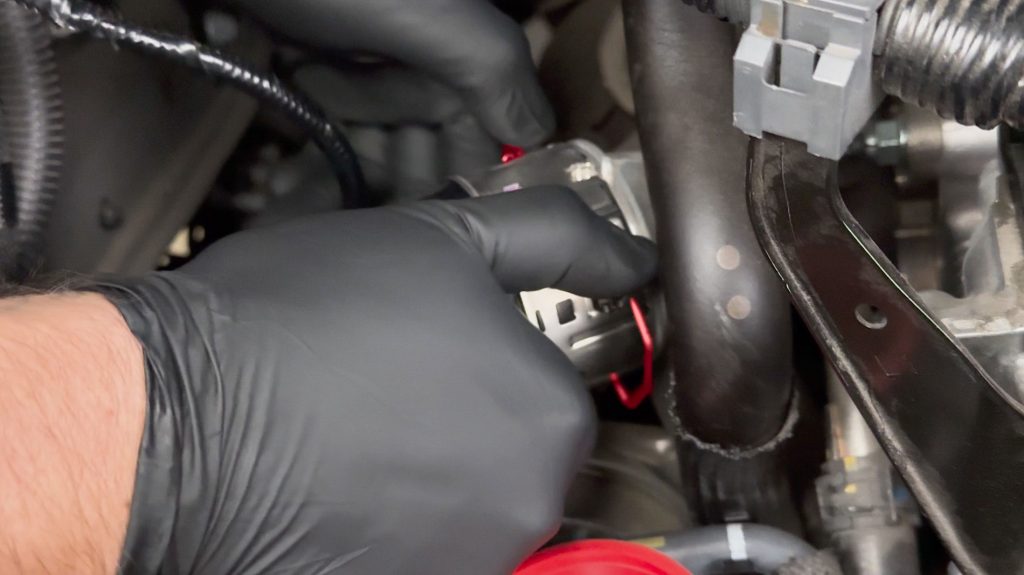
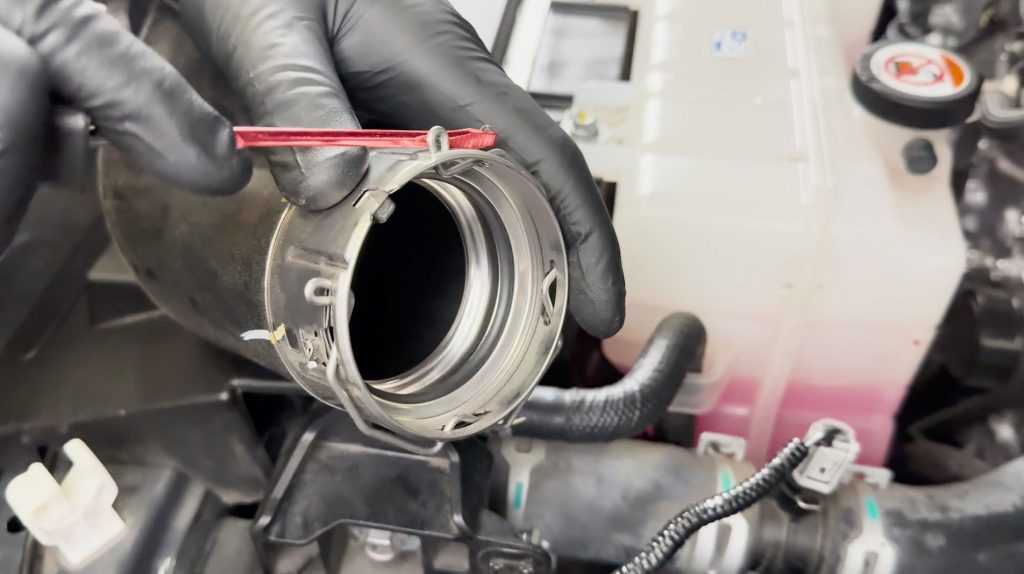
1. With a flat-head screwdriver, pry up the retaining tabs that hold the OEM locking rings in place.

2. Work the locking ring around until it’s free from the OEM Hot Side Boost Tube.
3. Do the same with the other side.
Set the two locking rings aside for now; they will be transferred to the billet couplers in the following steps.
Gather the parts and pieces needed to assemble the Banks Hot Side Boost Tube
and one of the hump hoses with the longer elbow.
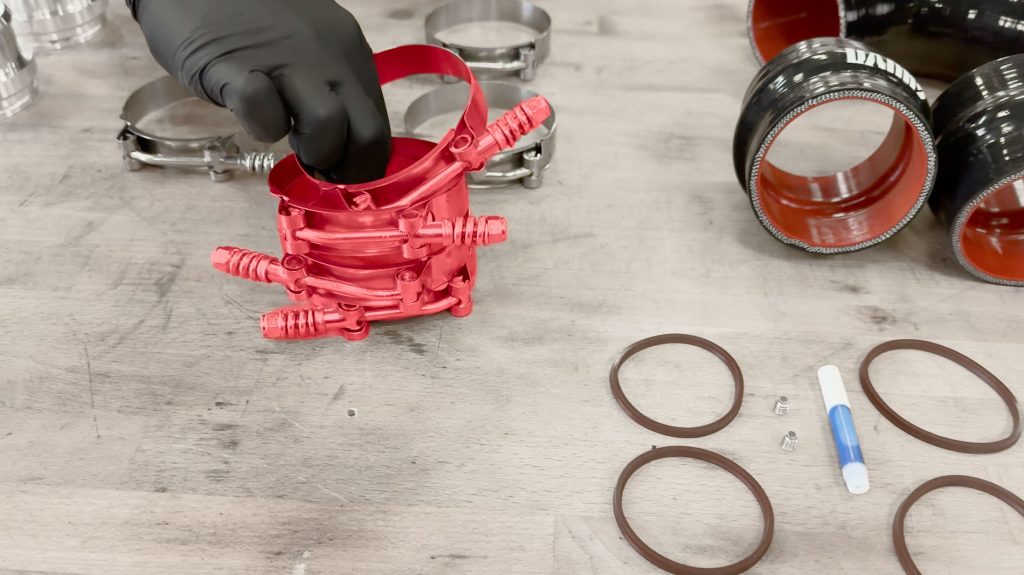
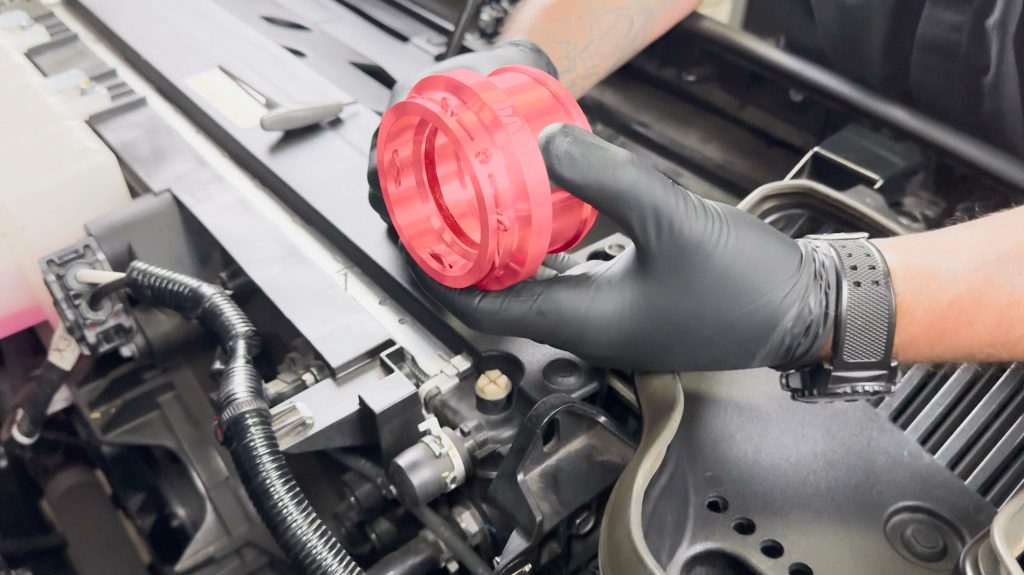
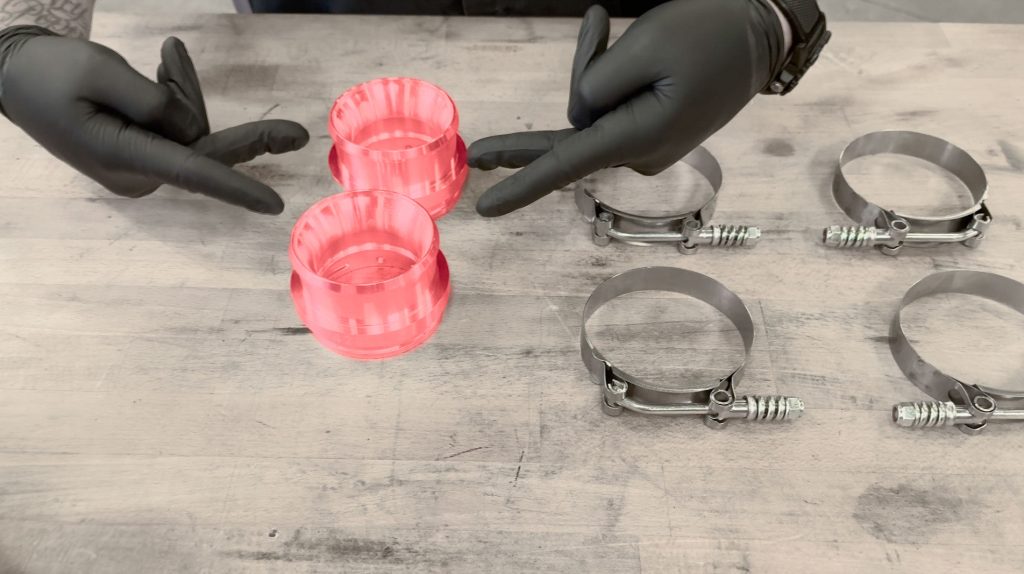
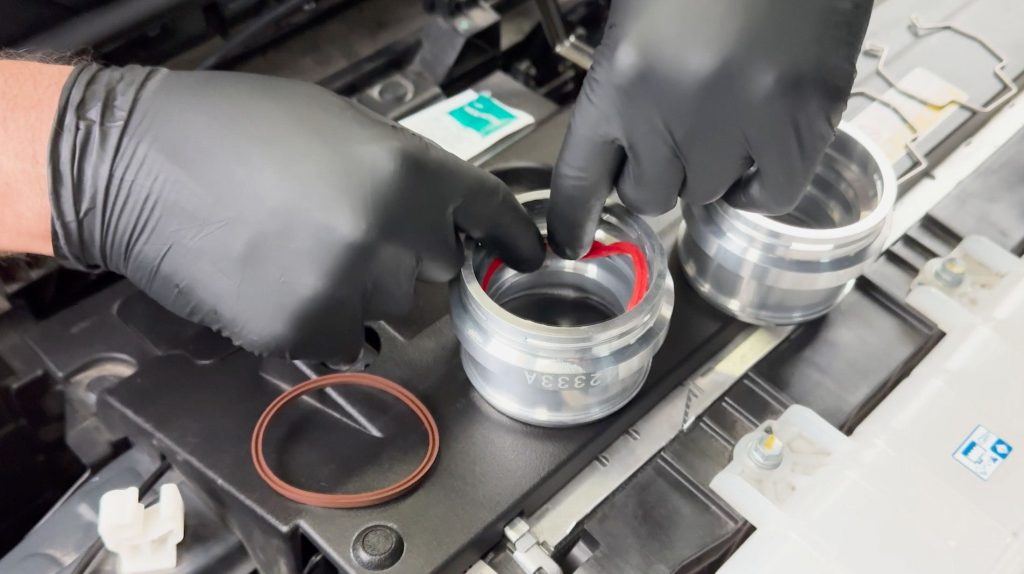
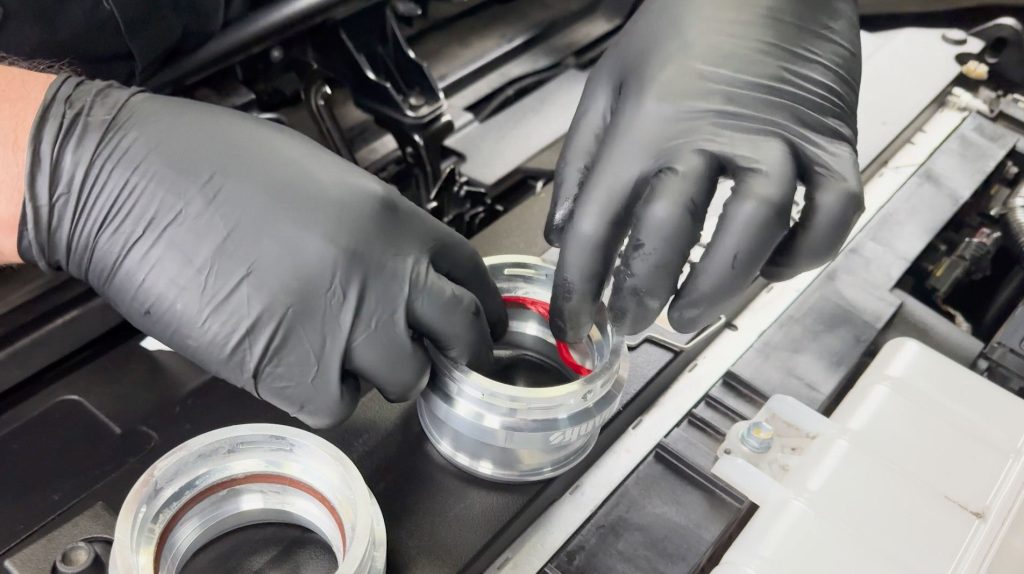
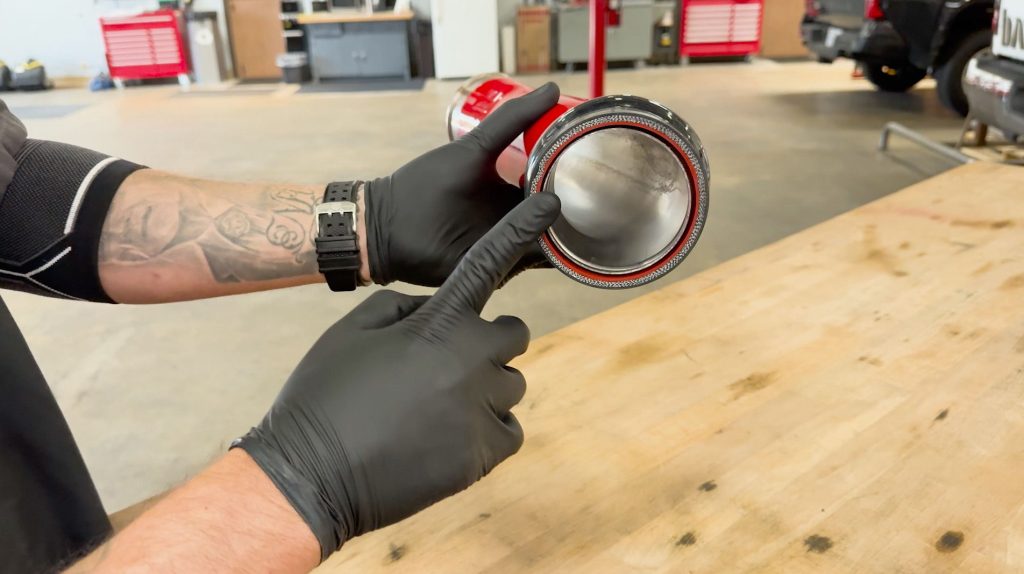
Start by assembling the billet couplers.
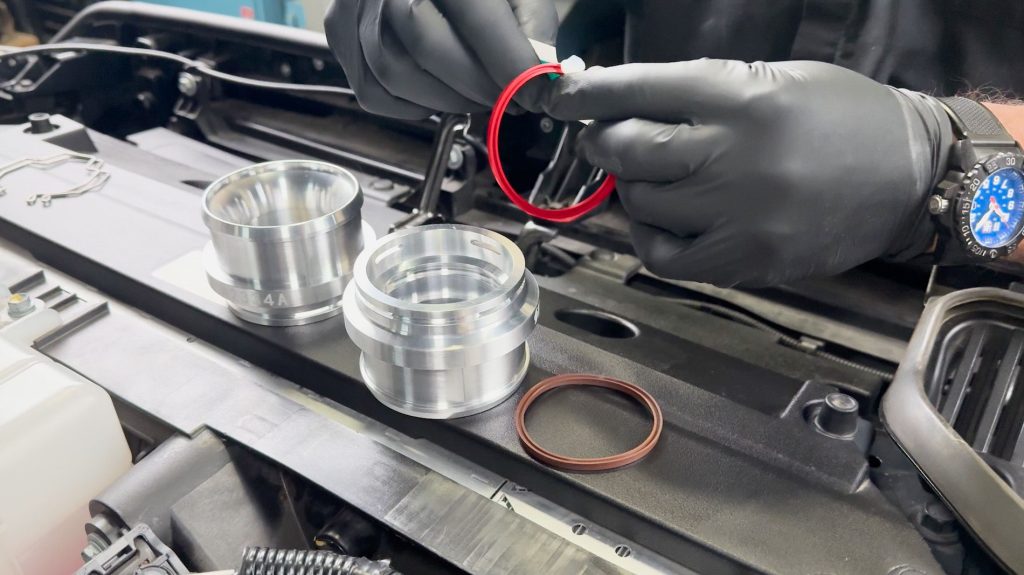
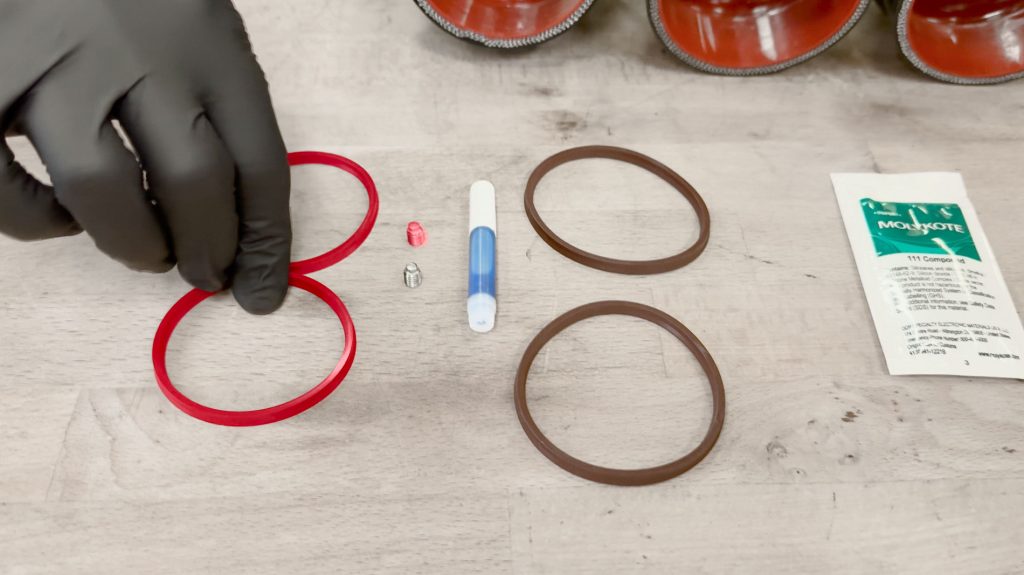
1. Apply some of the provided grease to the o-ring
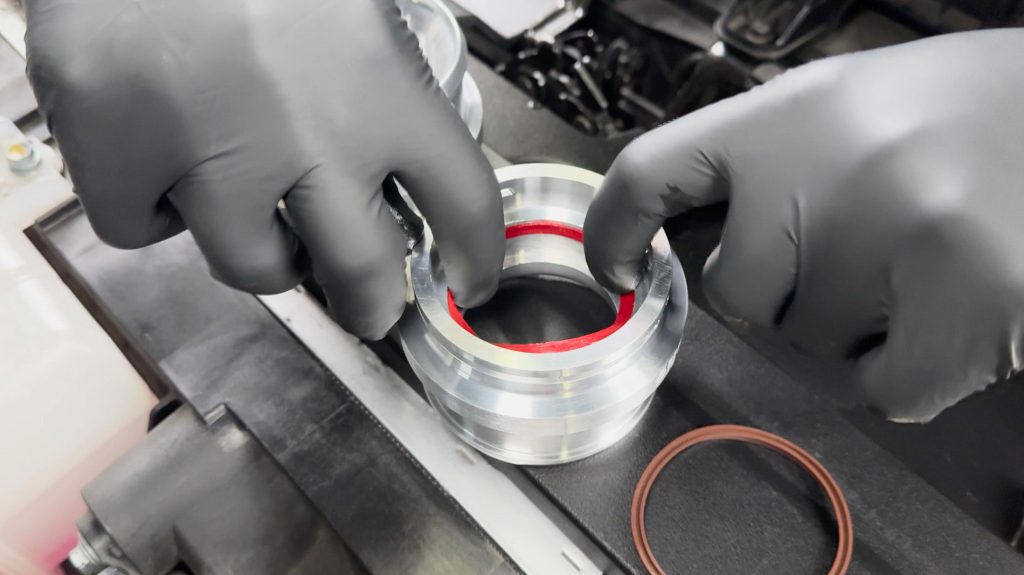
2. Work the o-ring into the coupler with its groove facing towards the venturi end.
3. Repeat the same steps for the other hot side billet coupler.
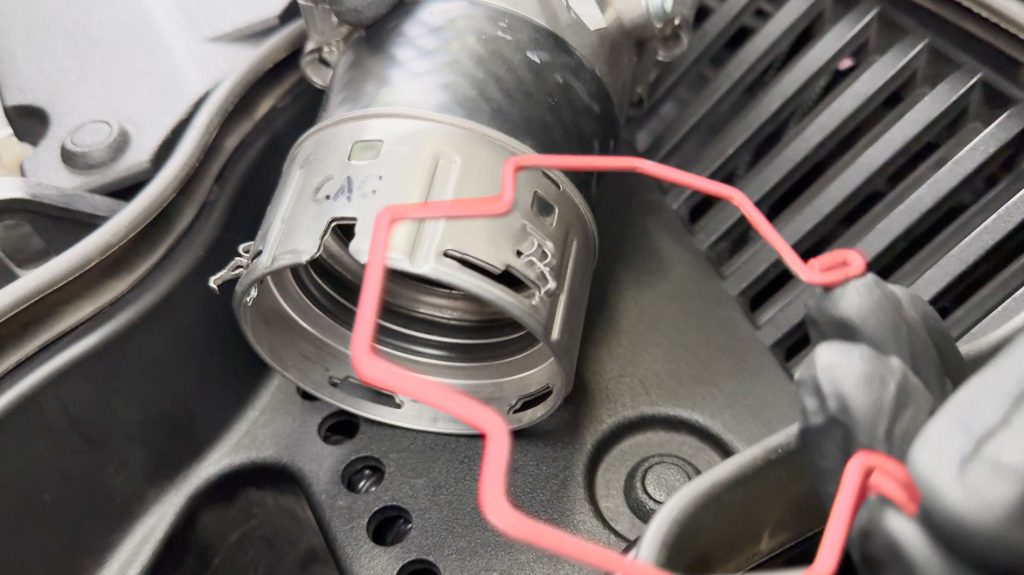
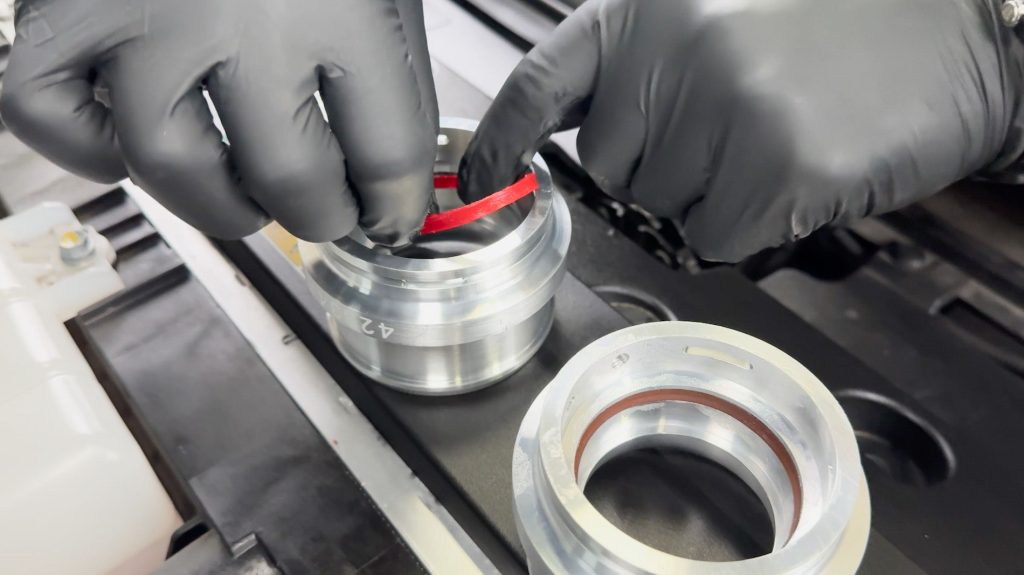
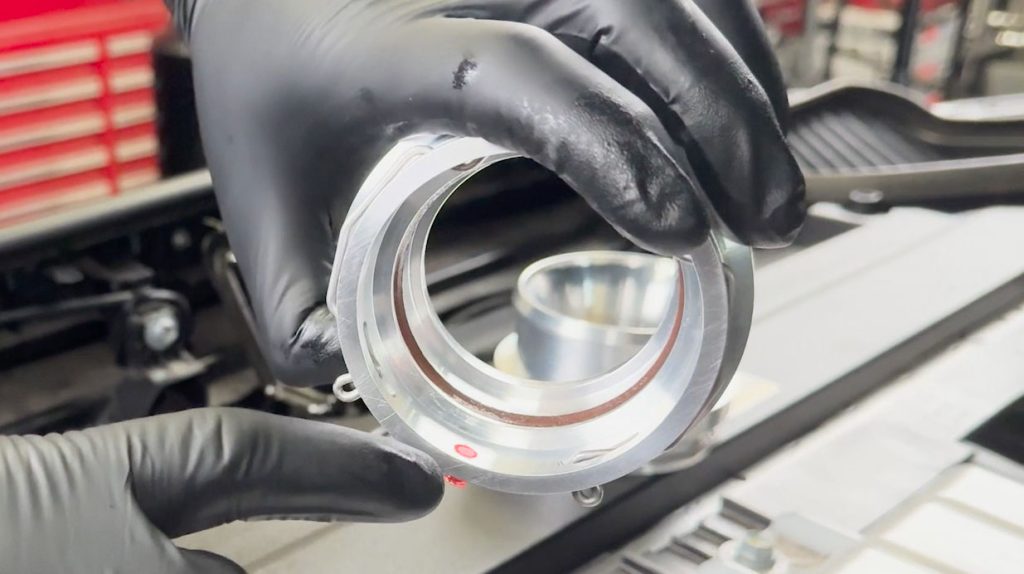
4. Grab one of the OEM locking rings you set aside earlier.

5. Install the locking ring in the grooves of the billet coupler.
Repeat for the other hot side billet coupler

Thread the set screw into the coupler, stop before it pokes out the other end.
Banks Hot Side Installation
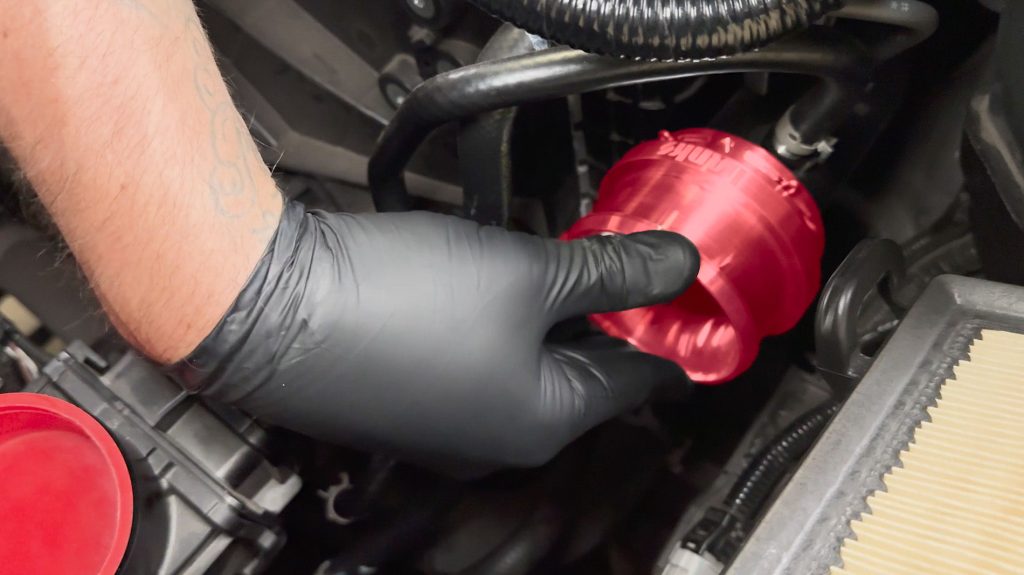
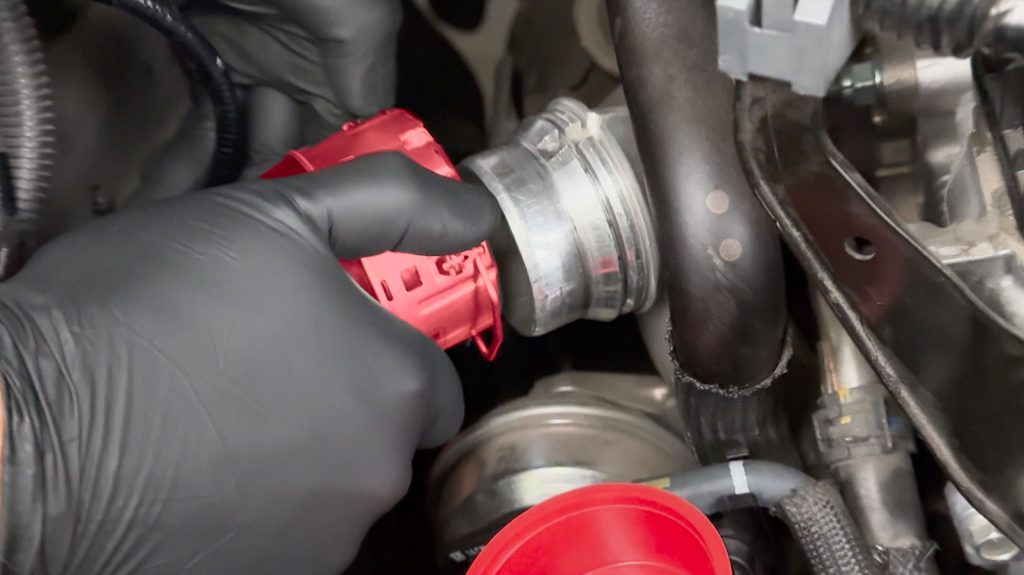
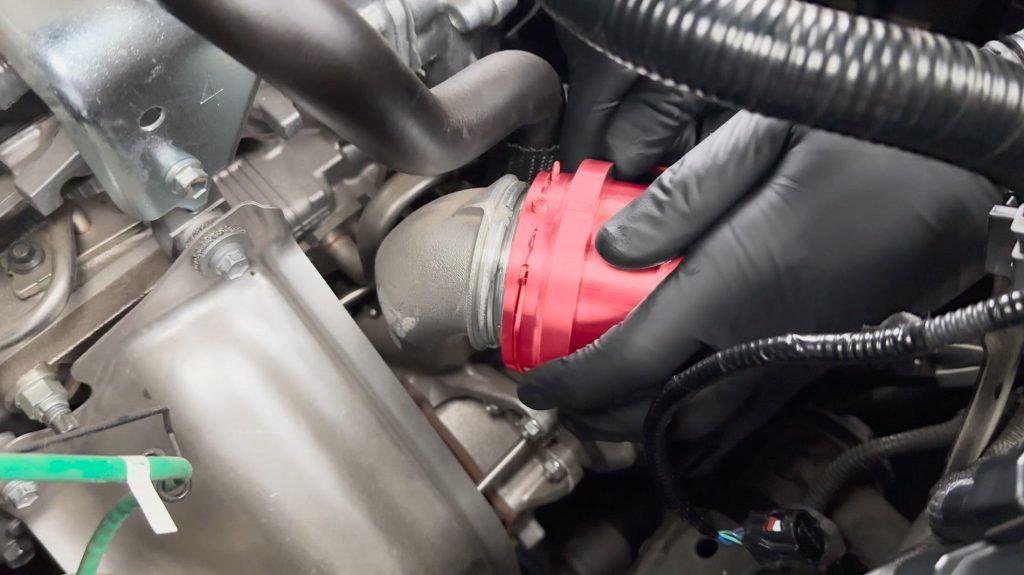
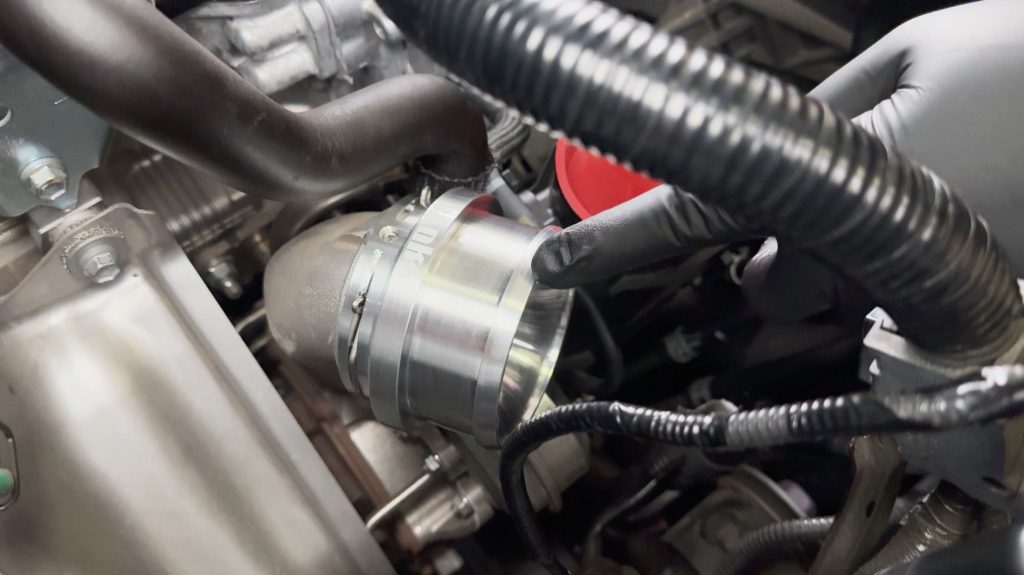
1. Snap the assembled hot side billet coupler onto the intercooler inlet. The locking ring will expand, then snap back in place.
Give it a tug to check that it’s secure.

2. Slip one of the clamps onto a hump hose loosely.
3. Slide the hump hose and clamp onto the billet coupler so that it’s fully seated.
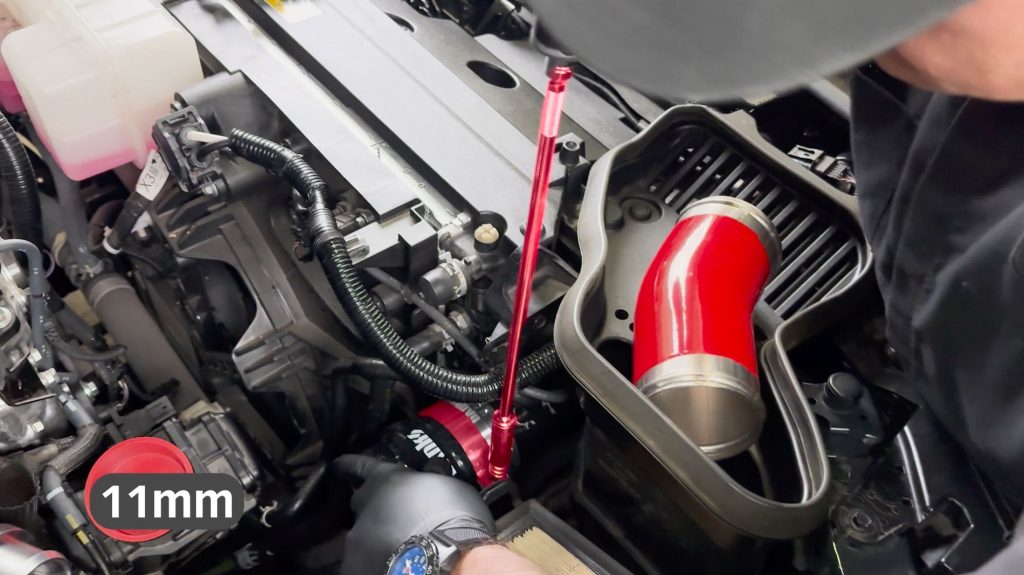
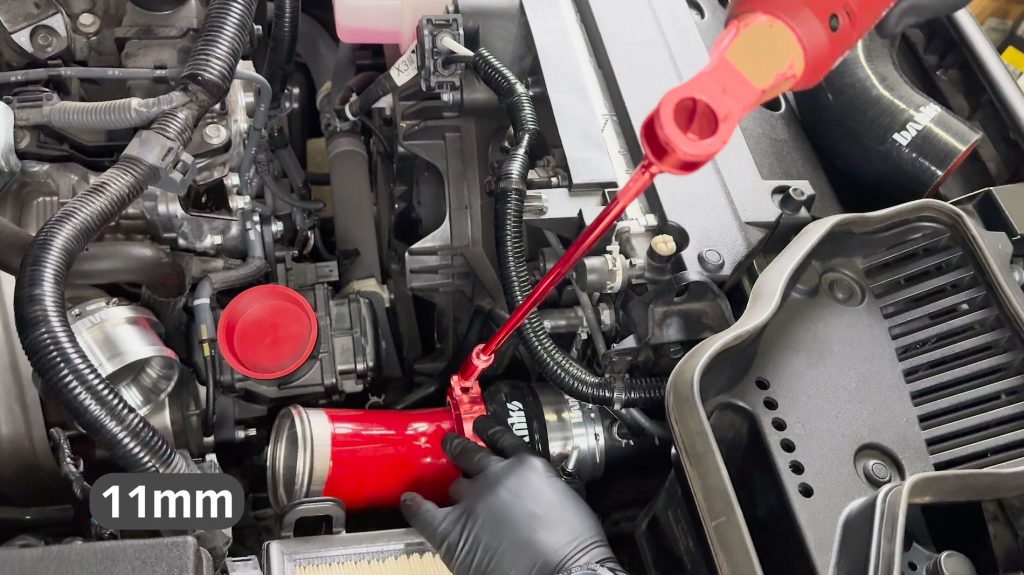
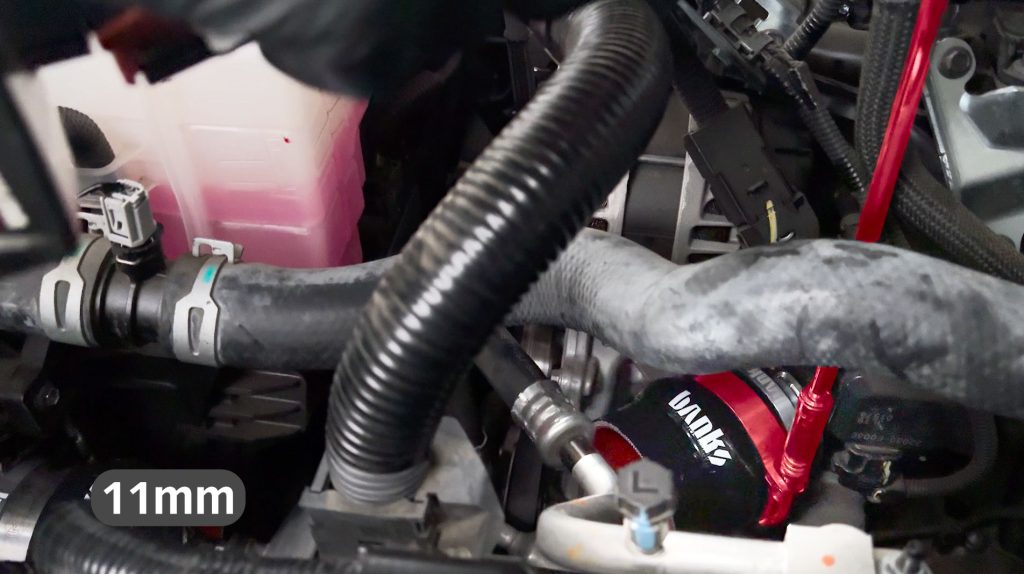
4. Then snug the clamp down with an 11mm socket and extension.
You will fully torque it down after the other 3 clamps are in place.
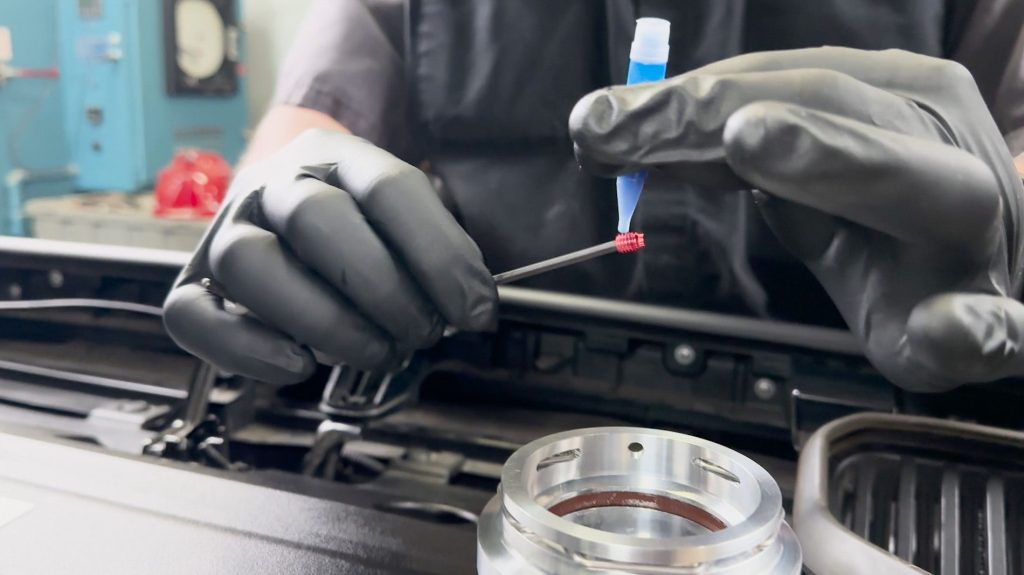
5. Moving to the other billet coupler, apply a small amount of blue thread locker to the set screw.
Thread the set screw into the coupler, stop before it pokes out the other end.
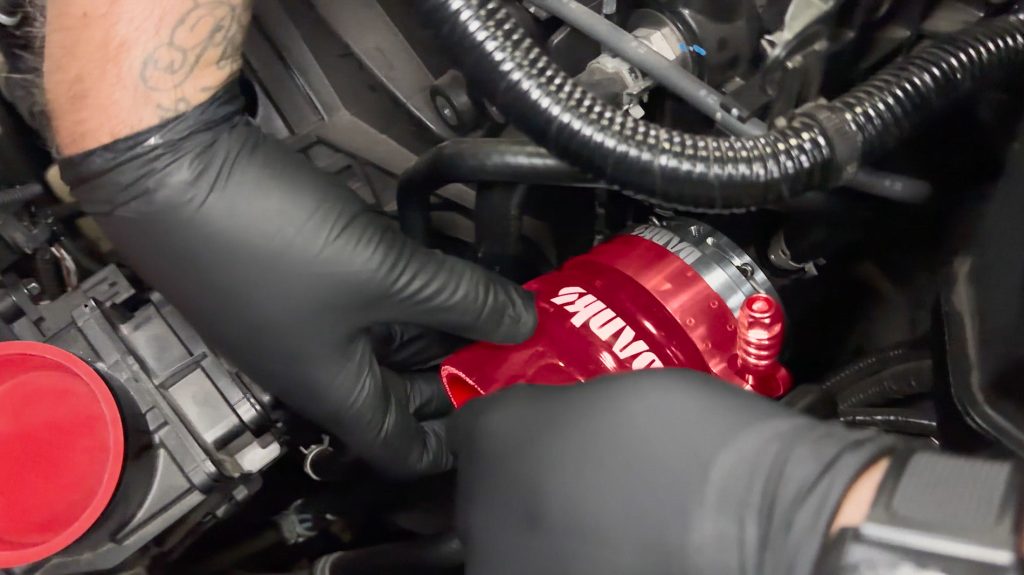
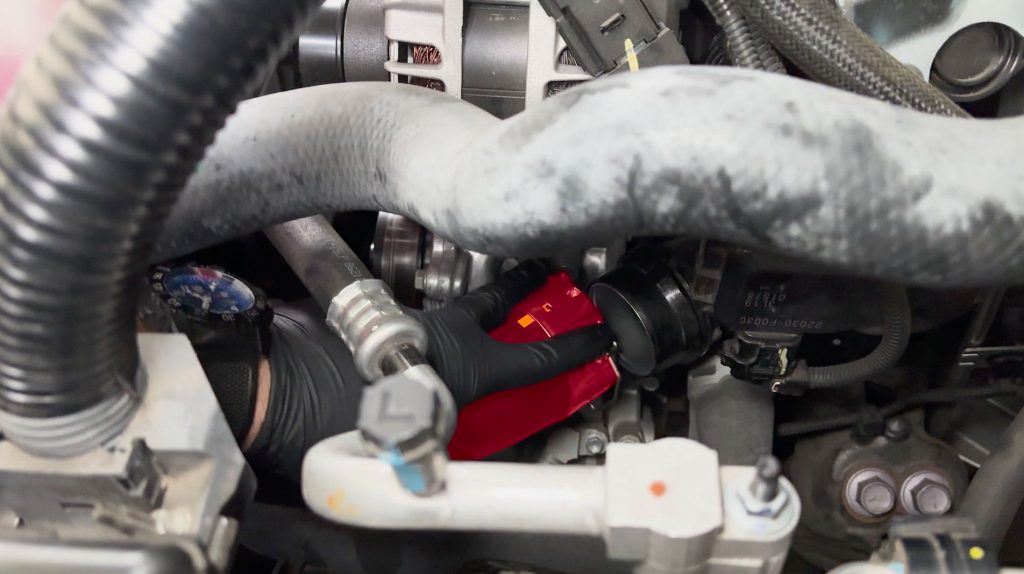
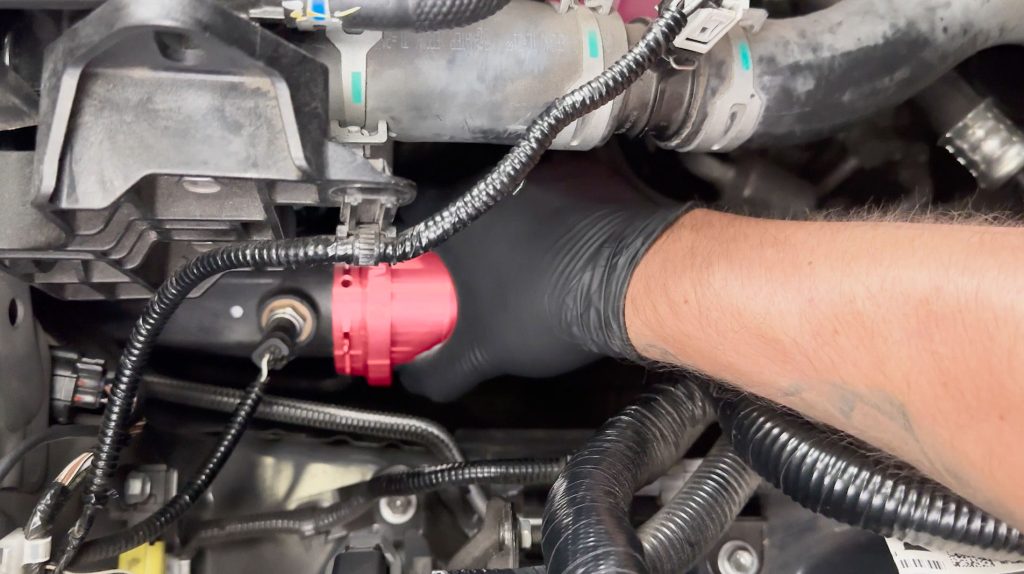
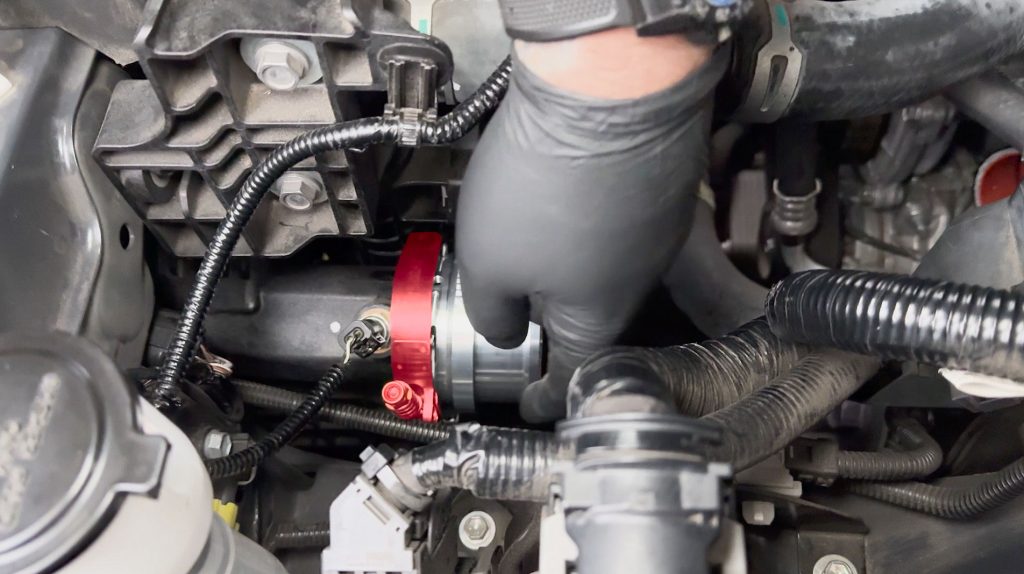
6. Now take the fully assembled Hot Side Billet Coupler…
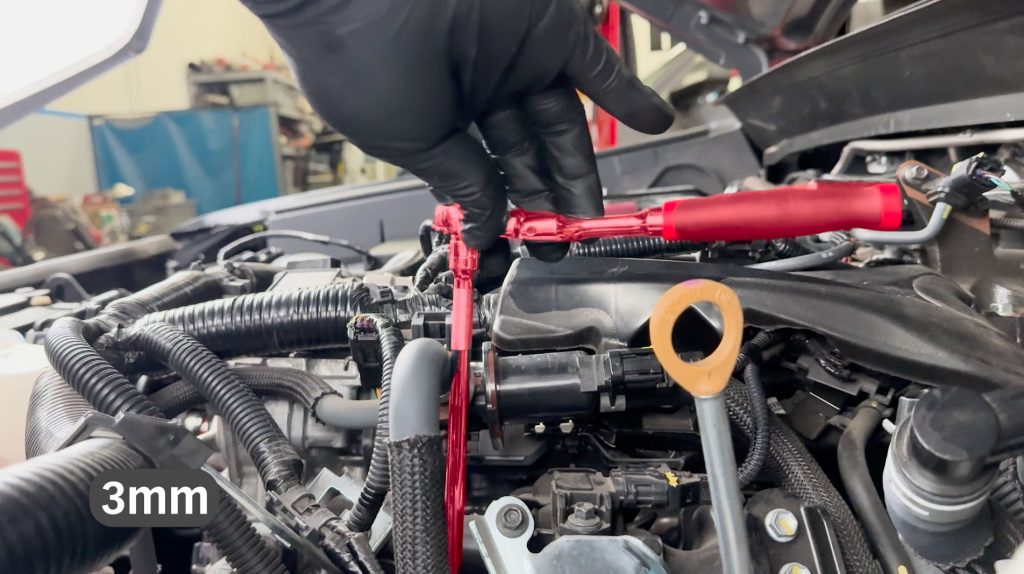
and with the set screw on the top, line the coupler up with the Turbo Compressor outlet and slide it into place.
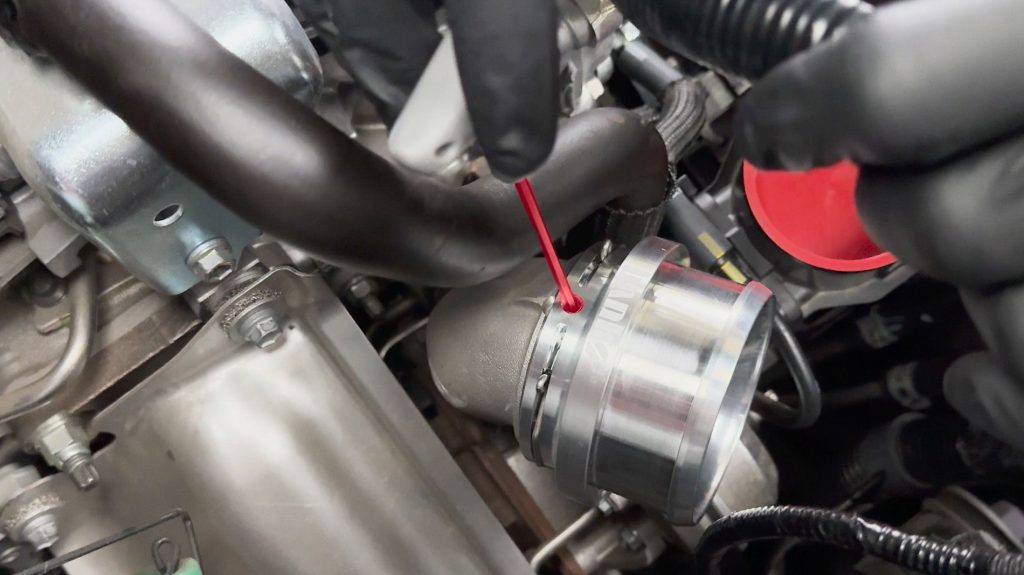
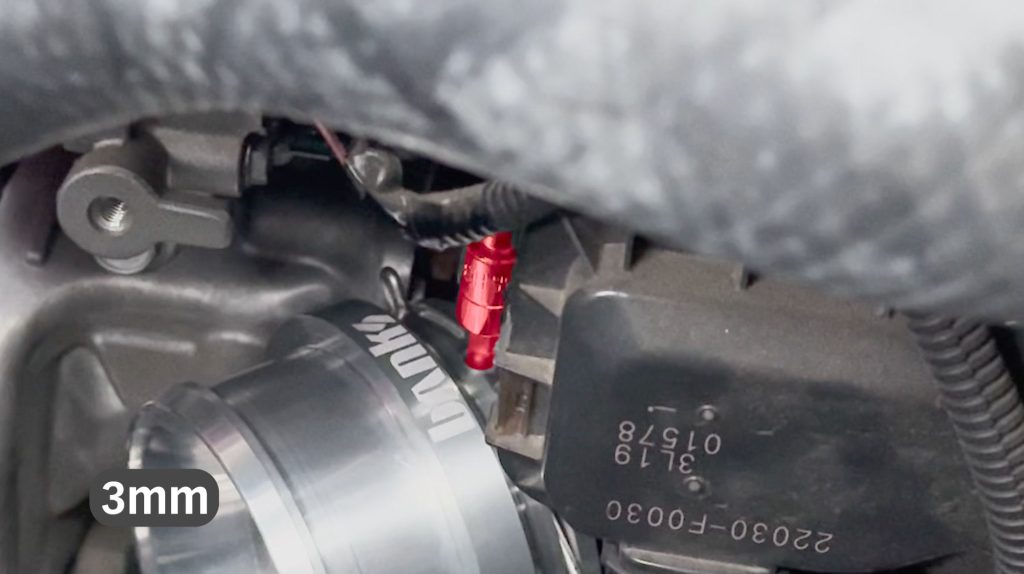
7. Once the locking ring snaps into place and the billet coupler is secure, tighten the set screw with a 3mm hex.
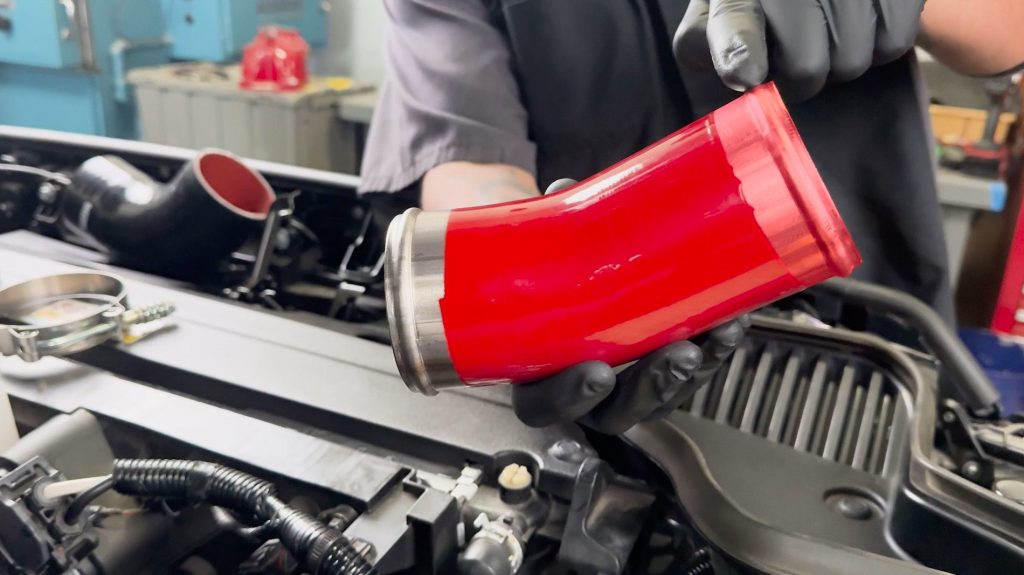
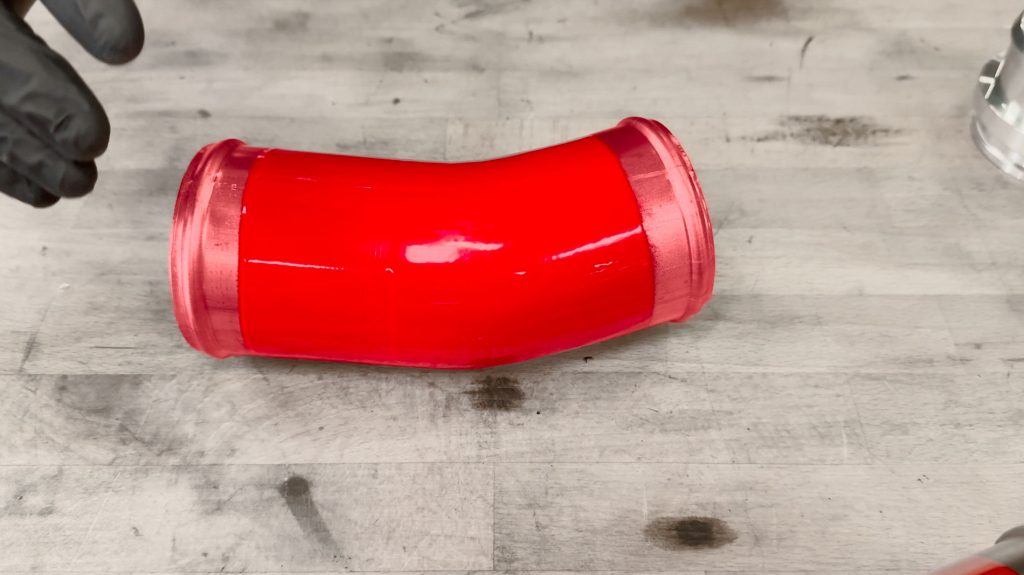
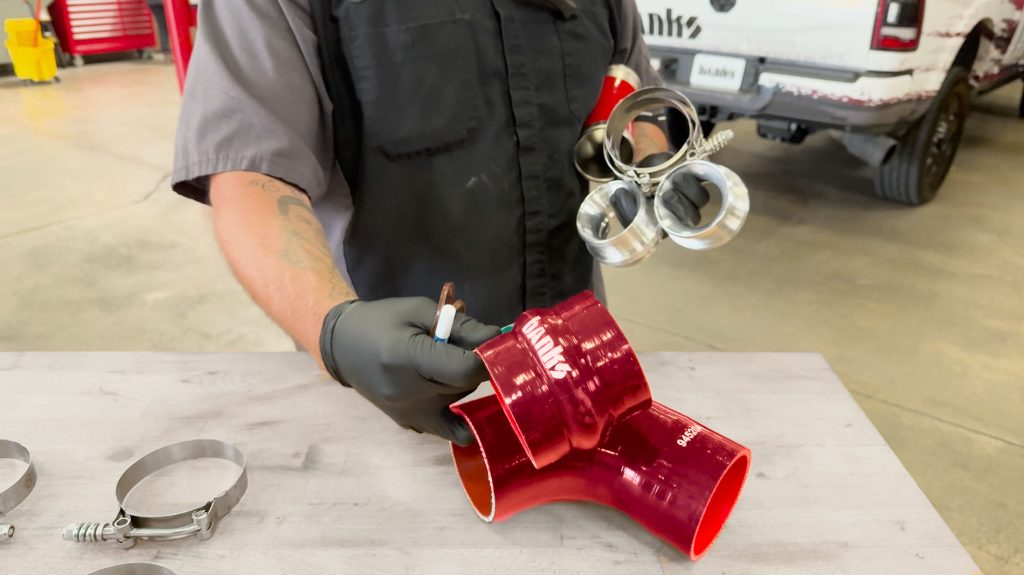
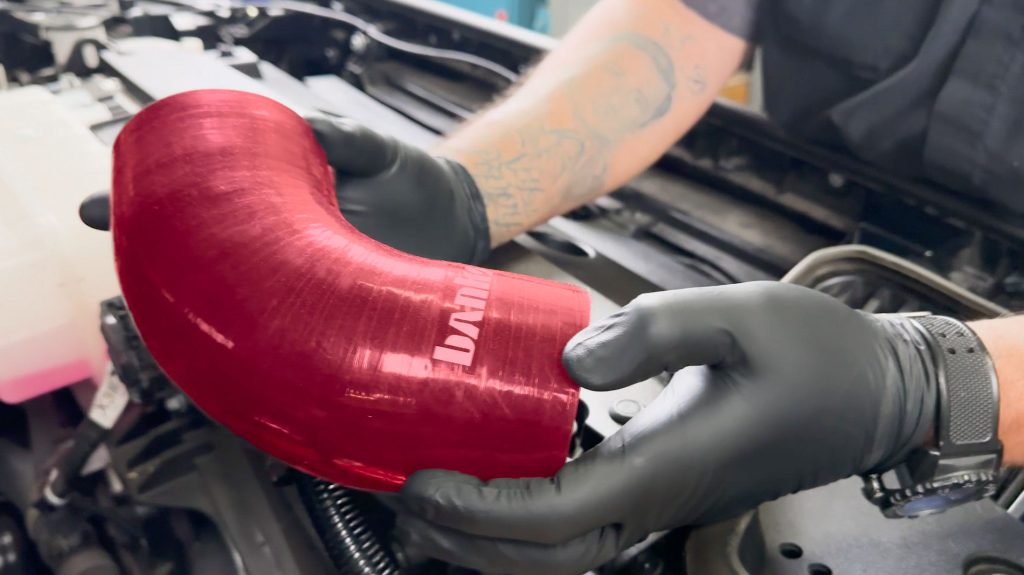
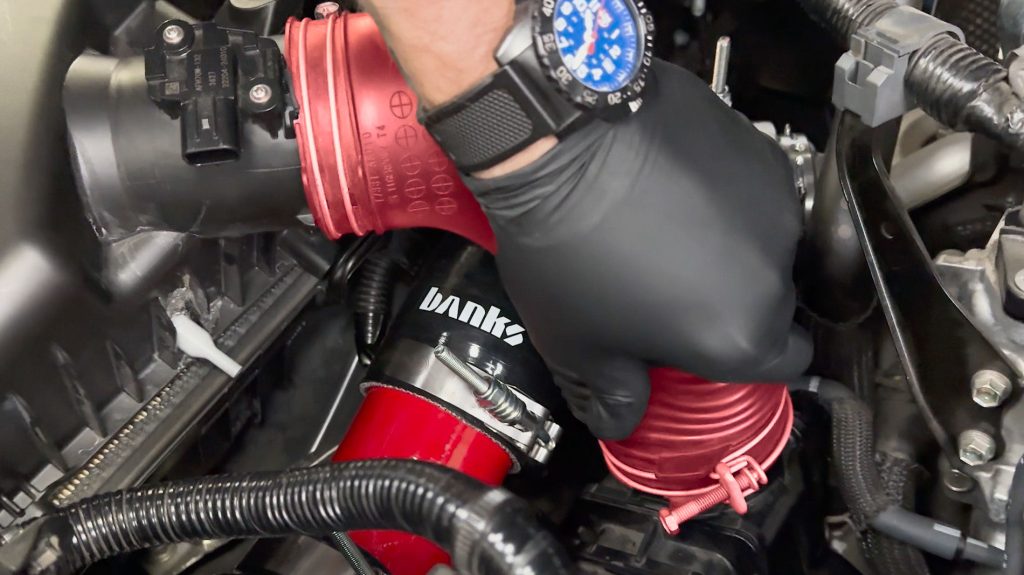
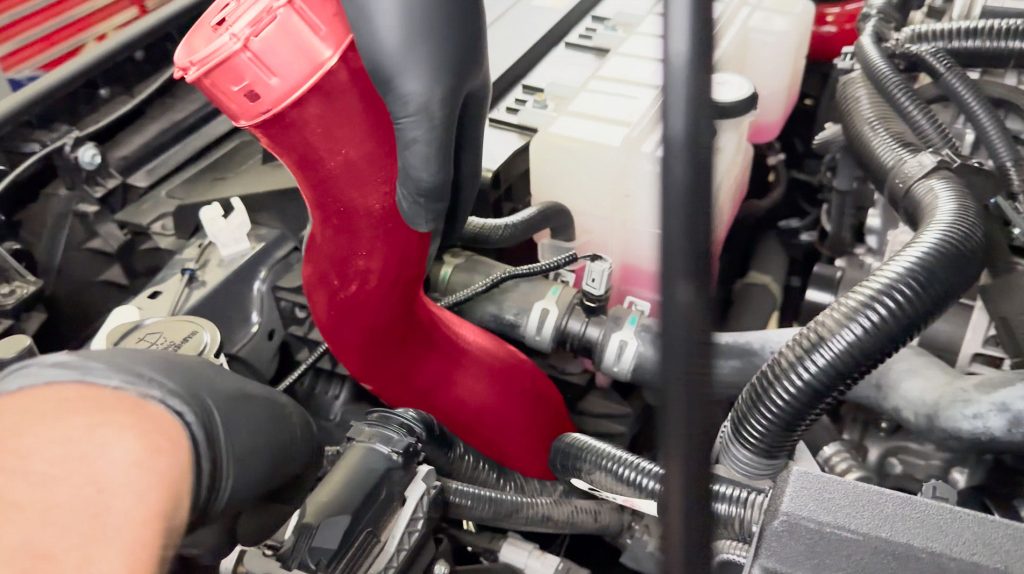
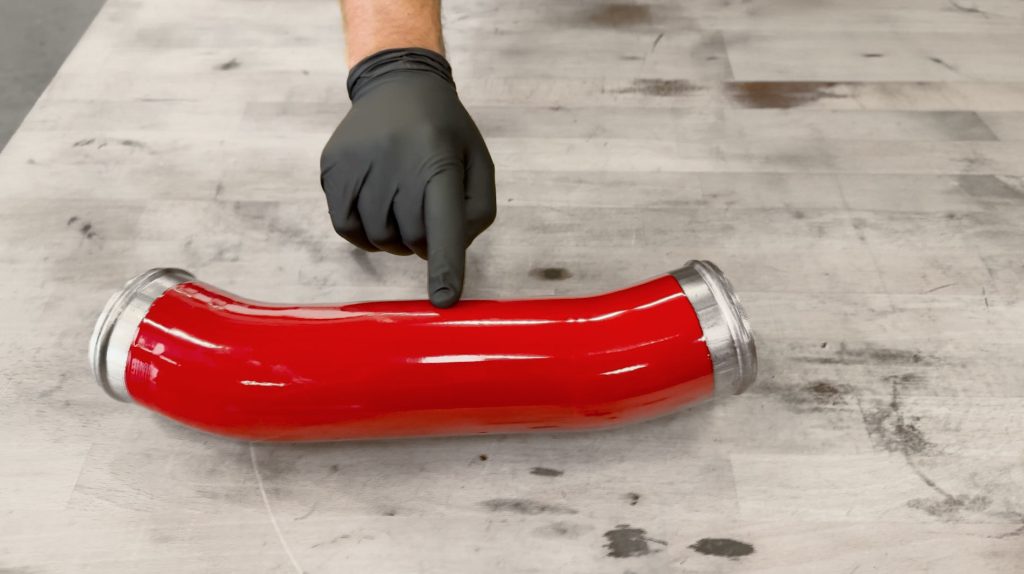
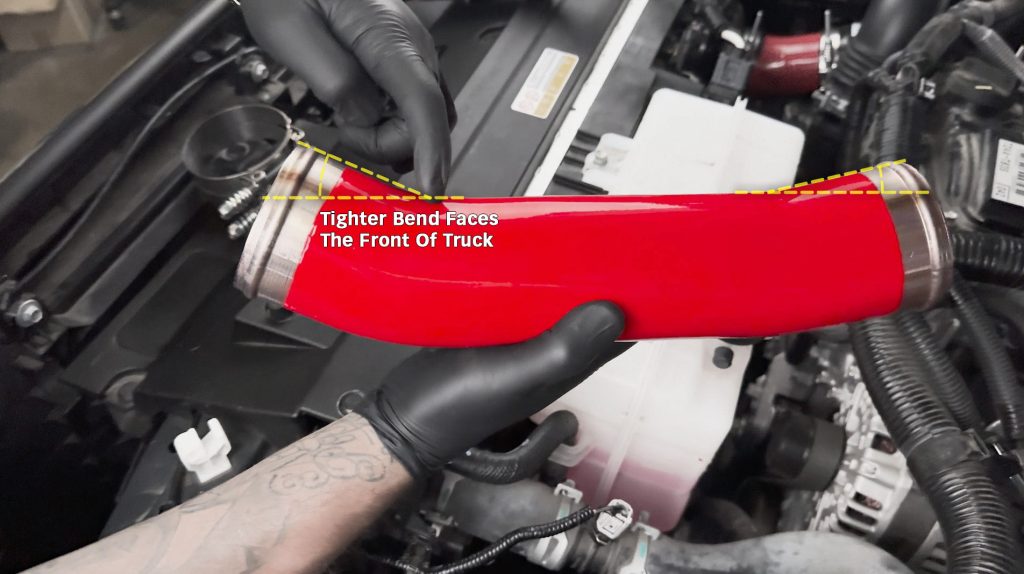
Moving on to the Boost Tube, take note of the orientation of the longer side.
The longer end will point towards the rear of the truck. Towards the Turbo Compressor Outlet.
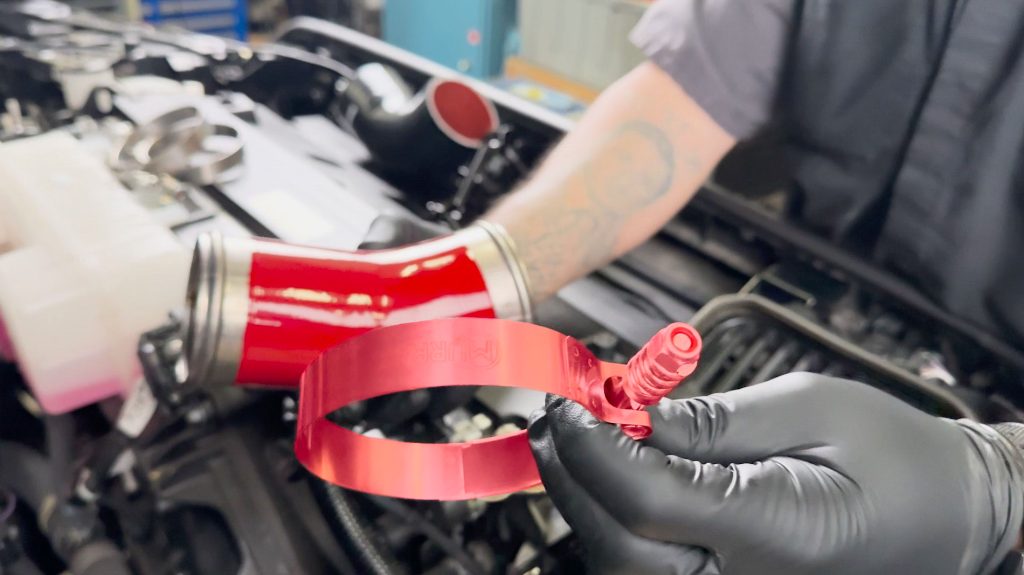
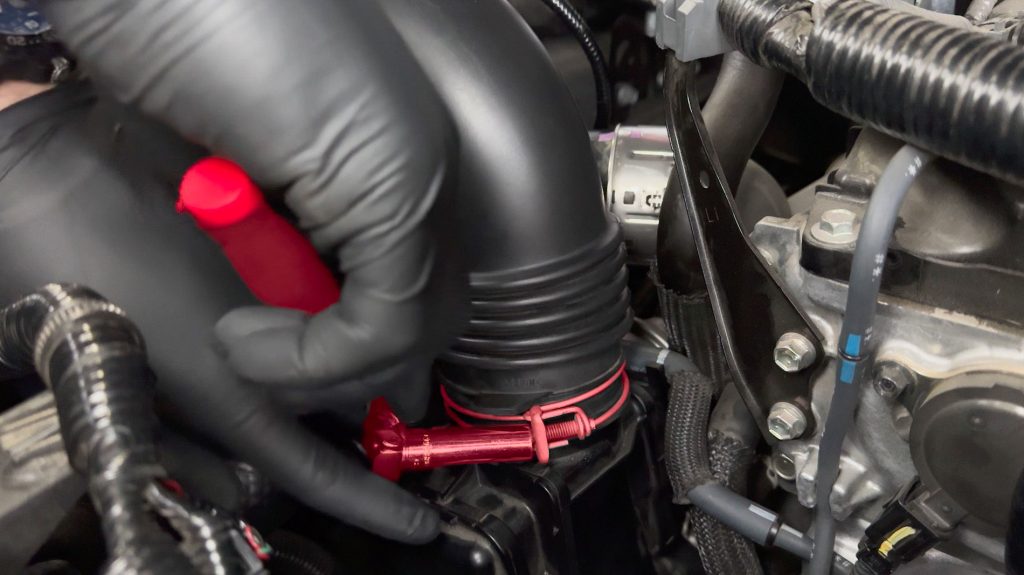
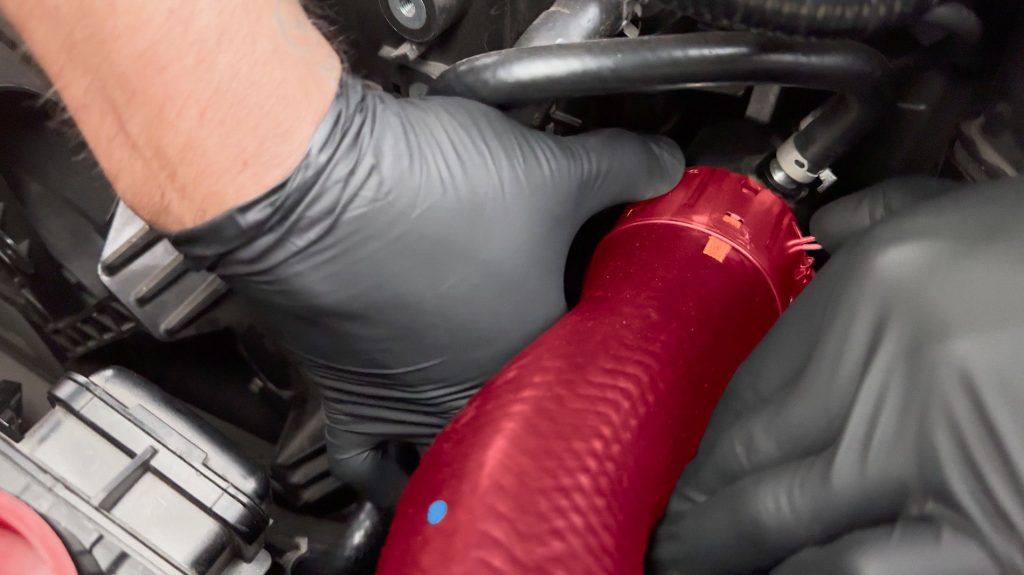
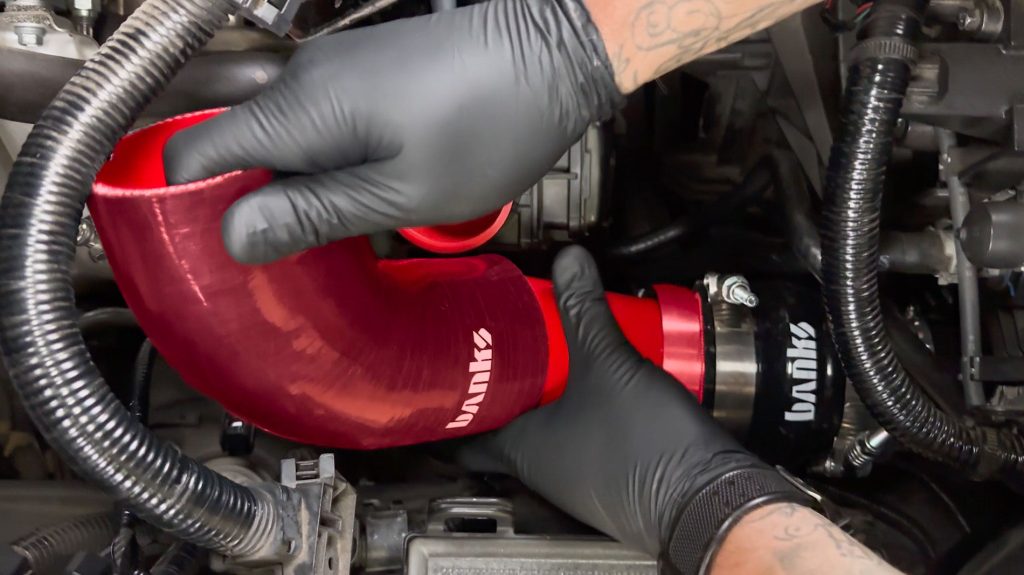
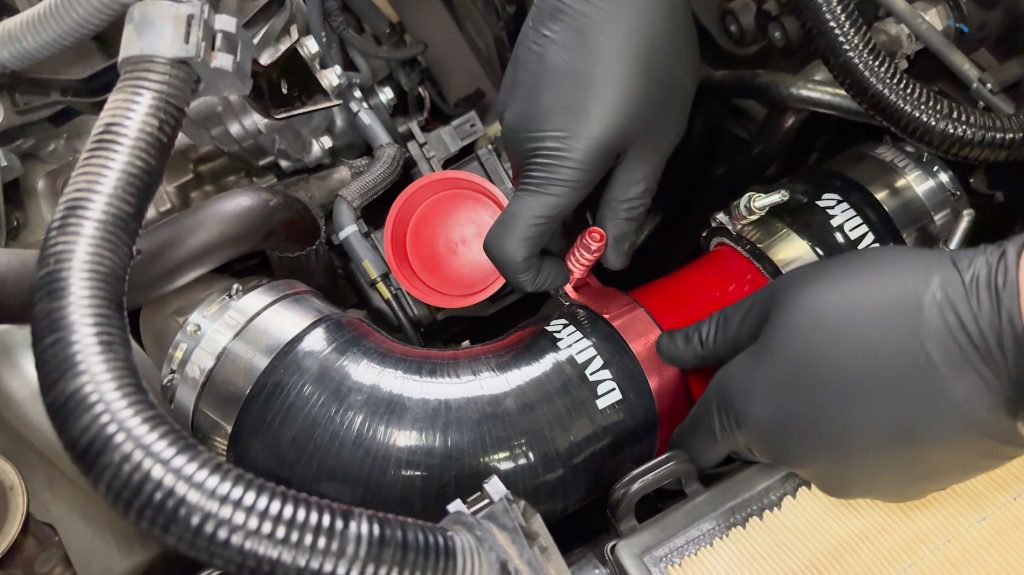
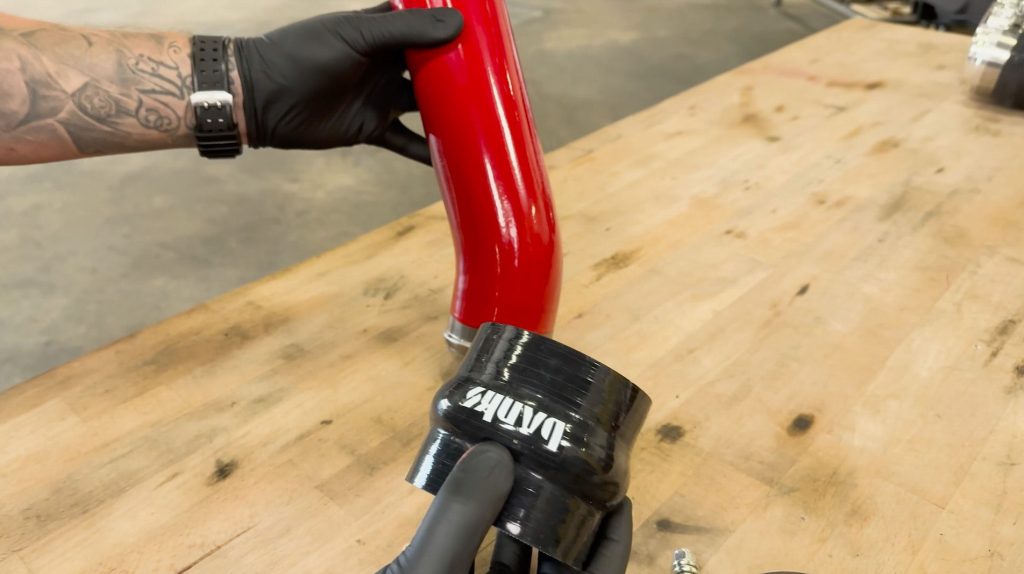
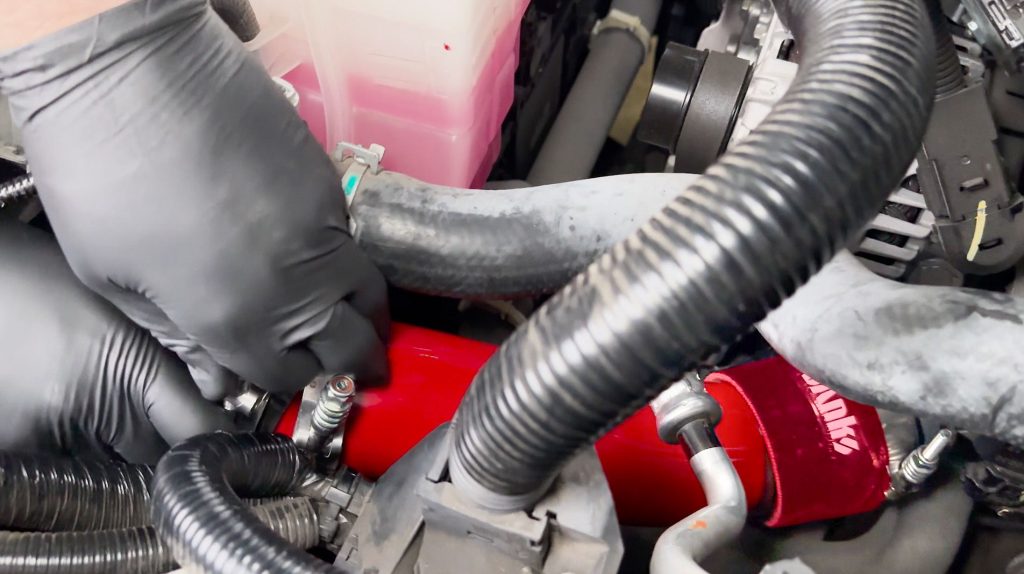
8. Grab one of the clamps and slide it over the hump hose.
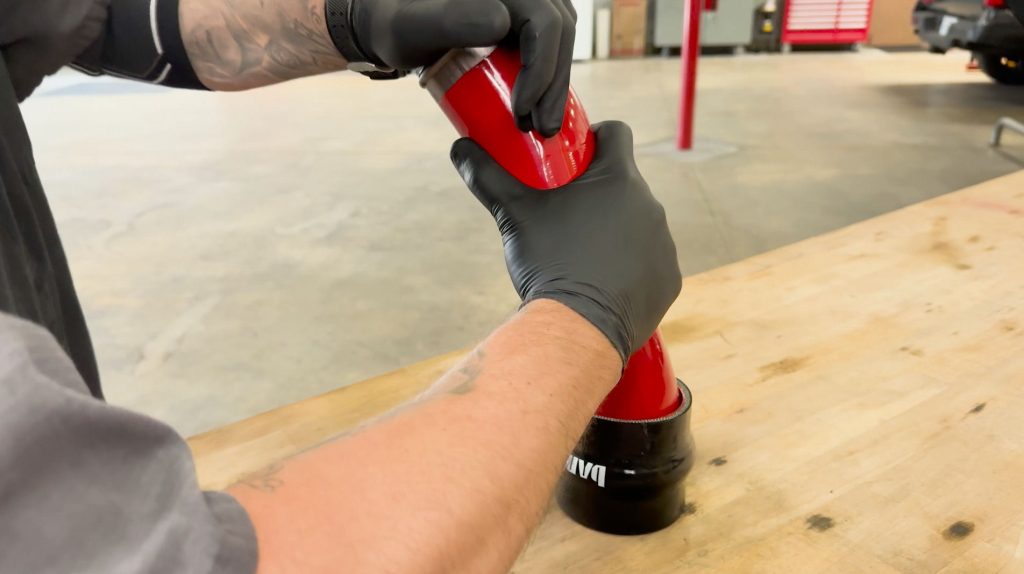
9. With the longer end pointing towards the rear of the truck and the bend pointing up, slide the boost tube into the hump hose.
Note: You will feel the bead of the boost tube slide into the hump section, be sure to tug on the Banks Boost Tube slightly providing a gap so that the Boost Tube does not crash into the metal of the Billet Coupler.
10. With the Boost Tube bend pointing upwards at the 12 o clock position, snug down the clamp.
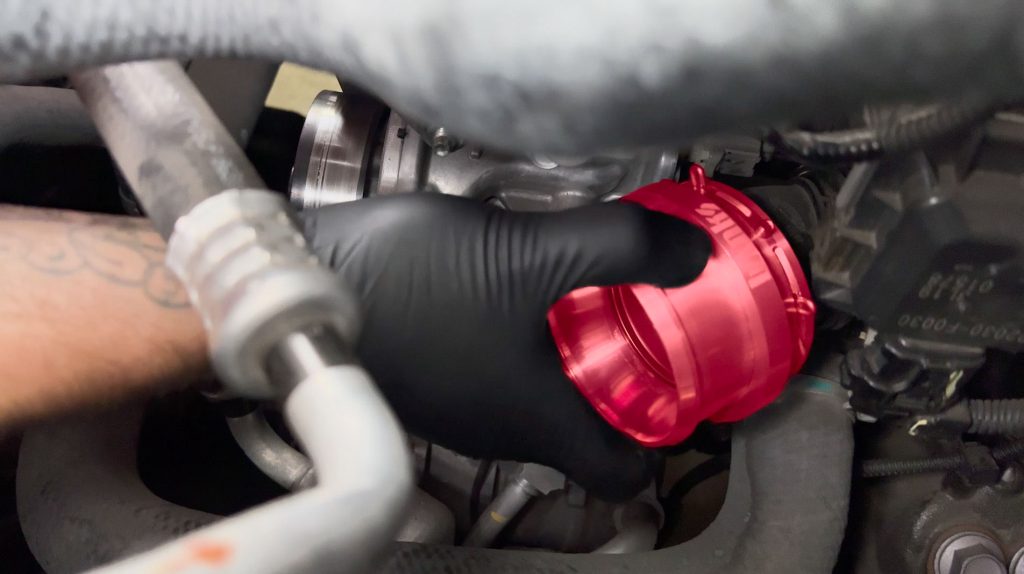
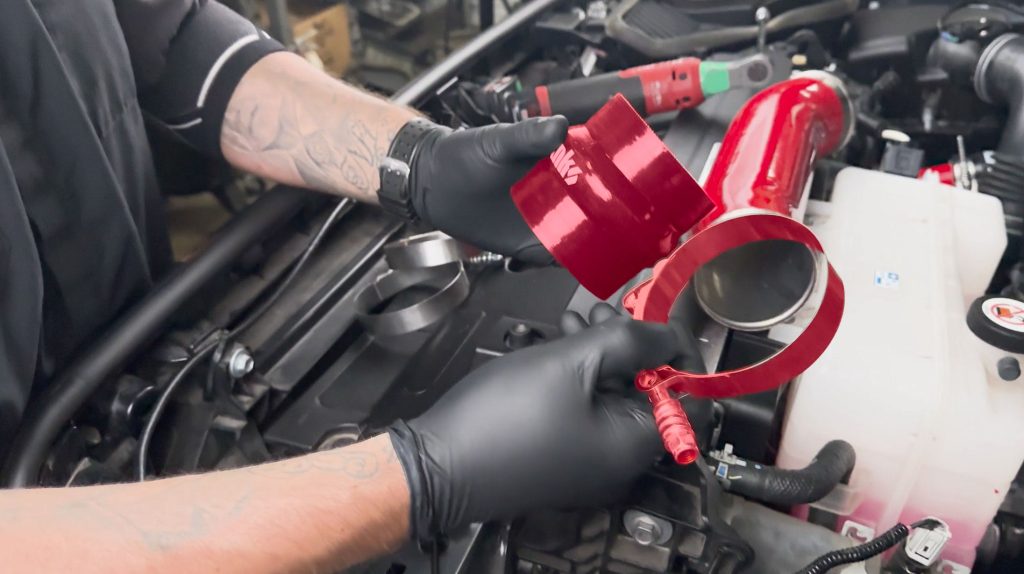
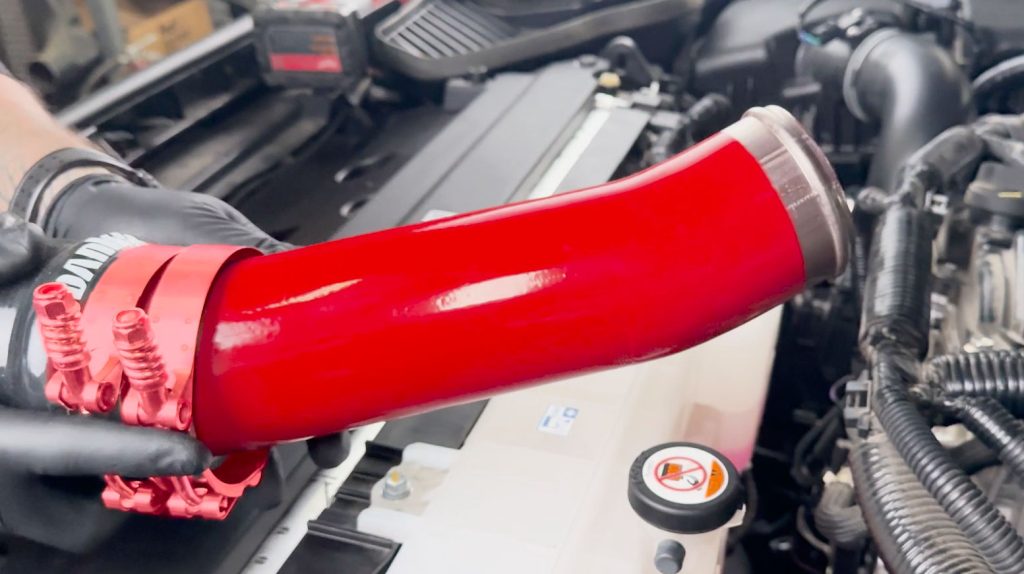
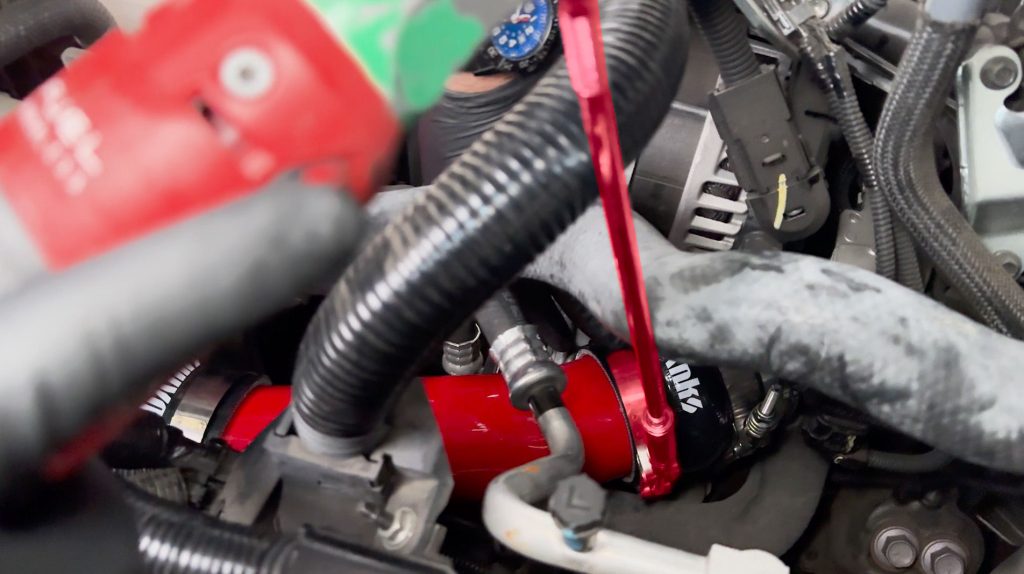
11. Next grab the elbow and the other 2 clamps.
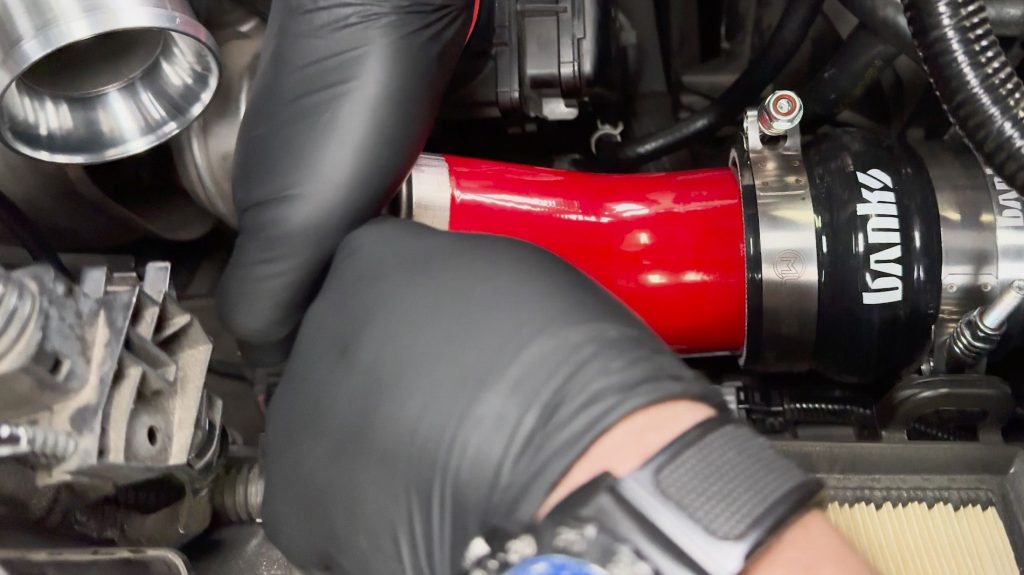
12. Slip one clamp over the billet coupler and the other down the Boost Tube first.
Then with the Banks logo legible from the front, slide the elbow onto the boost tube.
Do not clamp it down just yet.
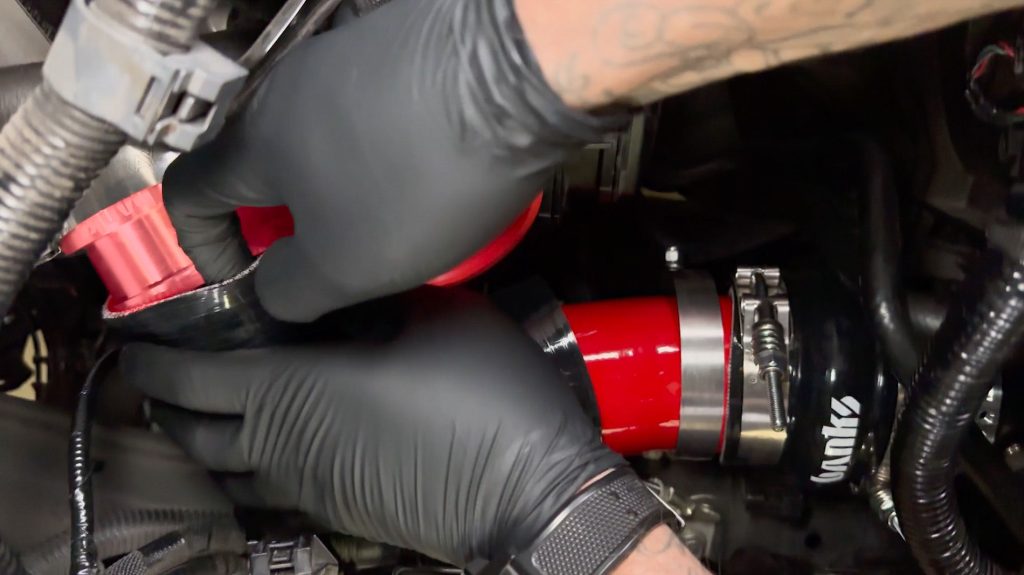
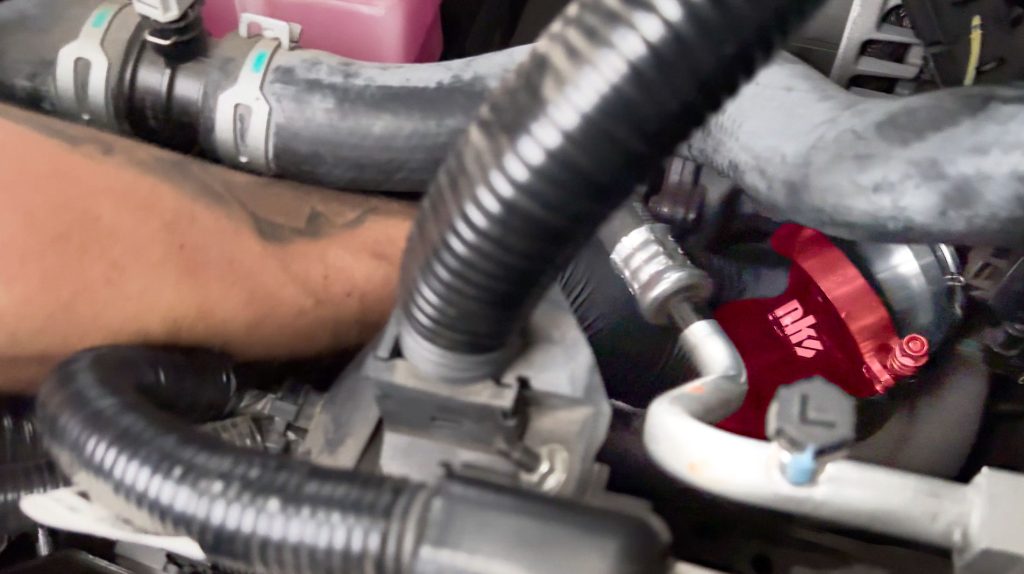
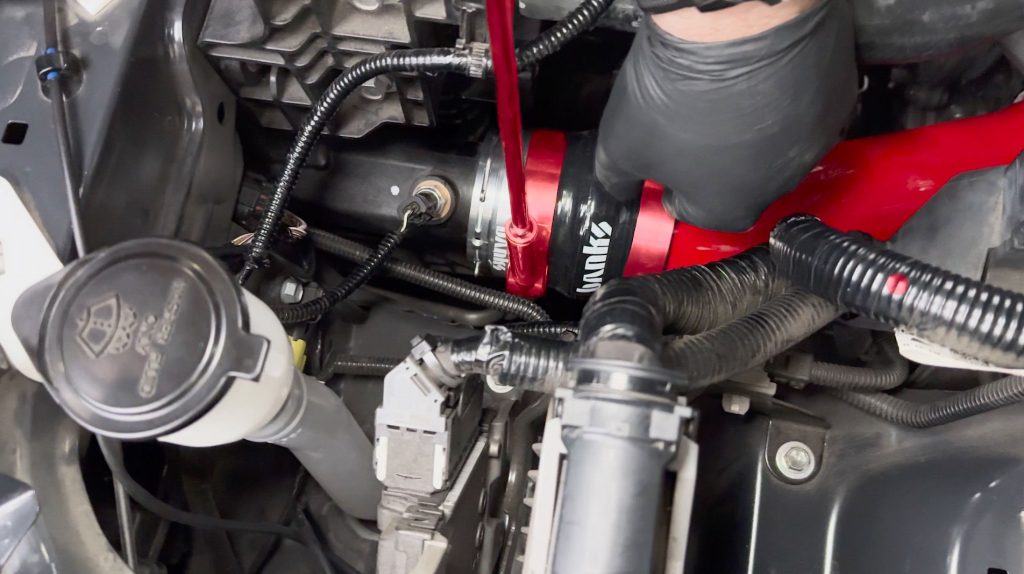
13. Slide the opposite end of the elbow onto the Turbo Compressor Outlet’s Billet Coupler.
Check that the elbow fully seats onto it.
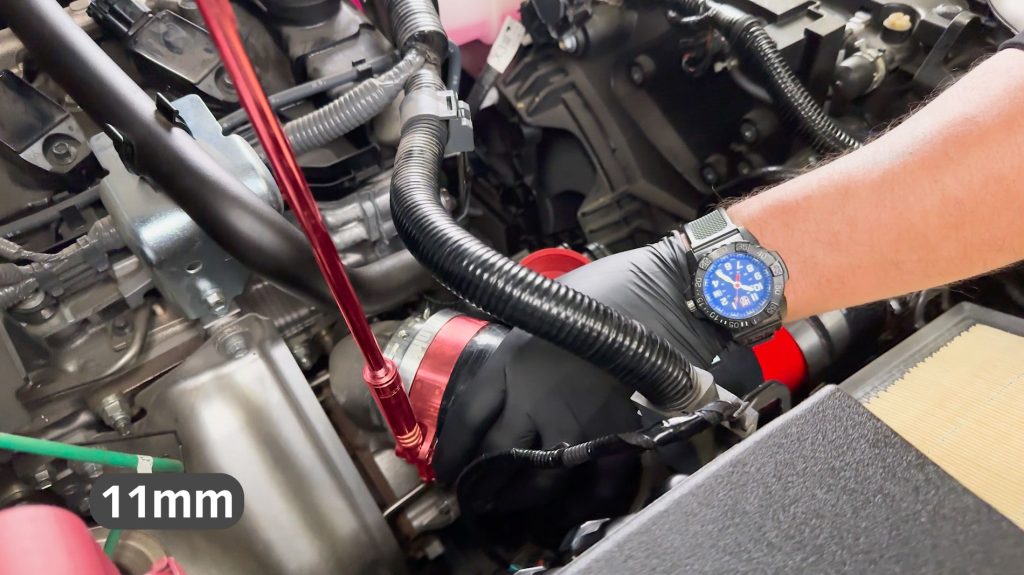
14. Once fully seated, snug the clamp down on the Turbo Compressor Outlet.
15. Now slide the clamp you slipped over the Boost Tube, up and onto the other end of the elbow.
Attention: Land Cruiser
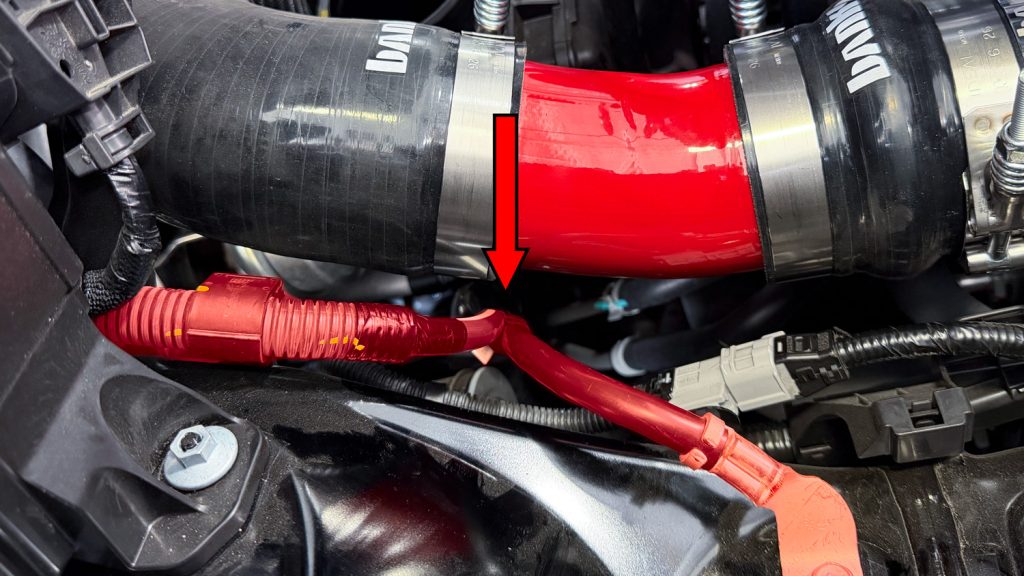
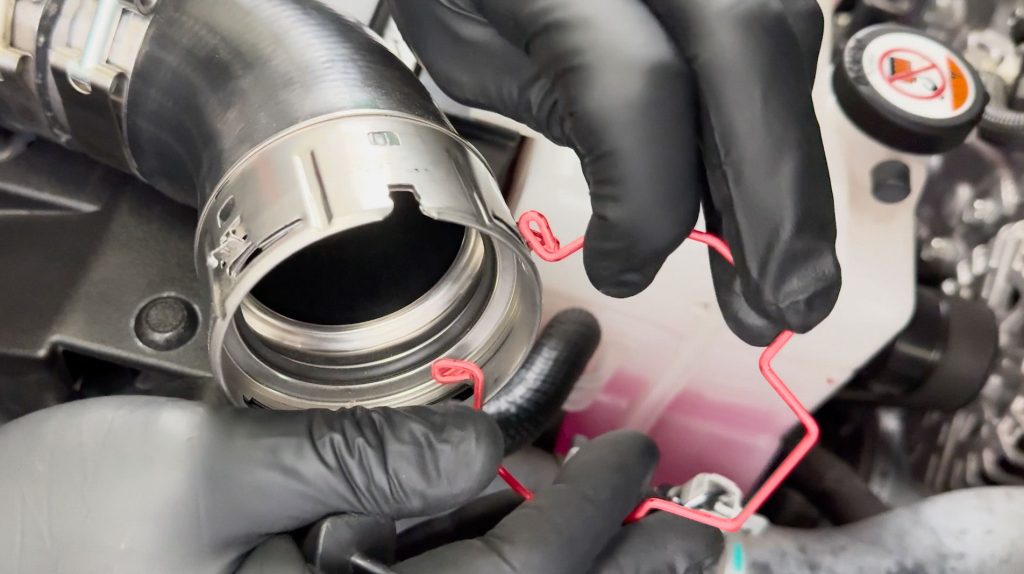
In Land Cruisers, the wires from the fuse box and the Boost Tube sit in a slightly different position than in Tacomas or 4Runners. If the wires are less than 1/4″ away from the Boost Tube after installation, gently push the wires away to achieve a minimum of 1/2″ of clearance.
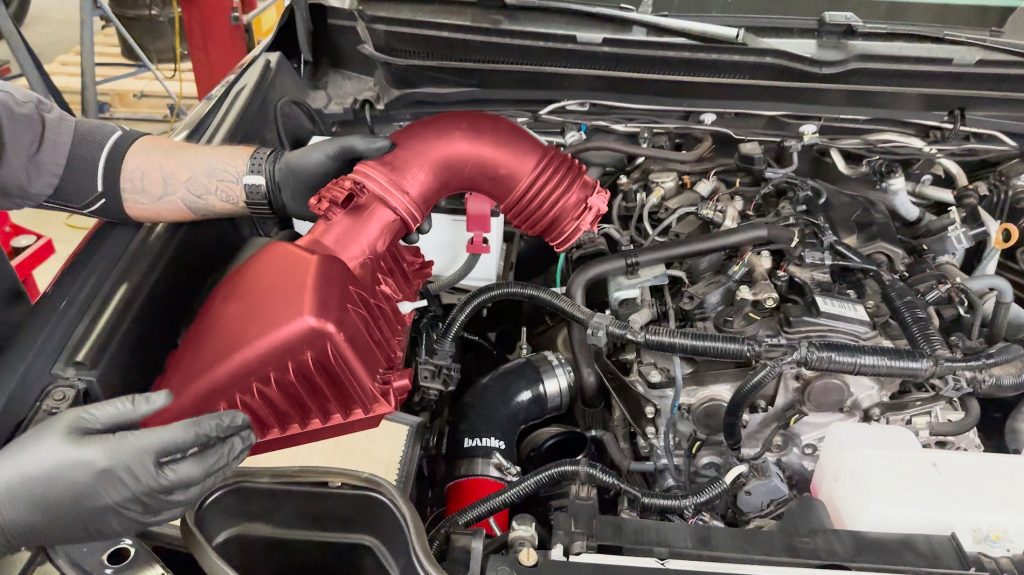
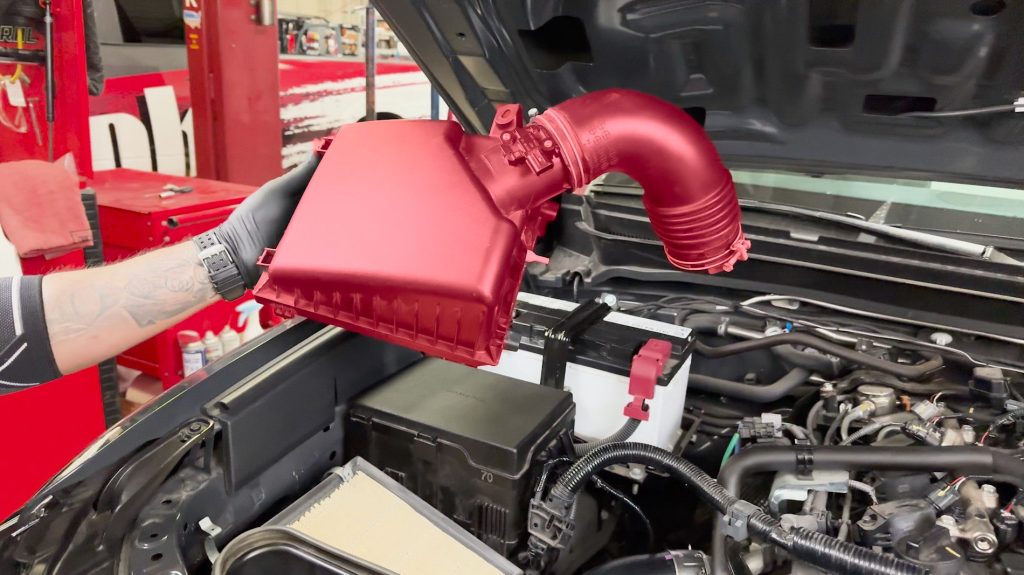
16. Bring the top of the air box cover back over to the truck
17. Slide the intake tube back onto the resonated turbo inlet.
18. Clip the air box back into place.
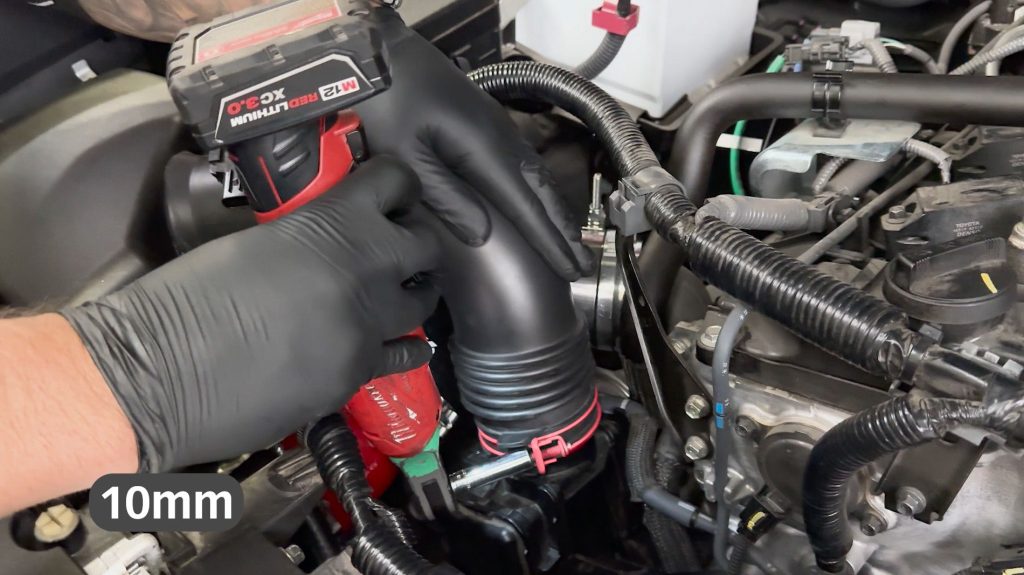
19. With a 10mm socket, tighten the clamp.
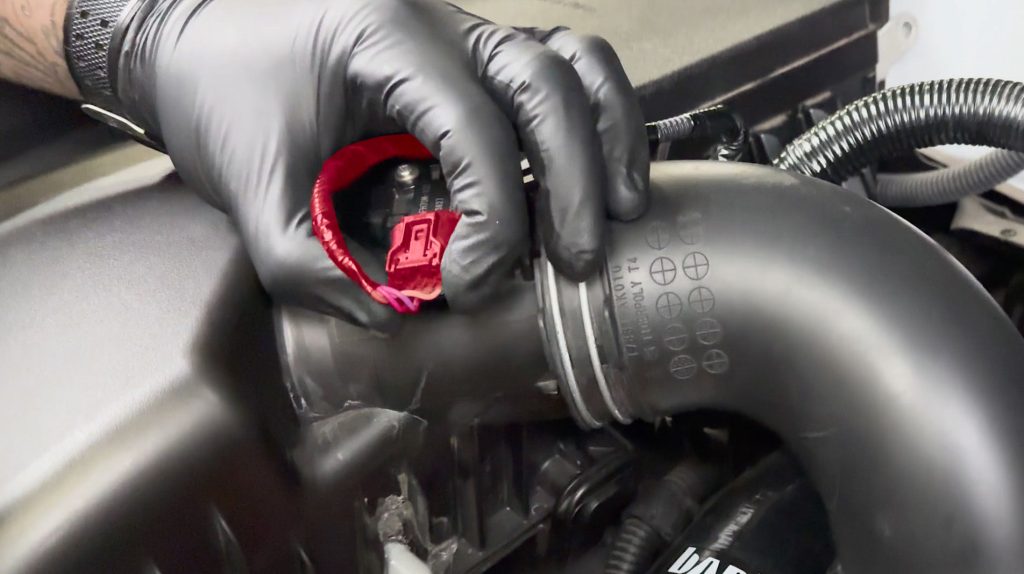
20. Then plug the MAF sensor back in.
Stock Cold Side Removal

1. Next, locate the Cold Side factory boost tube and its locking clip holding it onto the intercooler.
2. Just like the Hot Side, once the locking click is spread apart, the boost tube can be freed from the intercooler.
3. Do the same for the other side where it attaches to the engine.
4. Then lift the OEM boost tube from the engine bay.
5. Just like with the previous set, pry up the retaining tab that holds the locking ring in place.
Banks Cold Side Boost Tube Prep
Gather the remaining components to assemble the cold side Boost Tube.
The longer of the two Boost Tubes.
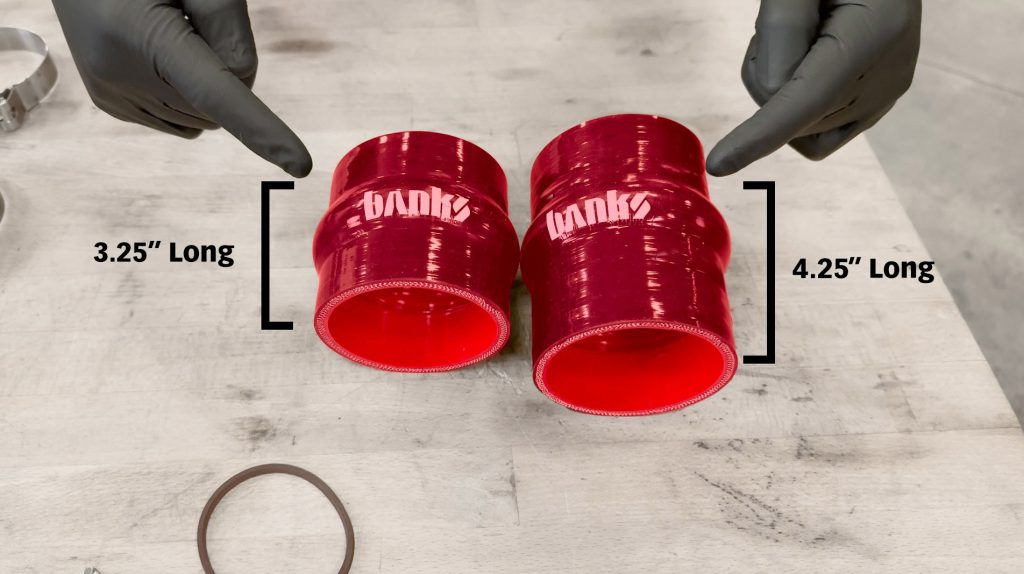
One 4.25″ Long Hump Hose

1. Start by lubricating the o rings with
2. Fit the o ring into the billet coupler
3. Do the same for the remaining billet coupler.
4. Now transfer the locking ring you removed earlier, onto the billet coupler.
5. Repeat this process for the remaining billet coupler.

6. Add a bit of blue thread locker to the set screw.
7. Thread it into one of the billet couplers so that its flush with the inside.
Banks Cold Side Installation
1. Grab the assembled coupler, which does not have the set screw, and connect it to the outlet of the intercooler.
The locking ring should snap into place.
2. Grab the last remaining assembled billet coupler and connect it to the engine air inlet.
3. With an extension and a 3mm hex head socket, snug down the set screw,
4. Grab a clamp and hump hose.
5. Slide the hump hose and clamp onto the billet coupler until it’s fully seated.
6. Slide the hump hose and clamp onto the billet coupler until it’s fully seated.
The hot side boost tube will be a tight fit. So it’s important to get the correct orientation when installing the tube. Note how one of the two bends is tighter than the other; this end will face towards the front of the truck.
1. Grab the 4.25″ long Hump Hose, and orient it so that the longer side is towards the intercooler.
To provide enough clearance to slip the hot side boost tube into place, you’ll have to press the hump hose all the way onto the boost tube until it’s flush with the end.
The end of the tube and the hump hose should be flush with each other.
2. Returning to the truck, slide one clamp over the billet coupler on the intercooler outlet side,
3. Slide the remaining two clamps onto the hot side boost tube.
4. Work the boost tube hose onto the engine side billet coupler. Tighten the Engine Side clamp only, leaving the other clamp loose to allow for adjustment.
5. Work the boost tube onto the engine side hump hose. Maintain a 3/8″ gap between the tube and billet coupler on both ends and tighten down the engine side clamp.
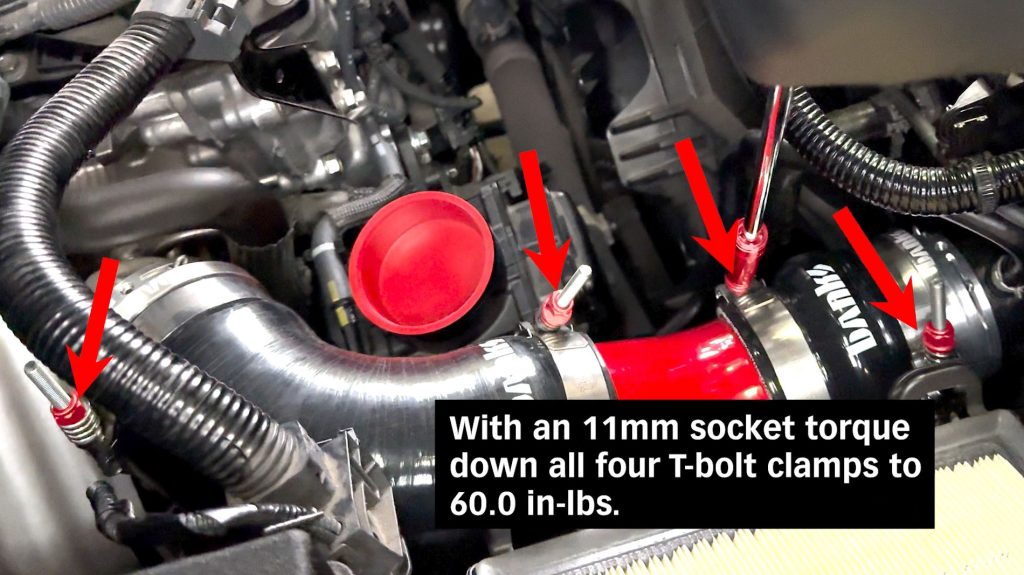
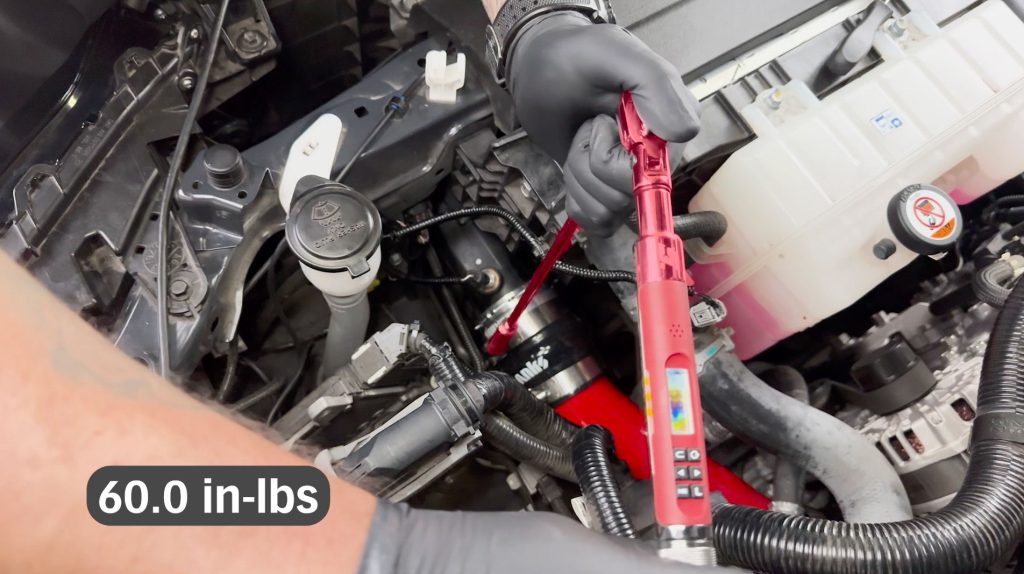
6. Maneuver the remaining two clamps into position so that they are straight and not sitting on top of a bead, then snug them down.
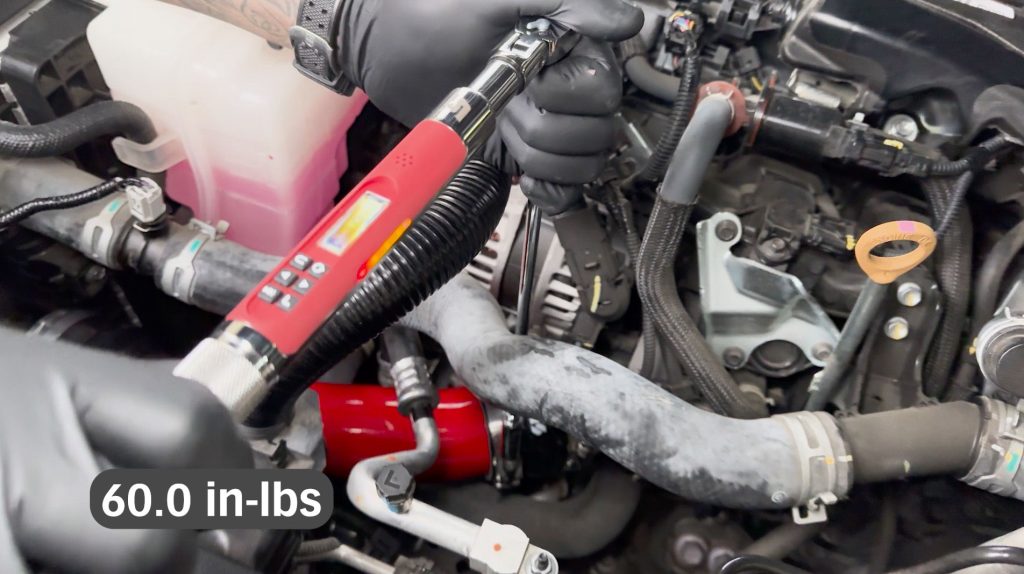
7. Check and torque all clamps to 60 in-lbs
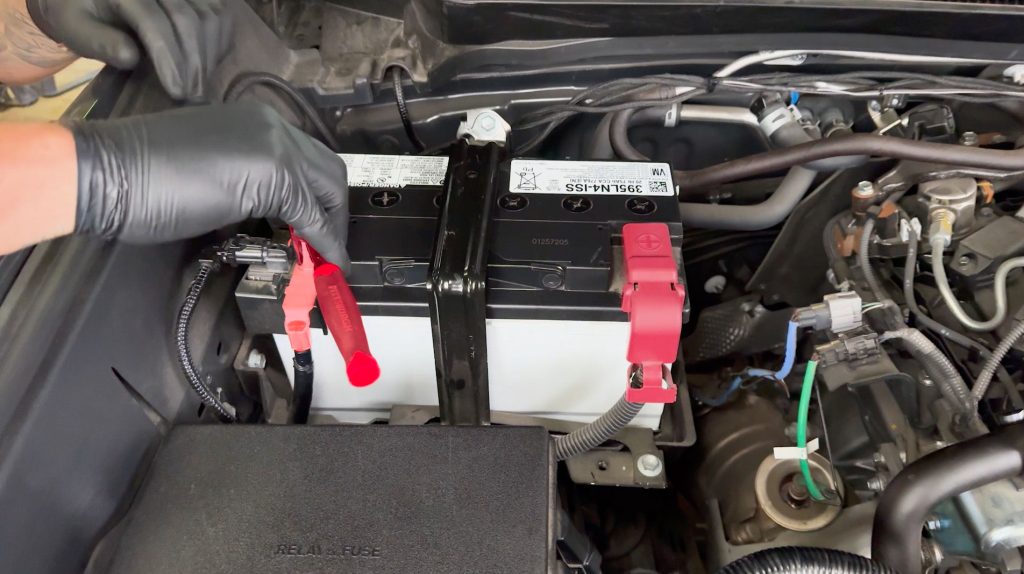
8. With a 12mm socket, re-secure the negative battery terminal.
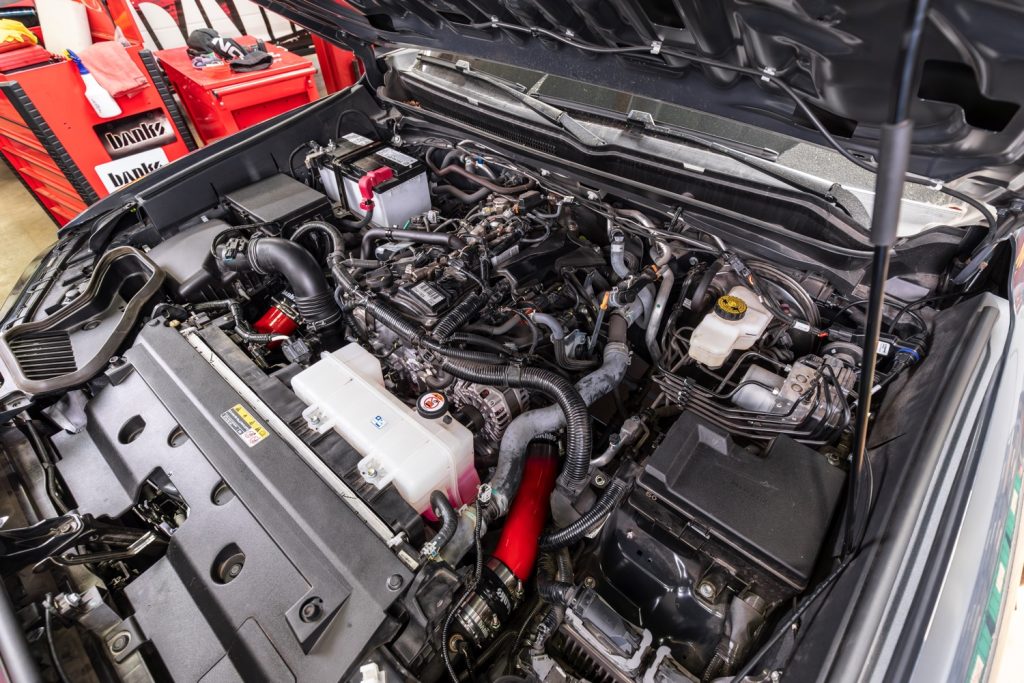
Check for any loose connections, hoses, clamps, or sensors. And enjoy your new Banks Boost Tubes.