97732 2024-26 Toyota Tacoma Stealth Pod Installation Guide
INSTALL INSTRUCTIONS
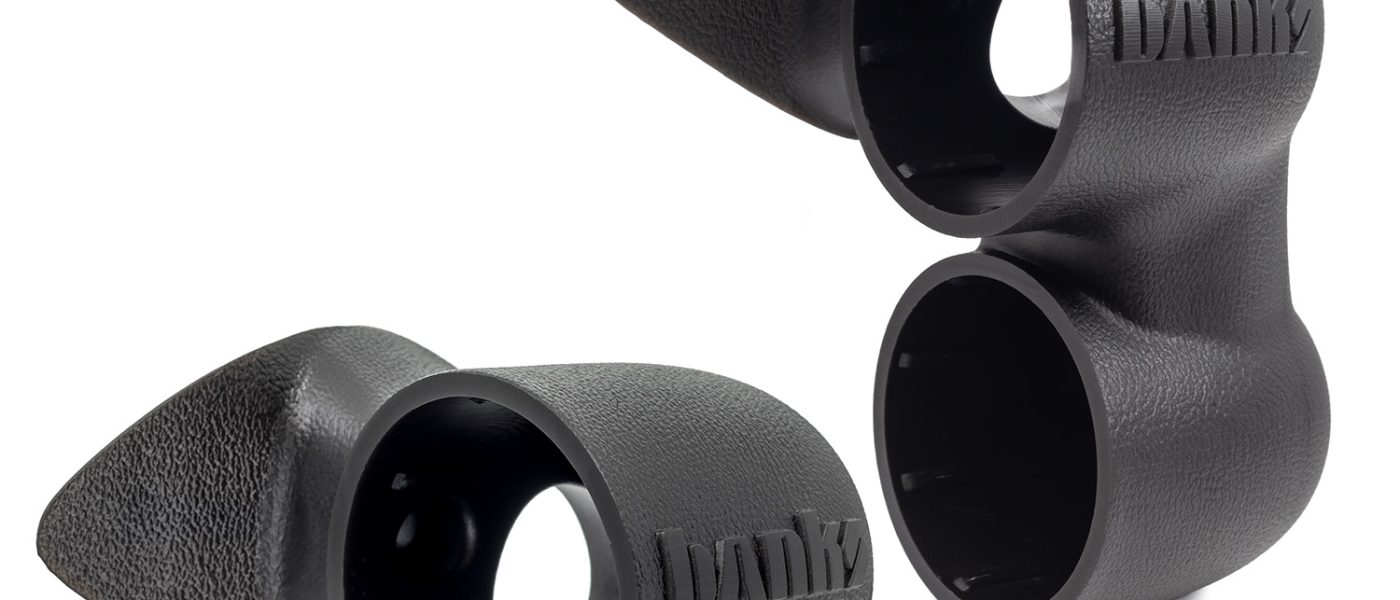
Part #s
63380, 63381
Gauge Pod 2024-26 Toyota Tacoma
Please read through the following instructions thoroughly before starting your installation. If you have any questions please visit our Support Page.
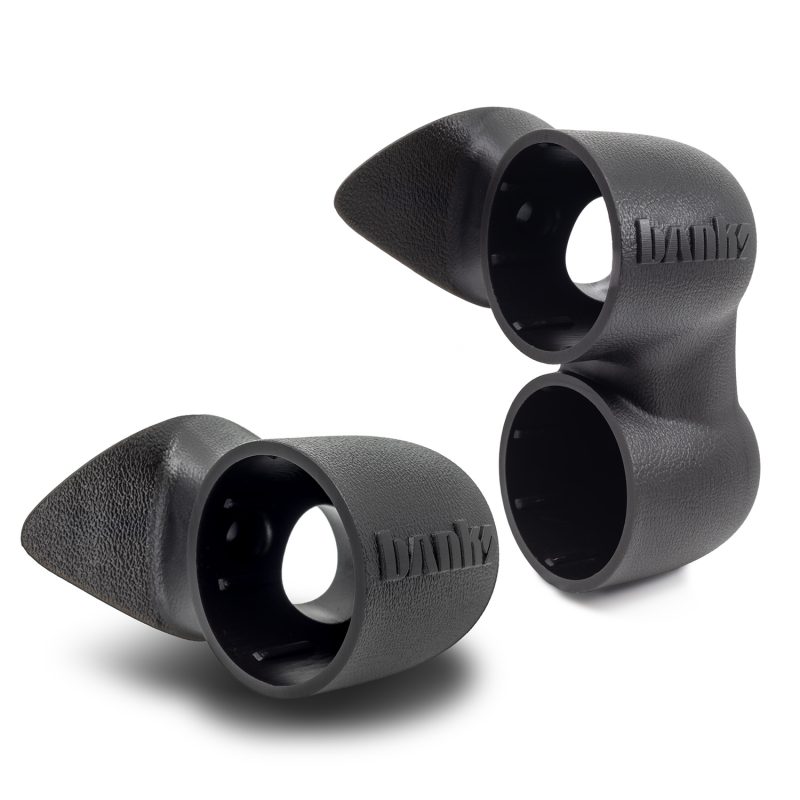

Part Number 63380 & 63381
Fits the A-Pillar below found in the:
• 2024-2026 Toyota Tacoma

Installation Guide
Note: If you’ve chosen to paint the pods yourself, please visit bankspower.com/paint to get perfectly matched spray paint. No primer is needed just three to four light coats.
What’s Included
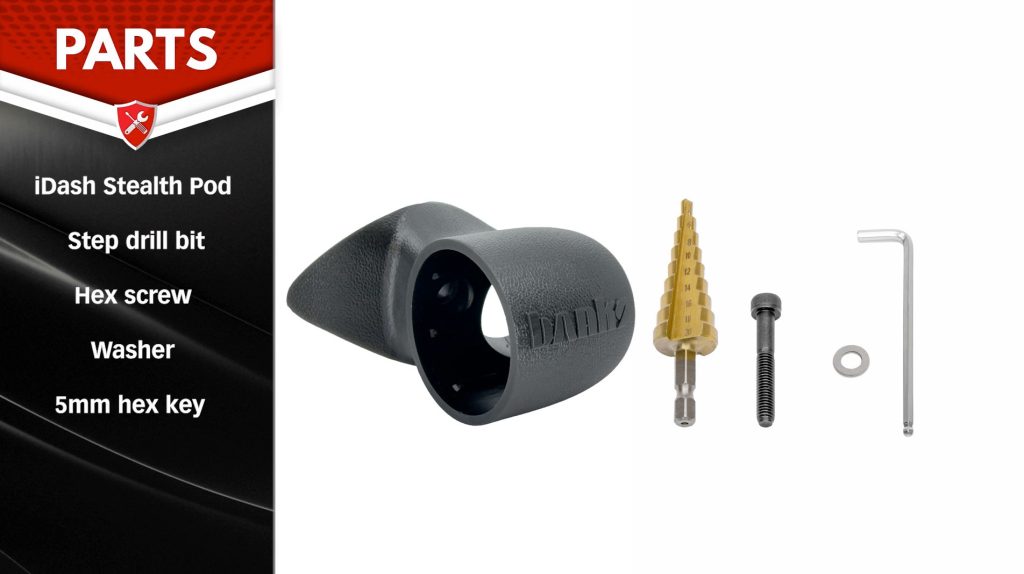
• iDash Stealth Pod
• A Step Bit
• A Hex Screw
• Washer
• 5mm Hex Key
If anything is missing, please call us at 800-601-8072 immediately!
Tools Required
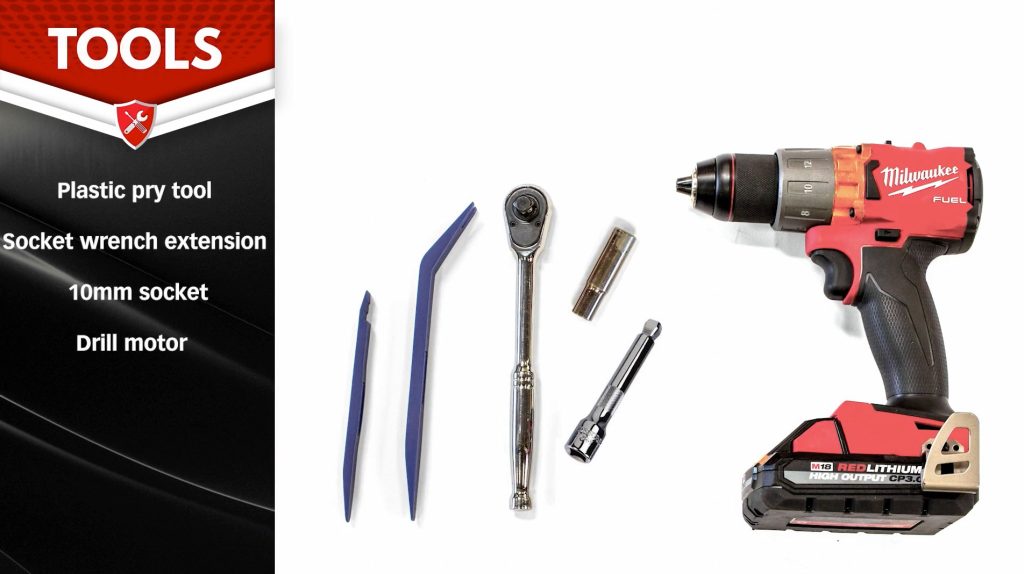
• Plastic Pry Tool
• Socket Wrench
• 10mm Socket
• Drill
Step-by-step Installation
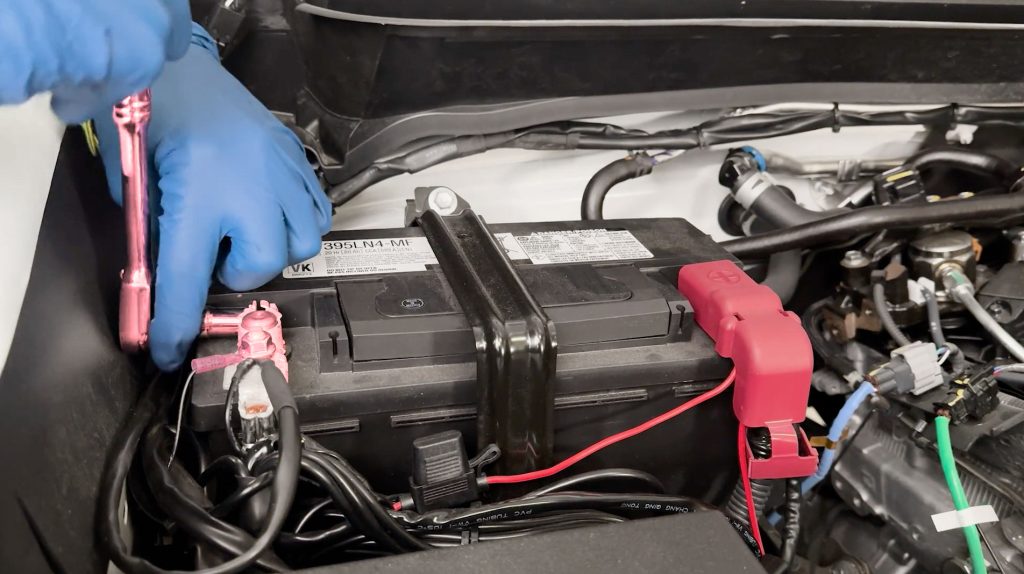
1. If installing in a conventional gasoline i-FORCE Tacoma, use your 10mm socket to remove the terminal and disconnect both batteries.
For hybrid i-FORCE MAX Tacomas, do not disconnect the 12V or HV electrical system.

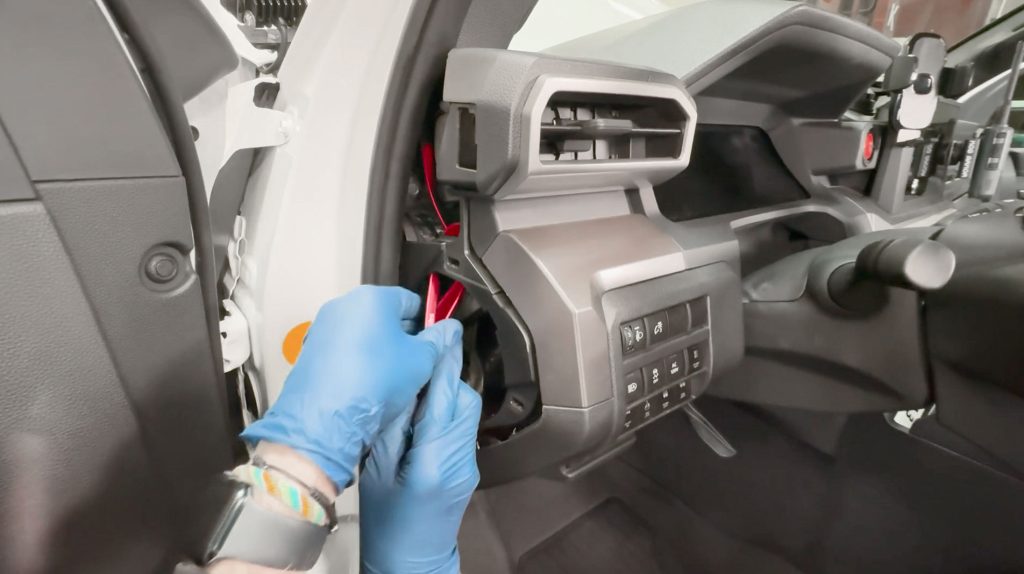
2. With a plastic pry tool, pop the upper SRS cover on the A-Pillar that hides the upper bolt.
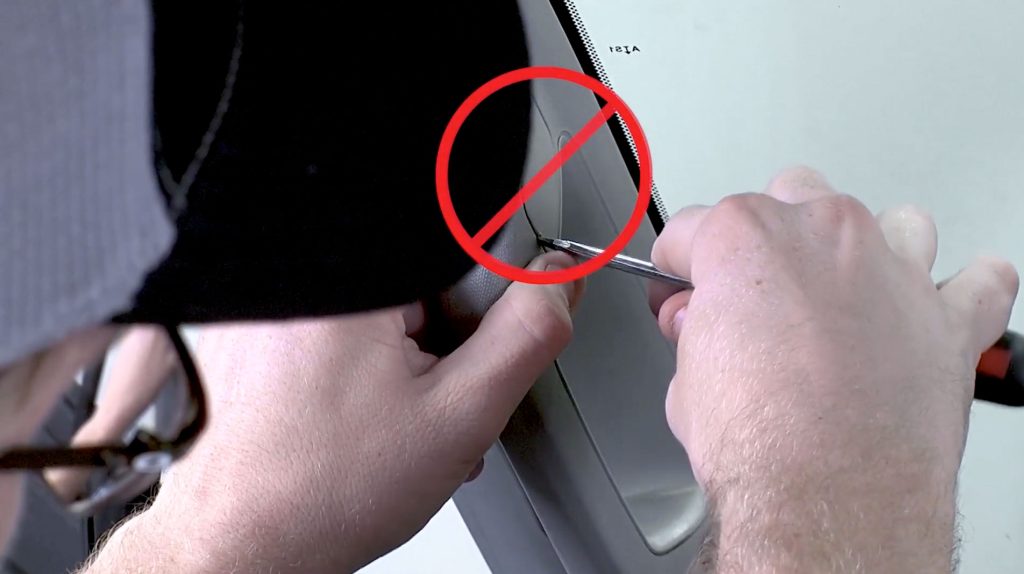
We recommend against using a metal screwdriver as it may scratch the pillar during removal.

Pinch the small plastic tail on the cap to remove it from the A-Pilar.

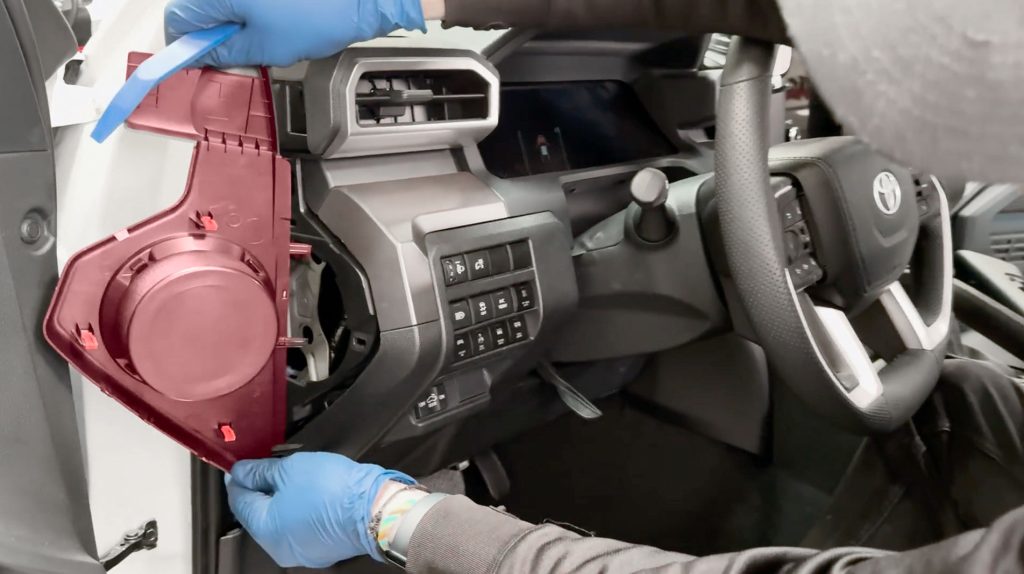
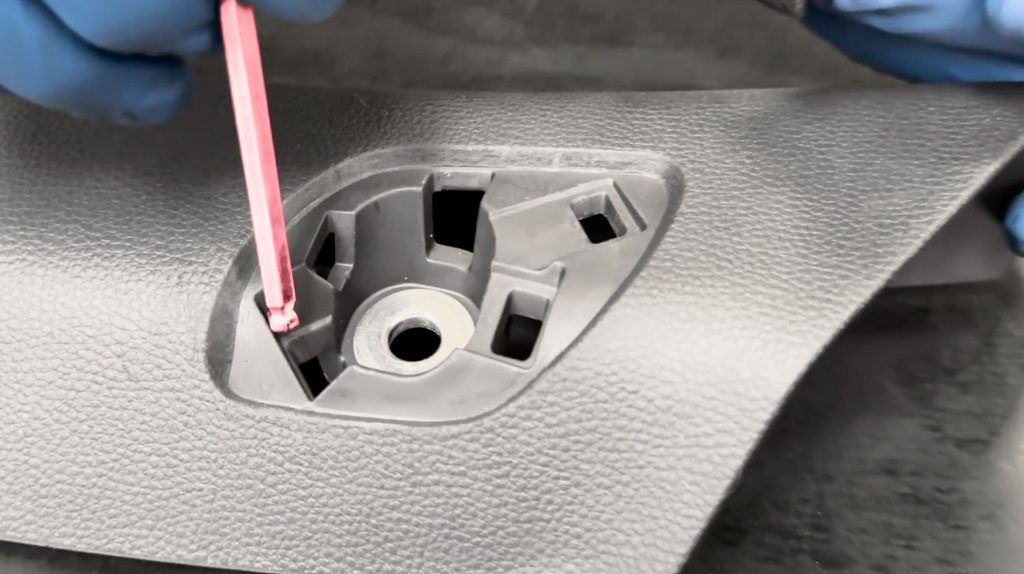
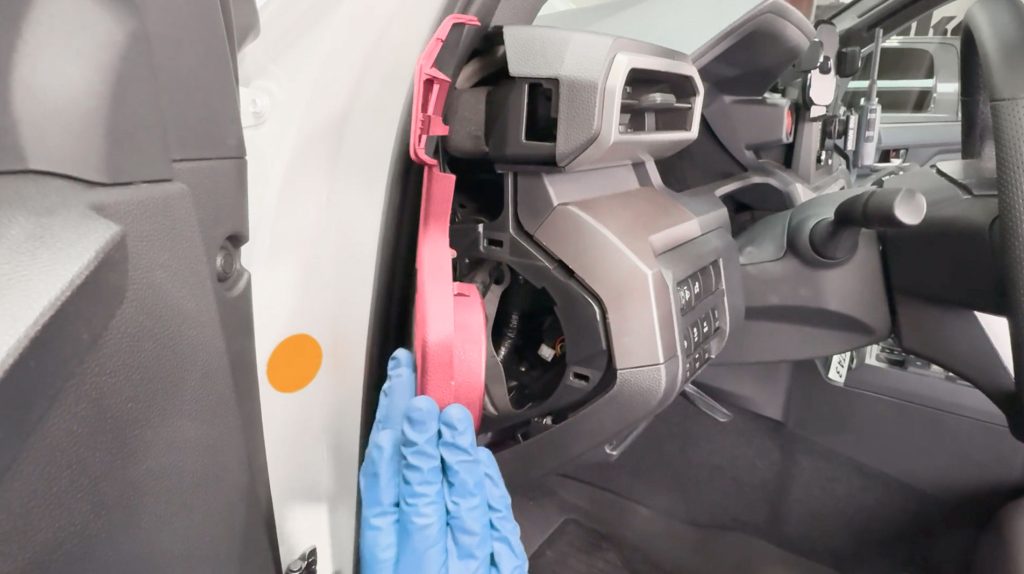
3. With a 10mm socket, remove the bolt that’s holding the A-Pillar to the truck.


4. With two hands, reach around the plastic A-Pillar trim piece, and pull firmly to the right, towards the steering wheel.
This will pop the pillar-free from the single plastic clip that was still holding it on.
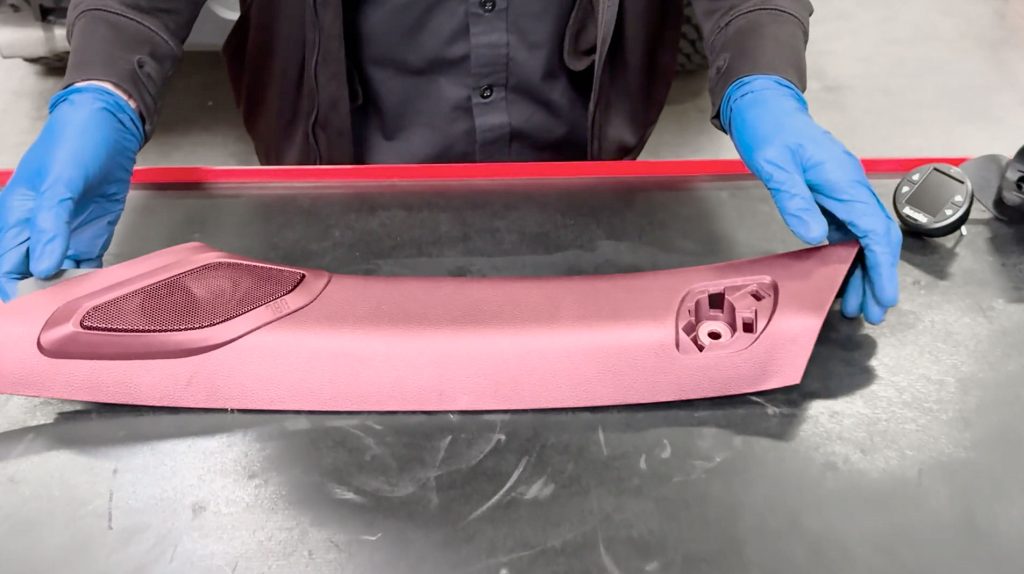
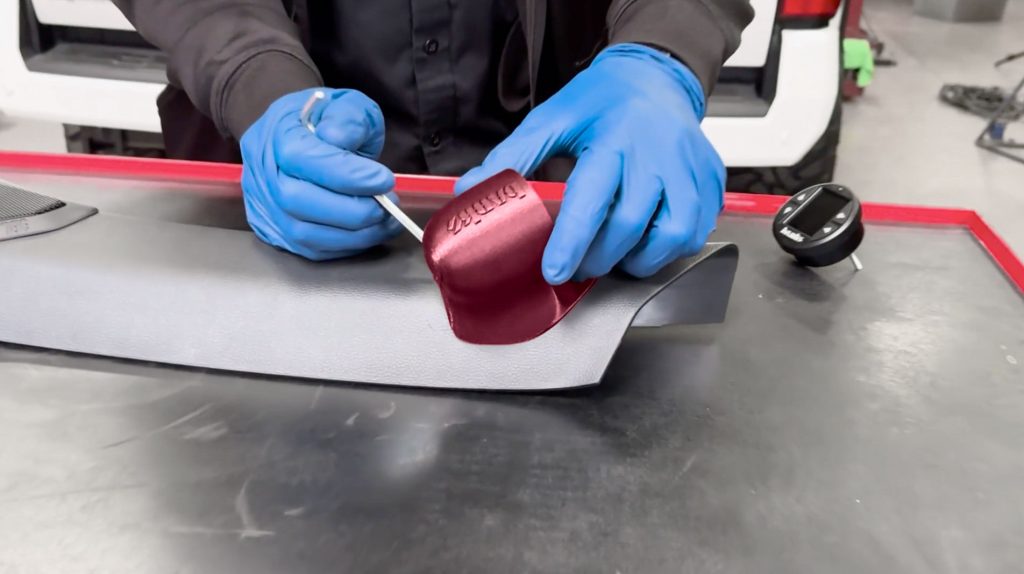
5. If your truck has a tweeter speaker, carefully remove it by lifting the plastic tabs around the speaker.
6. Once free, carefully rotate and remove the pillar from the truck
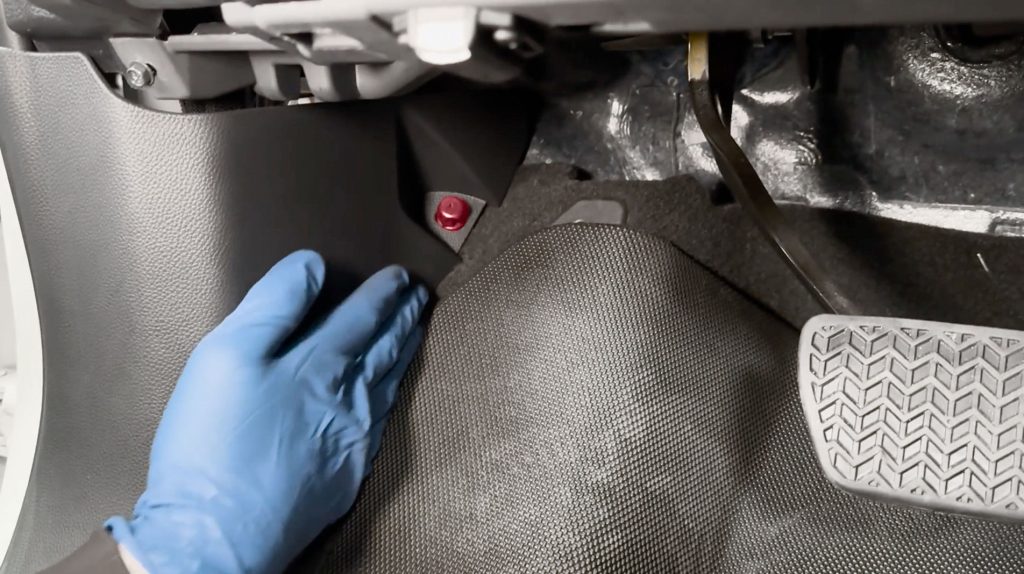
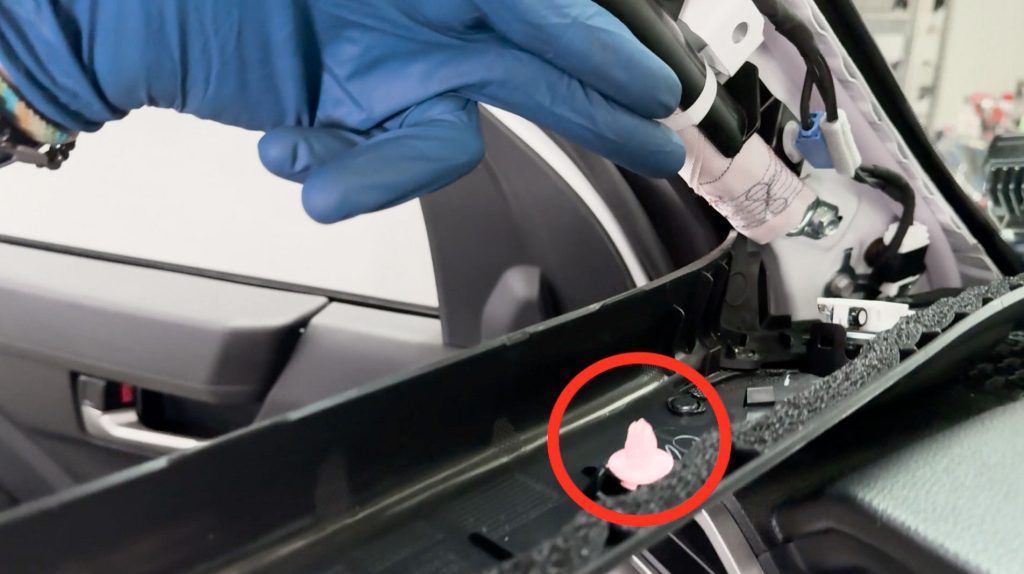
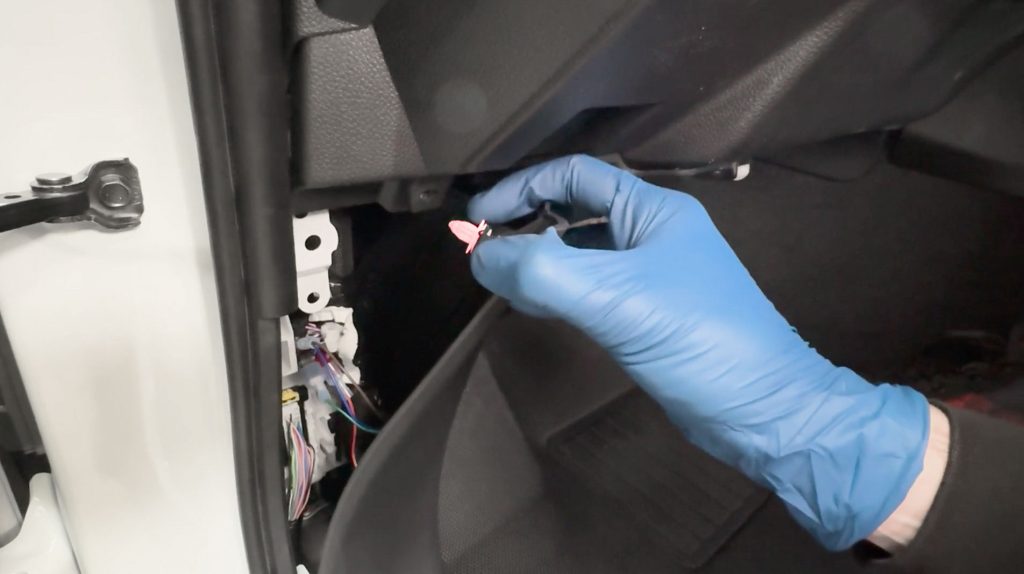
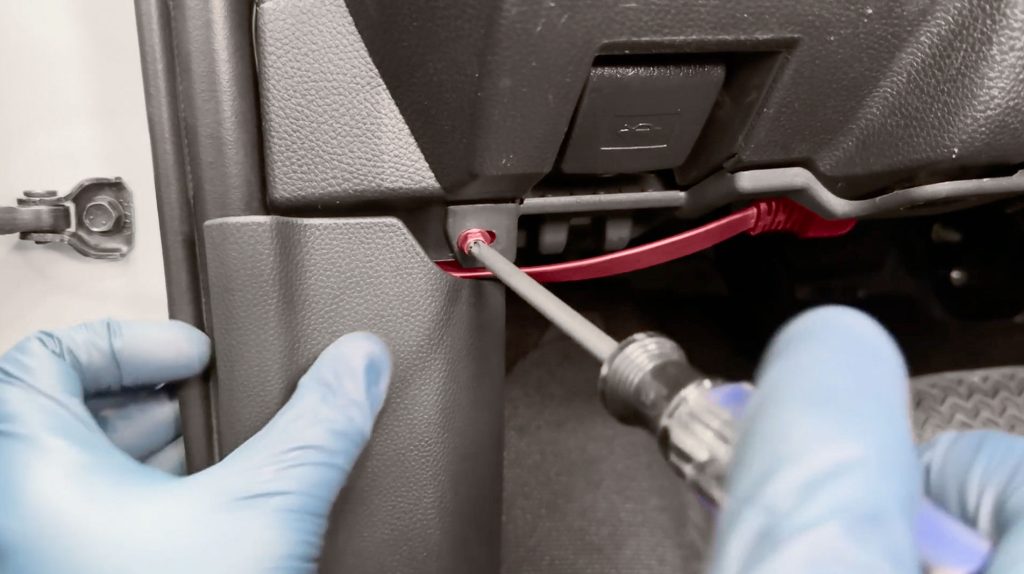
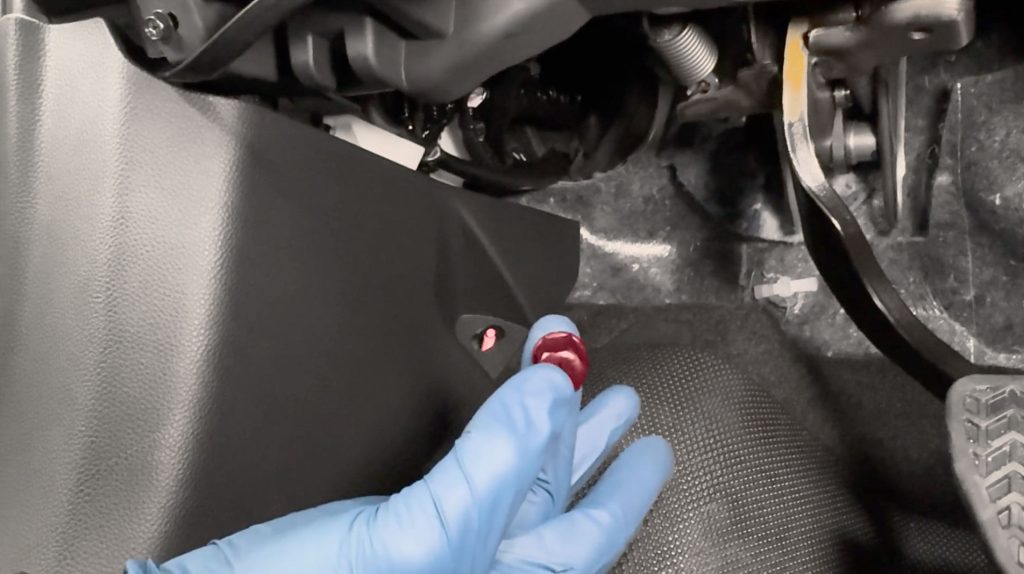
7. Looking under the dashboard, locate and remove the single finger nut that’s securing the lower kick panel.
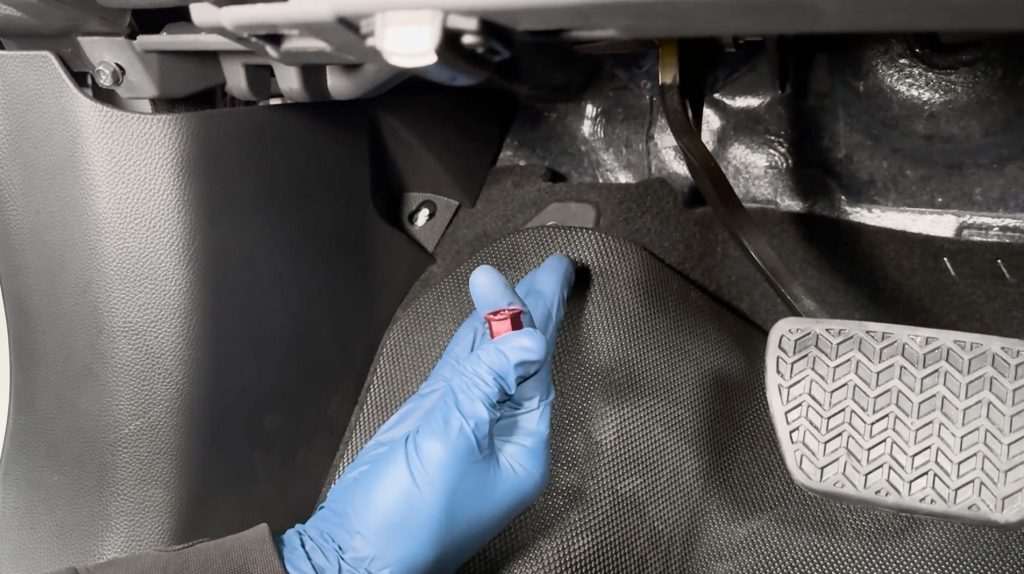
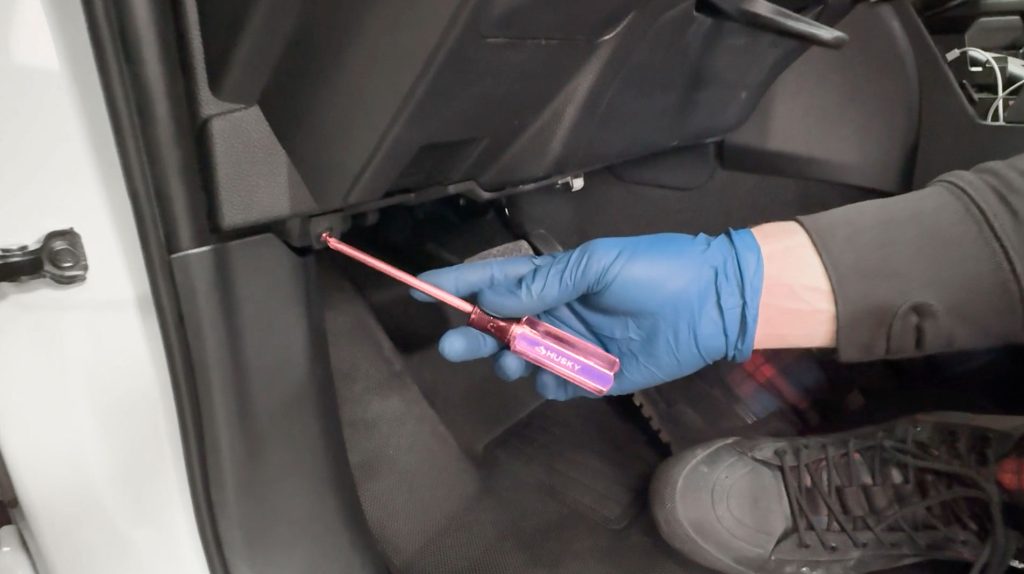
8. With a Philips screwdriver, remove this screw to provide extra clearance to pull the kick panel free.
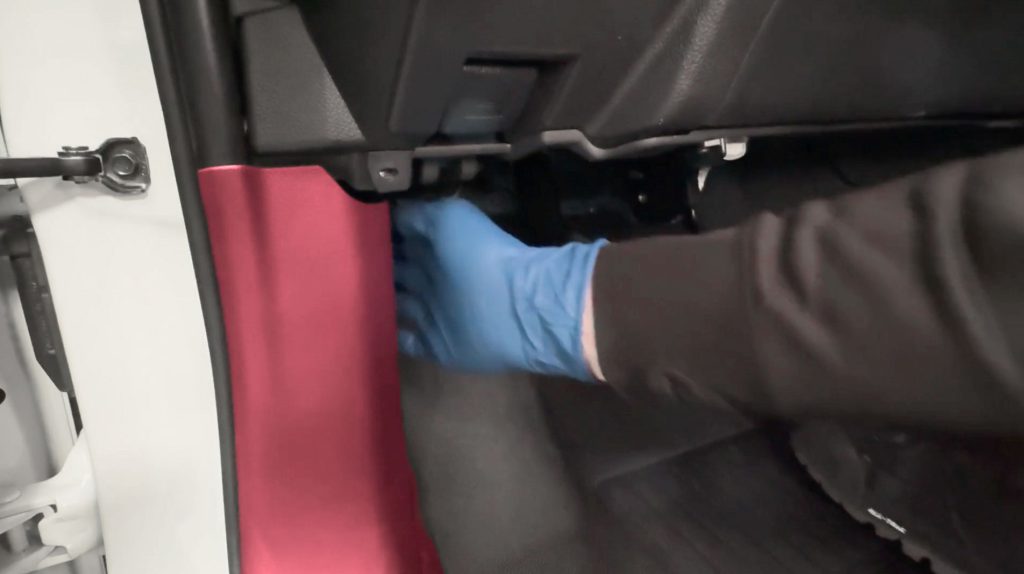
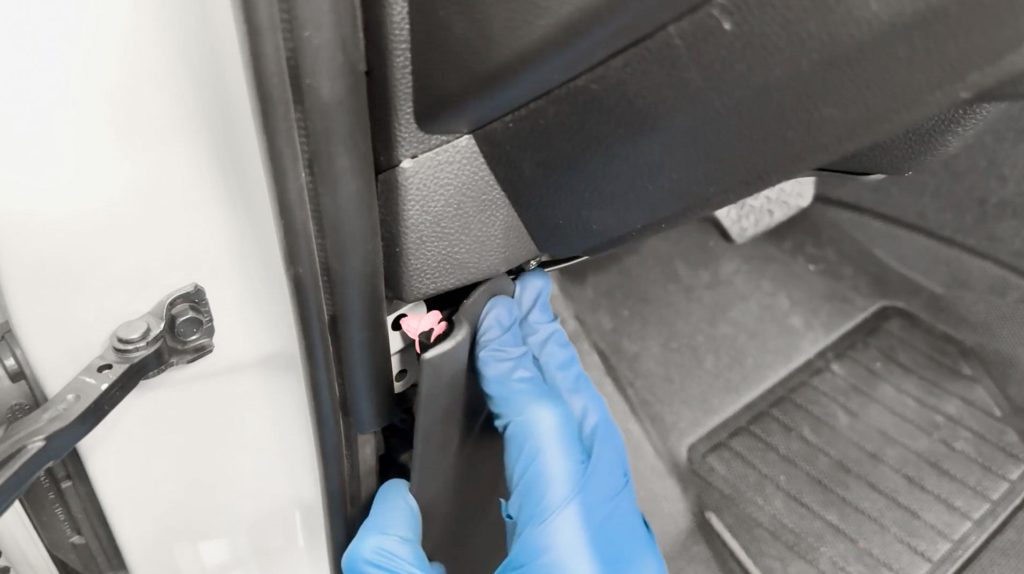
9. With both the screw and nut removed, firmly pull the kick panel towards the rear of the truck to pop it free.
It is being held in by this plastic clip, just pull the cover loose for now to provide access to run your OBD-II cable later.
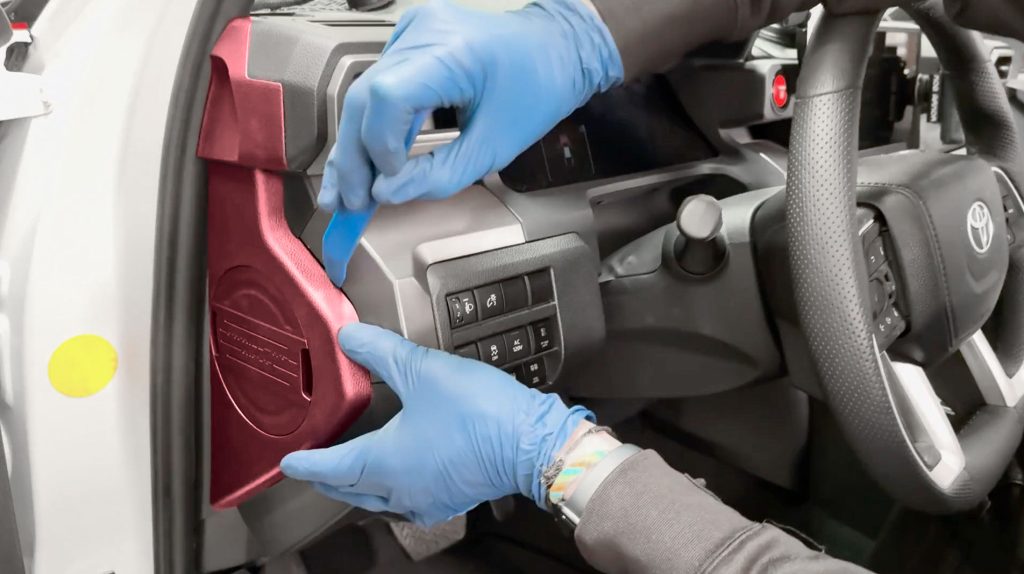
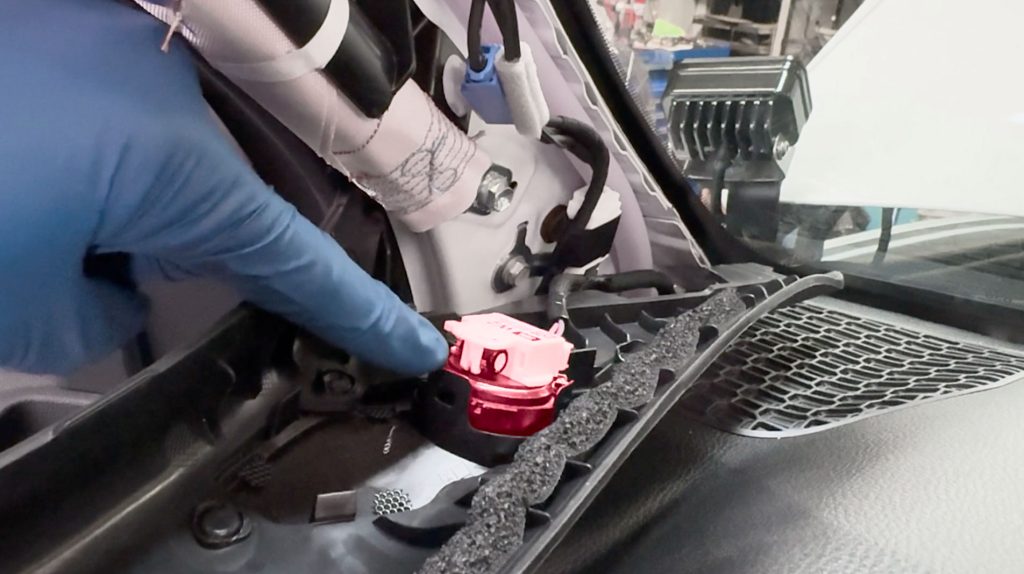
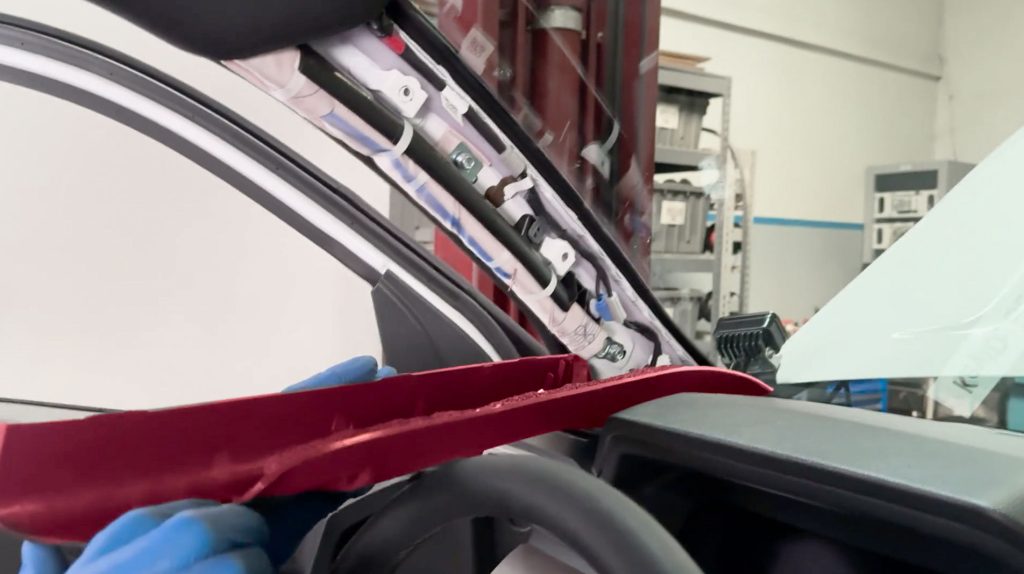
10. With a plastic pry tool, pop the entire left side dashboard cover free.

Cable Access Hole Prep & Drilling
11. Bring the pillar to a workbench with a non-slip surface.
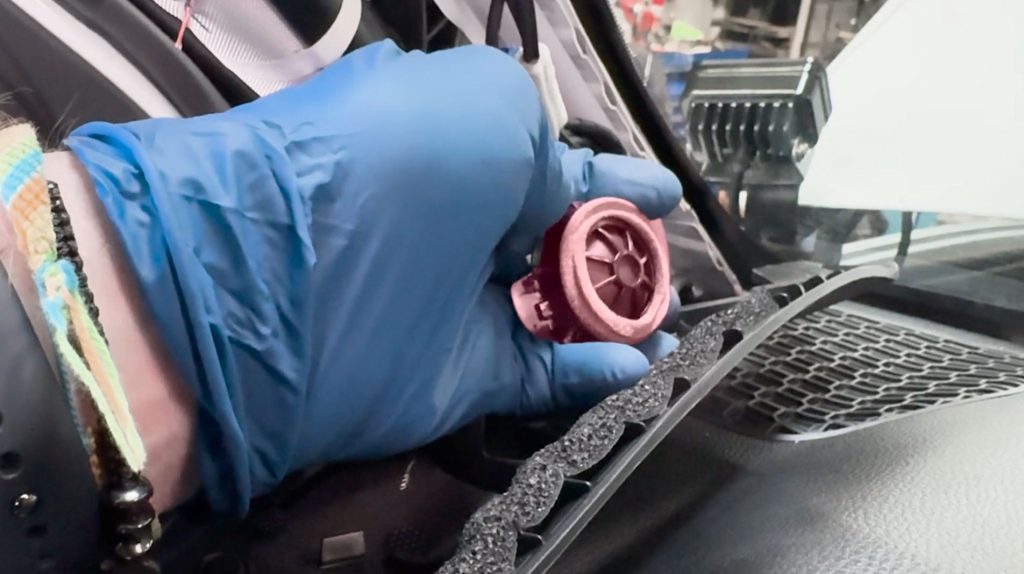
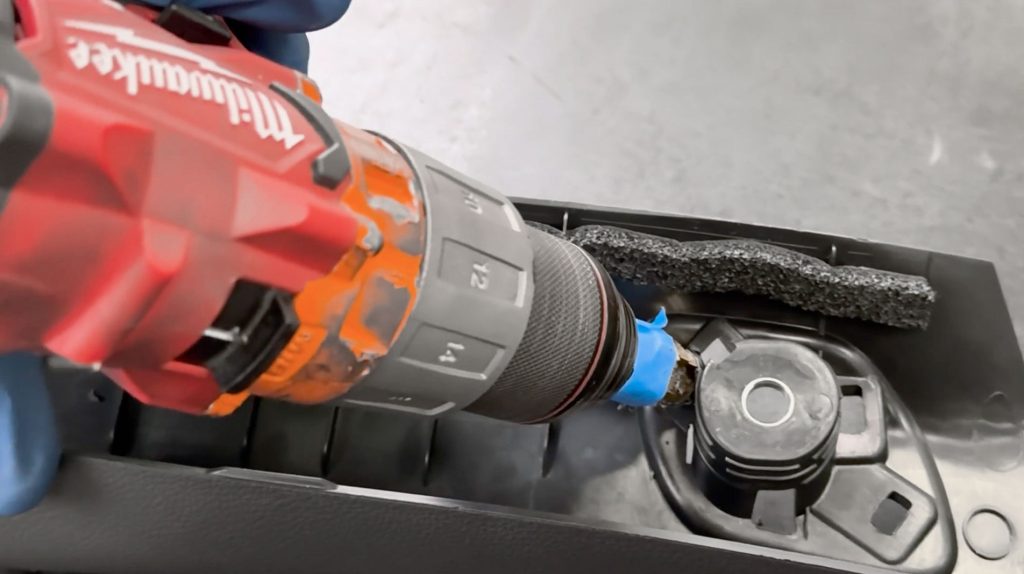
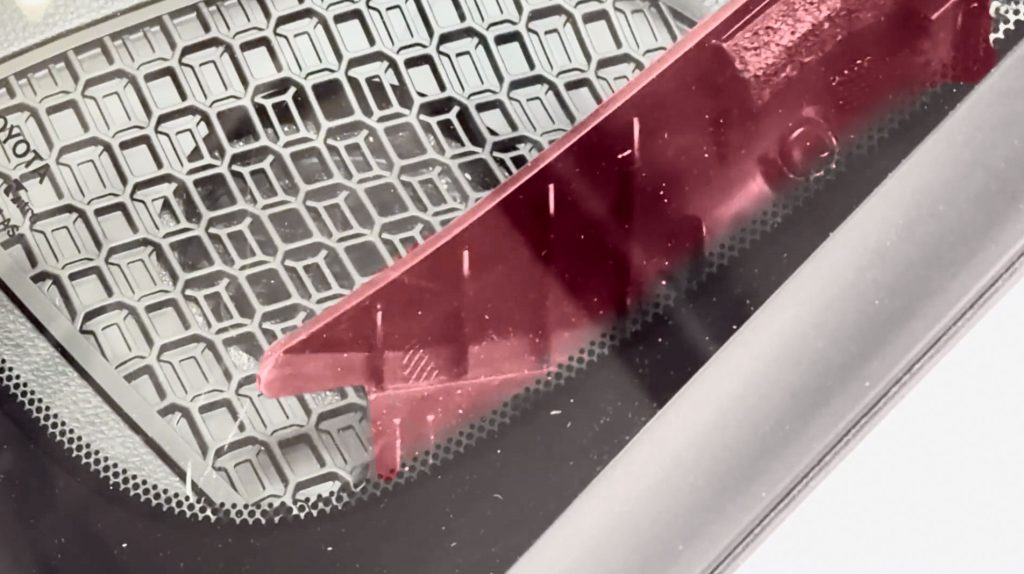
12. Test fit your Stealth Pod to see where you should drill your cable access hole.
For a 2024+ Tacoma, you will be drilling right where these 3 lines touch.
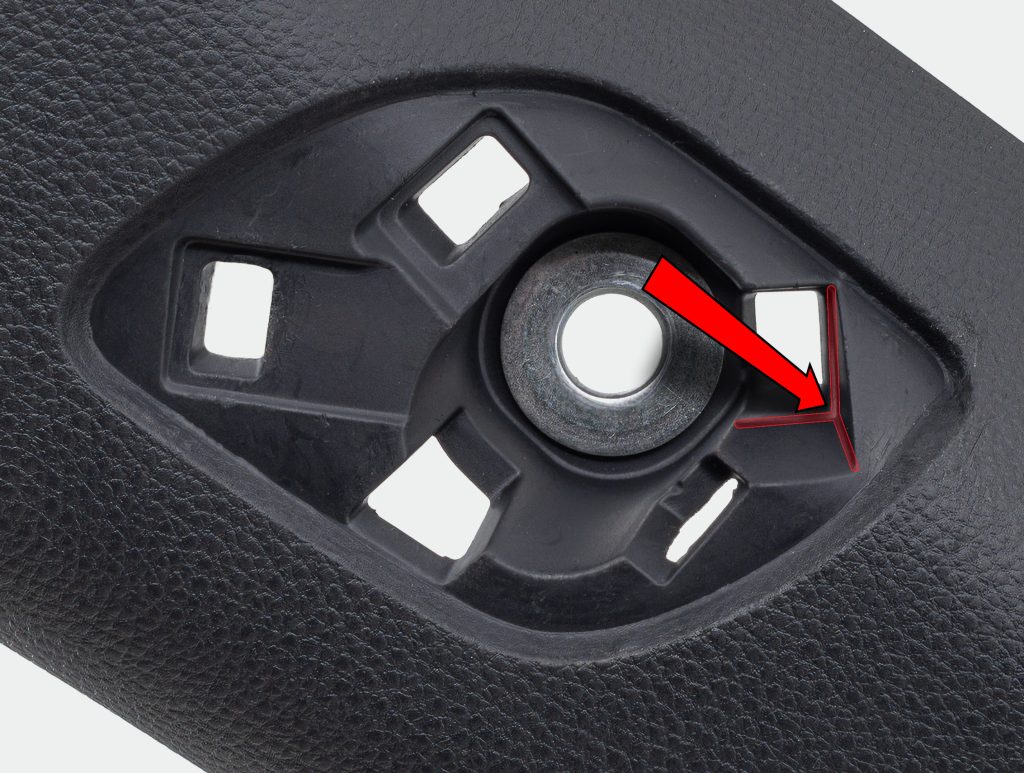
Set your drill in the pocket so it does not walk.
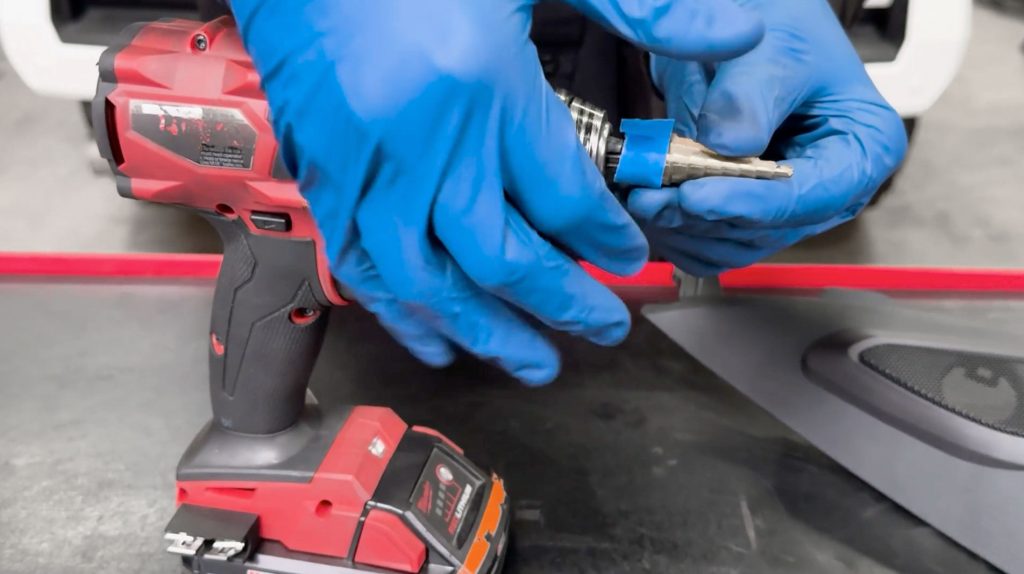
13. Place the bit in your drill and wrap a piece of painter’s tape around it so you don’t plunge deeper than the 18mm mark.
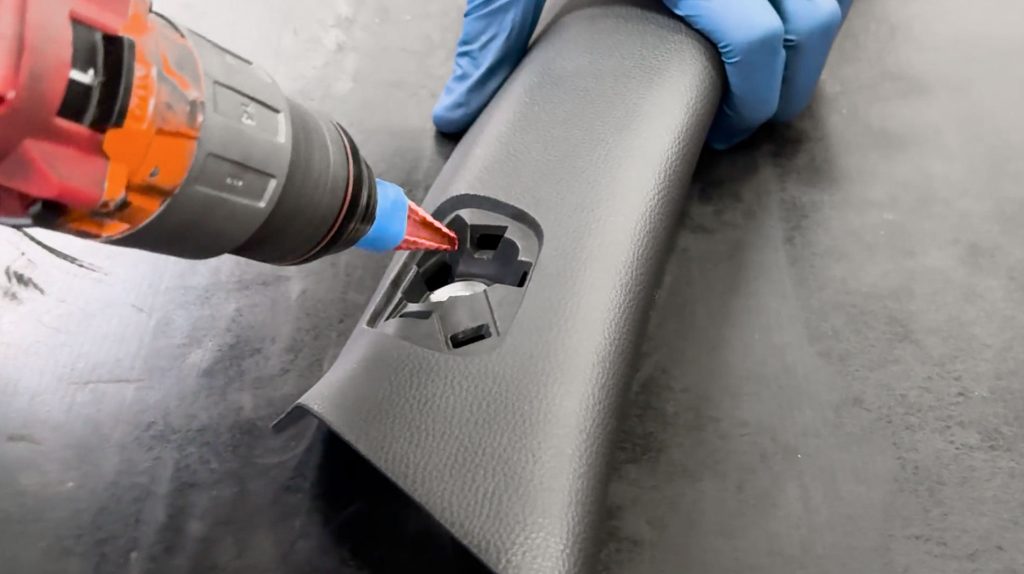
14. Start drilling in the pocket where those 3 lines meet. Keep the drill from walking towards the outside edge of where the stealth pod would not cover it.
You will need to drill to the 16mm step for a single iDash cable, or to 18mm if you have a PedalMonster.
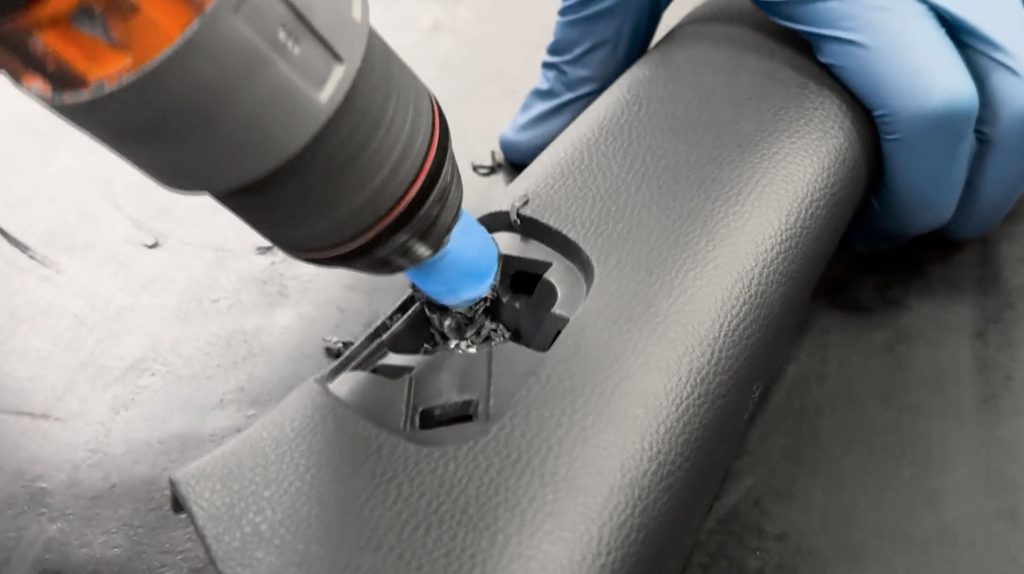
Drilling again from behind can help clear the cut plastic from the pillar.
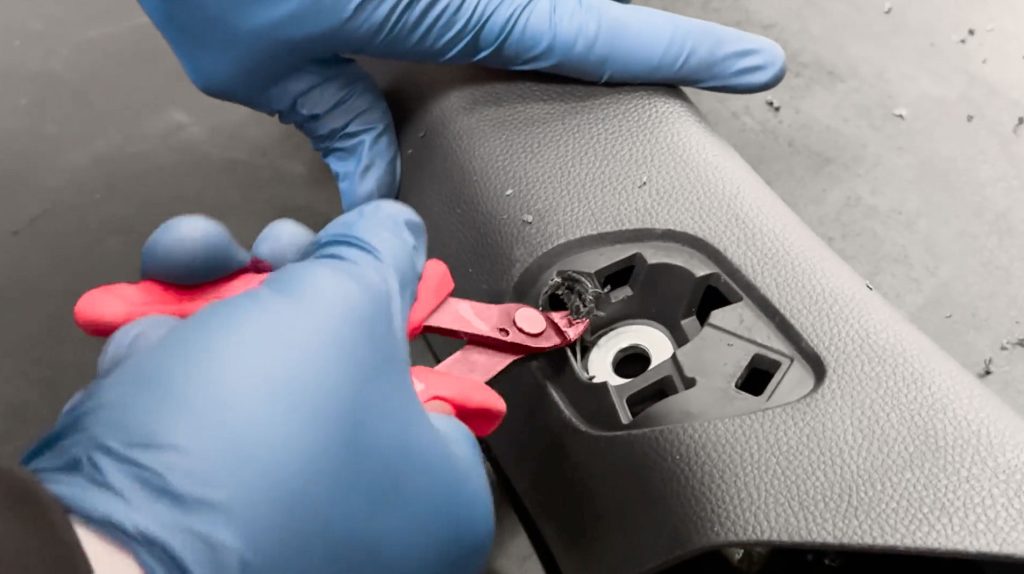
A pair of flush cutters can be used to clean up any excess.
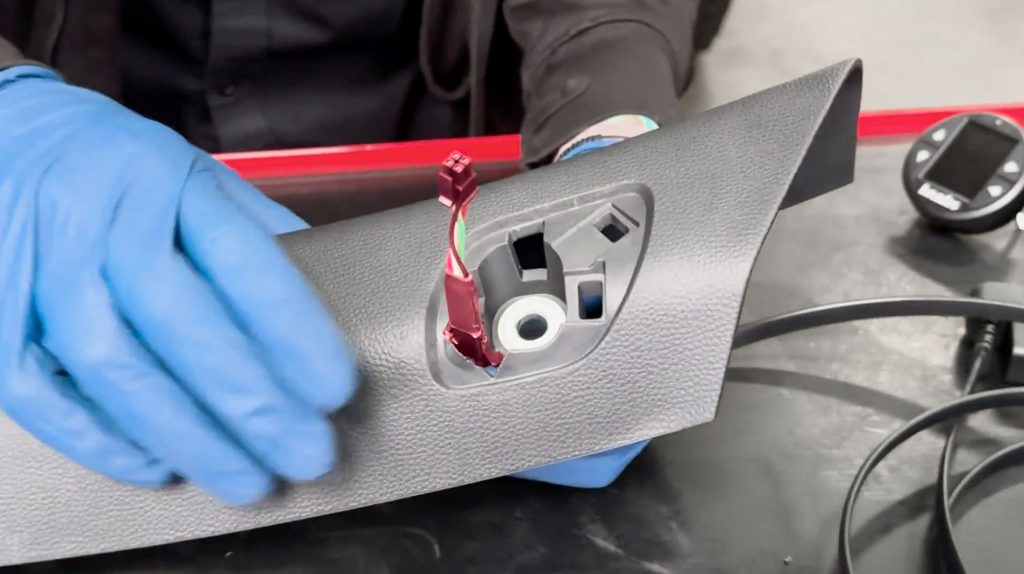
Check that your cable(s) pass through the hole before returning to the truck.
Stealth Pod Installation

15. Back at the truck, floss your OBD-II cable through the gap in the lower kick panel and up through the side of the dashboard.
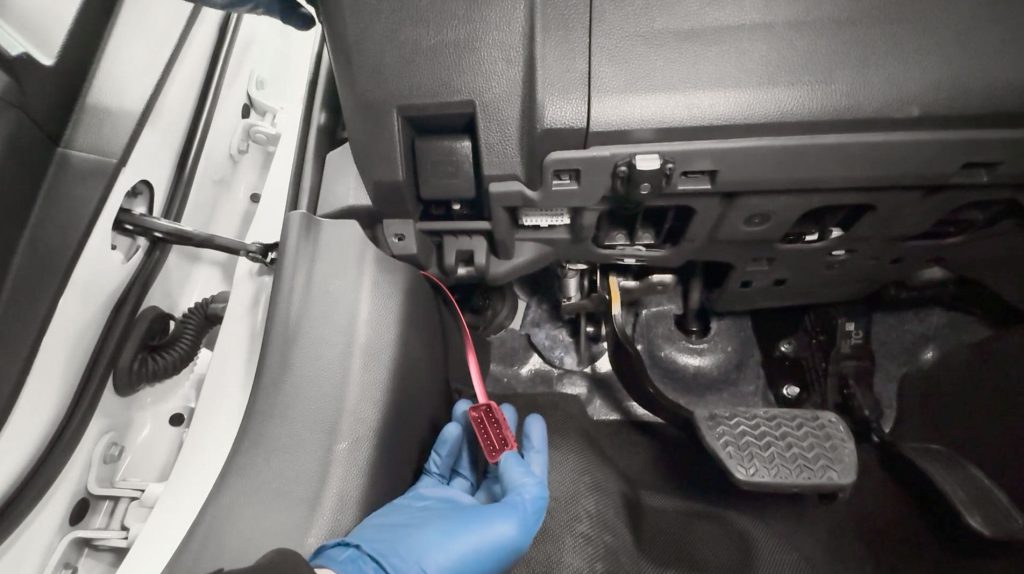
The goal is to leave just enough of the plug and wire to reach the OBD-II port while hiding the rest behind the kick panel.
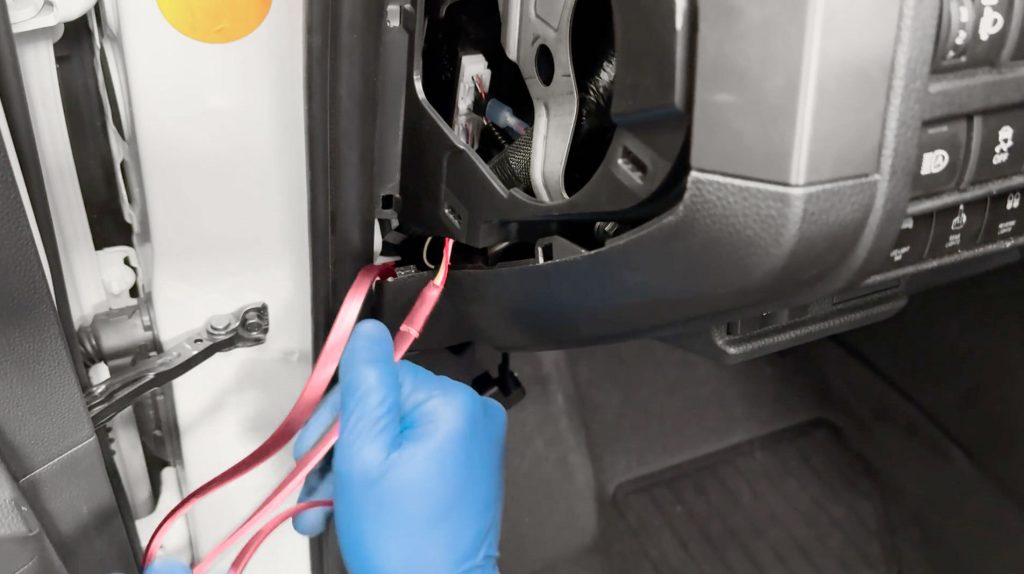
16. Fish the other end of the OBD-II cable up the side and drape the cable(s) over your dashboard for now.
17. If you have a tweeter speaker, re install it now.

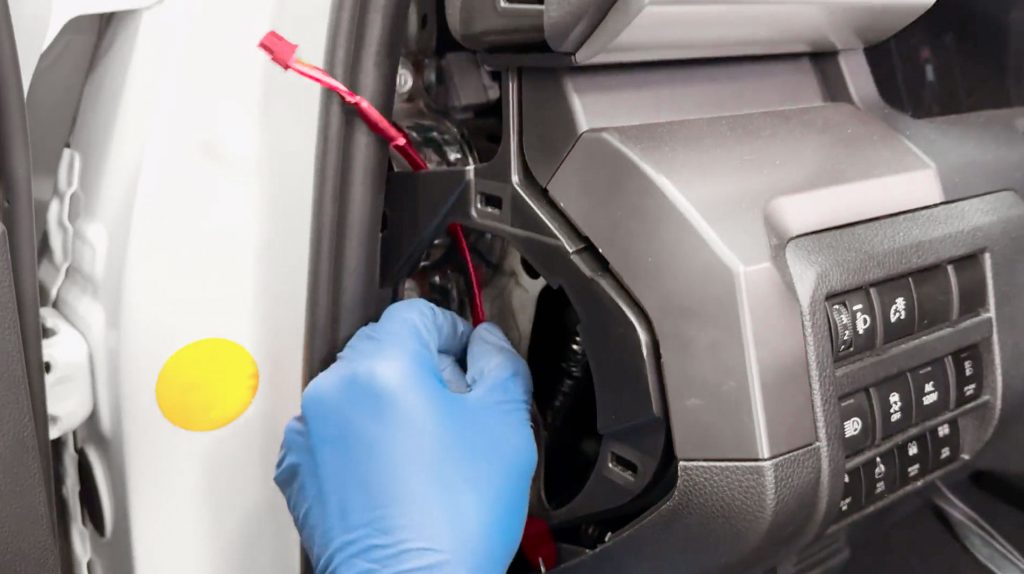
18. Run your cable through the cable access hole you drilled earlier.

19. Take care not to pinch or catch the OBD-II wire as you position your A-Pillar back into place.
The far end of the A-Pillar as a tab that helps guide and center the pillar to the dashboard. Be sure this tab slides into place or the pillar won’t fit.

The pillar should snap flush back into the truck.
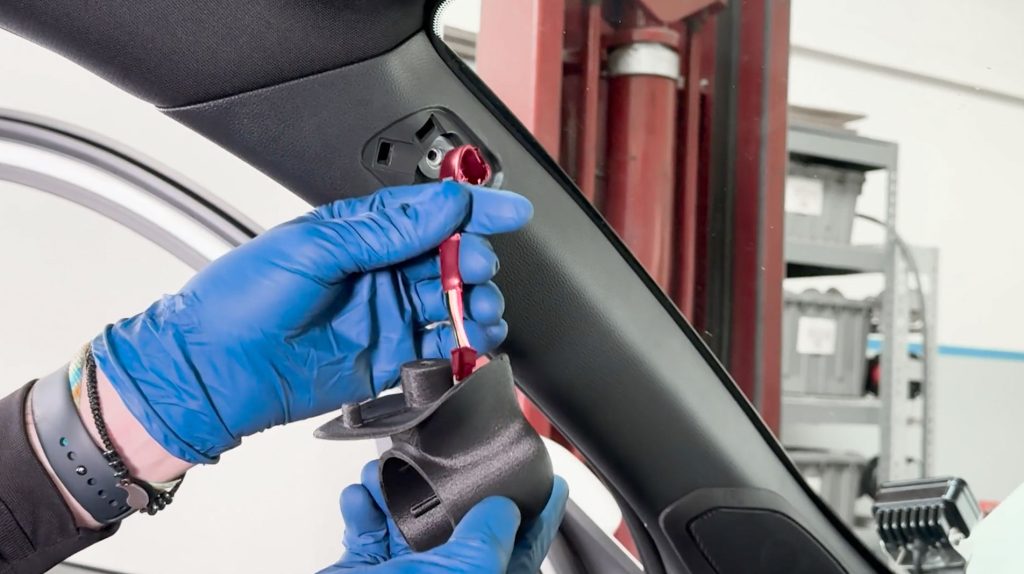
20. Run your cable(s) through your Stealth Pod, and attach it with the supplied bolt and Hex Key.
Tighten to 8-10 in-lbs. Due to the design of this Stealth Pod, over-tightening the bolt can cause a failure in the plastic.
Please hand-tighten until the pod is snug against the factory pillar. Do not tighten beyond this point.
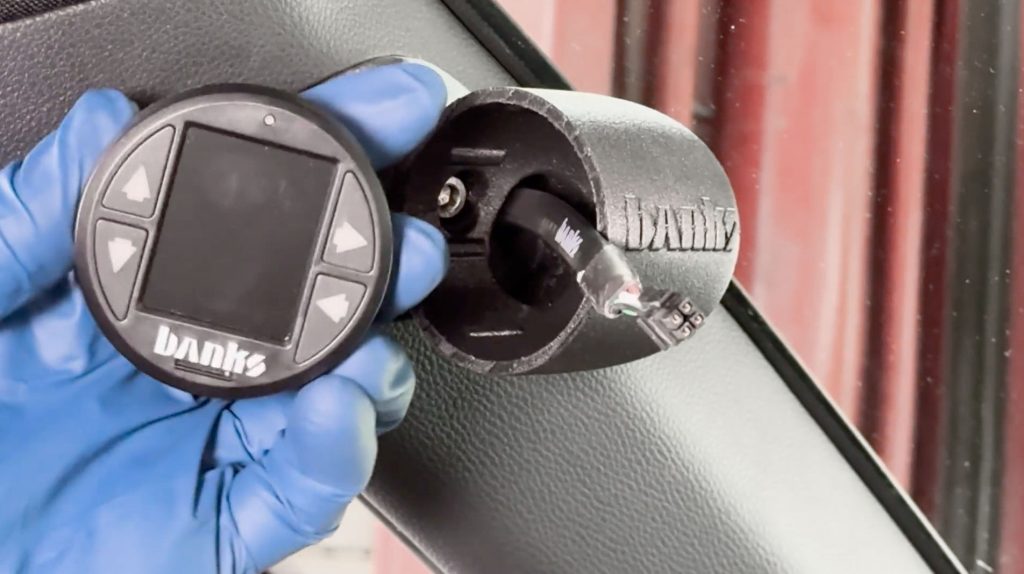
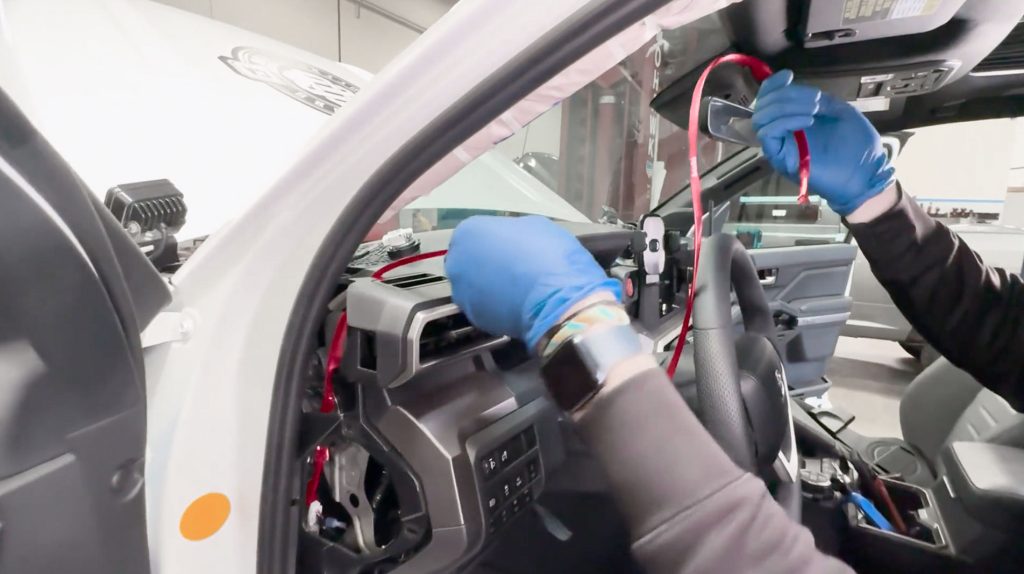
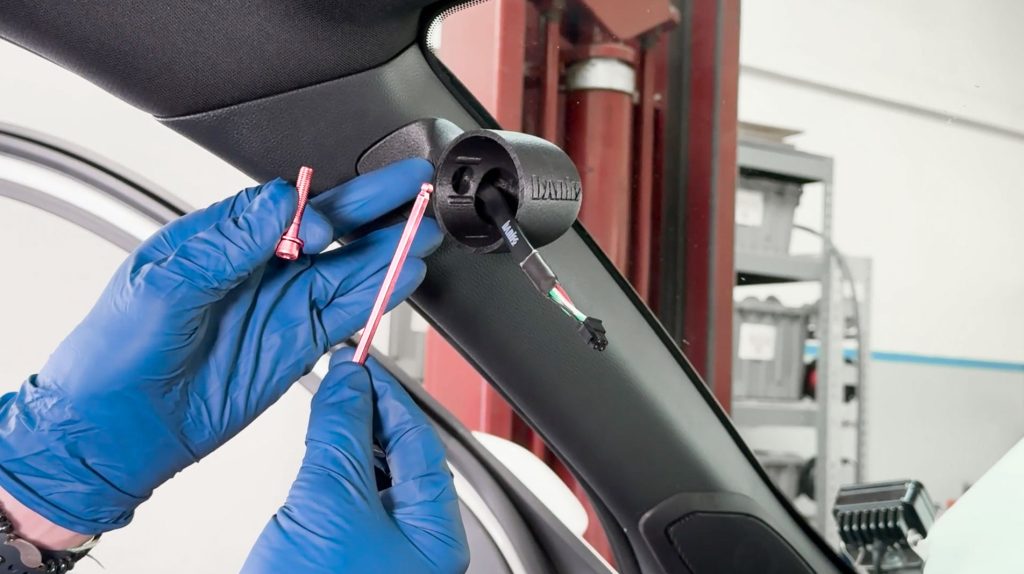
21. Now grab your iDash.
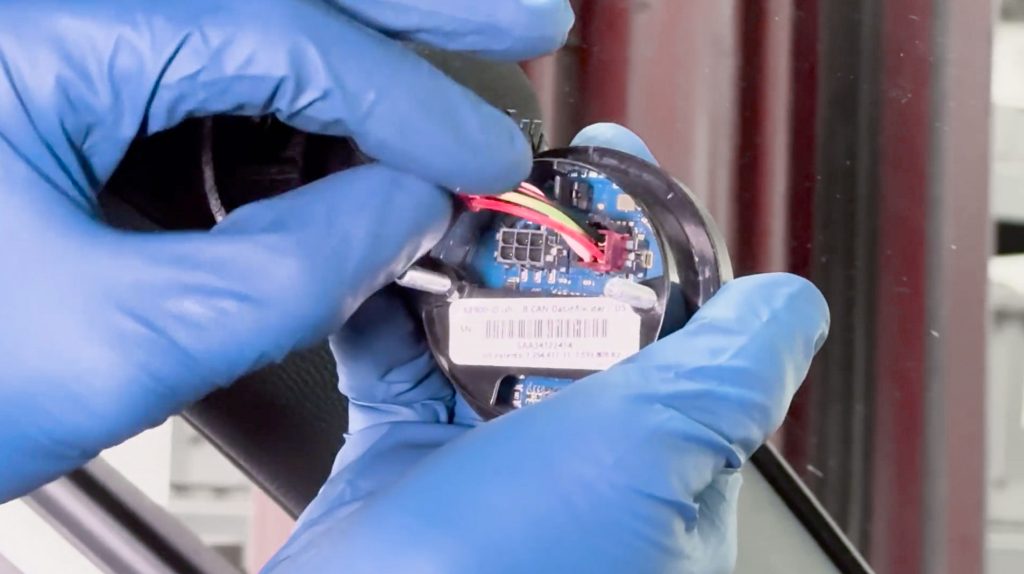
Connect your 4-Pin OBD-II connection. And if you have a PedalMonster, your 6 Pin as well.
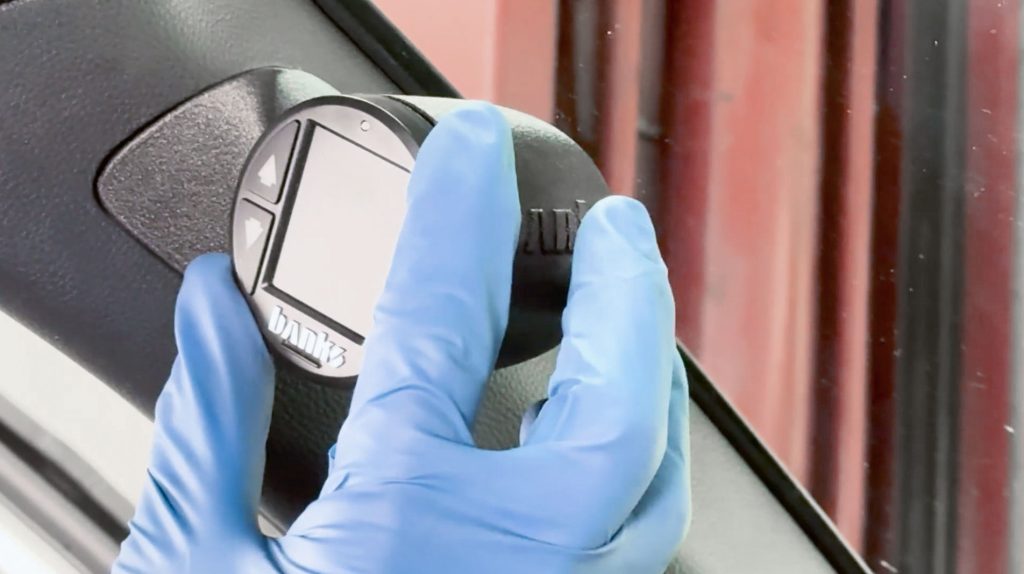
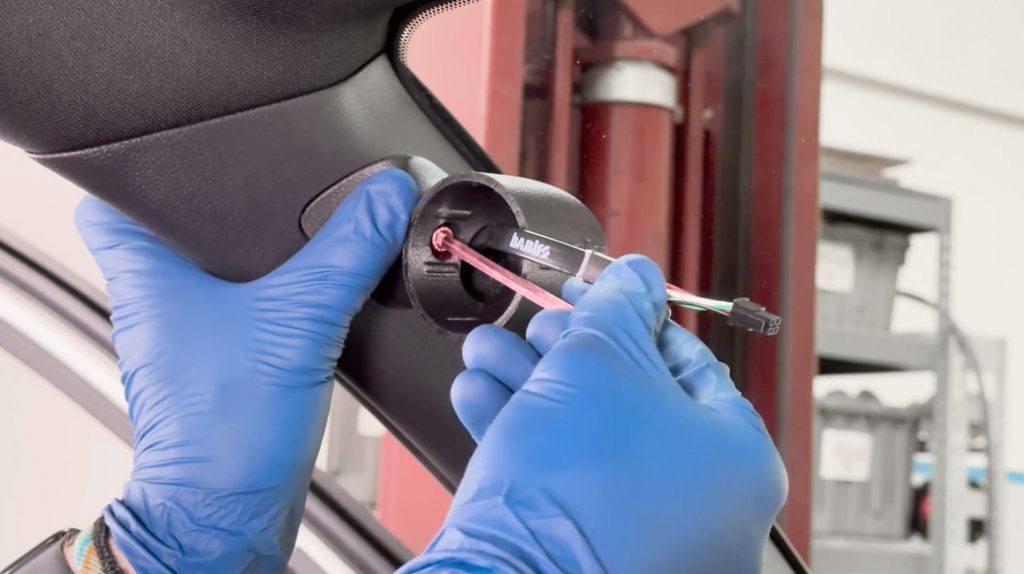
22. Slide the iDash into place.

Pull the excess wiring back through the A-Pillar, leave just enough free so you can pull the iDash out if needed.

Then check the iDash is level
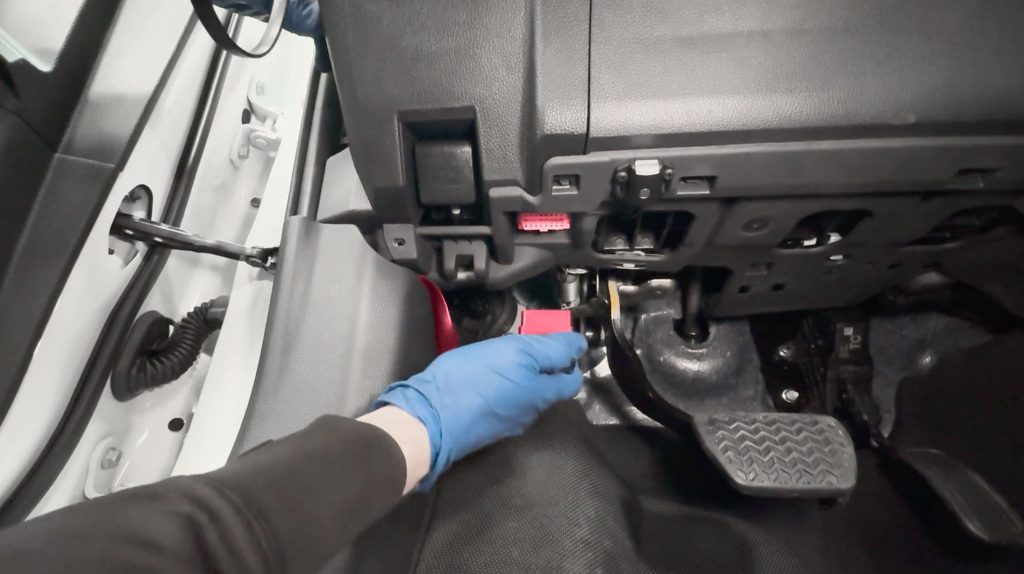
23. Plug in the OBD-II cable under the dash, pulling any extra wires back into the access panel on the side.
24. With the included zip ties, tidy up the excess wires and secure them together so they won’t rattle around when driving.
25. With the wires secured, snap the access panel closed.
26. Secure the single Philips screw you removed, taking care to route the OBD-II Cable cleanly through the gap.
27. Snap the lower kick panel back in making sure the plastic tab lines back up.
Re-attach the lower finger nut that holds the kick panel in place.

28. Re connect your batteries.
Check that your iDash powers up once the vehicle is started, and enjoy your new iDash Stealth Pod.