Truckin’ follows the step-by-step installation of a Banks Stinger system on an ’03 Chevrolet 6.6L Duramax
When looking for increased power, look no further than Gale Banks Engineering, one of the industry’s leaders and innovators. Banks opened his shop in 1958, specializing in race engines, and then in 1960, he expanded into the marine performance world. Since those early days, Banks has established himself as an icon, both in the shop and on the track, capturing many land speed records. Known as the master of turbochargers, Banks’ technology has contributed to the progression of power enhancement products for the past four decades.
To produce more horsepower from a diesel engine, it’s all about volumes of compressed air. More compressed air means more fuel, which creates a greater explosion in the combustion chamber and cylinder. Installing a Banks Power Stinger System on an ’00-’04 Chevrolet Duramax 6.6L will increase the airflow to balance the fuel flow. Increasing airflow and fuel flow creates more torque and horsepower.
The talented team, headed up by owner Mario Romero, at Top Line Performance in Huntington Beach, California, has been installing suspension and engine performance products and fabricating custom components for its customers for the past eight years. Mario and his talented team installed a Banks Power Stinger System on an ’03 Chevrolet 6.6L Duramax turbodiesel pickup. With a fist full of film and the camera already loaded, we followed along as the Banks Stinger System was being installed.
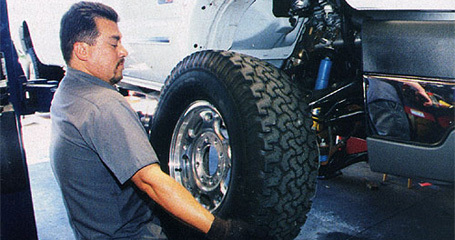
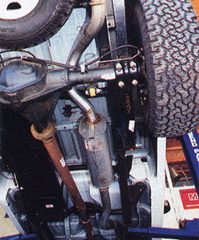
1. To gain access to the turbo side of the 6.6L Duramax engine, Mario removed the passenger-side front wheel and tire.
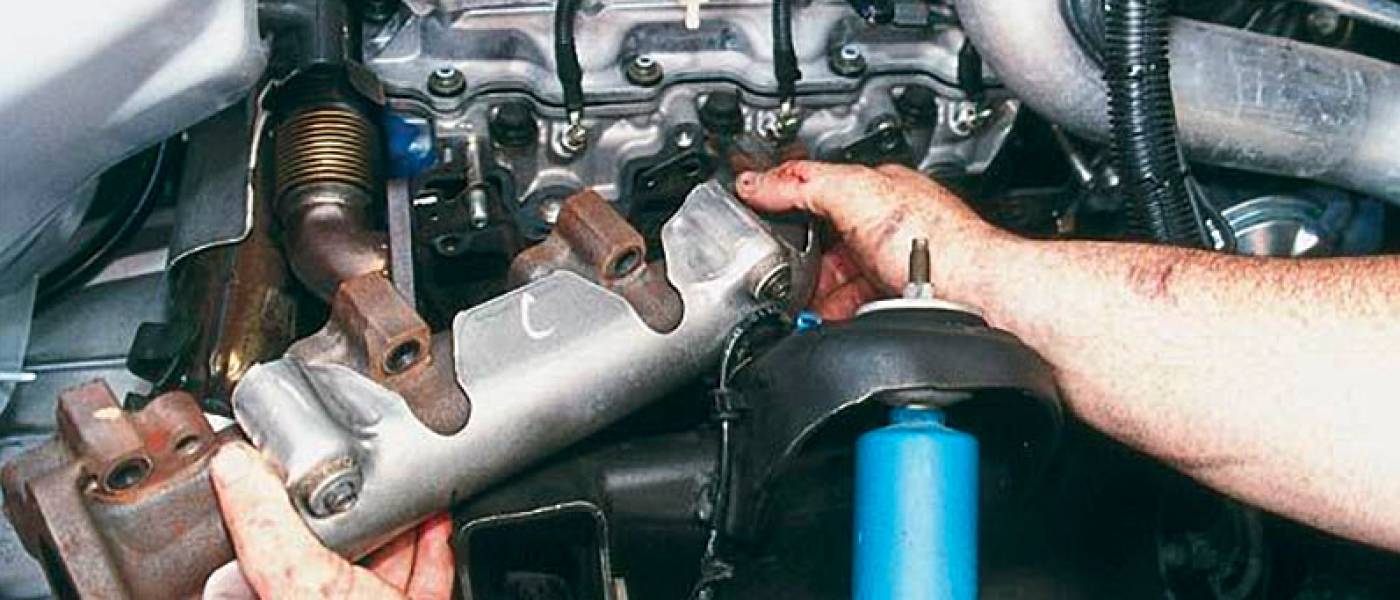
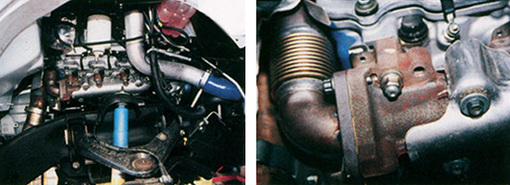
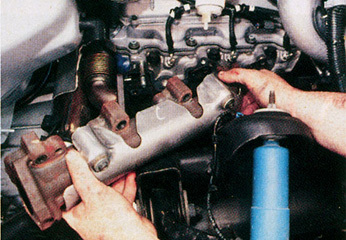
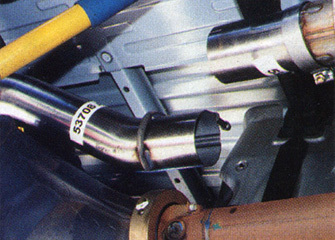
2 & 3. By exposing the turbo side of the engine, we saw the factory exhaust manifold and turbine inlet pipe.
4. The turbine inlet exhaust pipe flange hardware was removed.
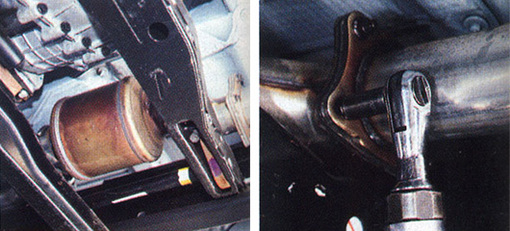
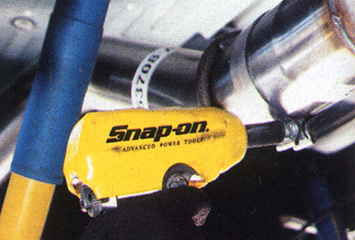
5. Then, the 12mm exhaust manifold bolts were removed using an air ratchet, which allowed the exhaust manifold to be removed.
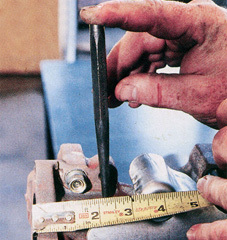
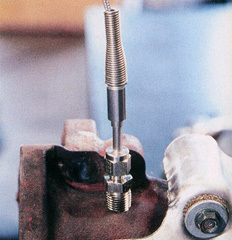
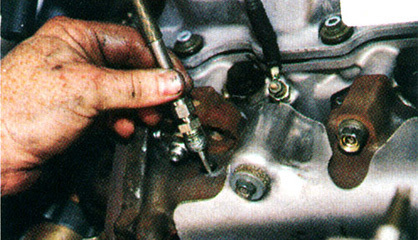
6. With the engine exhaust manifold removed, a tape measure was used to measure 2-1/4 inches from the edge of the exhaust manifold flange. A center punch was used to locate the center of the thermocouple sensor hole.
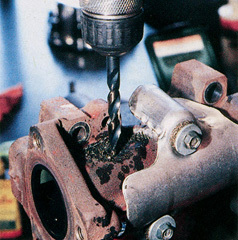
7. A 7/16-inch drill was used to drill the hole in the exhaust manifold.
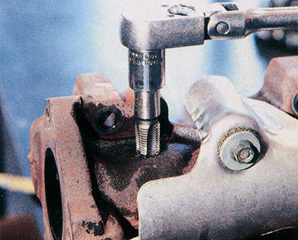
8. The hole was tapped using a ¼-inch NPT pipe tap.
9. The thermocouple probe was test-fitted to make sure the threads were not defective.
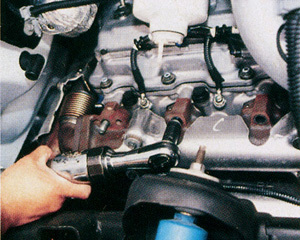
10. The exhaust manifold was reinstalled onto the engine cylinder head.
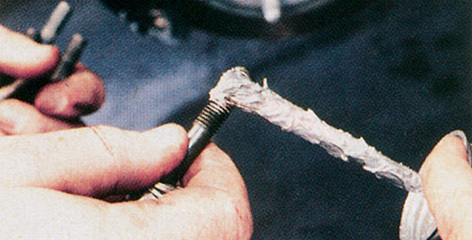
11. Prior to reinstalling the exhaust manifold bolts, they were given a good coat of antiseize. After that, they were torqued in sequence to 28 lb-ft.
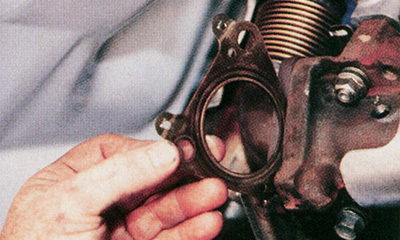
12. The gasket was inspected and showed no signs of wear, so it was carefully slipped between the exhaust manifold flange and turbine inlet exhaust.
13. Prior to installing the thermocouple probe, a healthy amount of antiseize was coated onto the threads to ensure the thermocouple probe could be easily removed later. Hot and cold cycling can make metallic materials fuse together.
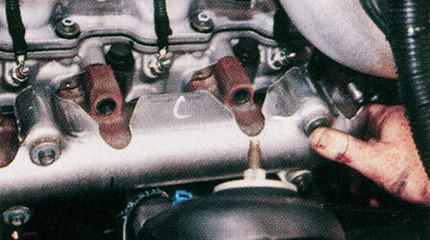
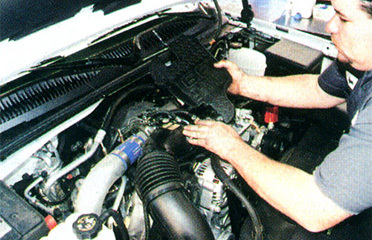
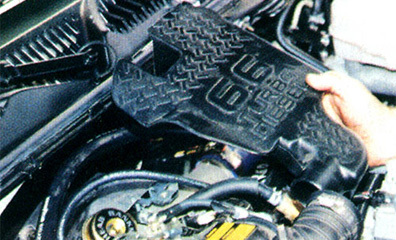
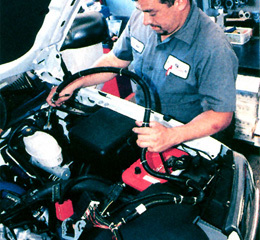
14. Moving to the top side of the Duramax 6.6L turbodiesel, the engine cover was removed to gain access to the turbo and wastegate.
15. Three bolts were removed to extract the turbine heat shield.
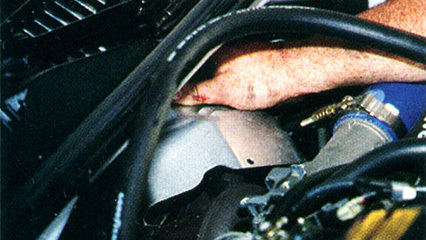
16. After removing the E-clip from the pin through the wastegate arm, the top turbocharger coolant inlet hose was removed using a #55 Torx wrench. The actuator air hose at the compressor outlet was then removed. Air was blown into the inlet air hose to relieve tension on the actuator pin. The wastegate arm was then removed. Using a 12mm socket, the two actuators were removed. The factory actuator (wastegate) was then removed.
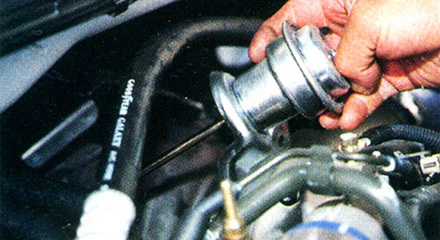
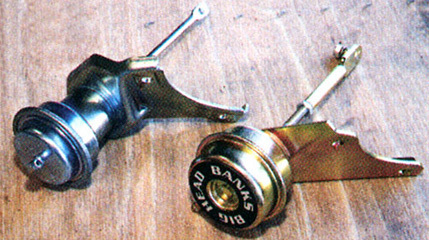
17. Here is a simple comparison of the factory wastegate and the Banks Power Big Head, which has twice the diaphragm area of a stock wastegate. We used twice the spring pressure to keep the valve seated longer, which in turn raised the boost produced. All of this improved the acceleration and towing power.
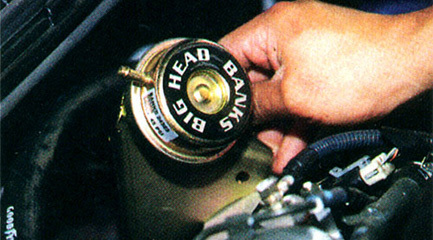
18. Since it bolted right up to the factory holes, the Banks Power Big Head Actuator was a simple swap. The E-clip was reinstalled to secure the rod endlink to the wastegate arm. The Big Head actuator required no linkage replacement nor adjustment.
19. The factory actuator air hose at the compressor outlet was reinstalled. Then, the factory engine cover was replaced.
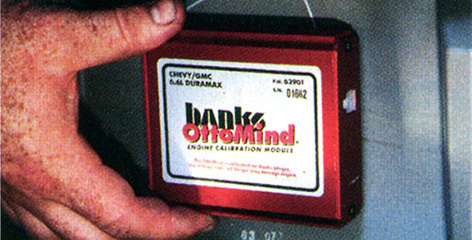
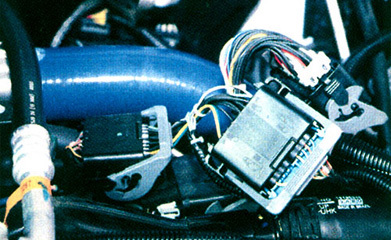
20. The Banks Power OttoMind Diesel Tuner module was located out of sight by installing it on the inside of the underdash panel. The module calibrated the engine’s electronic pulse width, timing, and fuel pressure. It maximized the engine’s performance and mileage while securing its durability.
21. AutoRate is a powertrain calculation system that automatically adjusts the Duramax power output, while still maintaining safe parameters, protecting the torque converter clutch lockup, which affects the transmission slip sensor, and exhaust gas temperature range to keep the engine’s turbo in safe limits. It also protects the engine during warm-up. The OttoMind Tuner self-monitors and diagnoses itself, ensuring proper operation that provides an automatic bypass.
22. After searching around the engine compartment, the 3-inch rubber grommet was found located on the driver-side high on the firewall. An X incision was made in the grommet to allow the OttoMind wire harness to be slipped through the grommet on the firewall and into the cab.
23. The OttoMind wire harness was simply matched up to the factory wire loom male 24-pin and male 38-pin connectors, then mated to the factory connectors.
24. As simple as machining and snapping, the Banks Power OttoMind wire harness was correctly connected into the factory wire loom.
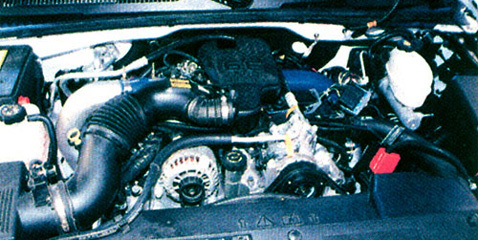
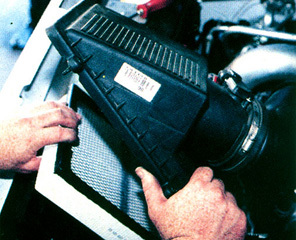
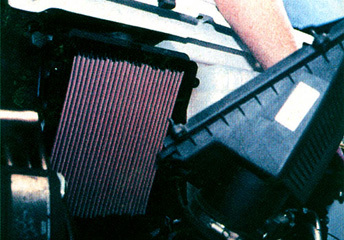
25. The factory air filter was removed from the air filter box and replaced with a new Banks Ram-Air Filter.
26. Its multilayer design traps moisture, dust, and debris without restriction of airflow, allowing more cool, dense air to be rammed into the engine.
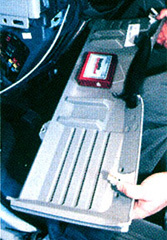
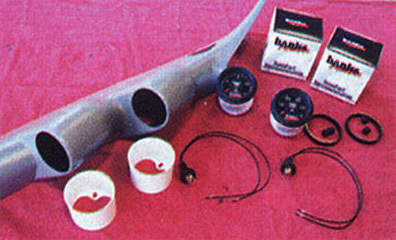
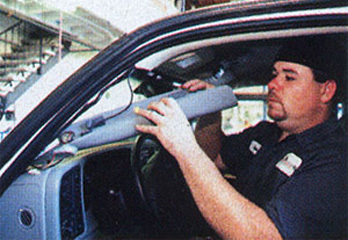
27. A Banks Power two-gauge Pillar Mount Instrument Pod Console with Banks DynaFact Turbo Boost and Exhaust Temperature gauges will continuously monitor the Duramax vital signs.
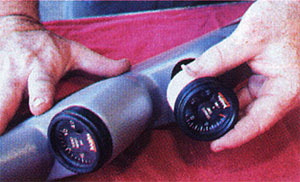
28. The Banks Power DynaFact gauges were installed into the A-pillar pod mounts.
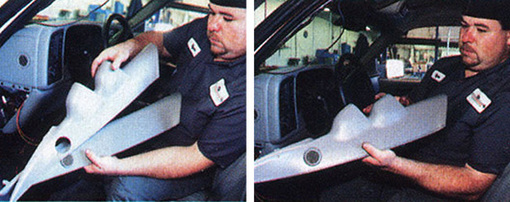
29. The factory A-pillar molding was unsnapped and removed.
30 & 31. The Banks Power A-pillar instrument pod console molding cover simply slipped over the factory molding.
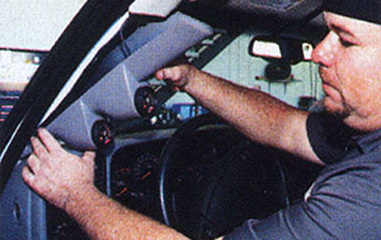
32. Just as simple as how the factory A-pillar molding came off, the Banks A-pillar mount instrument console snapped back in place.
33. The Banks Power Stinger exhaust system completed the increased airflow to balance the fuel flow, which produces the maximum torque and horsepower from the Duramax 6.6L diesel.
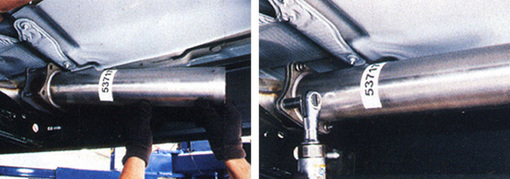
34. The smaller diameter factory exhaust system restricted the velocity of the exhaust flow, affecting the engine’s torque and horsepower.
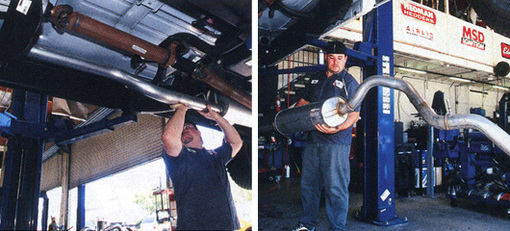
35 & 36. The factory exhaust system was unbolted at the mounting flange just behind the catalytic converter.
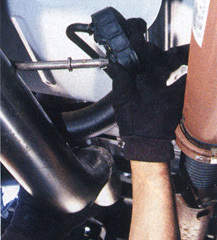
37 & 38. After disconnecting the exhaust rubber hangers, the entire exhaust system from the cat-back was removed and discarded.
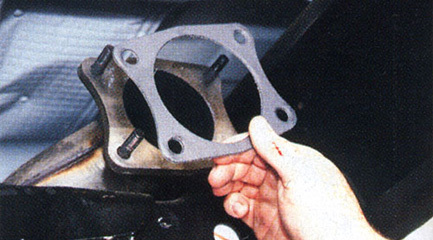
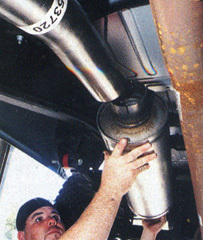
39. A new gasket was installed onto the factory catalytic converter flange to prevent any exhaust leaks. The Banks Power Stinger 4-inch Monster exhaust was broken down into four pieces for shipping purposes. It was bolted to the factory catalytic flange and assembled toward the rear axle.
40 & 41. The first Banks Power Stinger Monster exhaust piece was aligned and bolted up.
42. The factory rubber hangers were reused to support and suspend the new exhaust pipe system.
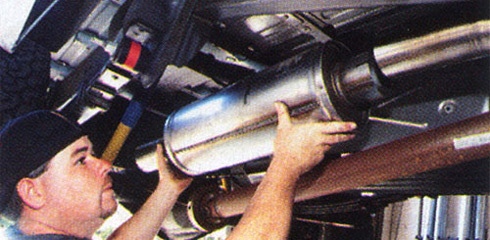
43. Next, the new Banks Power polished stainless steel Monster muffler replaced the restrictive factory muffler.
44. The muffler intake end and exhaust end slipped over the entering and exiting exhaust pipes, and featured a straight-through 4-inch flow path with a Banks-designed expansion chamber that used spun ceramic and very-high temperature packing, which dissipates the wide-range drone that is so noticeable in other systems.
45. The final section was a one-piece section that snugly bent up and around the rear axlehousing.
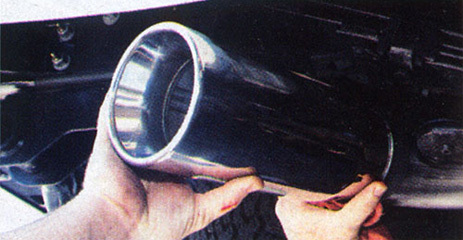
46. Capping off the end of the Banks Power Stinger system was a polished stainless 5-inch double-wall tailpipe tip with a rolled edge for styling.
47. After all of the Stinger exhaust system was installed, fine tuned, and straightened, all the fastener clamps were tightened.
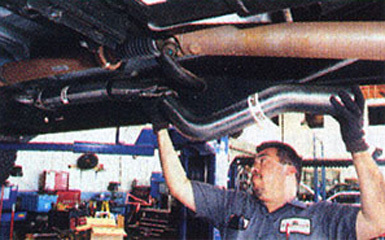
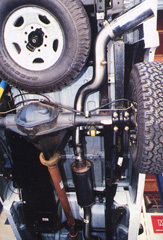
48. Here is a worms-eye view of the entire Banks Power Stinger exhaust system from the cat, back to the flange, to the tailpipe, and to the tip.