



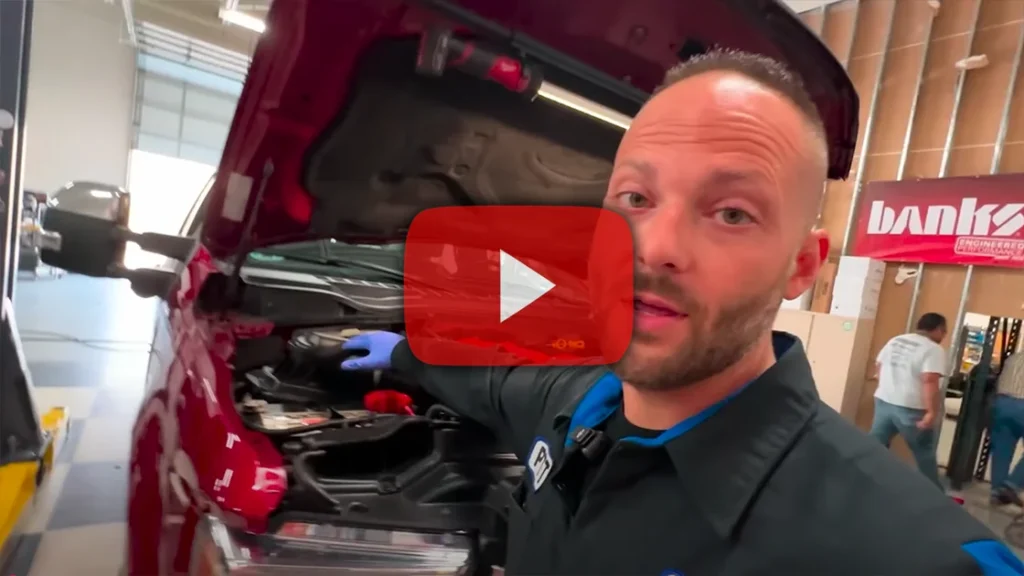

0:00 what is going on everybody Welcome Back gosh that red looks phenomenal but
0:07 there’s one more piece to the puzzle for this 2019
0:13 F350 we are putting in the last piece of the puzzle stay tuned and watch us put
0:19 this Banks ramir brand new filter kit and setup on this truck all right let’s
0:58 all right everybody thanks so much for coming back and checking us out make sure to hit that like And subscribe right here at the bottom you guys have
1:05 seen us install some Bank stuff before more so on the 2020 truck 2020 trucks
1:12 but I have not been able to put one yet on uh the 17 18s or 19s and that is what
1:19 we are going to do today I have some tulos set up um I actually did not
1:25 tighten this in anticipation for removing this off the truck after doing
1:30 The Pusher and the DCR and a whole bunch of other stuff we have some seven
1:36 Millies take them 7 milles off and we’re going to kind of put that to the side
1:42 cuz it’s no longer going to be reused um uh Banks has some instructions on their website they’re really nice and uh we’re
1:50 going to kind of go back and forth between those accompanied by this video and we’ll go step by step and how to
1:59 install this particular one because 17 181 19
2:04 they did a little Switcheroo with the battery the battery was here then it was here and then it was here and then it
2:10 was well now they switched it back and 2019 was like this 2020 the battery went
2:19 right here and the air filter went back over here so um this is going to stay
2:24 here but we have to mess with with the battery tray because the bottom part part of this box isn’t going to go to
2:31 the bottom part of the battery tray because we have a new box so we got to take that off no big deal but after putting these batteries in we did have
2:38 to set fores scan to tell these that tell the truck that we have agms but I
2:43 want you guys to disconnect that negative there and the neg over here because we are going to be pretty much
2:50 removing this battery up and out of the truck air filter time we have four tabs
2:57 one two three and then one over here but
3:02 when you take it off check this out right keep turning right here see this
3:09 red tab red tab button and pull off and then you can
3:17 unravel your connector but set this aside cuz we are going to need that to
3:24 put in the new air filter box okay 10 mil 10 mil we’re going to be taking not
3:31 that all the way off just enough so that we can wiggle it off we’re going to do that for both the negative and the
3:39 pository okay and let’s go take the negative off the driver side right here
3:46 we’ll leave the positive but we’ve separated the batteries from chassis ground now so now you don’t have to
3:51 worry about clicking anything together all right let’s take the battery hold Downs off again these are some t Millis
4:00 we’re going to hold on to them come on 10 Millis all
4:06 right hold down holding and then the battery these are
4:12 some heavy guys what do you guys use to take batteries out do you have like a a battery holder grabby thing thing
4:20 thingy and kind of hold the cables like that get my freaking finger at least get
4:28 half of it oh my gosh these things theyy all right battery
4:36 out oh no we got the engine starting up again all right all right all right all
4:43 right now this may look a little confusing for some but don’t uh don’t
4:50 fret definitely time for air filter holy the
4:58 Jesus okay okay what do we do what do we do what do we what do we what what do we do we need some 8 Millies we got 8 Milli
5:04 right here sometimes I like to use the wobbles the wobbles are coming at you we
5:11 got two eights right down here they’re uh
5:17 long longer bolts that we’ve seen yet so we’re not going to reuse
5:26 those time for the L trim tools we have a clip right here right on the
5:34 side of the batter tree bot check this one out we have a connector right
5:40 here boom bada bang uh what else do we have is that all
5:46 that’s holding it down I believe so all
5:53 right kind of get this out the way you know I’m going to do one step and Banks
5:58 doesn’t say you you have to do this but I’m going to take this out just for
6:04 visual sake and ease of showing you guys how to do this I take this 8 Millie out
6:12 this is the ground for the passenger side that bot
6:20 Trey there we go we will have to reuse that all right
6:27 so look look at that now this is step out of the way not worrying about [Music]
6:37 anything all right so now that pretty much leaves our air filter loose Loosey Goosey our last last
6:48 trimmy clip right here on the back side
6:53 holding the mass airfill sensor harness to it that’s off so now
6:59 I have showed you guys before on the other trucks how to pull these up and out we got to fight the rubber
7:06 grommets get this one right [Music]
7:11 here there we go and be careful not to drop any of your
7:23 debris okay so now we can see the area is completely opened up this is where we’re going to be putting some some
7:30 bolts from the banks box but let’s go ahead and we need to get this battery tray out
7:38 let’s start with taking this off get my too tuck away now once you take this out we have
7:47 two flaps two clips that we’re going to release we have one here and one
7:53 directly over here and that’s going to allow this whole thing to pop out of here look at that that goes down to the
8:00 air box that comes from the air filter and then the battery tray is right here
8:07 so you can see this is going to this is going to change a little bit so now the battery box we have 13 mil and go ahead
8:14 and rip these
8:21 out okay okay any surprises did we forget any
8:27 Clips or any trim clips or are we coming out free as a bir there it is battery box out we are
8:37 going to have to reuse some of these so don’t don’t let these go far fact I’ll just put them right here but this
8:45 is this is the last this is the last part of taking the air filter out now if
8:54 you flip this over now we need to take this off I would suspect fact I don’t know if these
9:00 are 8 m are they well by golly they are
9:05 let’s go ahead and pop these off we’ll come down here to the stool
9:11 and we’ll get these ripped out right here they’re just going into some J
9:19 clips get them out and now this is going to kind of slide
9:28 out there here we go so she was just a little stuck I’m going to push
9:34 this little uh hold down what you call it back all right so now here’s the
9:41 battery tray now let’s come over to the instructions because we have to hold
9:47 this a certain way I believe like this and we have to take out I think this clip all right so when you when you guys
9:54 come over here let’s look at Banks’s instructions
10:00 all right we’re talking about this left clip right here and if you guys notice the hole in the
10:06 Box here here is our hole in the box so we
10:12 we’re verifying we’re holding the same okay we got this tab right here on
10:19 the side we have this tab right here on the side so we’re going to go ahead and
10:25 remove this see if I can do it with my pocket screw driver we’re going to pop this
10:32 little just like that and kind of well you saw what I just did so now I got to
10:38 go pick it up gravity it claimed
10:44 one so the next step now is going to be
10:49 assembly um once we get that
10:56 off okay okay okay okay okay it’s time for new parts boys let’s put this
11:05 down let’s get the new Ram
11:11 Air look at this filter freaking
11:17 [Music] huge here’s the new box look at
11:23 that that looks good huh huh so I believe we’re going to do
11:30 something kind of like uh maybe like this oh
11:39 yeah let see there we go there we go look at that
11:46 these holes line up perfectly right here I can still put
11:51 that bolt in so that should be all right that looks
11:56 good okay I’m not on top of any wires still get by here yep
12:04 yep now they wanted us to put that [Music]
12:11 in and then
12:17 this oh yeah look at that dudes this is nice this is nice all right well let’s
12:23 Loosely install some screws we have where’ they go search and rescue search
12:28 and rescue you 100% successful all right we
12:34 have two bolts two washers going to go ahead and
12:40 fingertight finger start these start one there we
12:48 go look something like
12:54 that get this one started right here we go I like I like it a lot
13:02 all right that looks good now I believe we need to put in another Banks bolt but
13:12 we’re going to need to get our hole Downs for the battery tray there’s
13:19 one and
13:26 two let’s get one over here
13:45 what I failed to mention too now that I’m thinking about this is uh they
13:50 wanted to put some Loctite on these
13:57 bolts I believe let see yeah don’t be a
14:04 Goofus and forget a dabble do banks gives you guys some uh locktite
14:12 and I completely I completely forgot about it don’t hold it against
14:18 me this one got
14:27 it just to dabble
14:33 do put them back in all right those are
14:42 good those are good all right I like it we have one more Banks bolt we’re
14:51 grabbing the 10 mil and I’m going to kind of go like
14:57 this and I’m going to reach my hand hand down here see how this hole is kind of not lined up right here I’m pushing the
15:04 banks box back towards the vehicle with my hand and I have perfect
15:13 alignment if it’s not screwing in by hand then you guys stop and reindex the
15:19 bolt cuz you don’t want to screw that boss up but I think I think we’re going
15:24 to tighten all these down I like it I’m going to start with these ones inside the battery inside the air box
15:31 we got some 10 ms going at it right here we give it some
15:38 assistance guys saw it snug over a little okay 10 Milli right
15:47 here oh yeah don’t forget our 13s right here ready to go
15:59 all right after we put the battery box on don’t forget the trim clips that’s
16:06 very important don’t for be a forgetful Jones and forget all right that looks
16:11 great you guys do I put this on now so
16:18 that I’m not going to have a problem putting it in afterwards or am I is that
16:25 going to be a problem I think I can do that afterwards there’s just one step more that I decided to do you guys don’t have to do that okay that looks sick
16:32 let’s put the air snorkel in the front back in Banks leaves us a hole for that
16:39 down right in there and this is going to go right behind
16:50 it where’s the holy there it is all right we are in
16:56 rubber rubberizing I like it I like it and then don’t
17:02 forget this that’s where it came from I see a lot of people forget that clip or put
17:08 these clips somewhere else you know these these push pins that is specific to right there so don’t be forgetting
17:17 all right now the last Almost one of the last pieces let’s get this badass air
17:23 filter let’s come over here kind of mock this up see what looks
17:33 like this sits in here like this oh maybe the other
17:41 way oh yeah look at that look at that we have this
17:48 gasket that sits down on it like that dude that is way cool let me put this
17:54 battery in here all right battery back in
18:01 all right gorgeous gorgeous let’s get the negatory get this back over here and
18:08 routed correctly I’m going to go ahead
18:16 and go ahead and put this negative back down we have our negative Bolt
18:41 tight all right now that’s out of the way put
18:46 the the negative [Music] down go ahead and put the positive back
18:52 down we have a power let’s go ahead and tighten these now
19:00 going to go around and do the driver
19:07 side driver side negative going
19:16 on oh yeah oh yeah I don’t
19:23 know think we should clean that up they suck when they rust especially if you have have lead acid
19:32 so let’s do a little
19:37 clean thanks cliff
20:01 nice this is the only thing that sucks with this bench grinder
20:06 like like I can’t I can’t do this
20:14 side sort of all right maybe I
20:21 can oh rust and
20:31 battery acid you guys know what I’m talking
20:37 about it don’t taste good man oh
20:49 [Music] disgusting all right that’s good looks all right
21:02 let’s come down here and get some let’s get some
21:18 hallucinogens no not on the White
21:29 there we go get all that exposed
21:37 metal hold down finally dry let’s go
21:43 ahead put this down and this we have two 10
21:48 mli 10 mli 10 m come on can I do them both at the same
21:56 time commencing the auto
22:04 drive all right I like it that looks great now I think it’s
22:11 time for the air filter last part is the box and the
22:19 snorkel this is how it sits in the truck I want you to get the clamps and the
22:24 duct elbow kind of do something like this I’ll squeeze the CR clamp get a little oval so it sits on there before
22:32 we put this in the truck guess what has to go there the
22:39 math the math the mass airflow sensor
22:44 let we get this thing to set right here nice there we go okay let’s take the stock one out stock lid we’re going to
22:52 go probably T20
23:00 oh it’s been a minute but we got it see if we can get this
23:07 too nope let’s take it
23:13 out one two I’m not going to be reusing
23:18 these screws but keep them I mean I would keep them just in case I ever lost them mass air flow sensor out mass
23:26 airflow sensor going back in see how that doesn’t look right well
23:33 guess what it only goes in one way so you guys can’t screw that
23:41 up we have that screwdriver with uh the
23:48 [Music] star the screwdriver with the star we’re going to use that
23:59 again these bolts were in were in the
24:07 kit okay screwdriver with the
24:14 star and last
24:19 okay she’s going on fam check it
24:25 out TR to go like this get this down in
24:32 here now this truck opted for The [Music]
24:40 Pusher let’s get that rubber elbow come
24:45 [Music]
24:51 on how about definely push this on first there we go
25:00 that looks G oh
25:08 yeah I can take that we’ll put this clamp over here so it’s not hitting the
25:15 hose okay okay okay I’m going set this in here like
25:21 this do a little twisty try to get this engaged okay mass
25:27 airflow sensor you guys can see it when you put this
25:32 in before you put it down go ahead and hit that
25:38 locking that locking tab see if I can get it connected come on
25:44 Nelly Here We Go connected and this popped off The Pusher
25:58 [Applause] okay I like it now let’s go back over here and
26:07 work this we got to put this one by the mass
26:15 air flow sensor they say let’s do that one
26:22 first where’s the hole
26:29 that’s a real uh that’s a real challenge right there I’ll tell you
26:40 that all right got that one and see if I
26:47 can see if I can walk it around need a driver
27:01 see if I can get this T down in
27:12 here all right let’s sense that down let’s see how far off we are cuz that
27:17 was kind of all right that’s looks fairly
27:25 close okay can we get the last one in underneath
27:33 here please tell me it’s going to line up cuz that’s a crappy hole to oh I just
27:41 felt it Go Down in the
27:47 Hole maybe not I cannot
27:53 tell I think so I think so all right let me tighten these
28:03 down last bolt well the first bolt Banks tells you
28:08 to do it’s uh it’s kind of a a trickery to get but if you have the right
28:15 tool I’m using a ratcheting Flex Head Quarter drive
28:23 ratto and I think I’m getting to the end
28:29 all right well now that’s started let’s draw these down see how much farther I got to
28:37 go all right let’s see how far more we got to go oh just a little I can feel just a
28:45 tiny baby Gap there we
28:50 go there we go tight okay so now
28:58 so now you guys can come right here and tighten the last
29:06 clampy look at that that looks freaking
29:11 awesome last step which is right here last thing I want you guys to do is
29:18 come over here to the air filter grab the filter
29:25 minder and there is a hole right right
29:33 here push the rubber in and screw that and make sure that’s reset couple of
29:40 bolts up here we’re not going to need but check it out that is it for the
29:48 banks air filter for this 2019 F350 I guess let’s start it up and
29:56 see what she sounds like
30:09 oh yeah I like it I like it looks good it’s going to
30:15 sound good exhaust brake is going to sound good Pusher Banks and SNS and HSM and
30:25 AMS oil are the best thing for your Superduty and if you’re in the Southeastern Michigan area and want to
30:32 get a variety of these things installed on your truck or it’s getting close to Winter you guys might want to get some
30:39 additional heat in your passenger cabin so reach out to the email in the
30:44 description powerstoke truck Tech gmail.com Shop phone number
30:49 9479 11115 make an appointment I love to take care of your power strokes and help
30:55 make them great again I’ll talk to you guys later see what
We’ve known ARod of PowerStrokeTechTalkwARod as one of the best Ford Techs around. In fact, he is a Ford Senior Master Tech working at a dealer for 23+ years. He’s seen a lot of Fords, he knows how they work, and what’s best for them. In his latest video he installs the Banks Ram-Air Intake on a 2019 Power Stroke, which is the finishing touch to the work that he’s already done. “You’ve seen us install Banks stuff before, but I haven’t installed a Ram-Air in a 2017-2019. Banks has some really nice instructions on their site, so we’ll be going between those and the truck.”
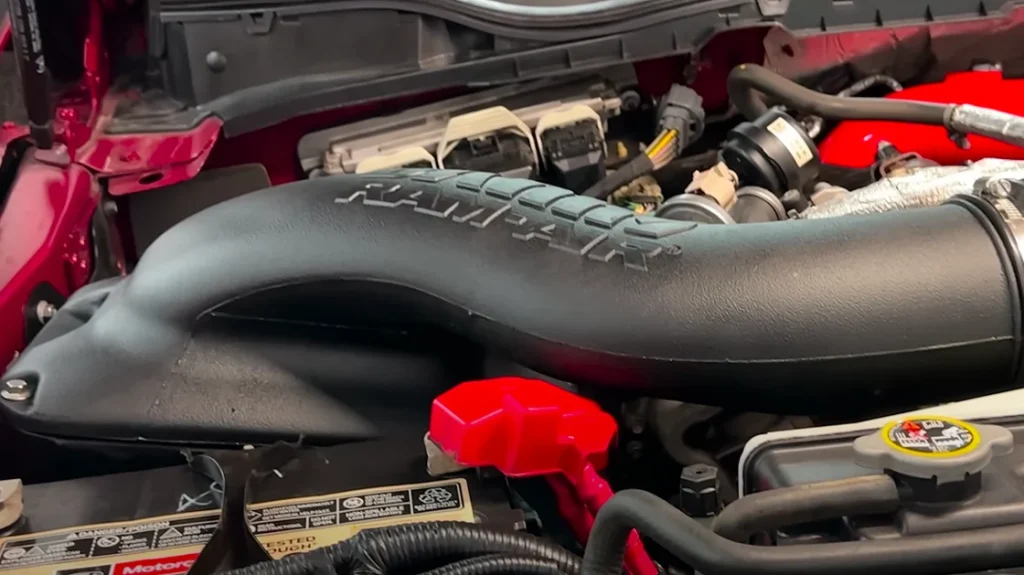
ARod’s step-by- step installation and helpful comments demonstrate that the whole process can be tackled by seasoned mechanics, yet is easy enough for enthusiast.