
97732 4th Gen RAM Stealth Pod Installation Guide
INSTALL INSTRUCTIONS
Part #s
63384 63385
Gauge Pod
2009-2018 RAM 1500
2019-2023 RAM 1500 Classic
2013-2018 RAM 2500/3500
Please read through the following instructions thoroughly before starting your installation. If you have any questions please visit our Support Page.

Part Number 63384 & 63385
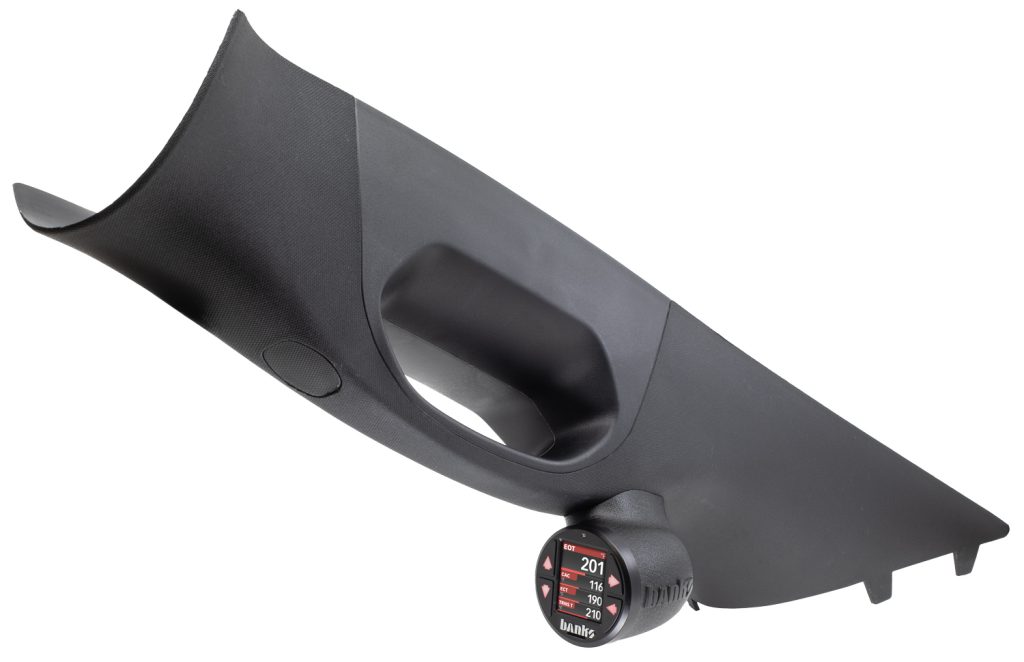
Fits the A-Pillar below found in the:
• 2009-2018 RAM 1500
• 2019-2023 RAM 1500 Classic
• 2013-2018 RAM 2500/3500
Installation Guide
Note: If you’ve chosen to paint the pods yourself, please visit bankspower.com/paint to get perfectly matched spray paint. No primer is needed just three to four light coats.
What’s Included
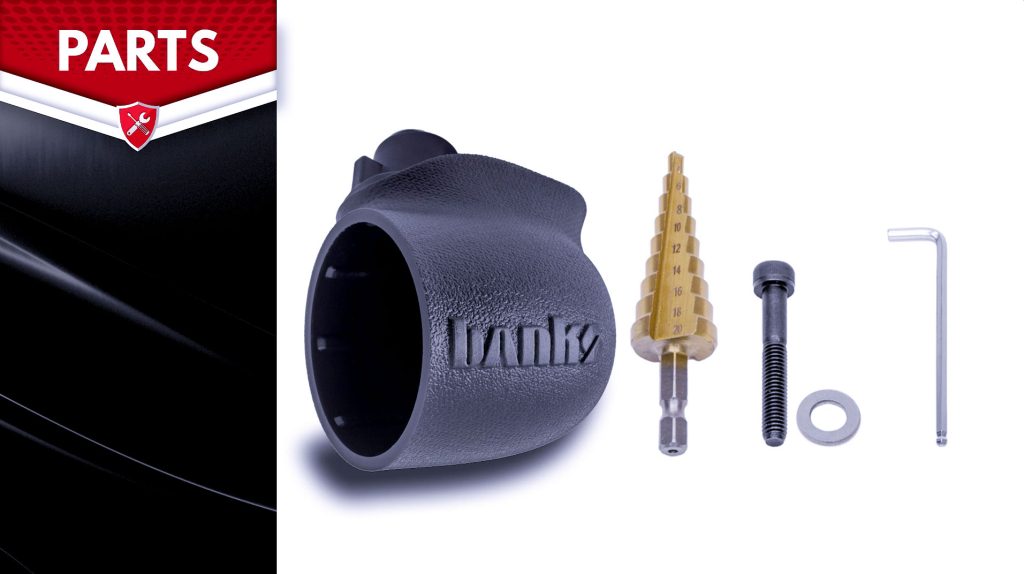
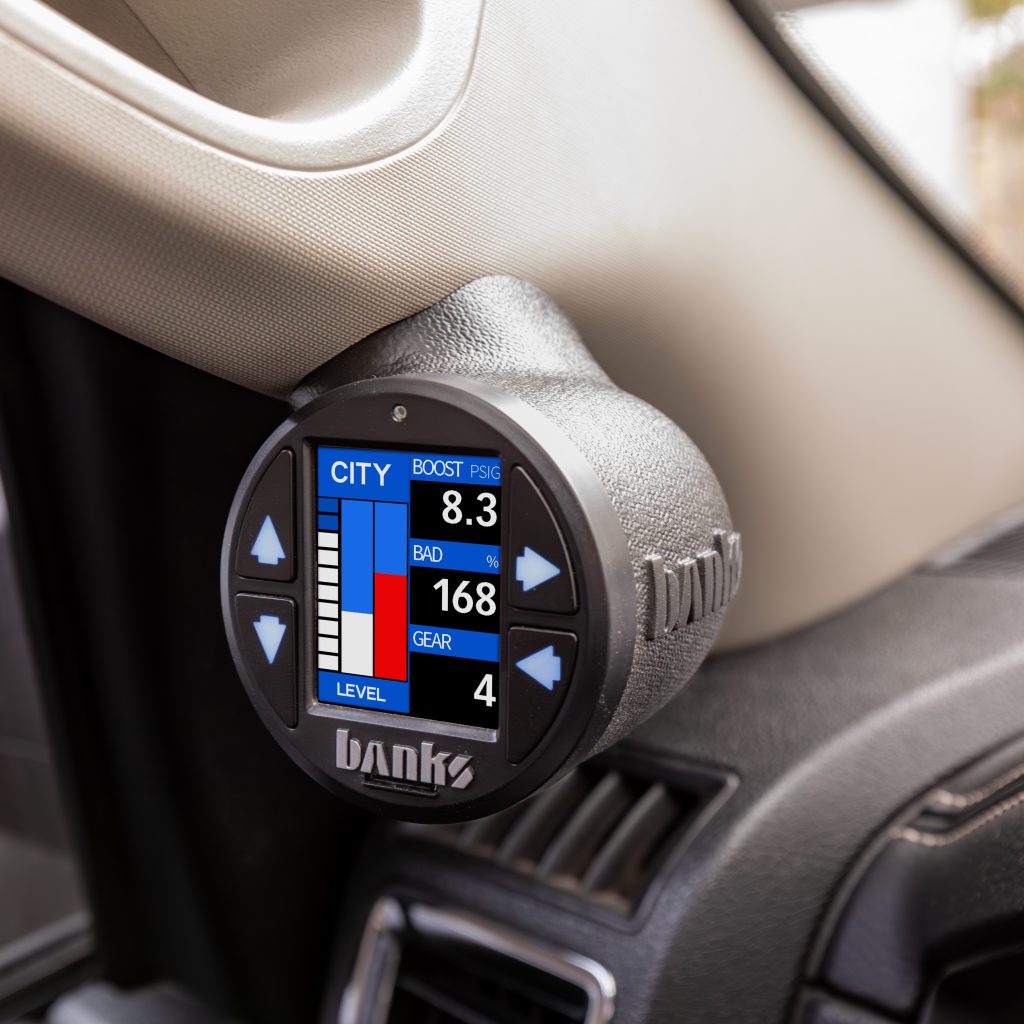
• iDash Stealth Pod
• A Step Bit
• A Hex Screw
• Washer
• 5mm Hex Key
If anything is missing, please call us at 800-601-8072 immediately!
Tools Required
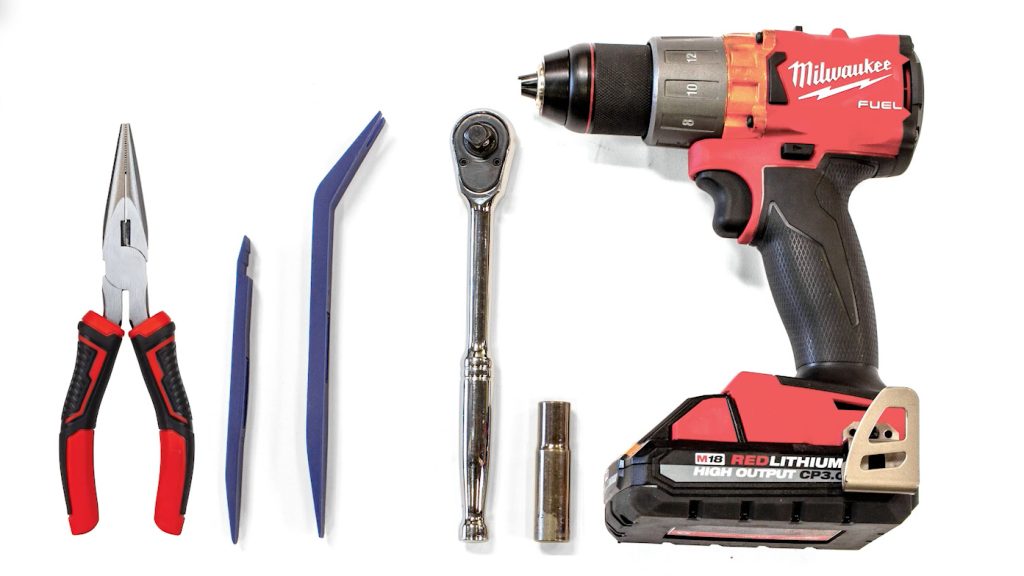
• Plastic Pry Tool
• Socket Wrench
• 10mm Socket
• Drill
Step-by-step Installation
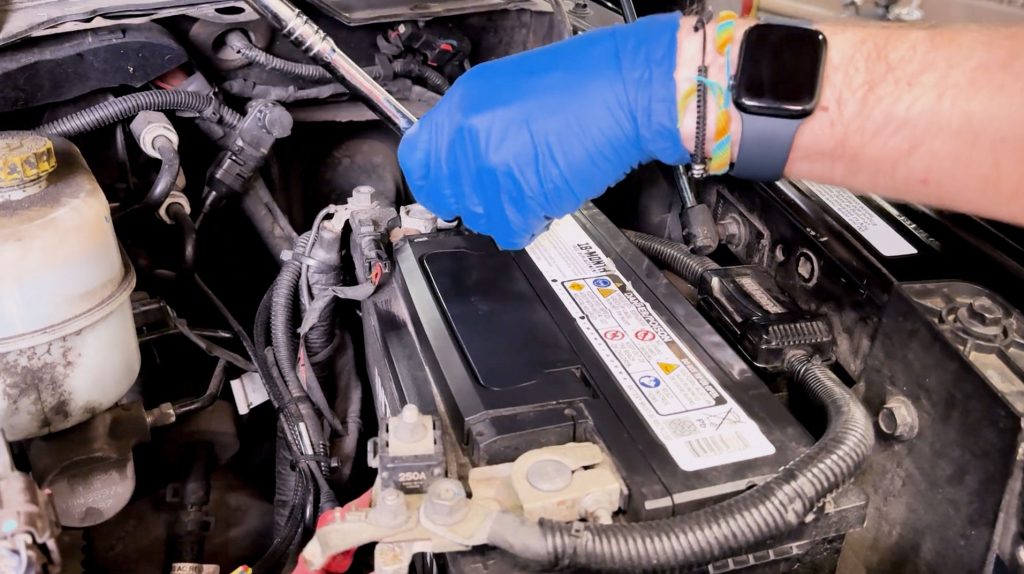
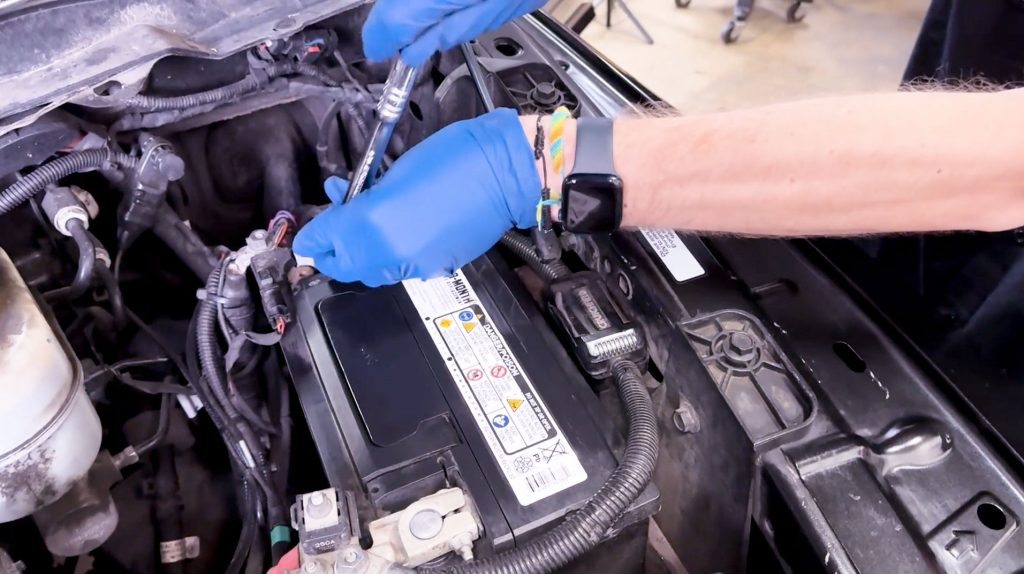
1. Before starting the installation, use your 10mm socket to remove the terminal and disconnect both batteries.
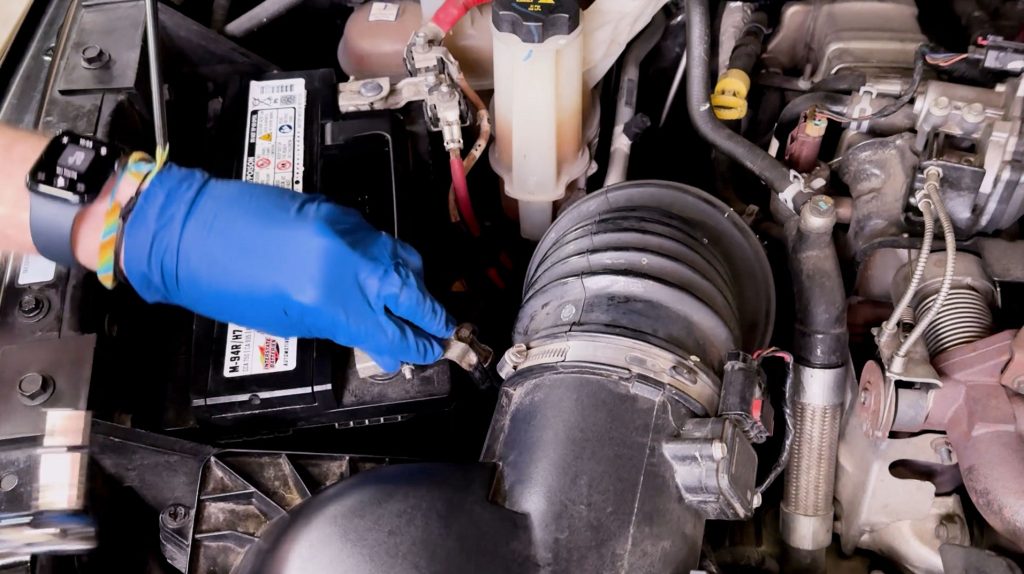
This is important because you’ll be working near an airbag and you don’t want it to go off.

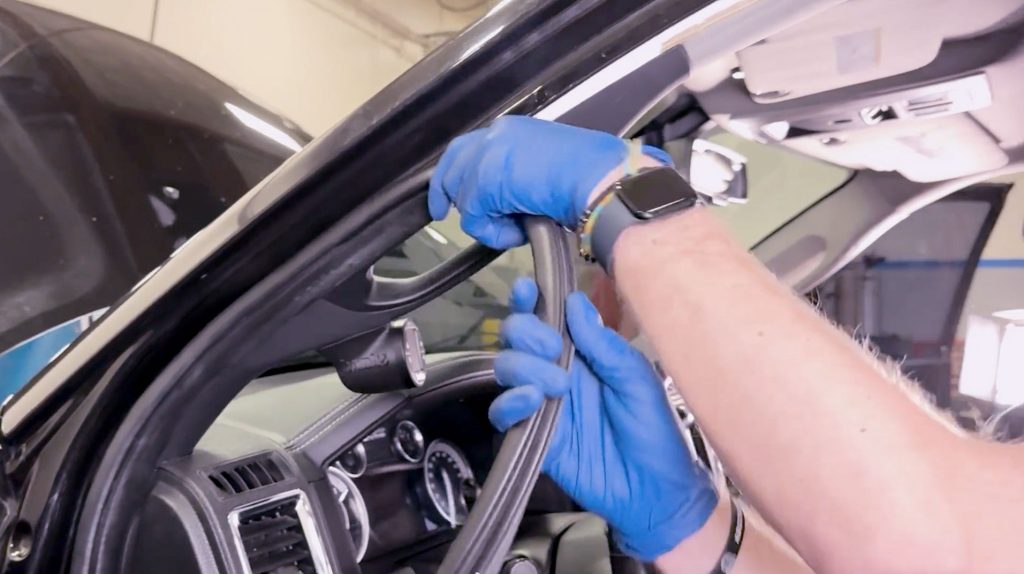
2. Pull off about three feet of the weather stripping from just below the dashboard to the top of the A-pillar.
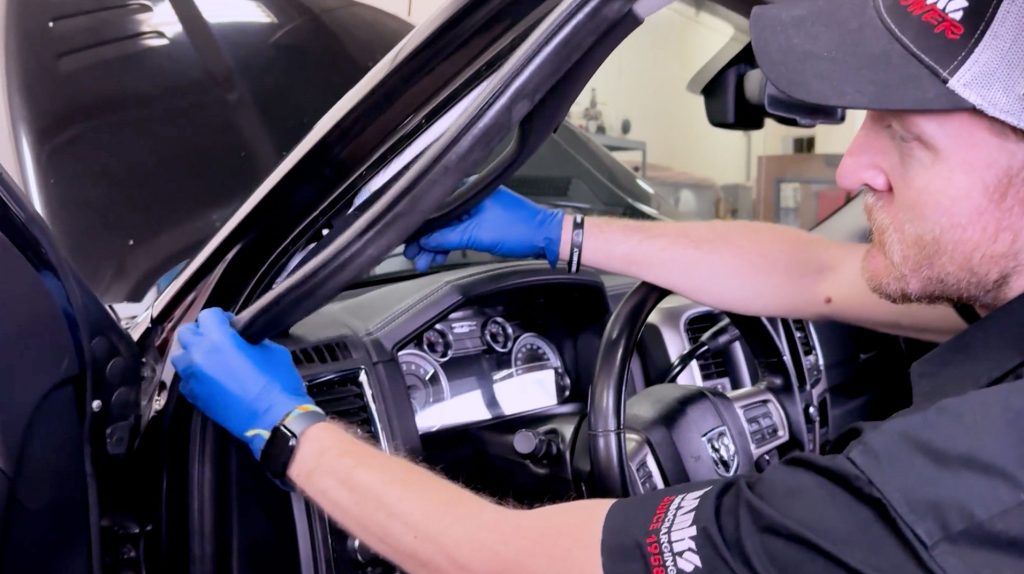
The weather seal is held in with pressure, and will pop right out with your finger tips.
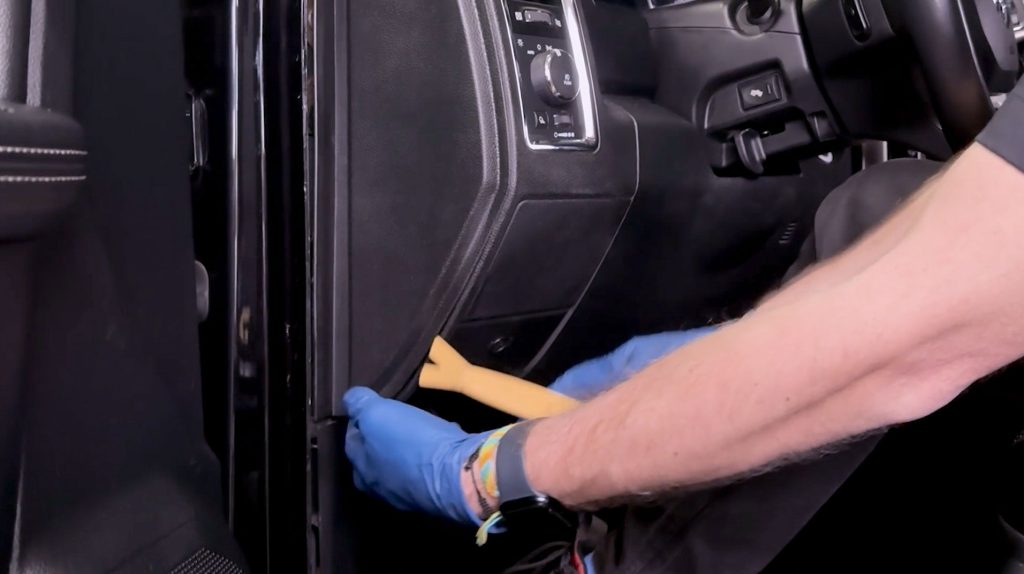
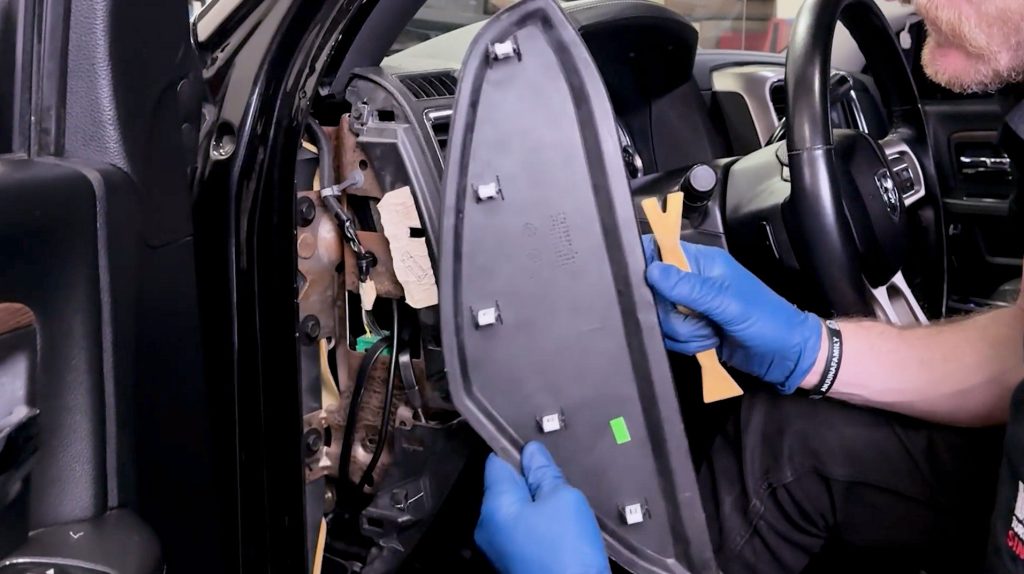
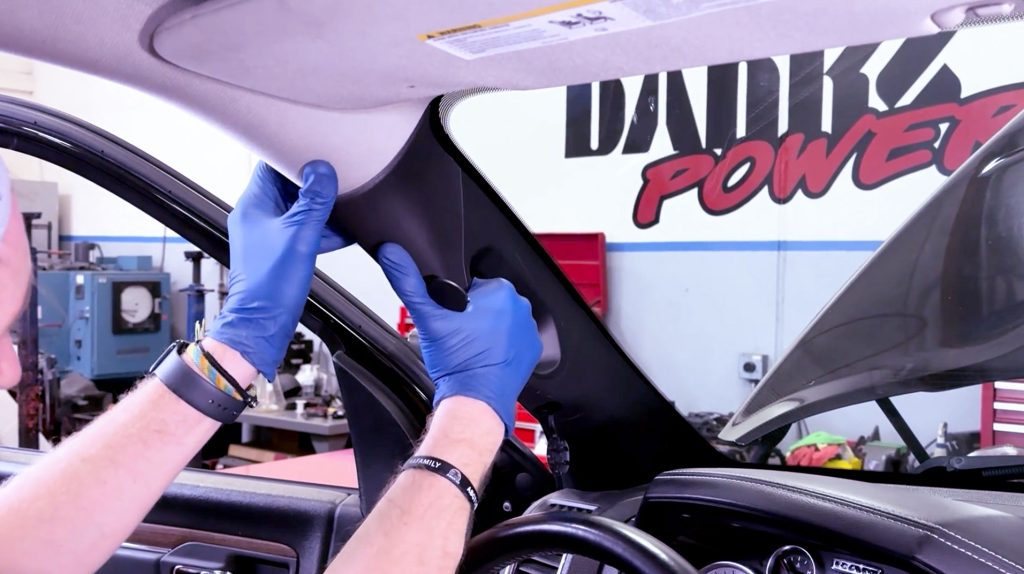
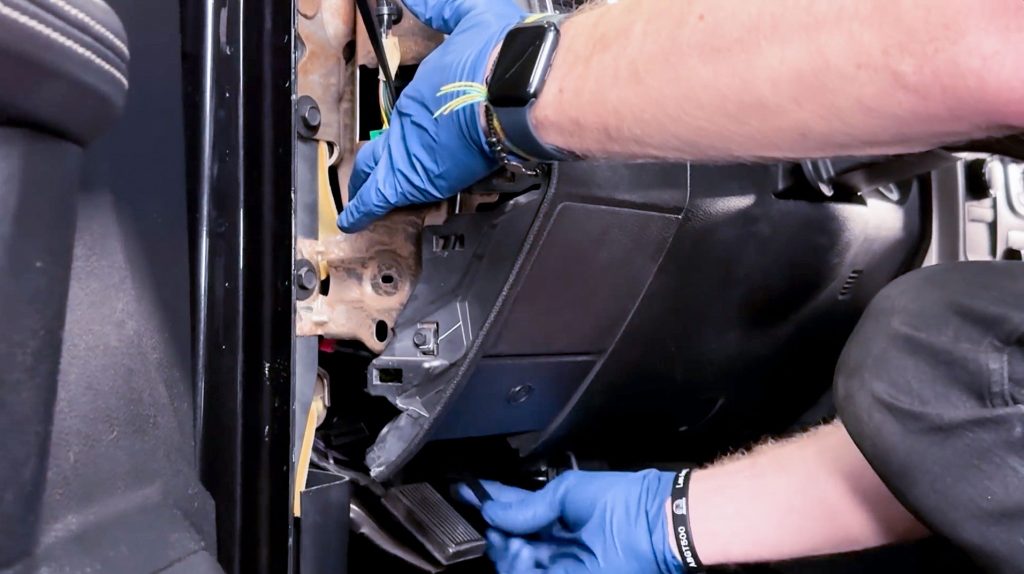
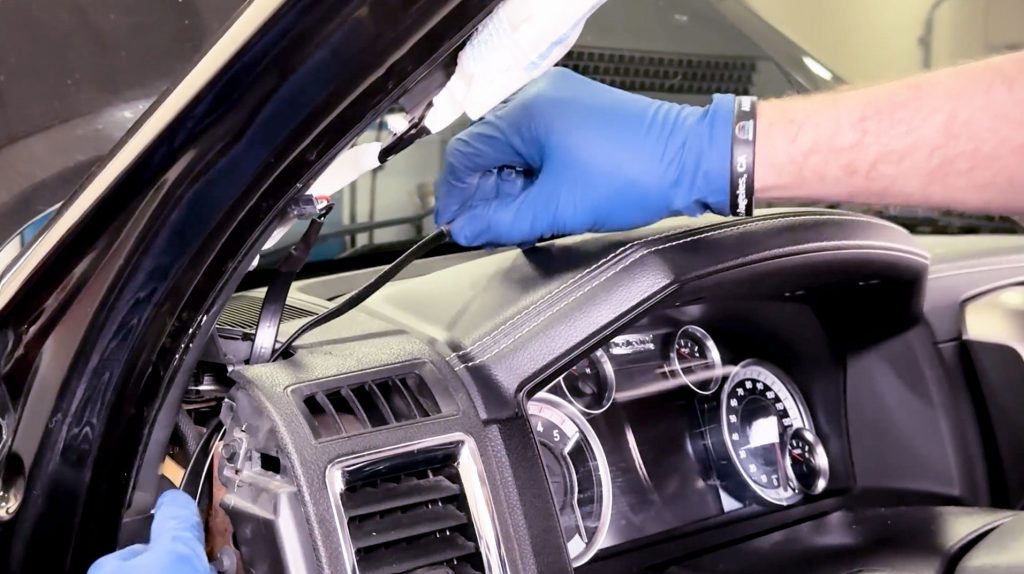
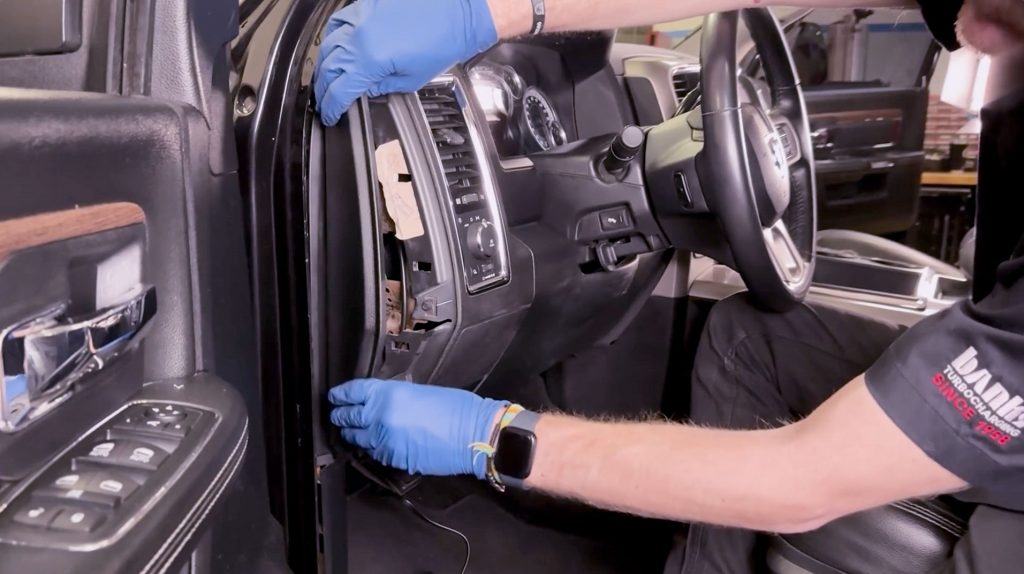
3. Pry the side dashboard cover open to gain access to run cables through.
Beware: If you use a screwdriver, it could leave a mark on the soft plastic. A plastic pry tool and/or rag is recommended.
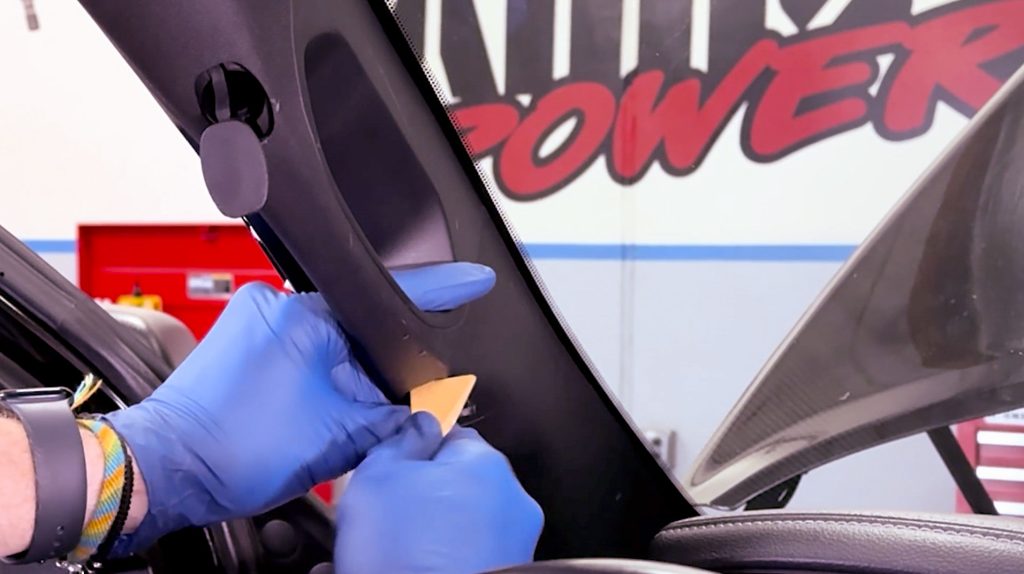
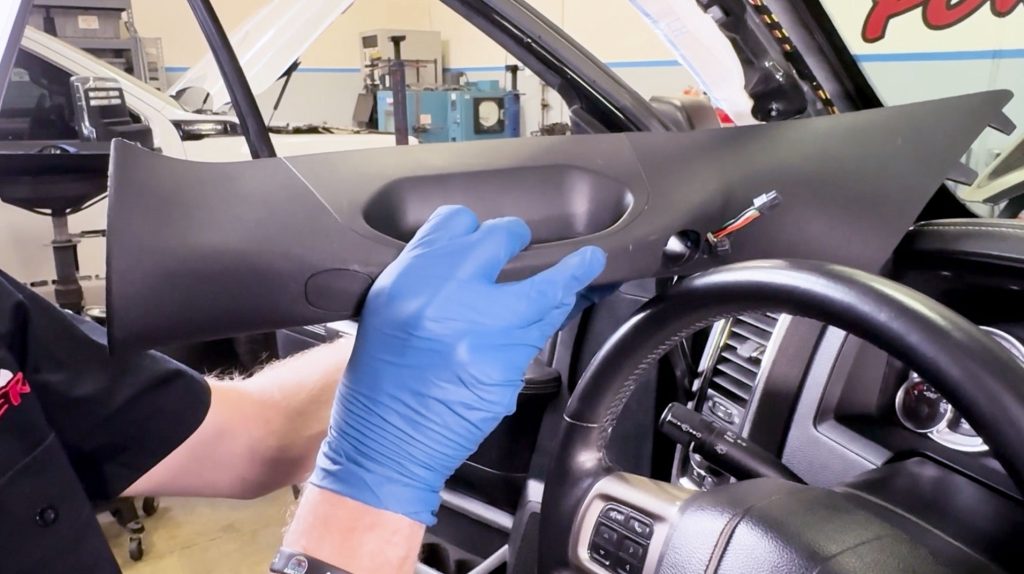
4. With a plastic pry tool, pop the covers that cover the handle bolt.
Beware: If you use a screwdriver, it could leave a mark on the soft plastic. A plastic pry tool and/or rag is recommended.
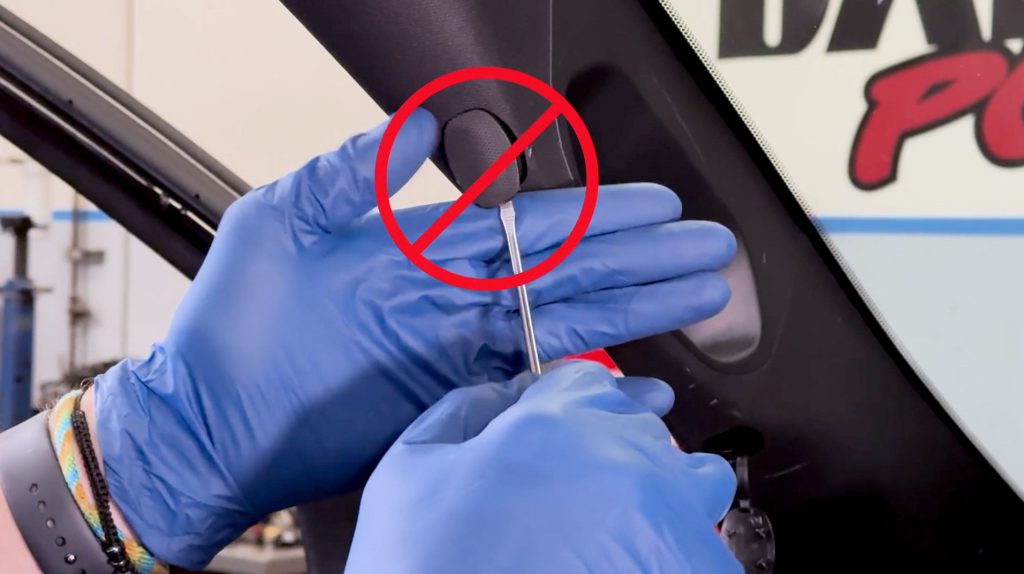
Beware: If you use a screwdriver, it could leave a mark on the soft plastic. A plastic pry tool and/or rag is recommended.
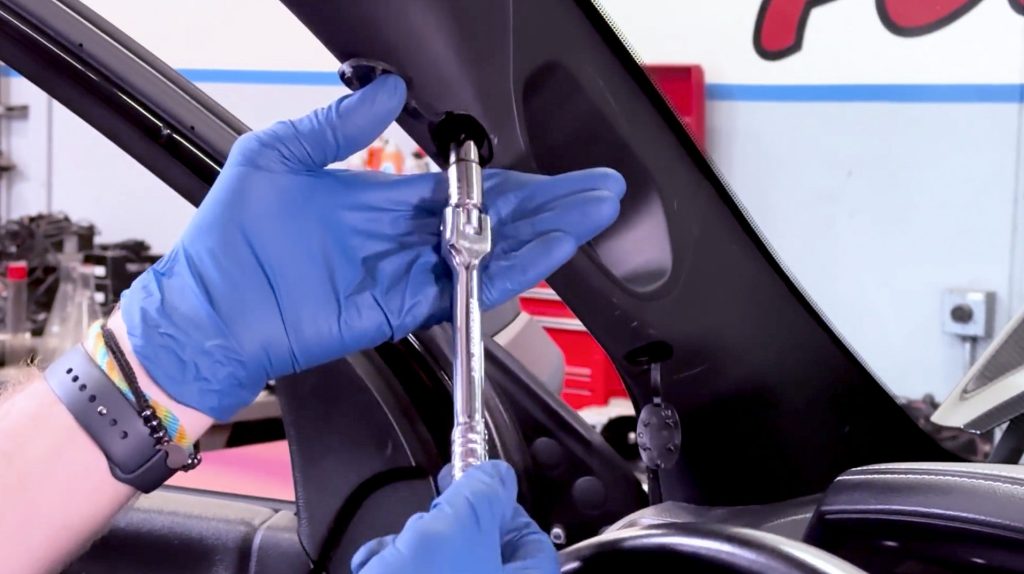
5. Use a 10mm socket to remove bolt.
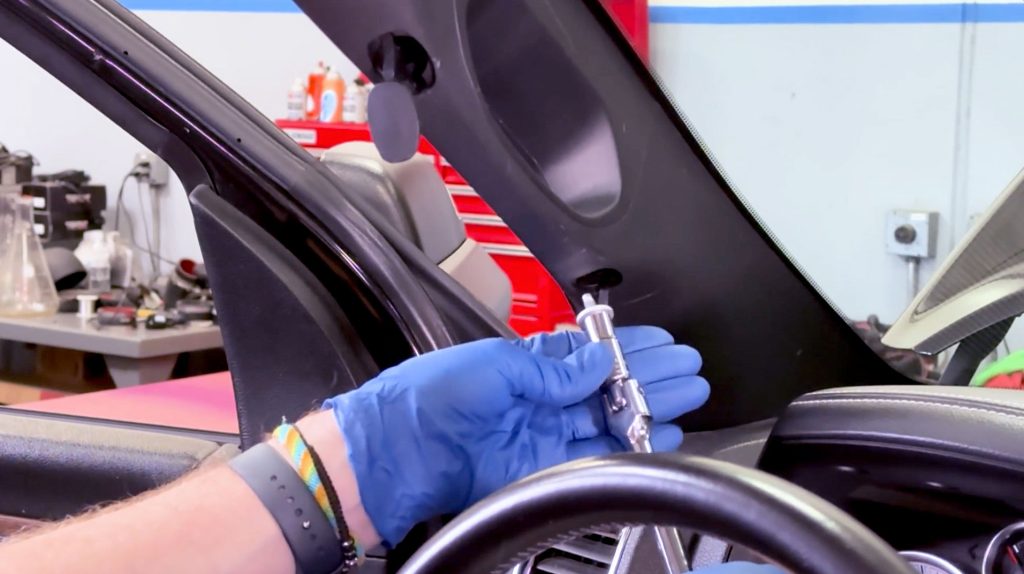
Do the same with the lower bolt
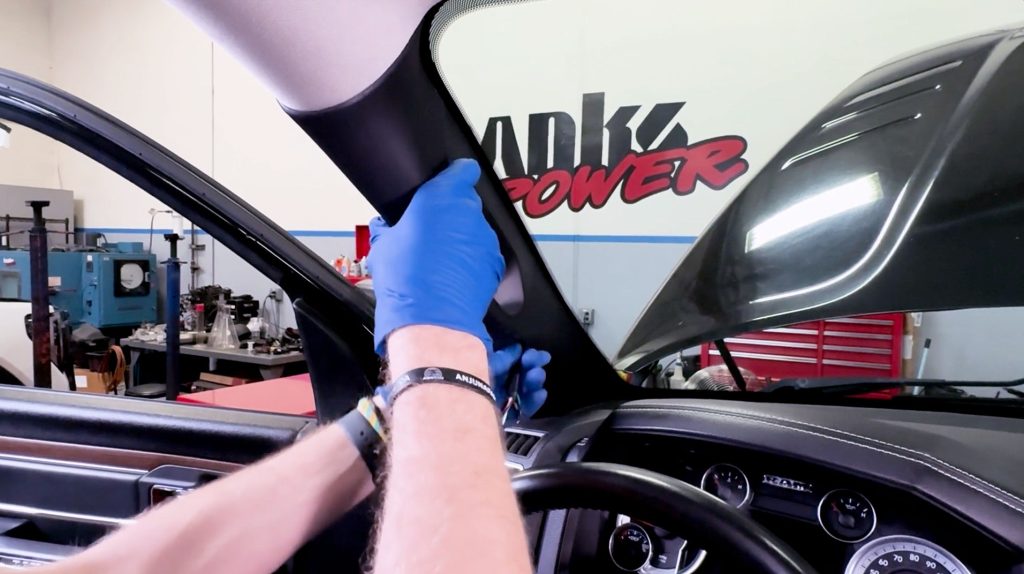
6. With a firm tug, remove the pillar from the vehicle.
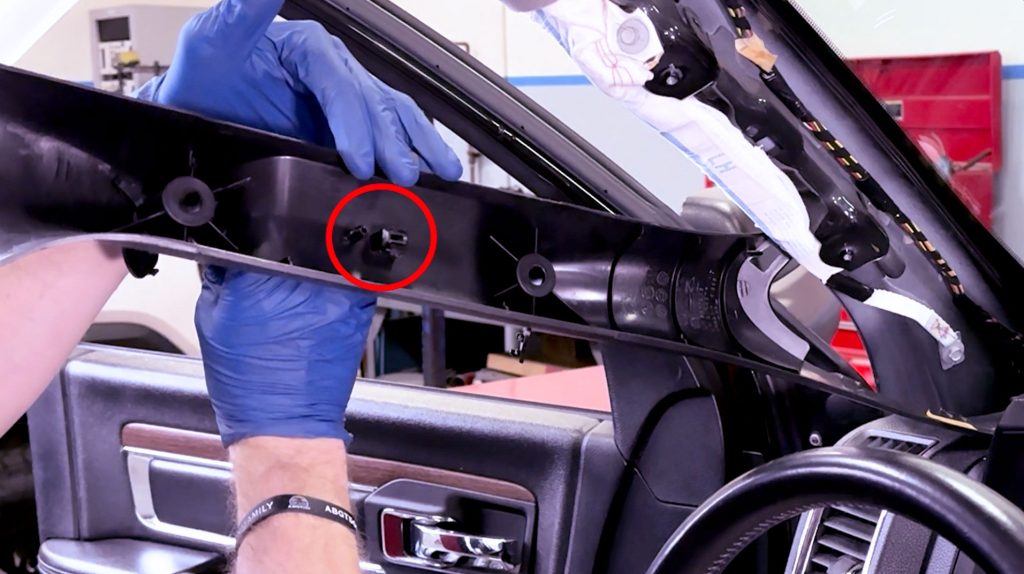
It is being held in by this plastic tab. One firm yank should free it.
Cable Access Hole Prep & Drilling
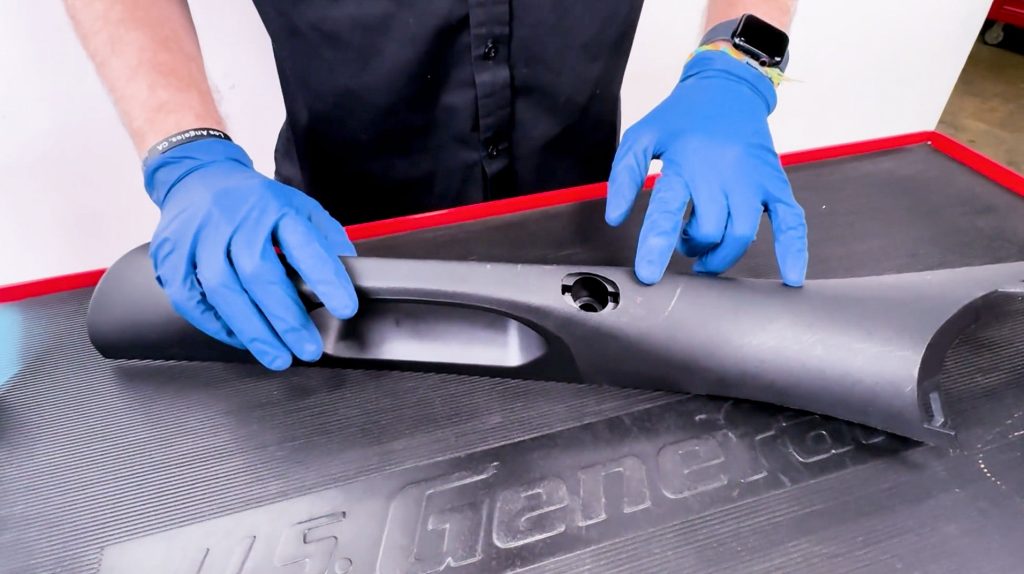
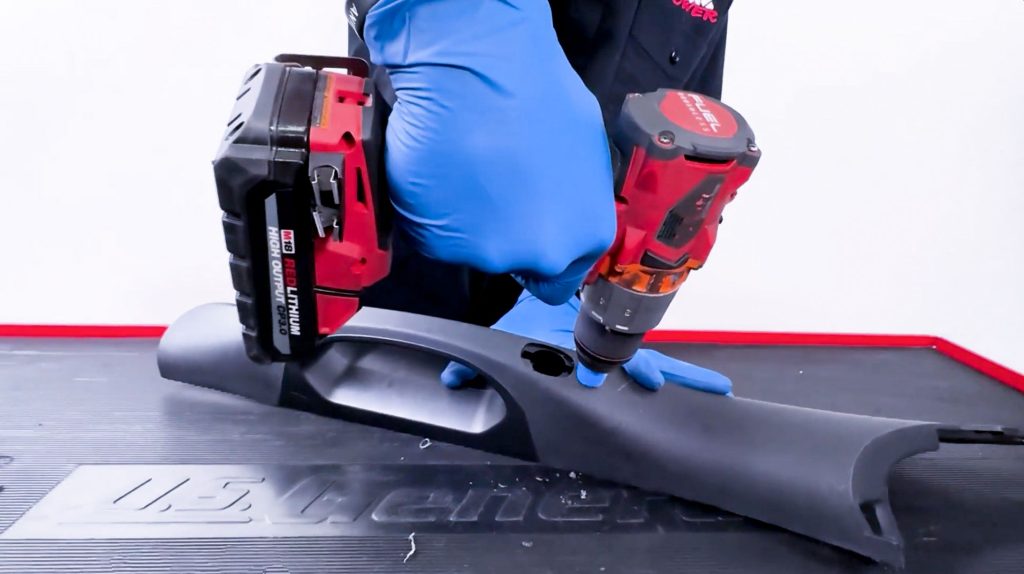
6. Bring the pillar to a work bench with a non-slip surface.
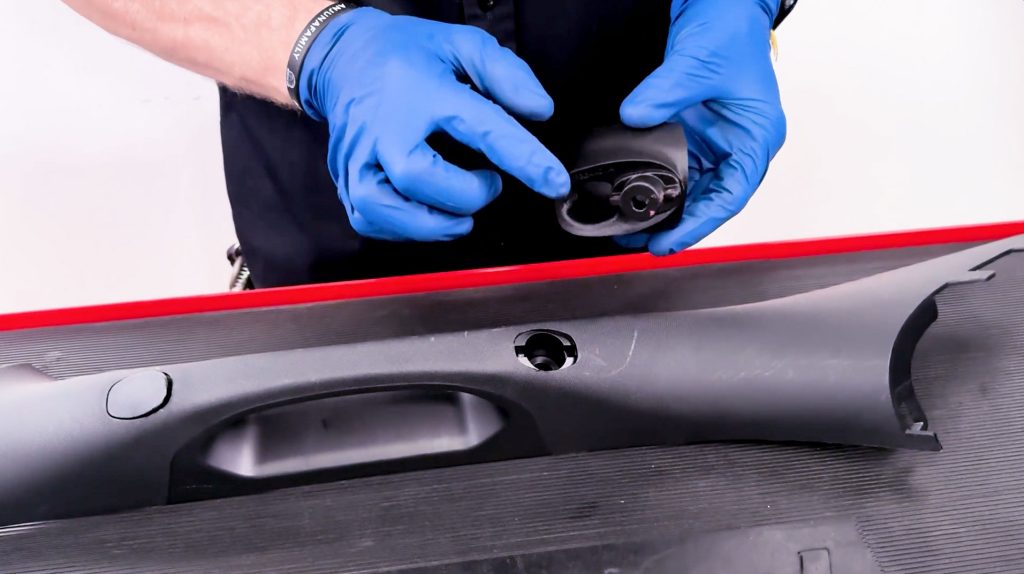
7. Test fit your Stealth Pod to see where you should drill your cable access hole
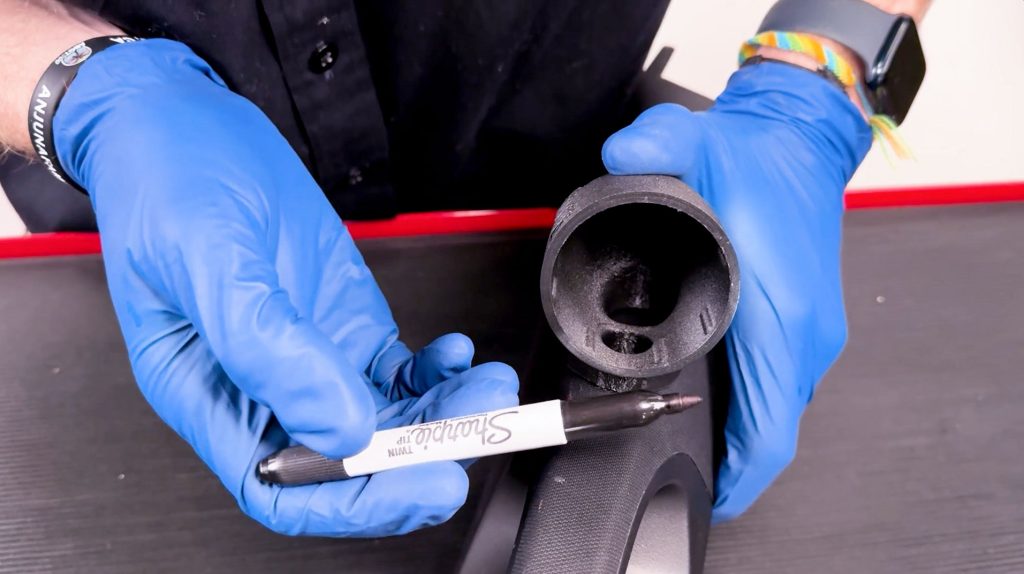
With a marker, place a dot in the center of the cable access hole onto the pillar.
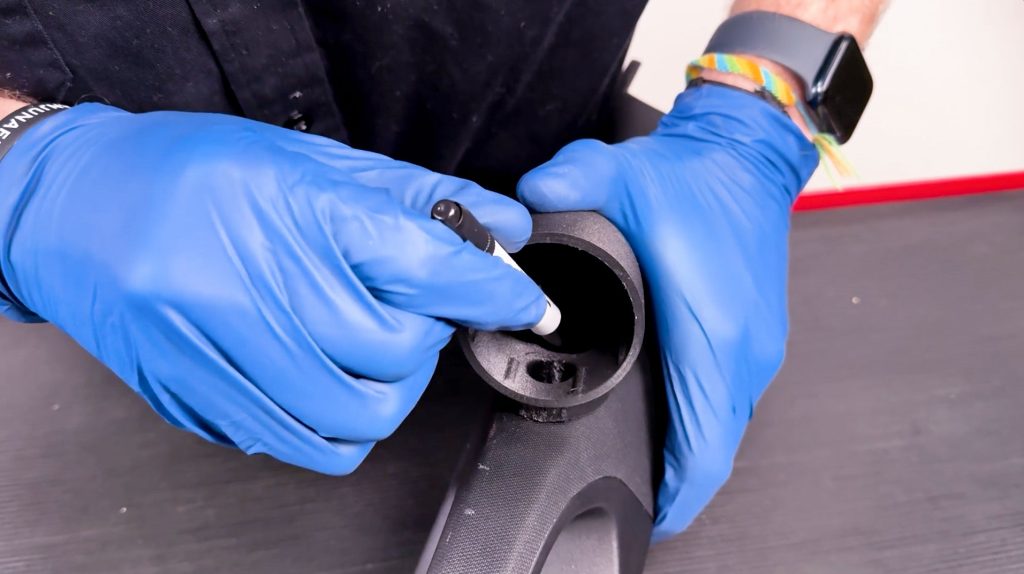
Use your Stealth Pod as a guide & mark a dot as the center for the cable access hole on the A-Pillar.
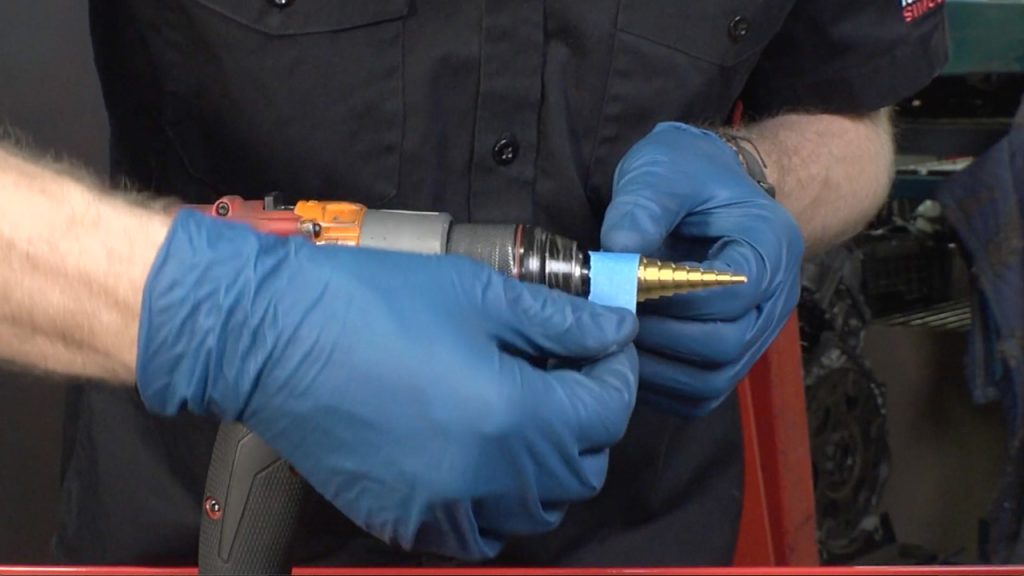
10. Place the bit in your drill and wrap a piece of painter’s tape around it so you don’t plunge deeper than the 18mm mark.
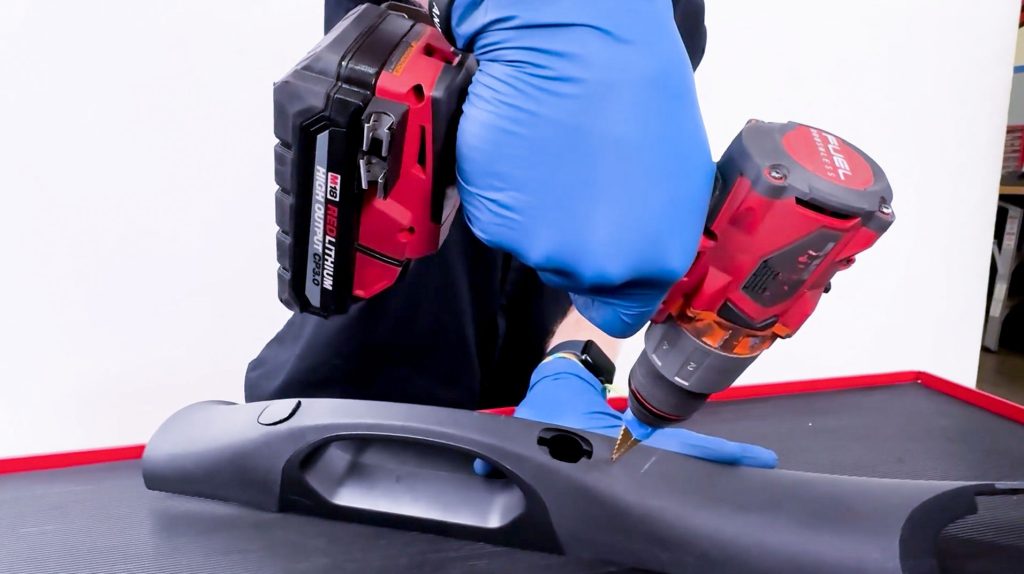
11. Start drilling 90° perpendicular to the spot you marked.
12. Continue until you reach the 16 or 18mm step.
9. You will need to drill to the 16mm step for a single iDash cable, or to 18mm if you have a PedalMonster.
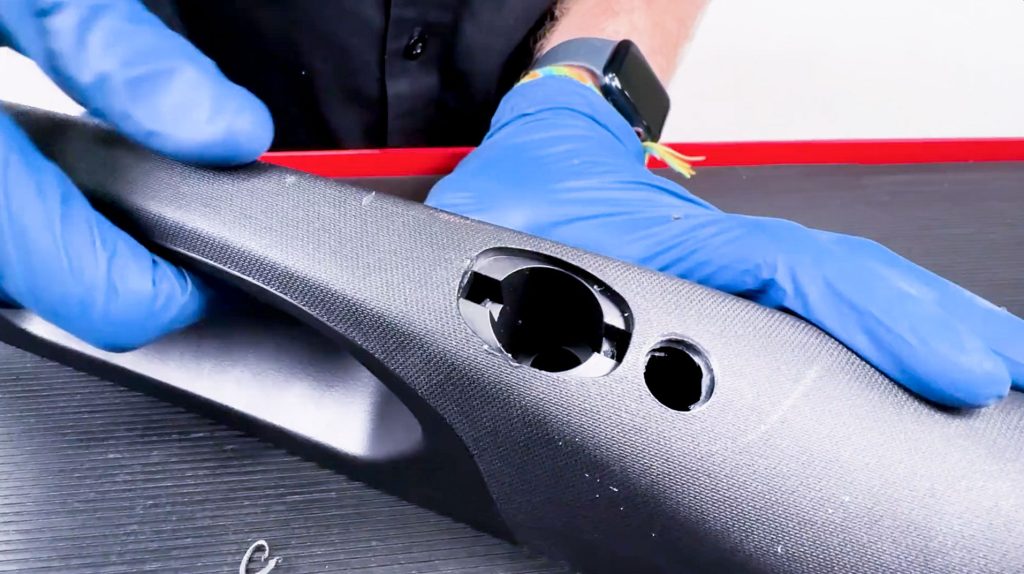
Check that your cable(s) pass through the hole before returning to the truck.
Stealth Pod Installation
10. Back at the truck, fish your OBD-II cable up through the side of the dashboard.
11. Continue until you have enough slack to drape the cables over your dashboard for now.
12. Run the cables through the cable access hole you drilled.
And loosely re attach your pillar for now.
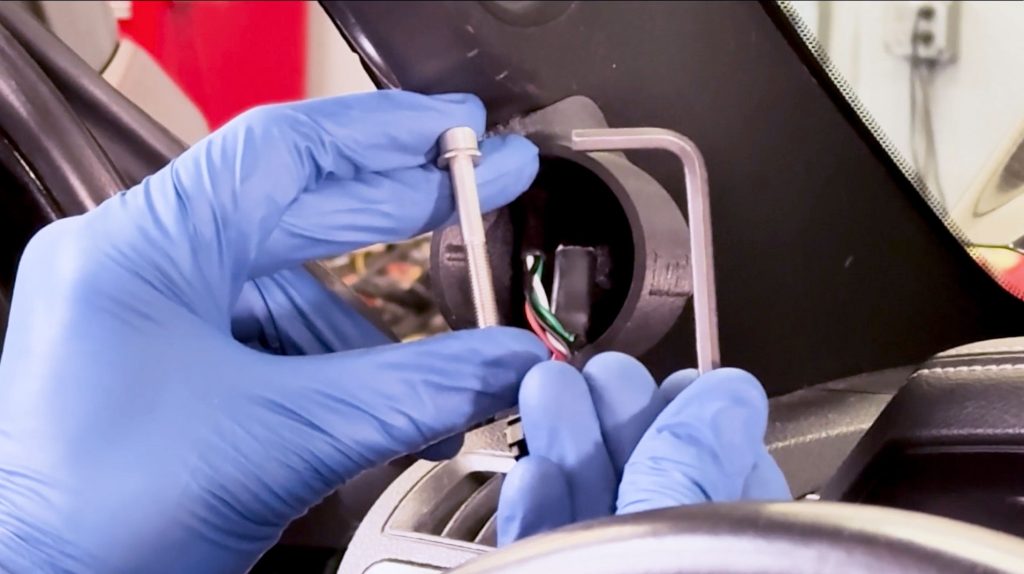
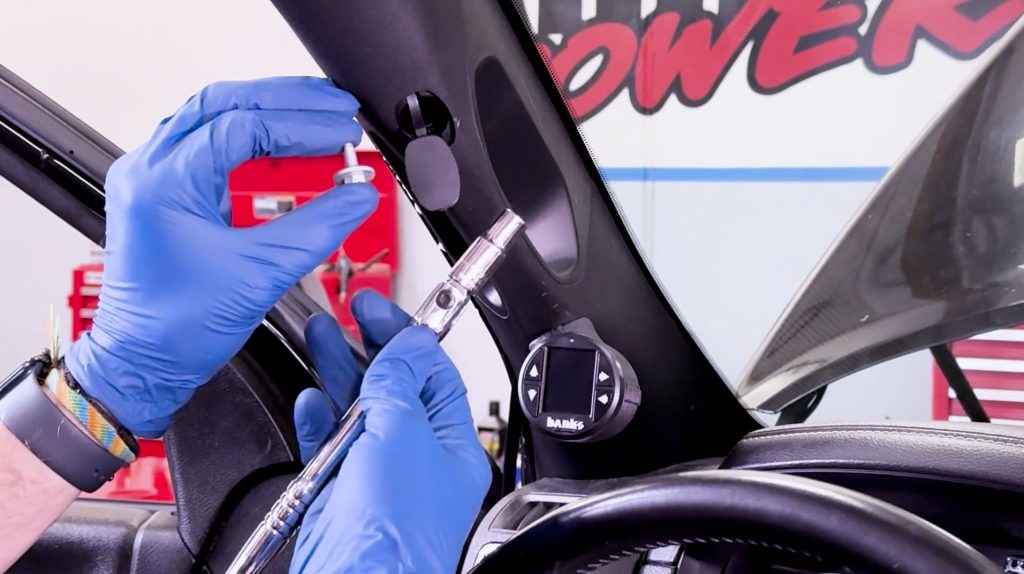
13. Run your cables through your Stealth Pod, and attach it with the supplied bolt and Hex Key.
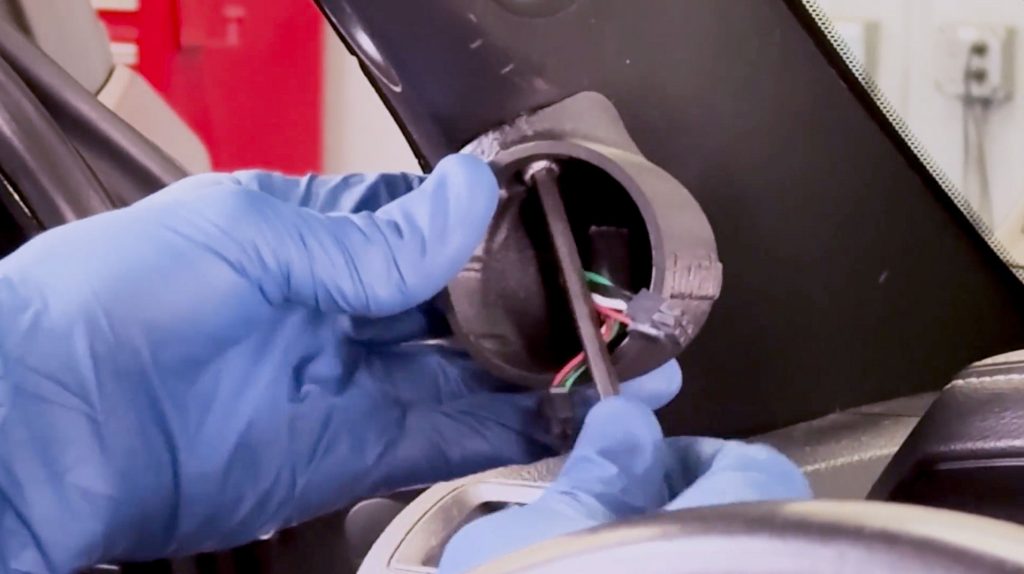
Tighten to 8-10 in-lbs. Due to the design of this Stealth Pod, over-tightening the bolt can cause a failure in the plastic. Please hand-tighten until the pod is snug against the factory pillar. Do not tighten beyond this point.
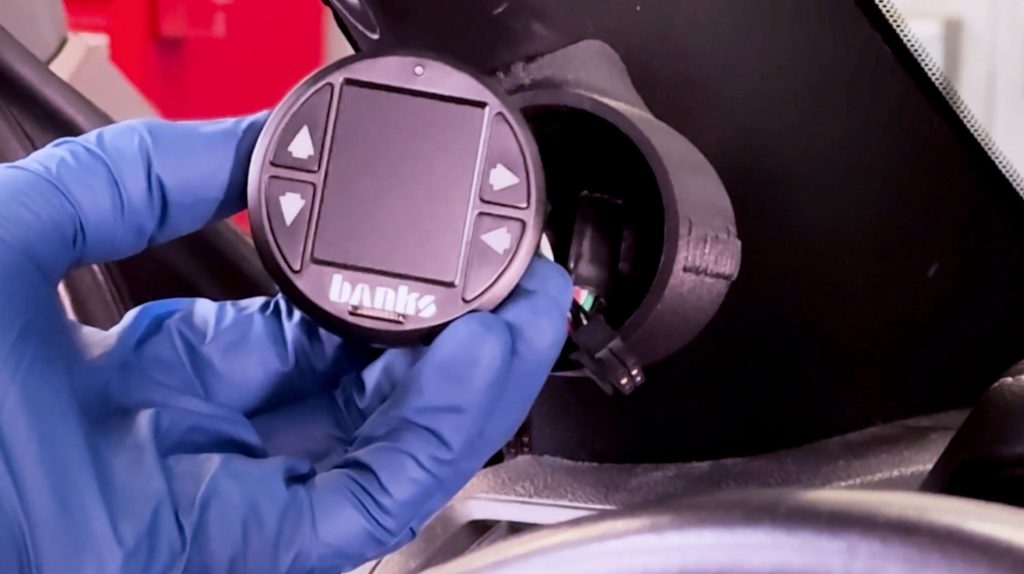
14. Now grab your iDash.
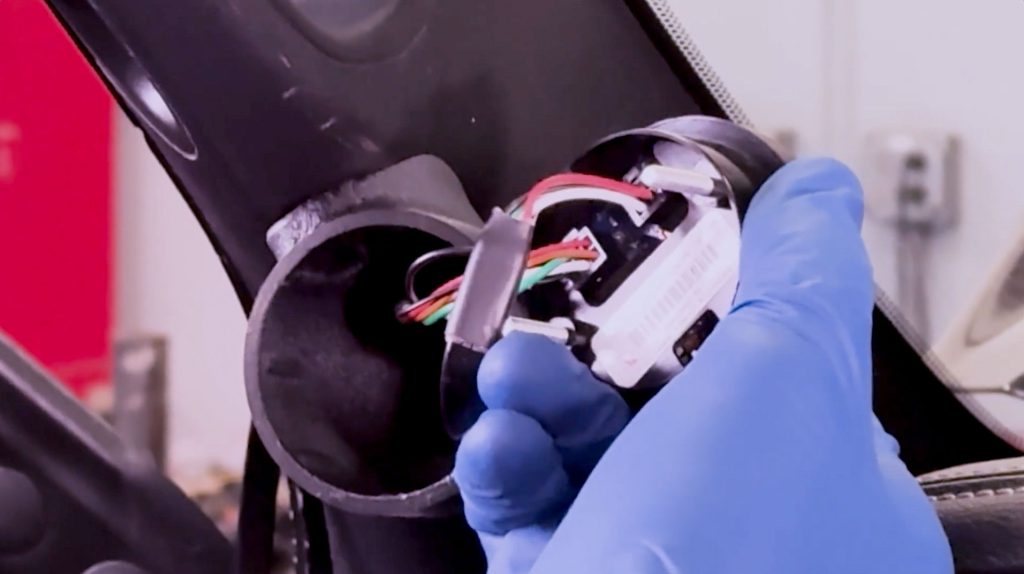
Connect your 4-Pin OBD-II connection. And if you have a PedalMonster, your 6 Pin as well.
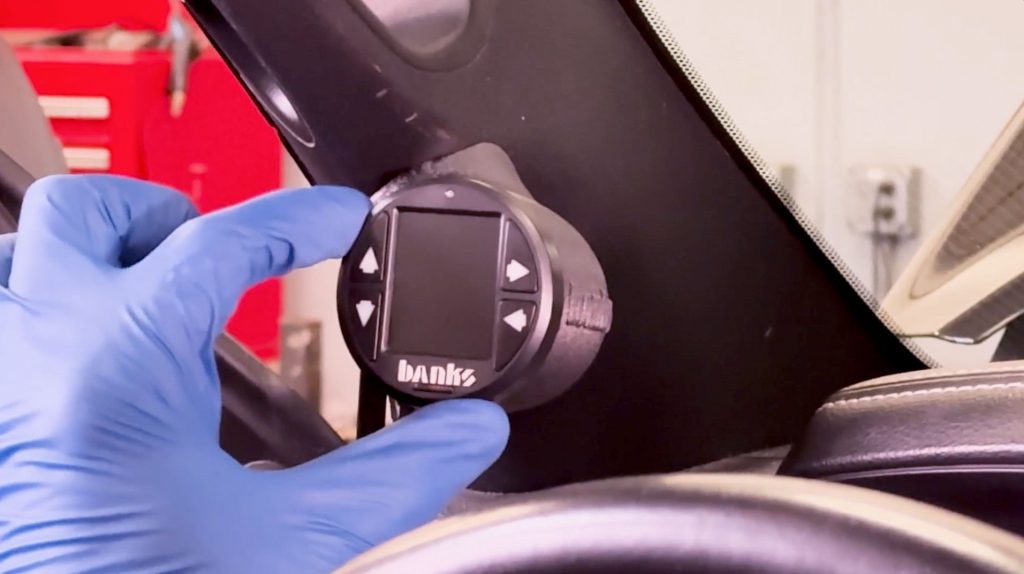
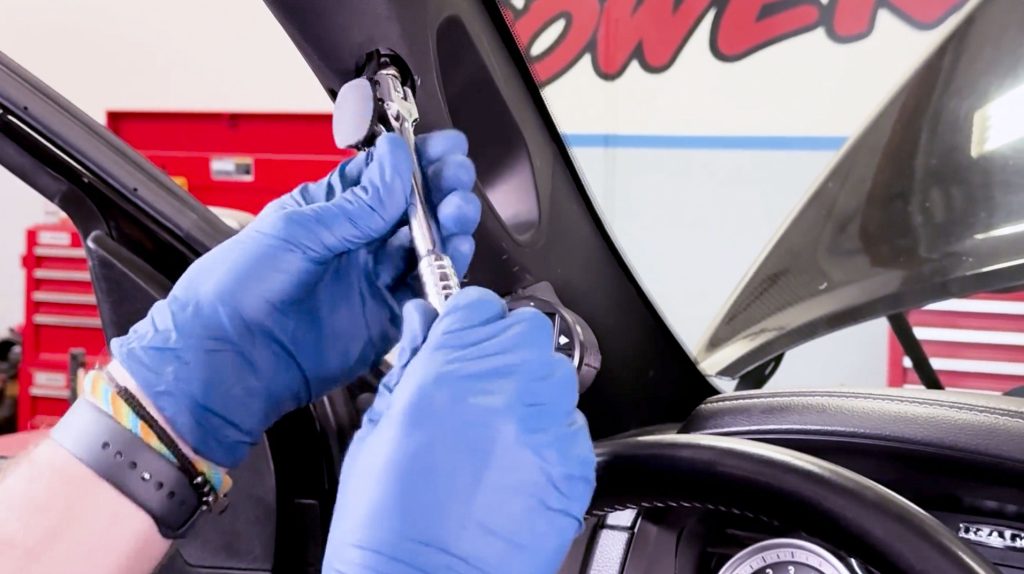
15. Slide the iDash into place, checking that it is clocked level.
16. Use the factory 10mm bolt, and re attach the upper bolt.
18. Re attach the side access door
Check to tidy up any extra cable slack, leave just enough to reach your OBD-II port.
19. Press back in your doors weather seal.
20. Re connect your batteries.
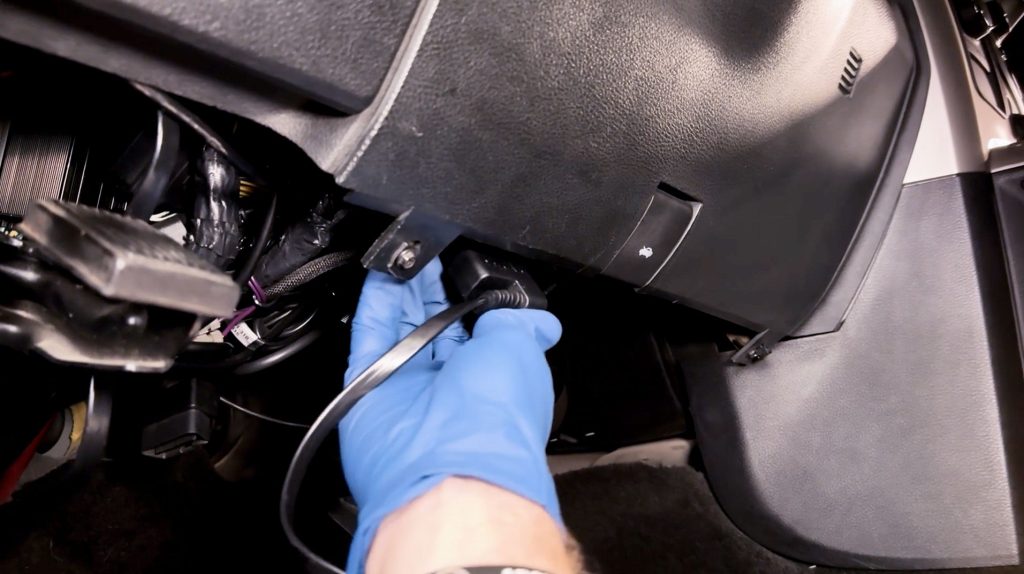
21. Plug in the OBD-II cable to your OBD-II Port.
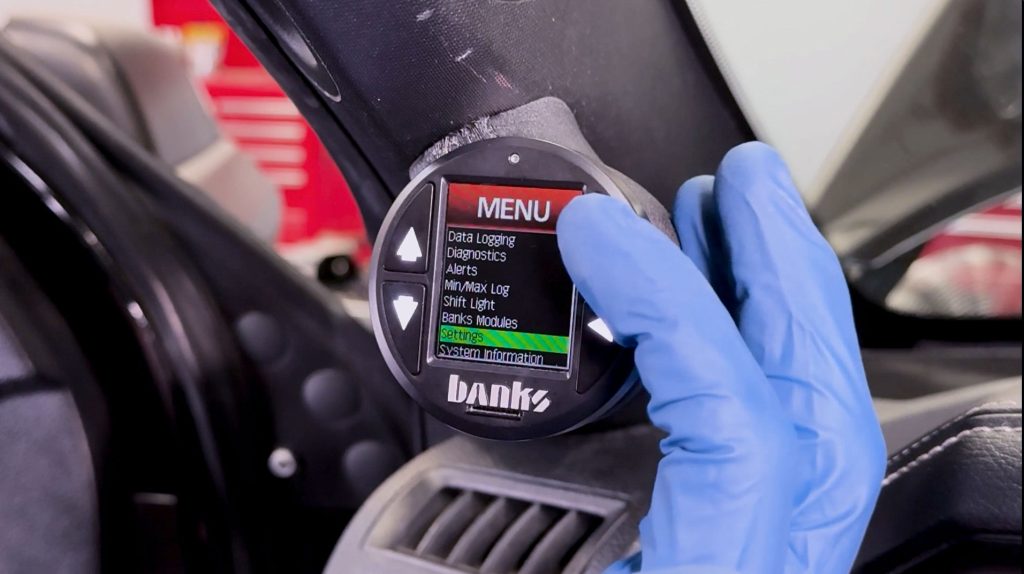
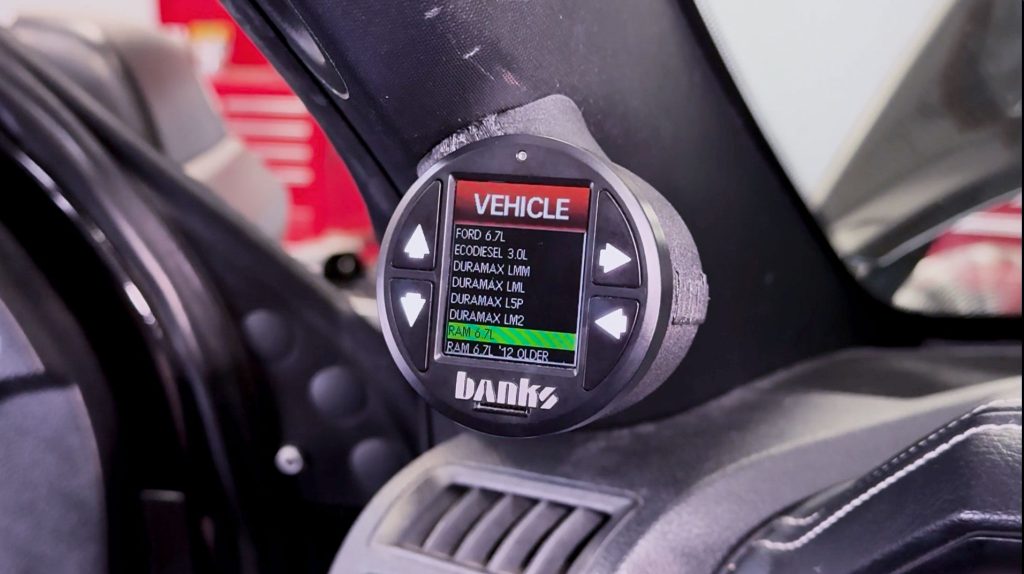
22. Press any key to power on your dash, and select settings.
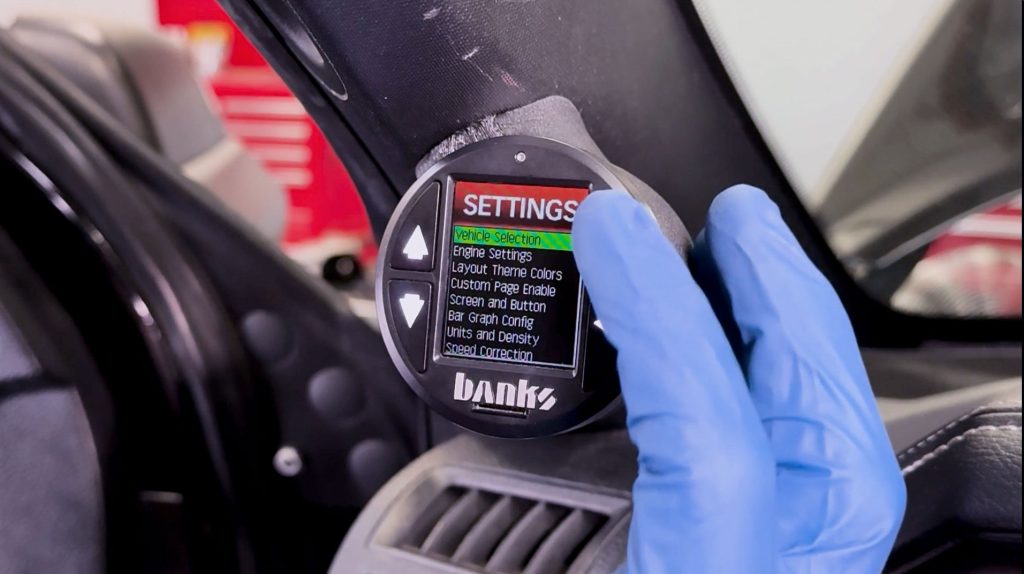
22. From the Vehicle selection menu, select the correct RAM setting for your truck.
Now enjoy your new iDash Stealth Pod.