97732 RAM Stealth Pod Installation Guide
INSTALL INSTRUCTIONS
Part #s
63363, 63364
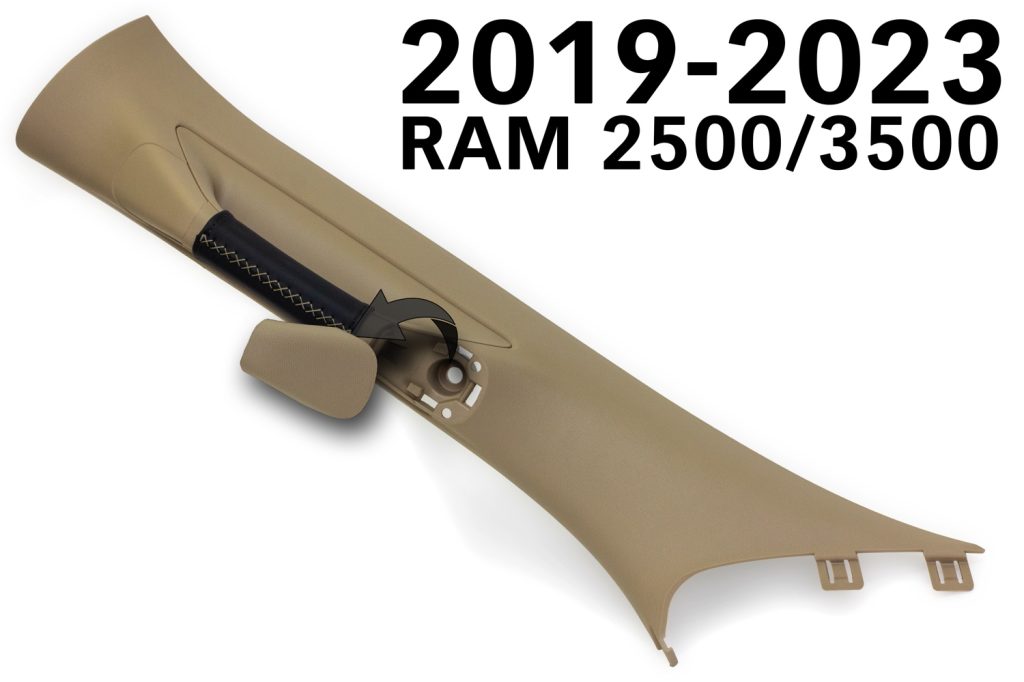
Gauge Pod 2019-2024 RAM 2500/3500
Please read through the following instructions thoroughly before starting your installation. If you have any questions please visit our Support Page.
Part Numbers 63363 & 63364
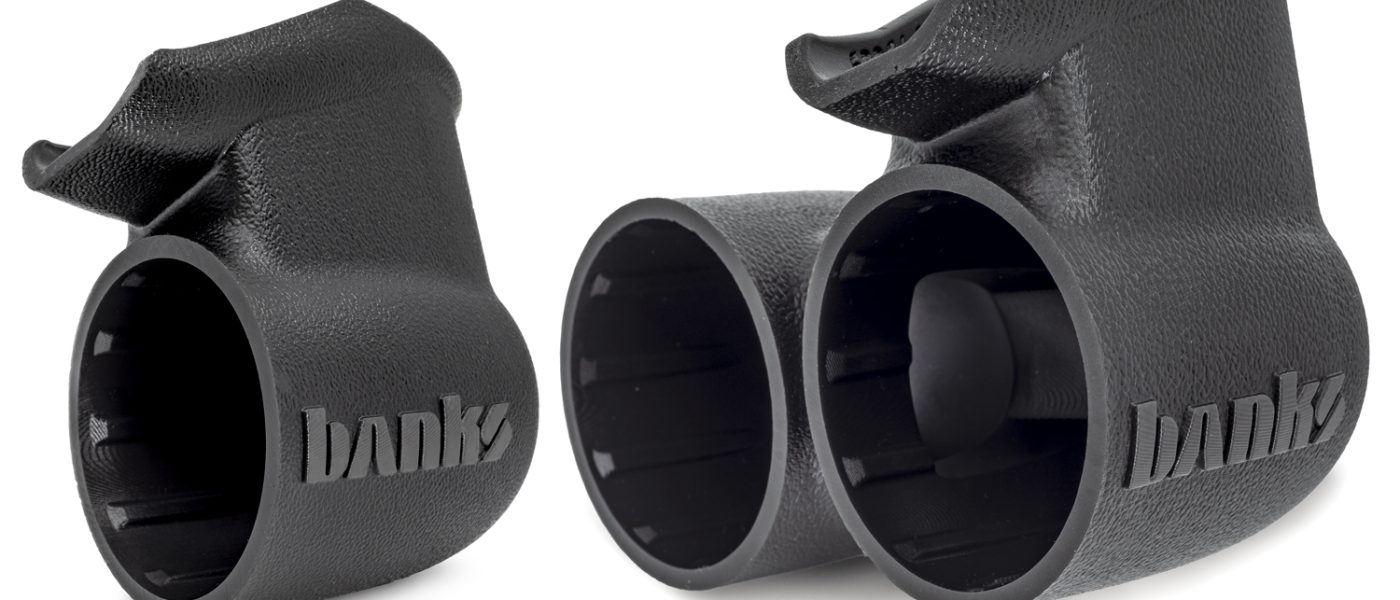
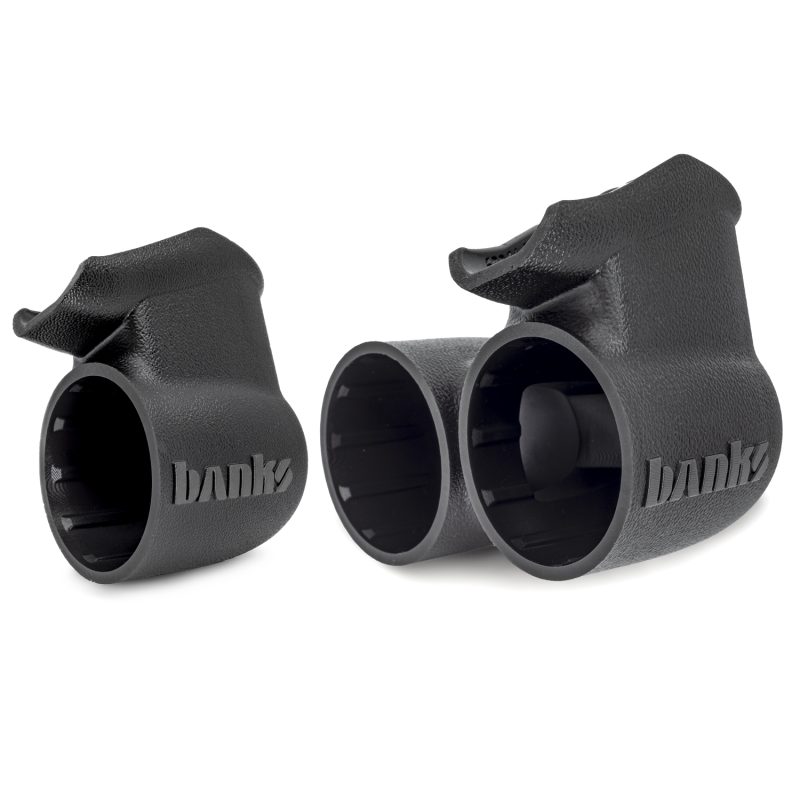
What’s Included

iDash Stealth Pod
Socket Head Cap Screw
Washer
5mm Hex Key
Flush Cuts
If anything is missing, please call us at 800-601-8072 immediately!
If you want to paint your Stealth Pods, you can purchase spray paint to match your interior here.
Tools Required
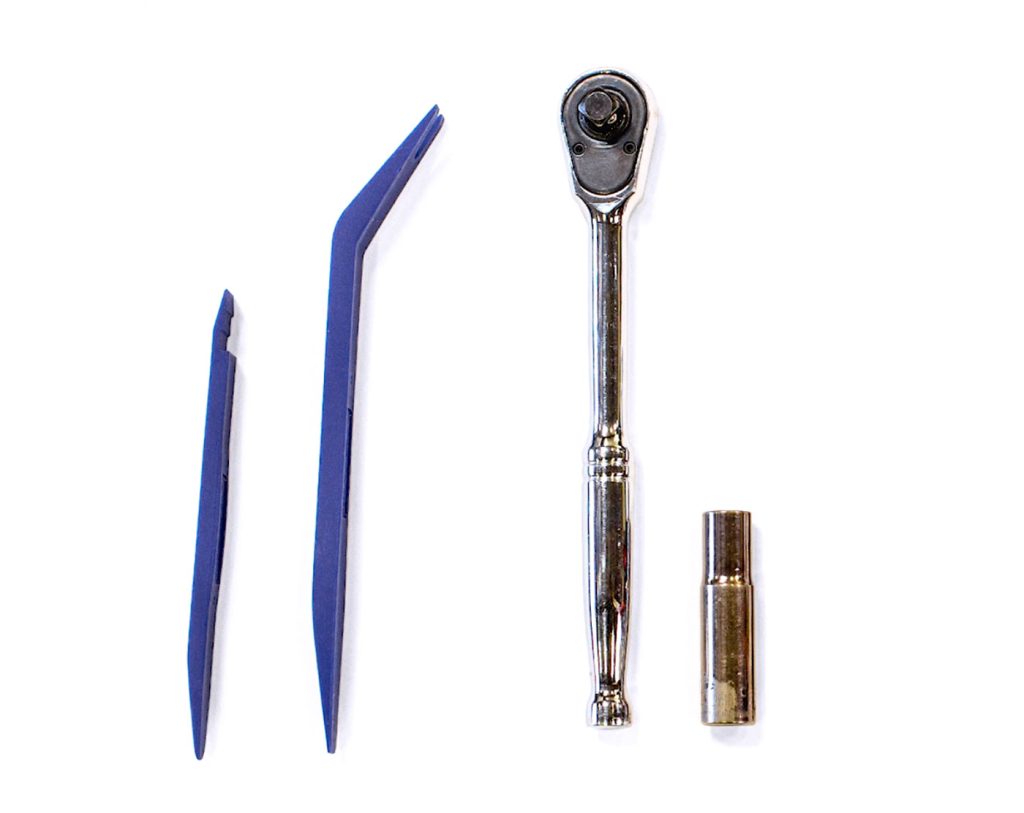
Plastic pry tool
Socket wrench
10mm deep socket
Step-by-step Installation

1. Before starting the installation, use your 10mm socket to remove the terminal and disconnect both batteries.
This is important because you’ll be working near an airbag and you don’t want it to go off.
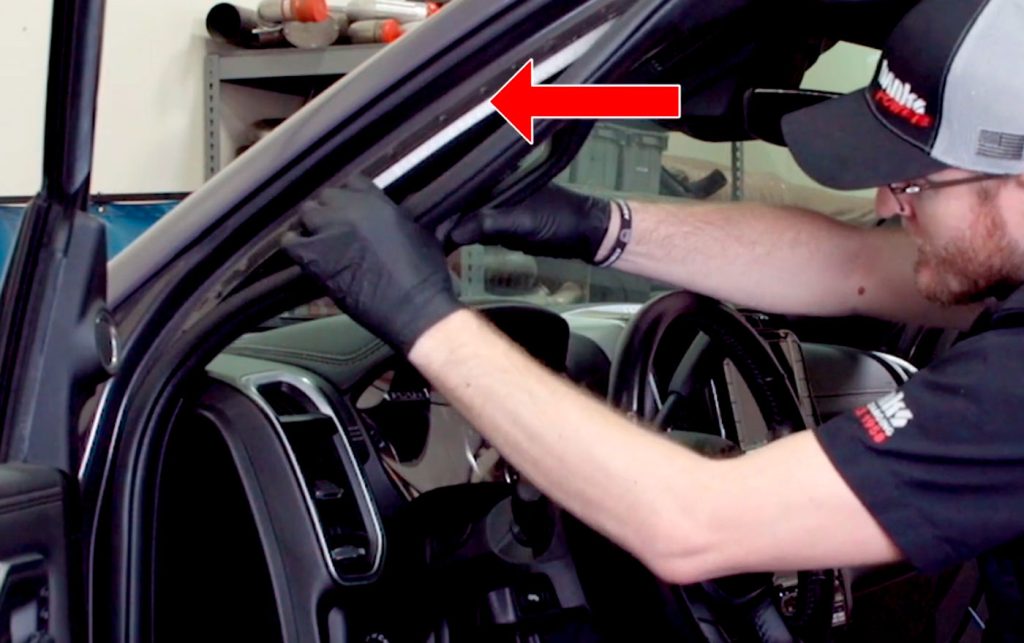
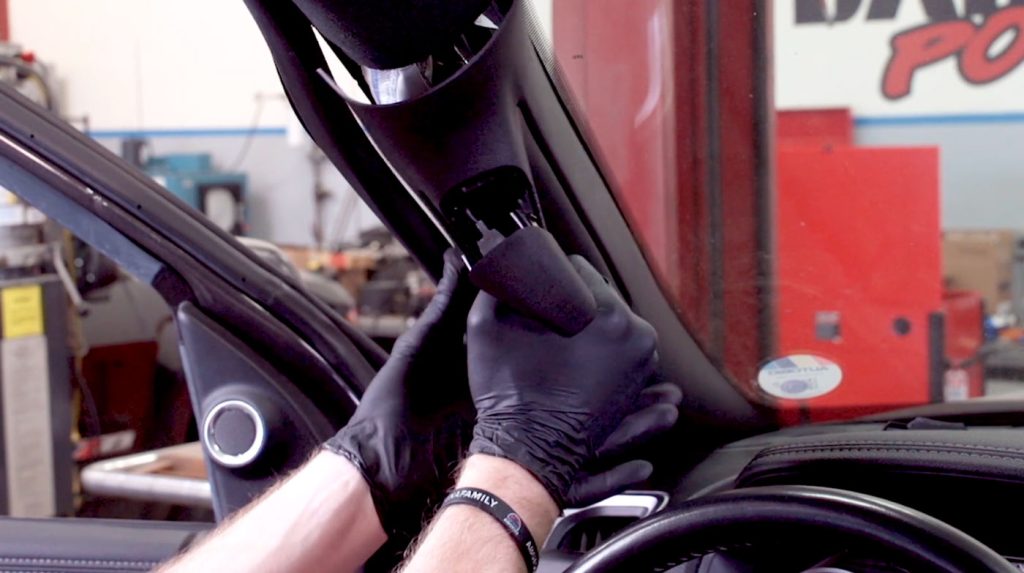
2. Using your fingers, pull back about three feet of the weather stripping, from the top of the a-pillar to below the dashboard.
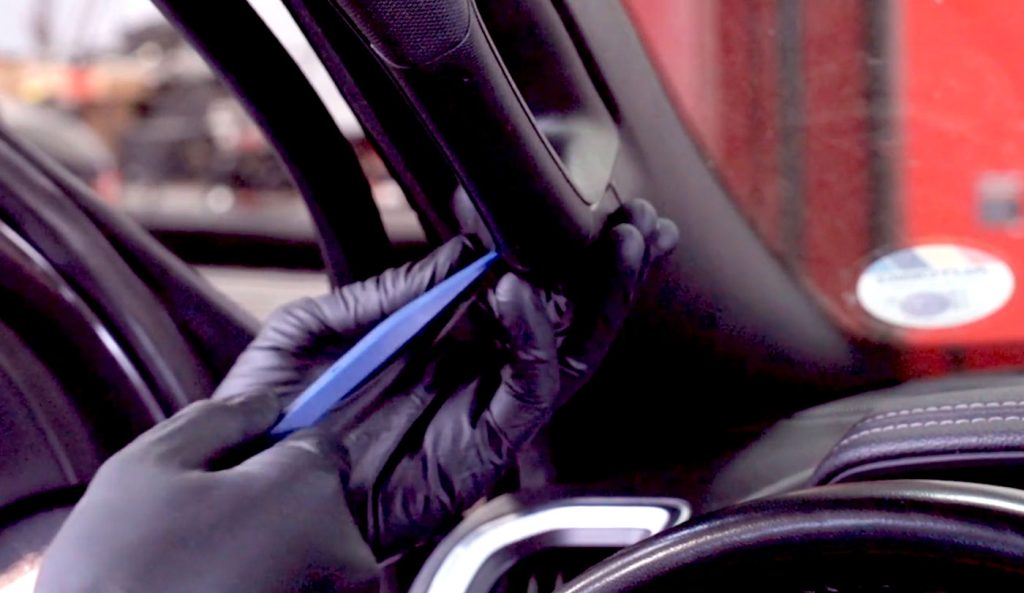
3. Use the plastic pry tool to pry out the small plastic covers that hide the bolts which secure the plastic pillar to the metal frame.
If using a screwdriver, be mindful that if could leave a mark on the soft plastic.
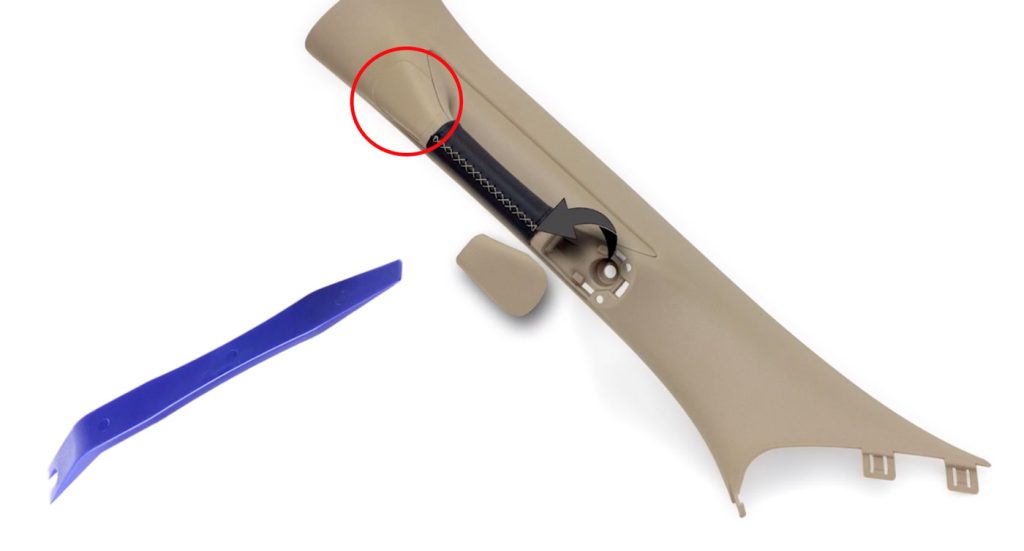
The two plastic pieces will look like this.
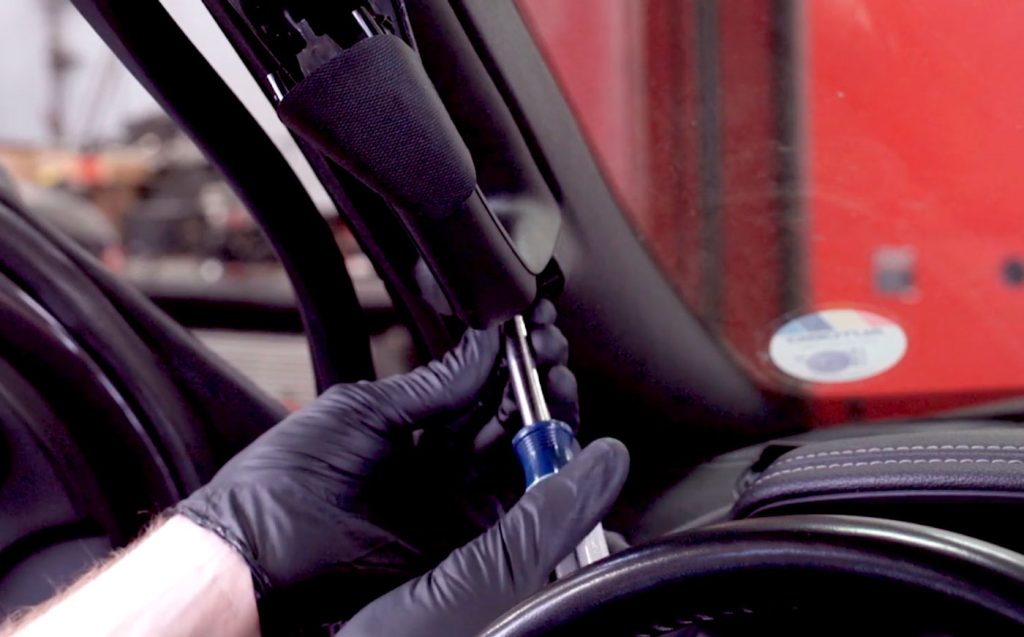
4. With the 10mm socket, remove the two bolts.
Take Note:
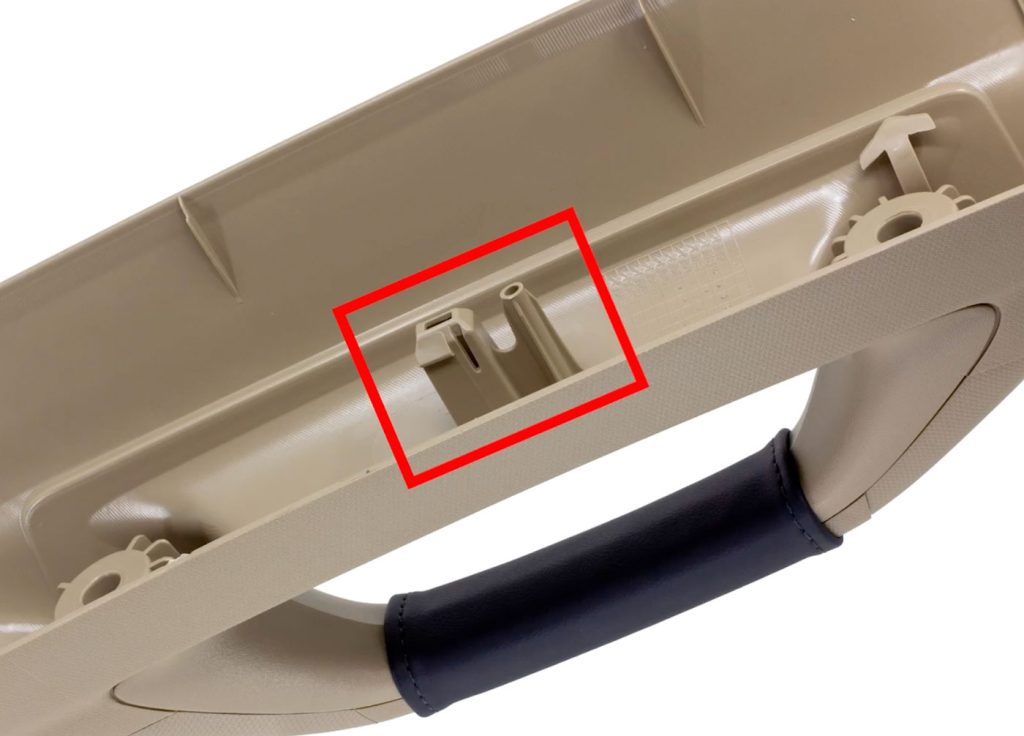
A plastic snap is molded into the pillar right behind the center of your grab handle that holds everything in place.
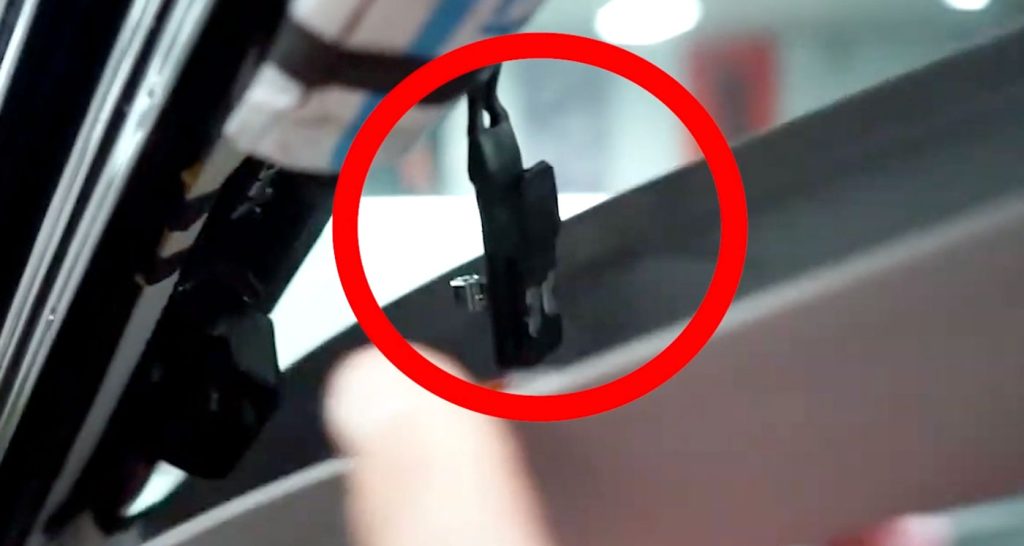
IMPORTANT NOTE: Some trucks have an airbag retaining strap connected to the pillar. Please look before pulling it off to see if your truck has one. If it does, slide the strap out of the clip, and then remove the pillar.
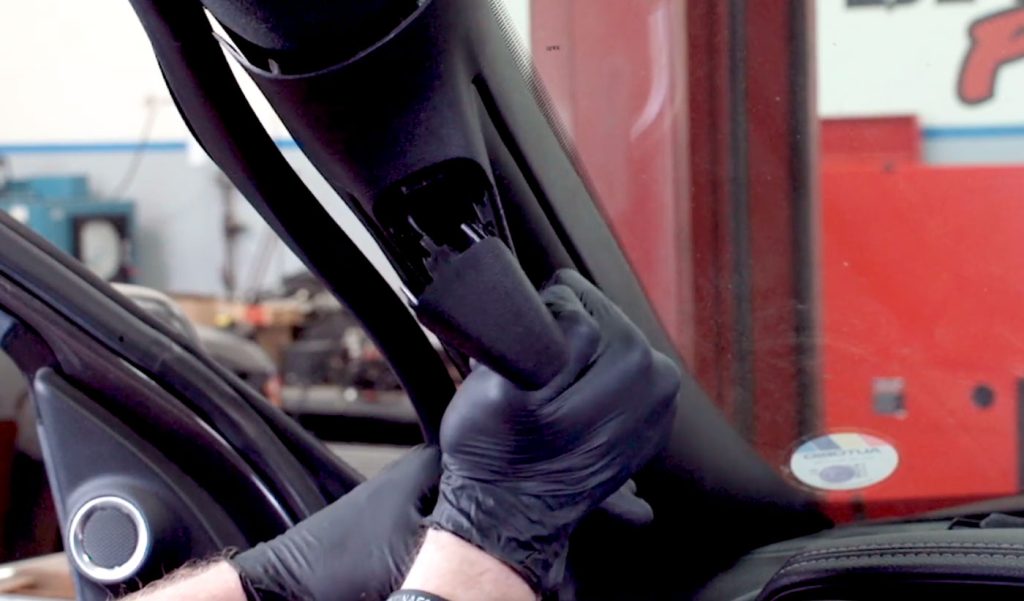
5. Remove the plastic pillar.
Hold the grab handle and give it a swift tug to disengage the plastic tab.
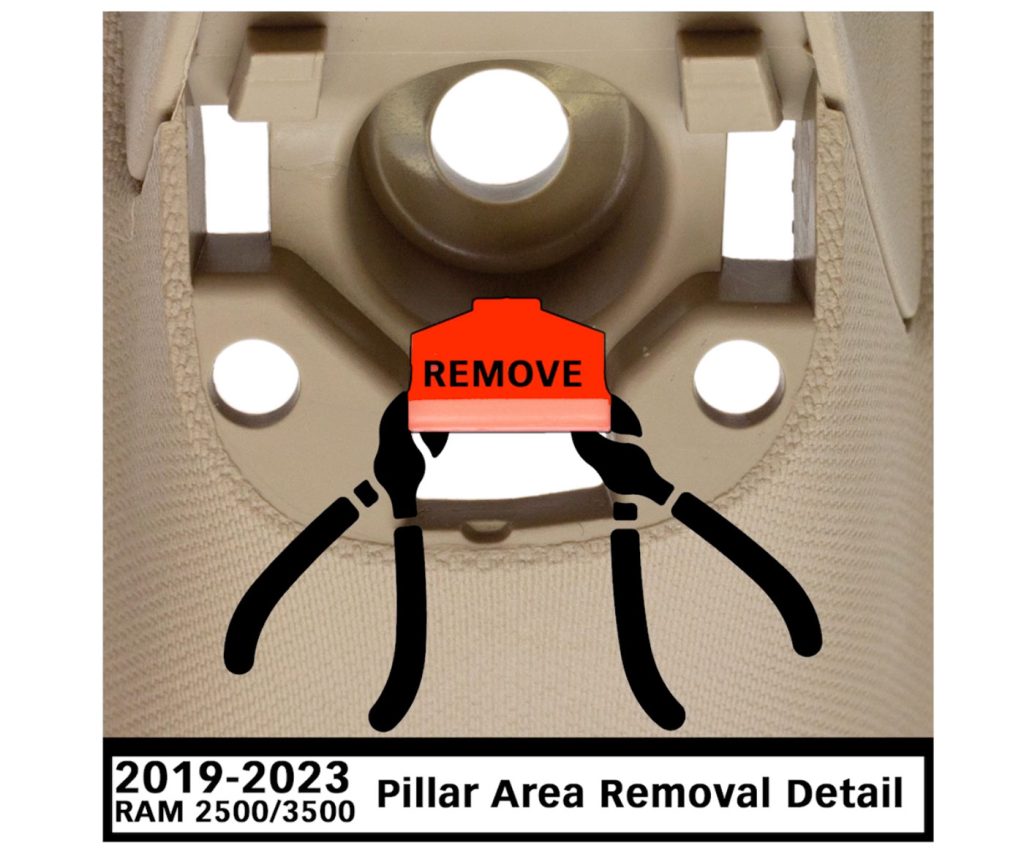
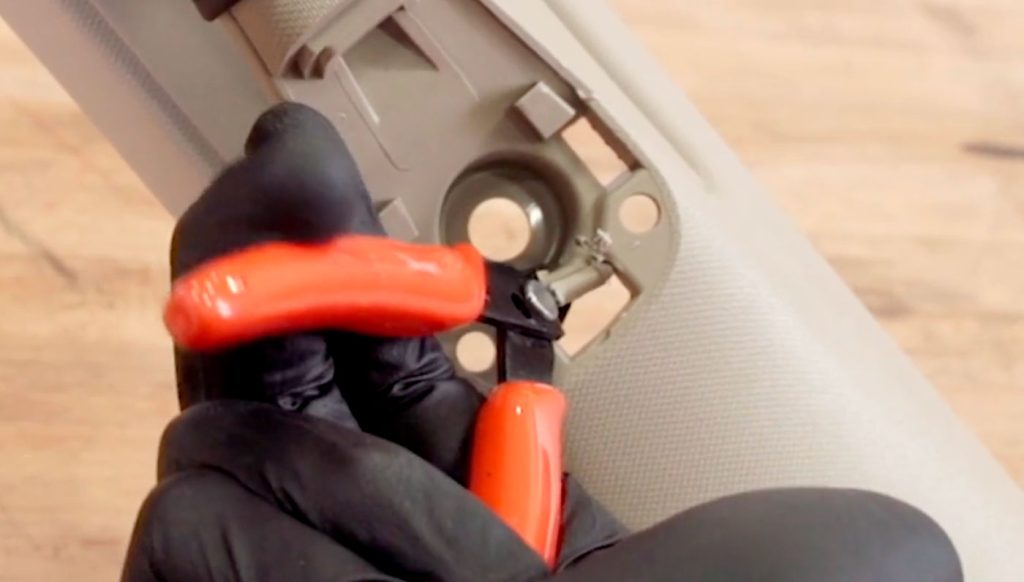
6. Using your flush cutters, remove some of the plastic shown here in red.
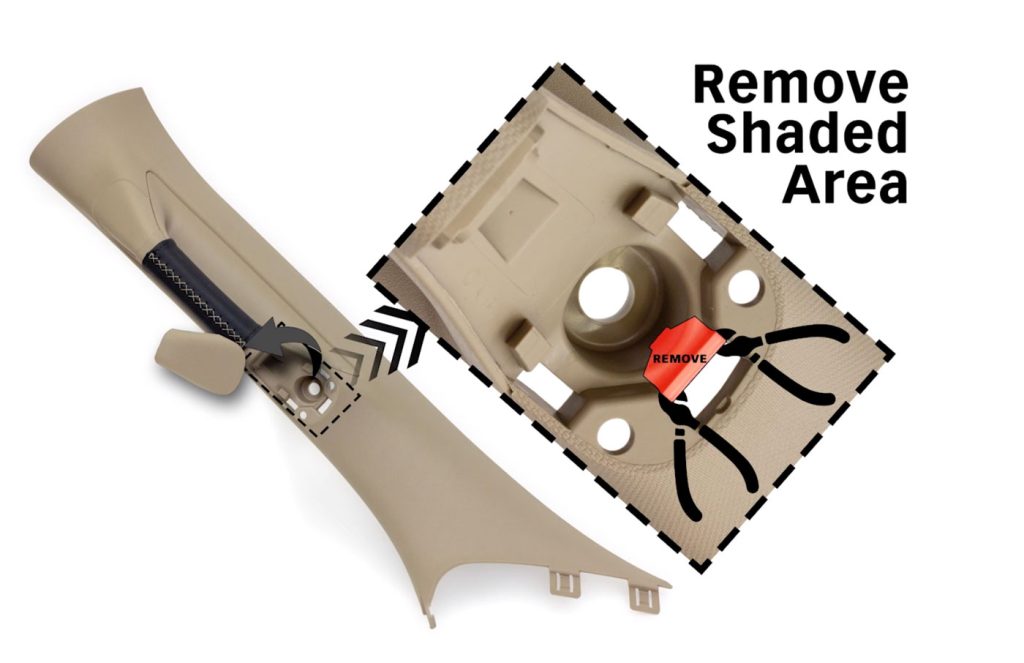
This will allow the iDash data cables to pass through.
You only get one shot to do this, so be sure you are clipping the access hole in the correct place.
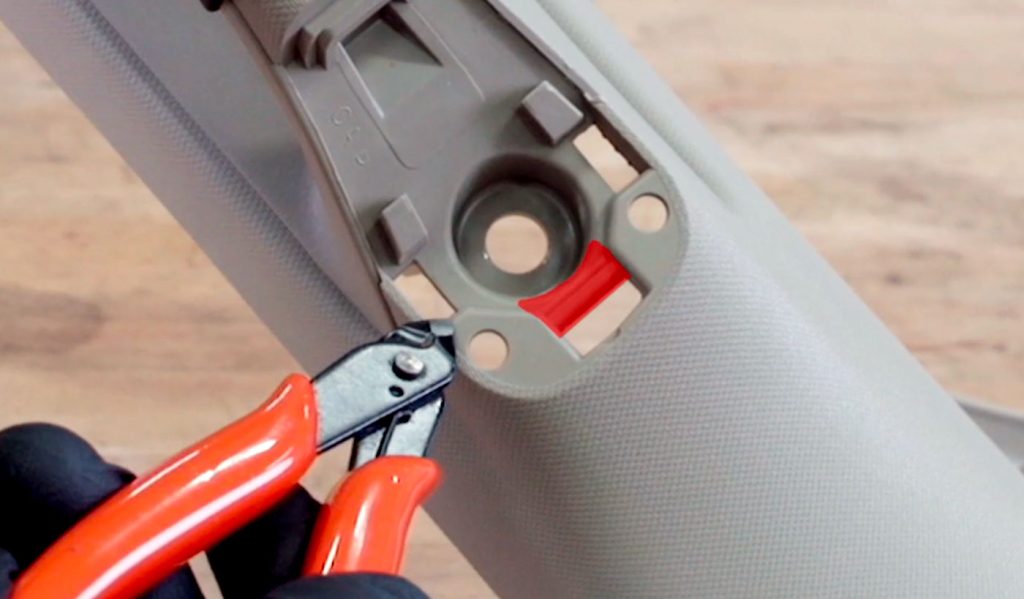
Avoid the sides of the bottom hole since these are used for rigidity. Cut just below the lower bolt hole as highlighted.
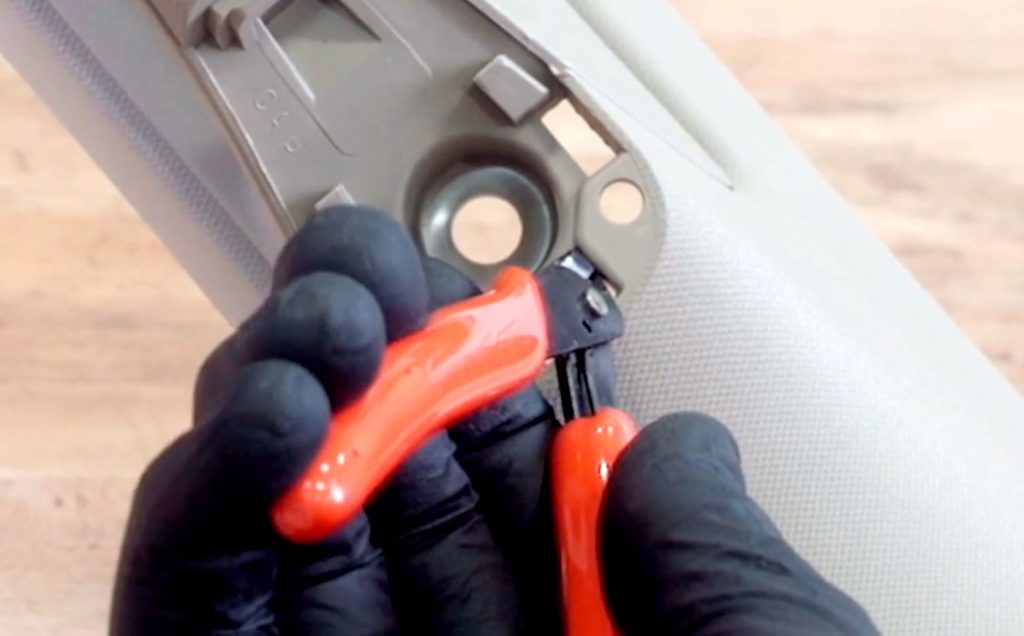
To start, make a single cut here and move to the left side and make an identical cut.
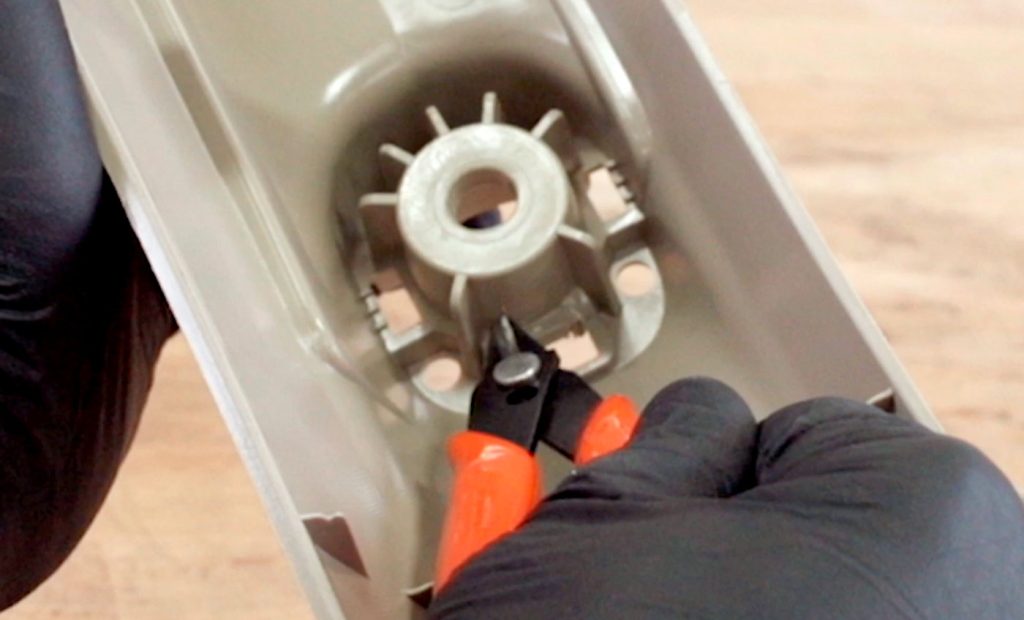
Viewing from the back side, cut halfway down the cylinder, avoiding the sides where the support is.
Now turn it back over to finish the cut. Revisit the left side to complete the cut.
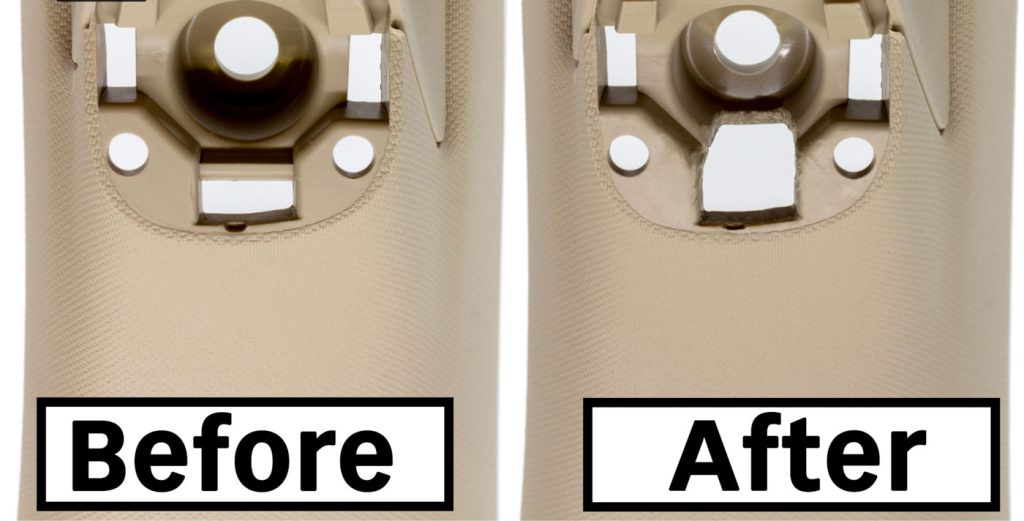
This is what it should look like before and after the cut.
It’s your choice to clean up the edges or not, but the iDash Stealth Pod will cover it up.

7. Route the cable up the left side of the dashboard, tucking them in as you go.
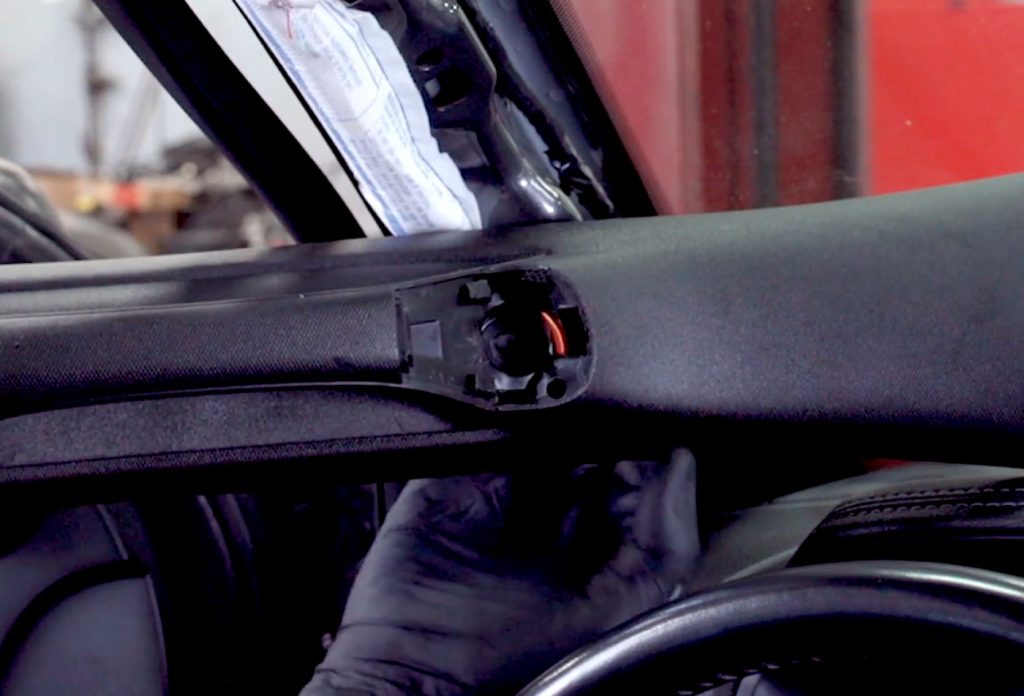
Your Stealth Pod mounts on the lower of the two bolts on the pillar. The cable goes through the hole you just cut.
Please note: If you only have the iDash, you’ll only have one OBD cable. If you have a Derringer or PedalMonster you’ll have two cables. Start with the six-pin, then the four-pin to reach your iDash.
Keep about four inches of slack so the cables will reach the iDash once the pod is installed.
When satisfied with the fit, line up the bottom of the pillar and snap the entire piece back into the truck.
Installing the Stealth Pod

1. Insert the Banks supplied bolt and washer through the pod.
2. Run the cables through the Stealth Pod and then press the Pod flush into the pillar.
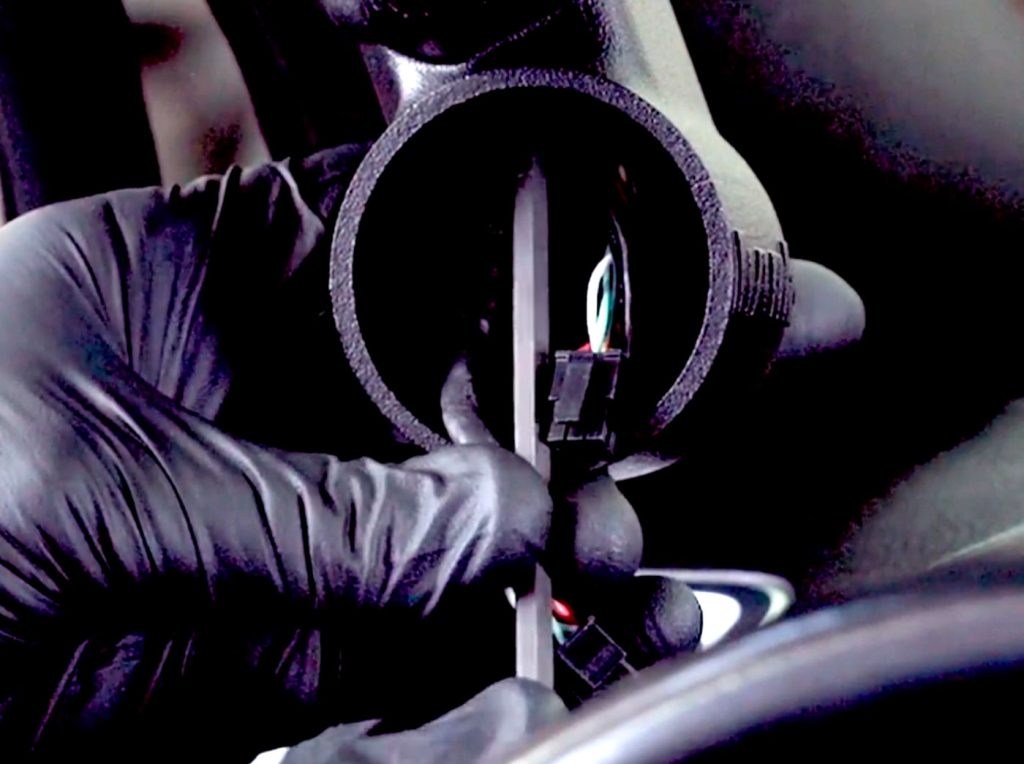
Start threading the bolt by hand and then use the supplied 5mm hex key to finish securing the Stealth Pod in place.
Then insert and tighten the upper bolt on the pillar.
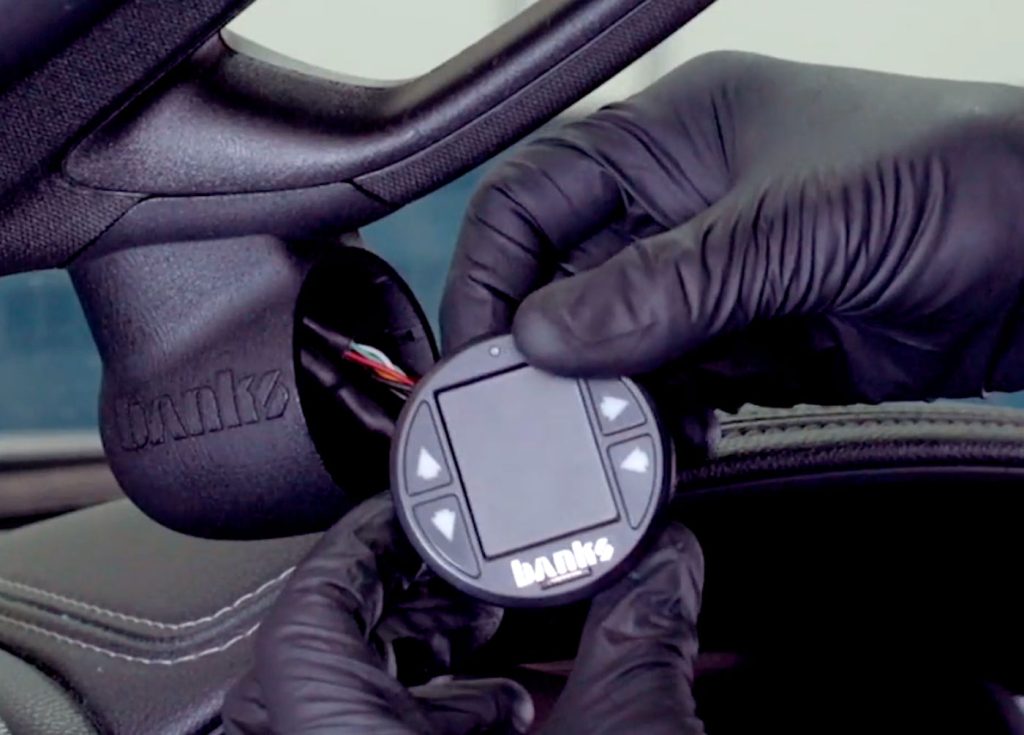
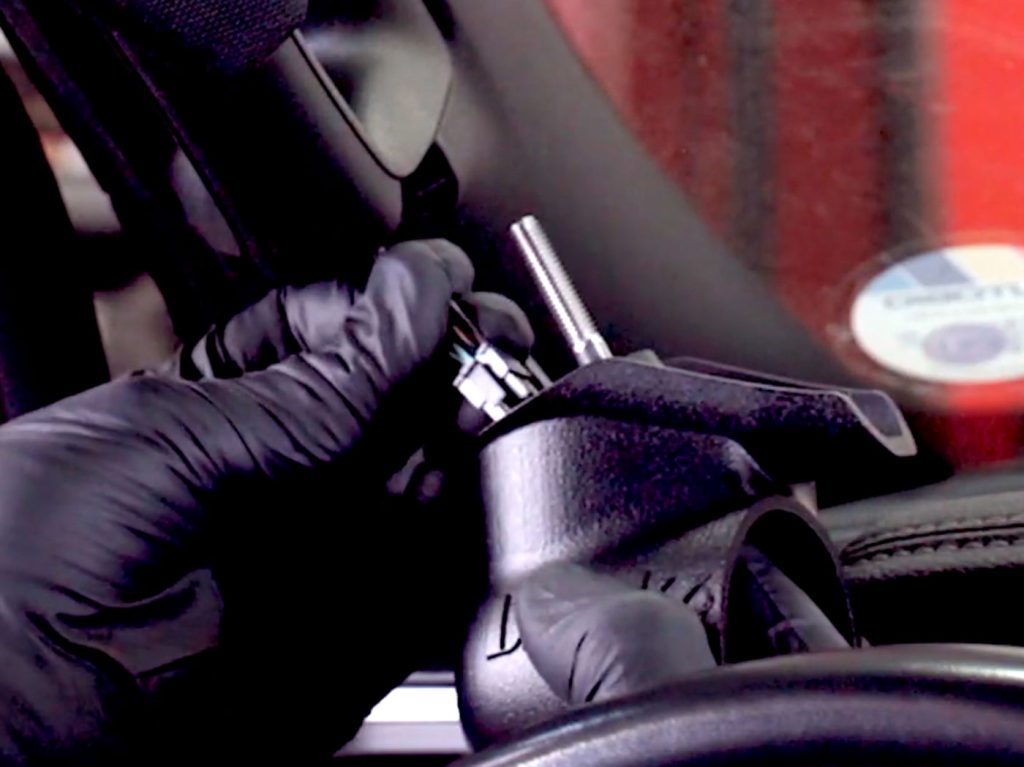
3. Insert the iDash
Connect the four-pin and six-pin cables to the back of the iDash. Make sure they click to ensure they are locked in and then slide the iDash into the Stealth Pod.
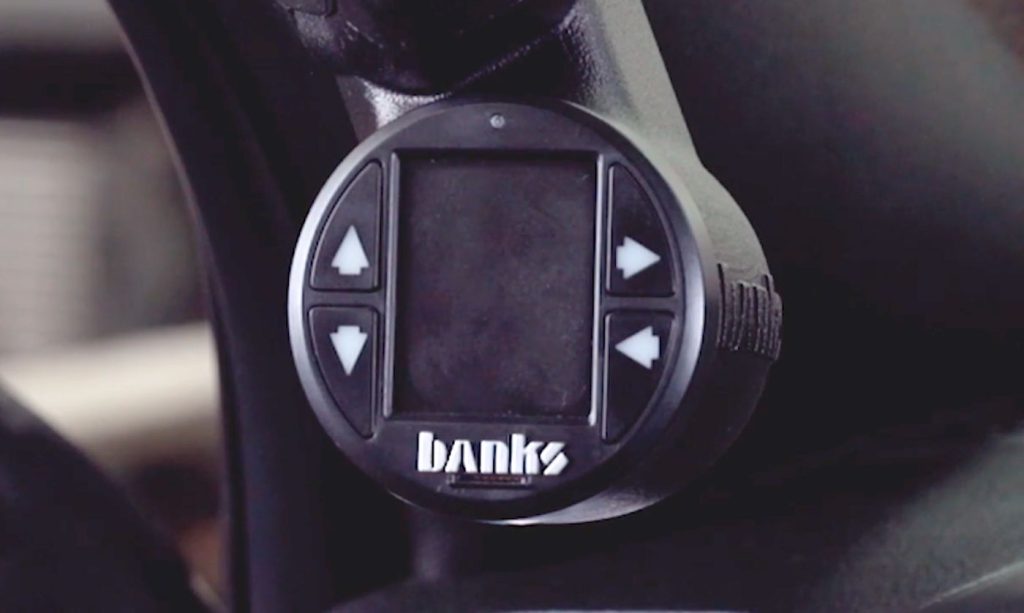
Make sure the Banks logo is aligned correctly. Then reinstall the plastic cap that hides the upper bolt on the pillar.
4. Plug in the OBD cable. Push the weather stripping back in and reattach both negative terminals to your batteries.
Fire up your iDash, hit the road, and enjoy!