


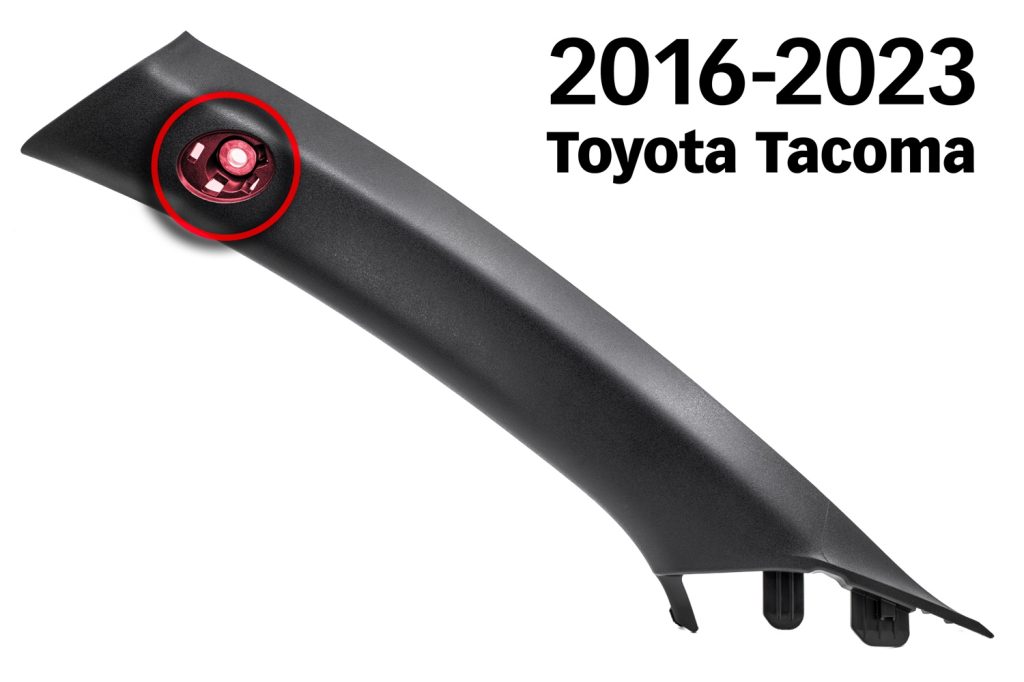
97732 2016-2023 Toyota Tacoma Stealth Pod Installation Guide

Part Number 63372
Fits the A-Pillar below found in the:
• 2016-2023 Toyota Tacoma
Installation Guide
Note: If you’ve chosen to paint the pods yourself, please visit bankspower.com/paint to get perfectly matched spray paint. No primer is needed just three to four light coats.
What’s Included
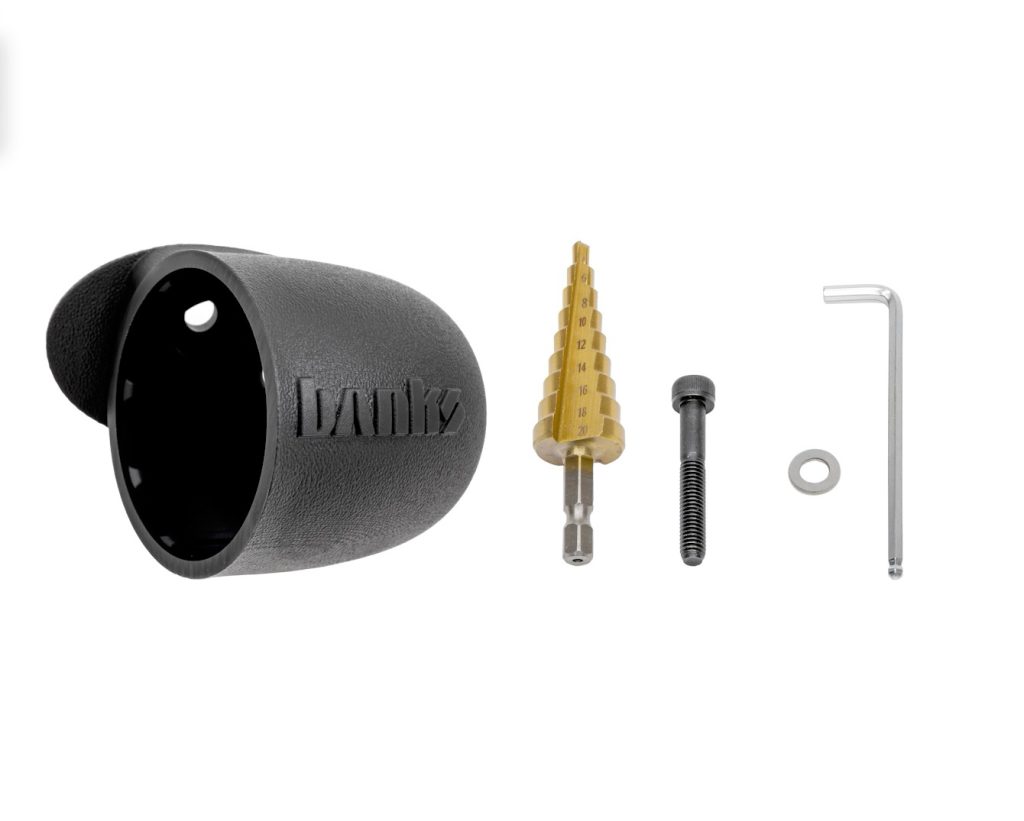
• iDash Stealth Pod
• A Step Bit
• A Hex Screw
• Washer
• 5mm Hex Key
If anything is missing, please call us at 800-601-8072 immediately!
Tools Required
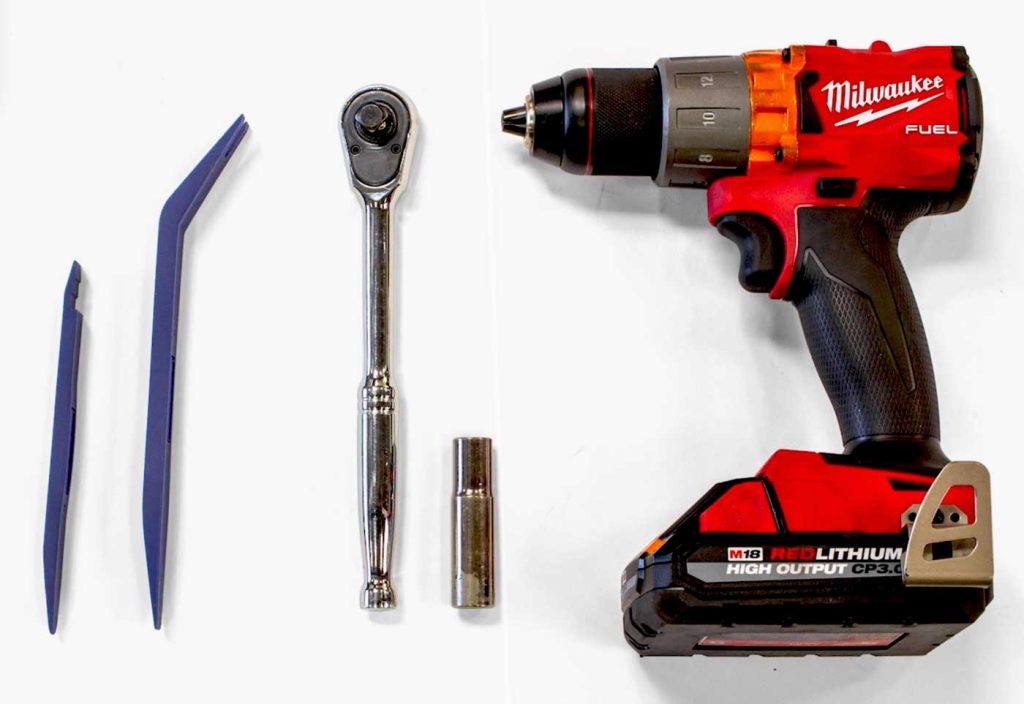
• Plastic Pry Tool
• Socket Wrench
• 10mm Socket
• Drill
Step-by-step Installation

1. Before starting the installation, use your 10mm socket to remove the terminal and disconnect the battery.
This is important because you’ll be working near an airbag and you don’t want it to go off.
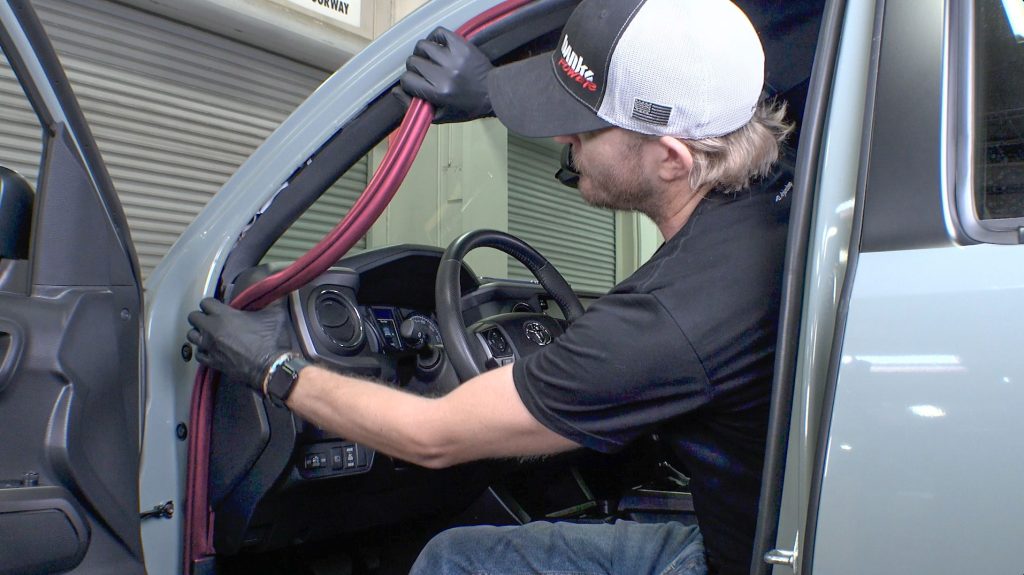
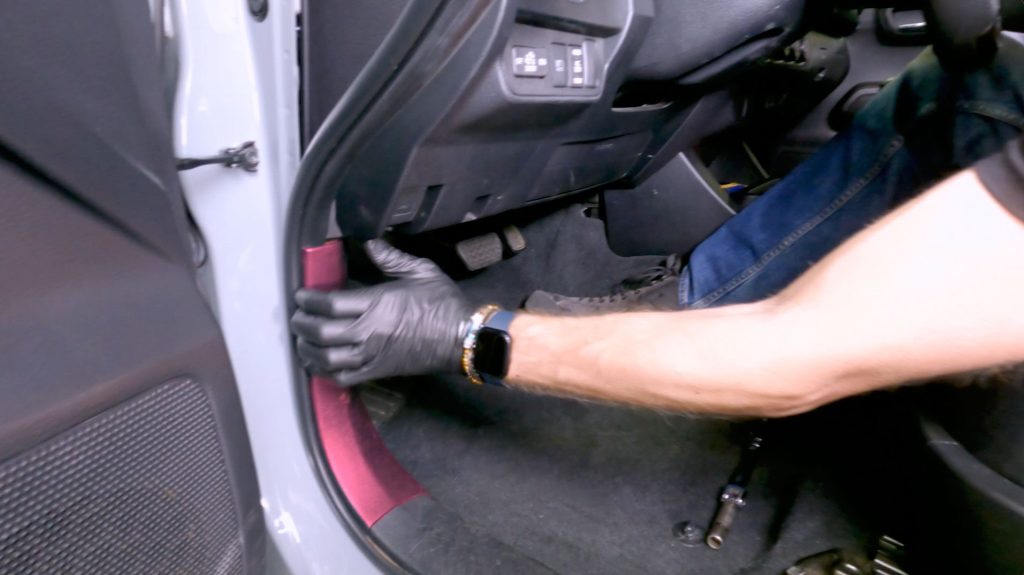
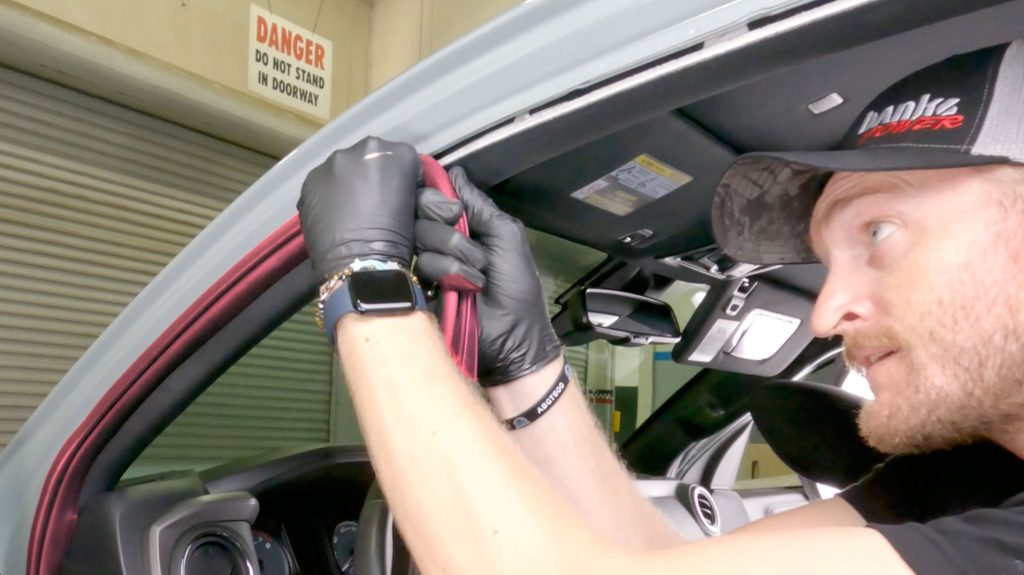
2. Pull off about three feet of the weather stripping from just below the dashboard to the top of the A-pillar.
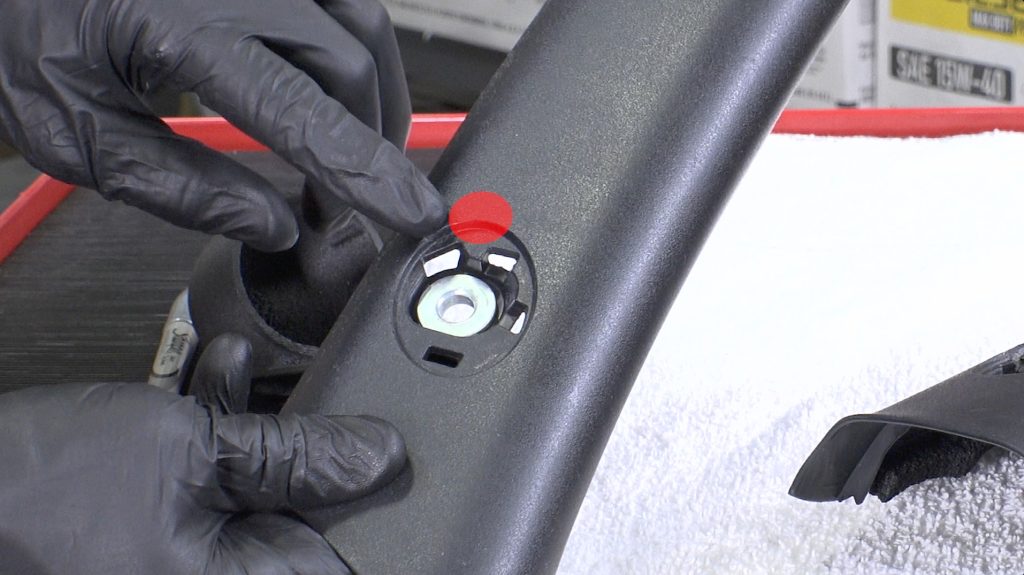
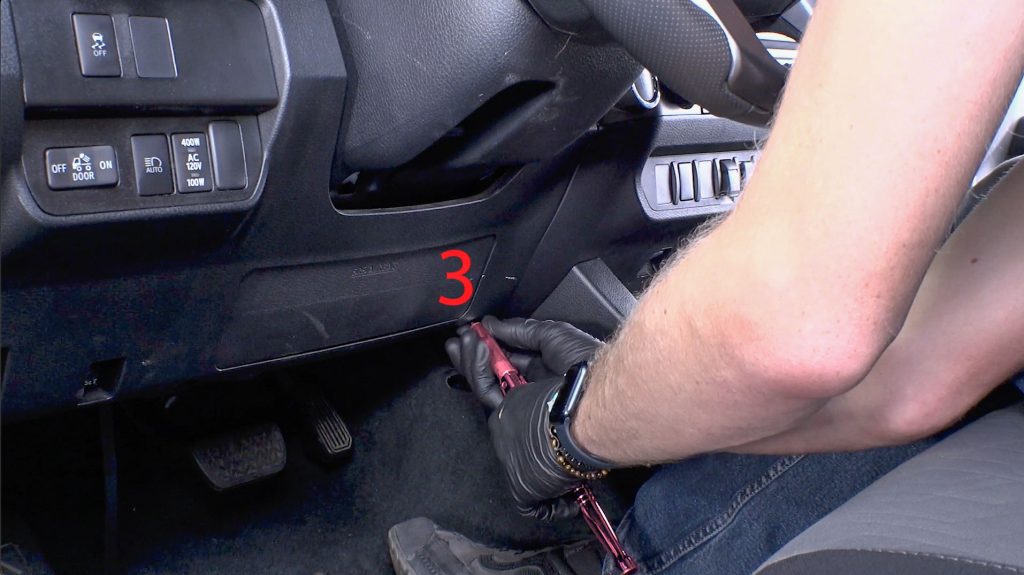
3. Pry off the plastic “SRS” cover that hides the bolt which secures the pillar to the frame.
Beware: If you use a screwdriver, it could leave a mark on the soft plastic. A plastic pry tool and/or rag is recommended.
4. With the 10mm socket, remove the bolt.
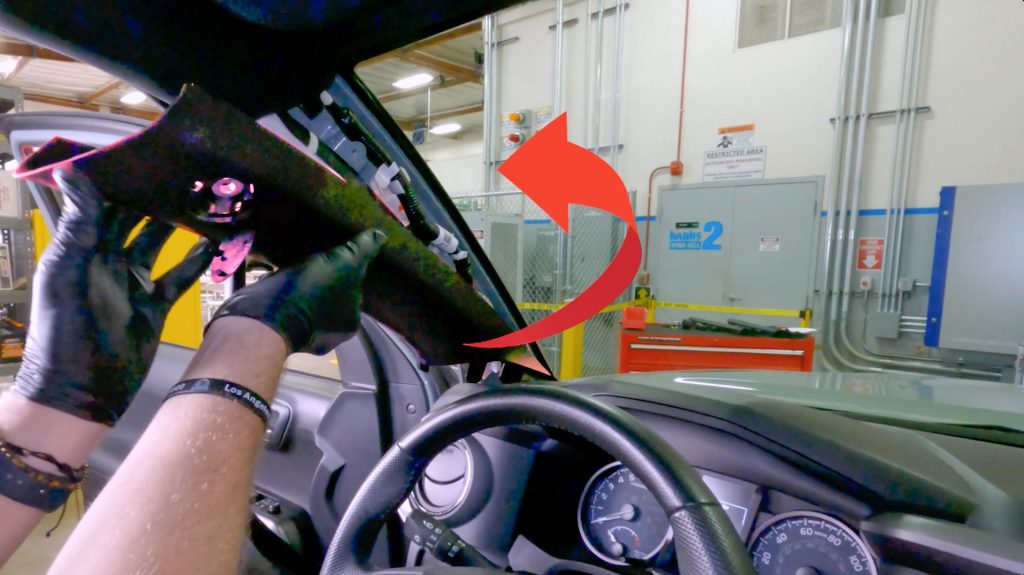
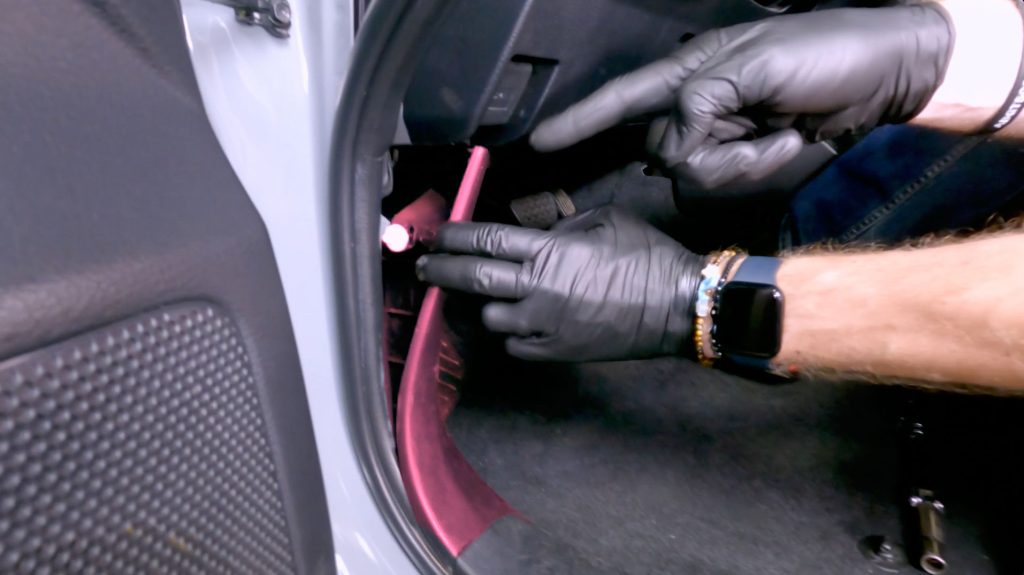
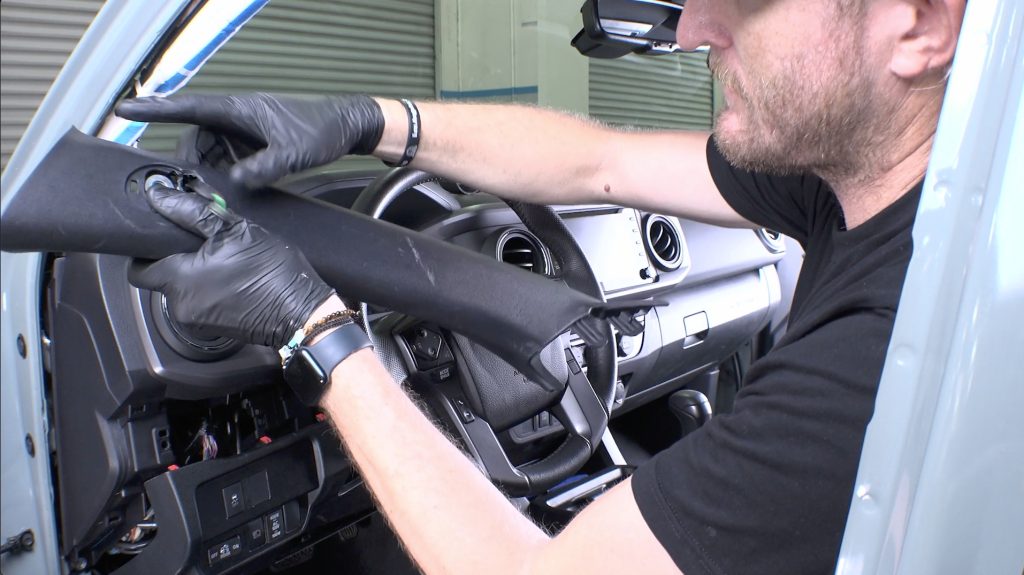
5. Using just your hands, pry the pillar away from the truck.
There is a plastic clip in the middle of the plastic trim piece. The clip will click and release.
Now the pillar can be slid up and away from the dashboard.
Please Note:
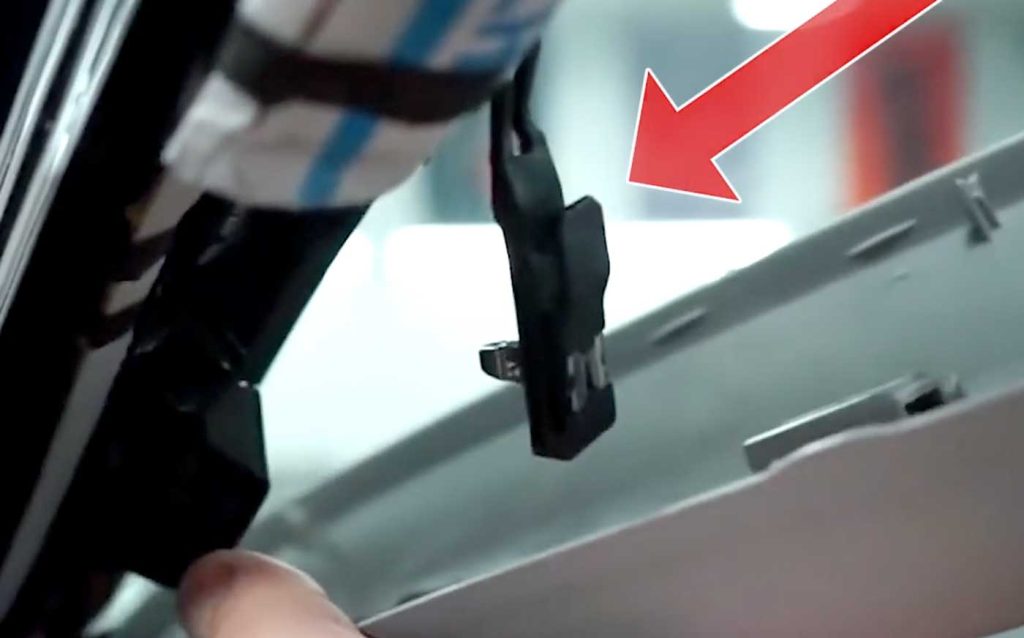
Some trucks have an airbag retainer strap. If your truck does, slide the clip off the plastic trim piece before removing the pillar.
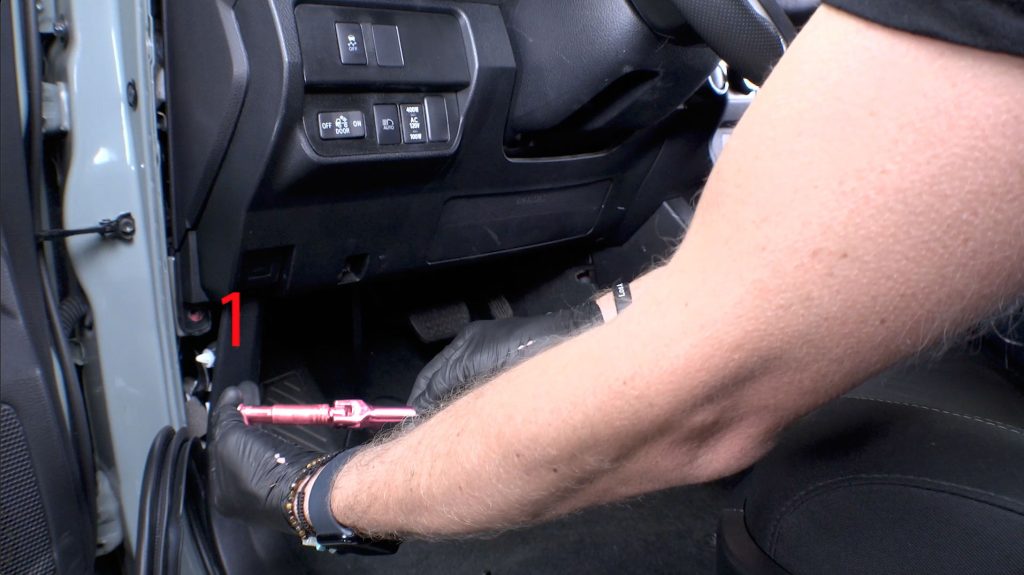
6. Remove Lower Kick Panel
There is a small plastic clip holding this trim to the frame. Pull straight off the body toward the center of the truck to release it.
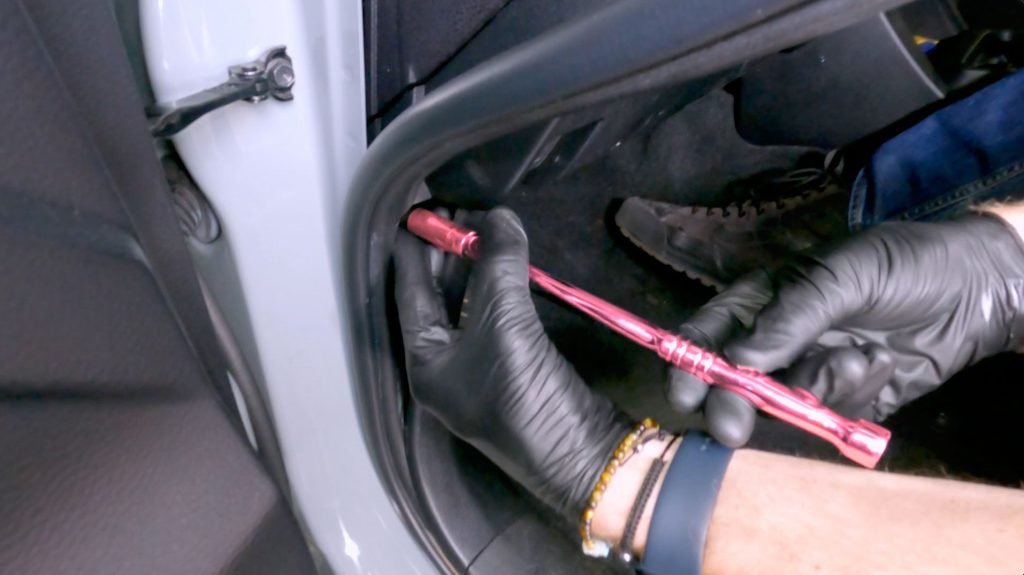
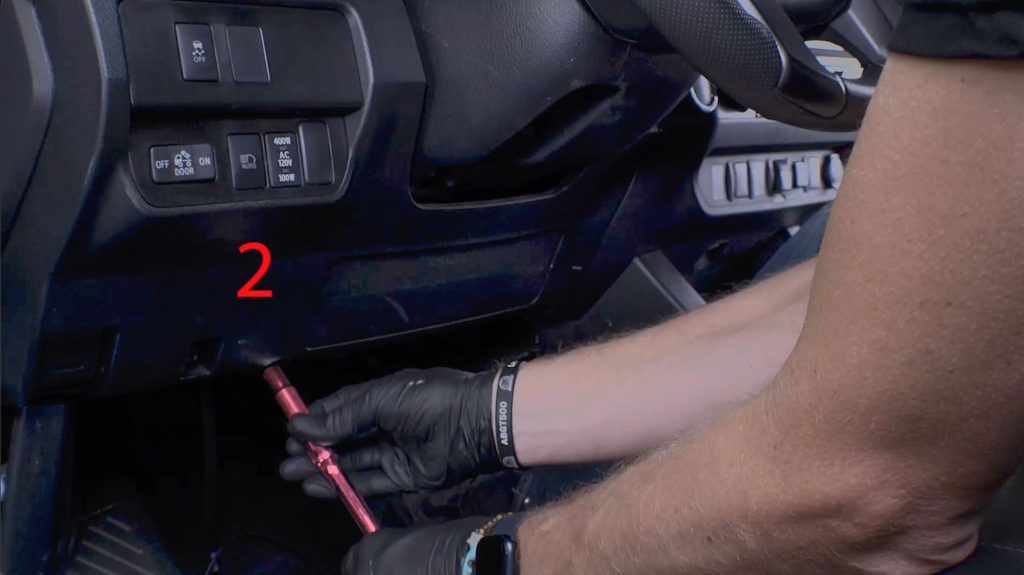
7. Remove 10mm bolt by Hood Latch Release.
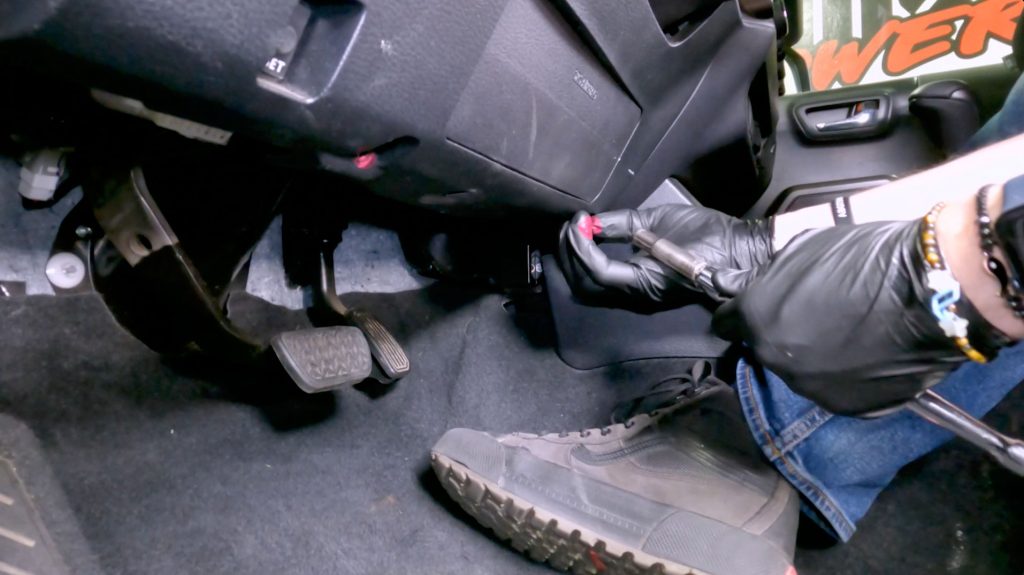
8. Remove two 10mm bolts by lower airbag.
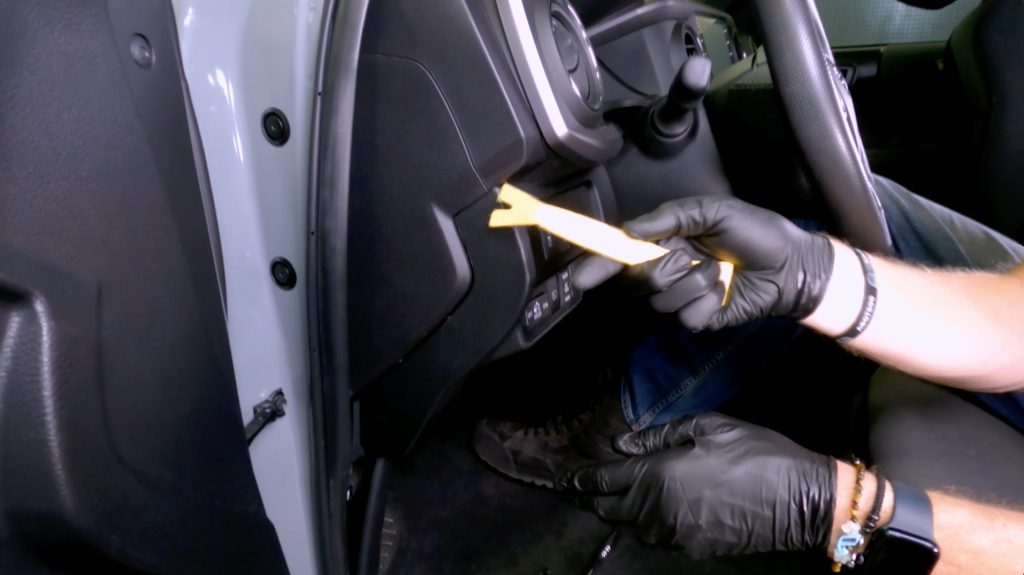
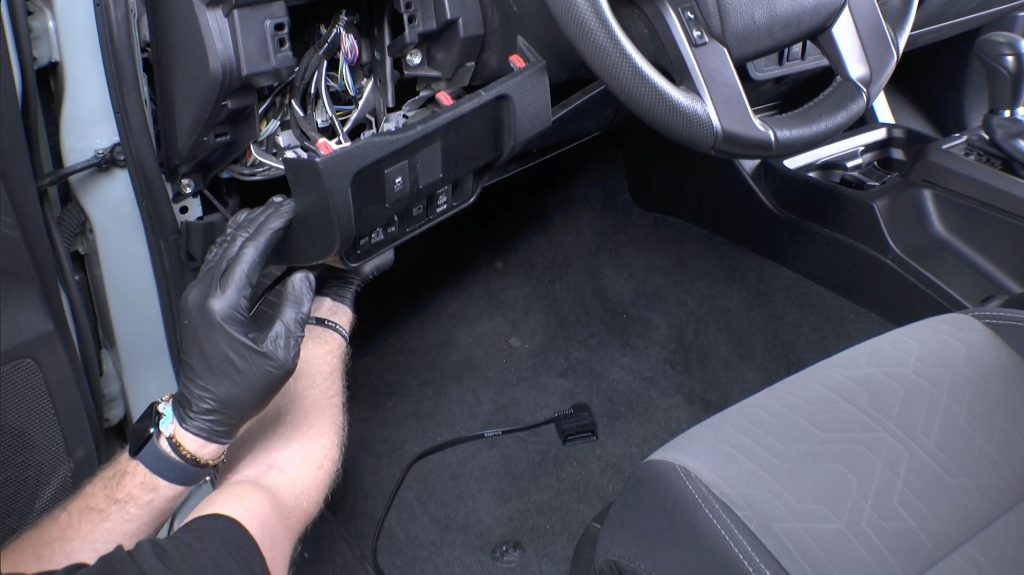
9. Detach lower dashboard trim.
Use a panel popper tool on the seam and work your way around.
You don’t need to fully remove this trim piece, this is just to provide easier access to run your OBD-II cable up through the dash.
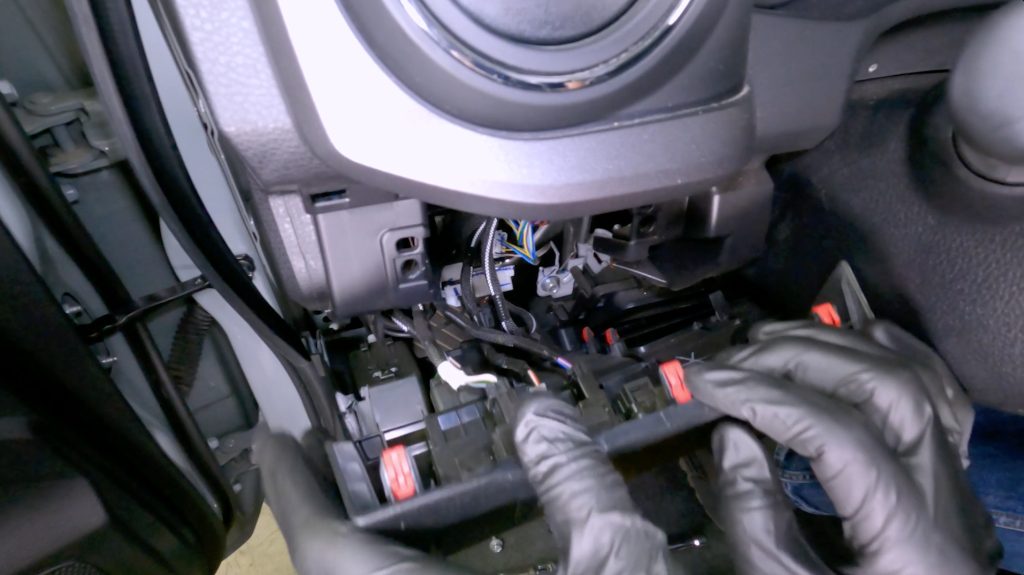
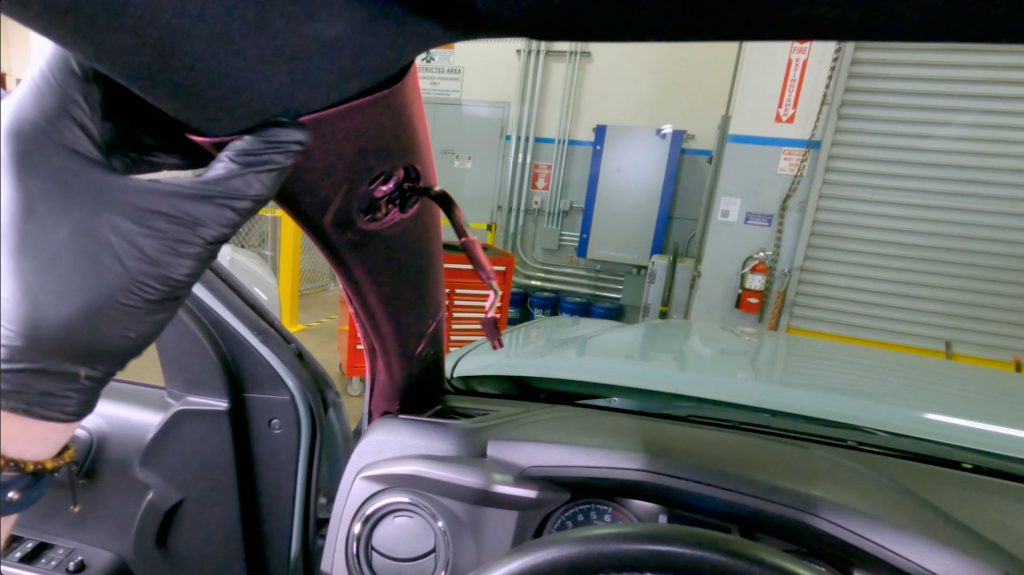
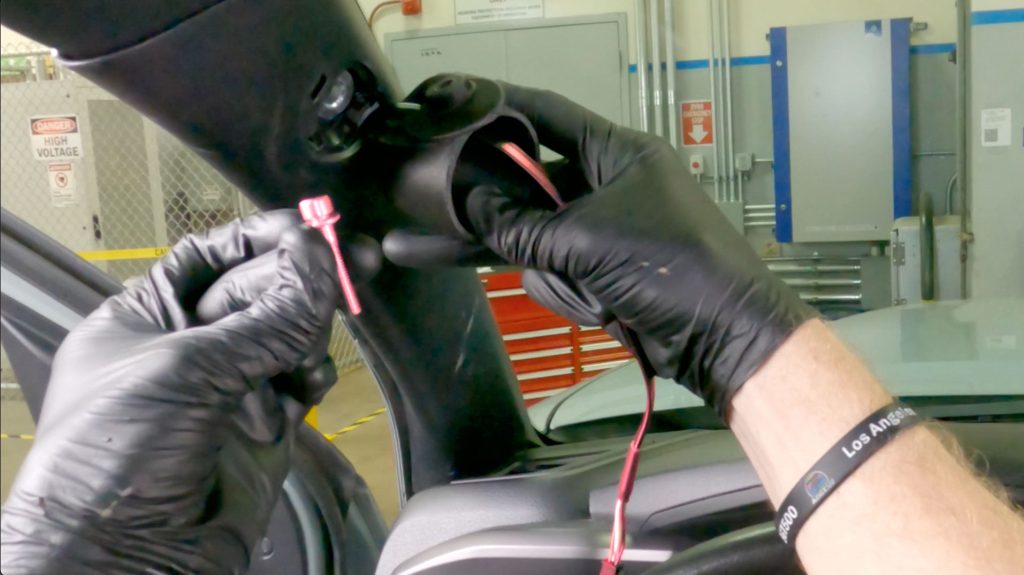
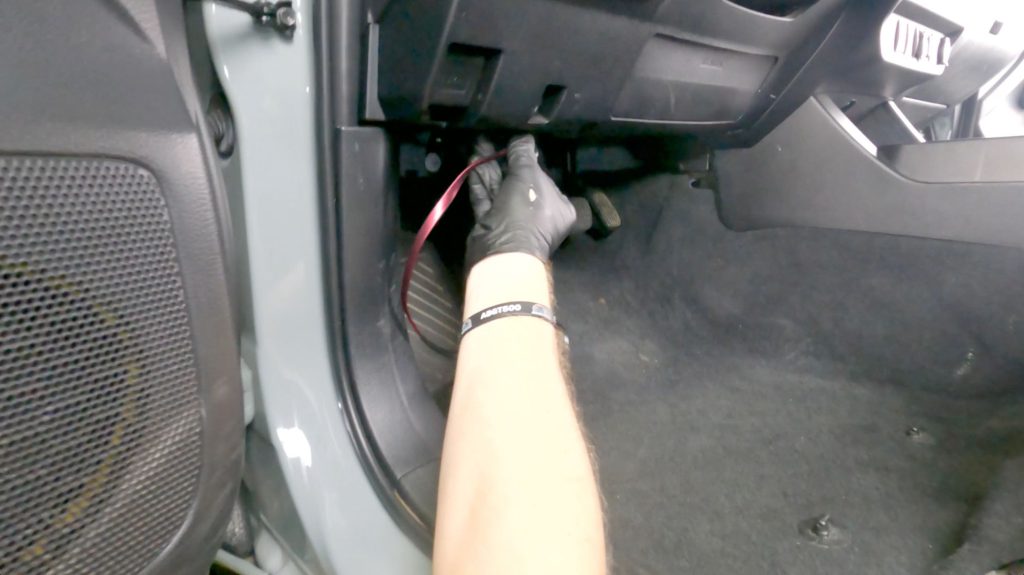
10. Plug in and route Banks OBD-II Cable from the bottom, up past the driver side air vent, and through the top of the dash.
You should be able to fish it through the top area as shown. Carefully pull it through and give yourself a foot or two of slack for now.
Important Detail: Drilling Location
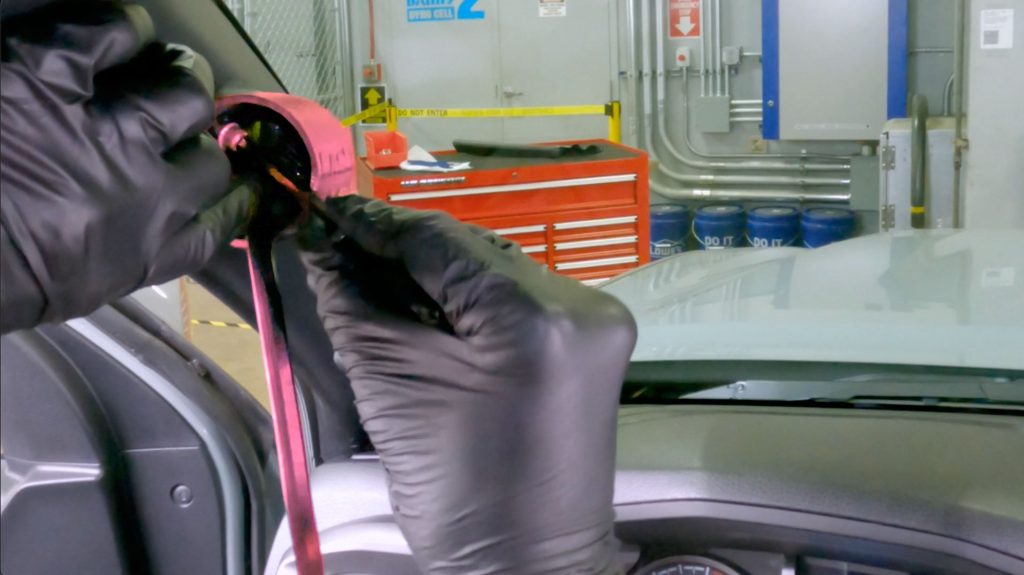
1. Grab your A-Pillar and mark the drill location.
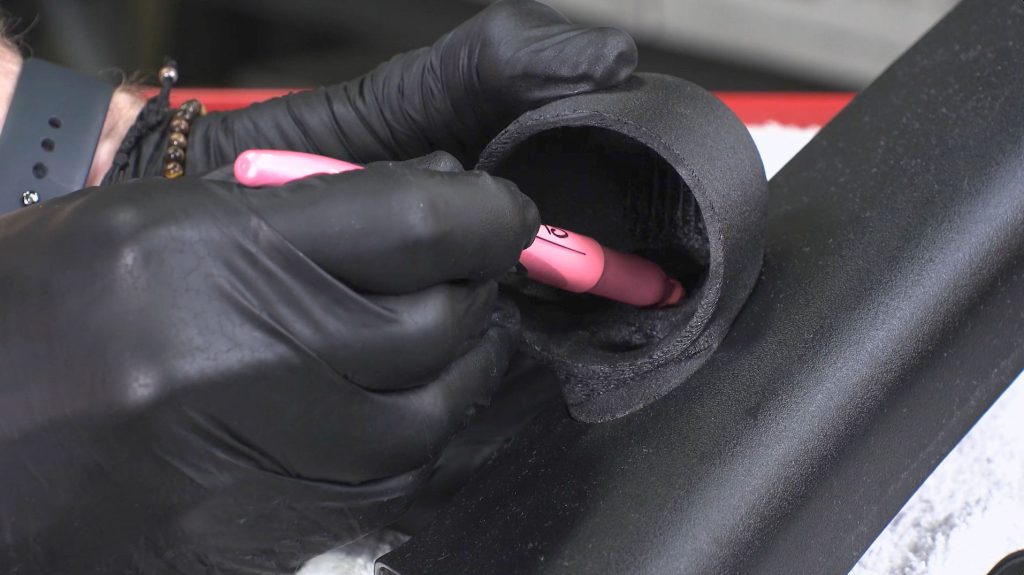
With a marker, place a dot in the corner where SRS cap used to go. Align it center with the Stealth Pods cable passthrough hole.
This will guarantee your drill location will line up with the Stealth Pod
This is how your dot should be when looking through the empty Stealth Pod. Right in the corner of the A-Pillar plastic , and center aligned.
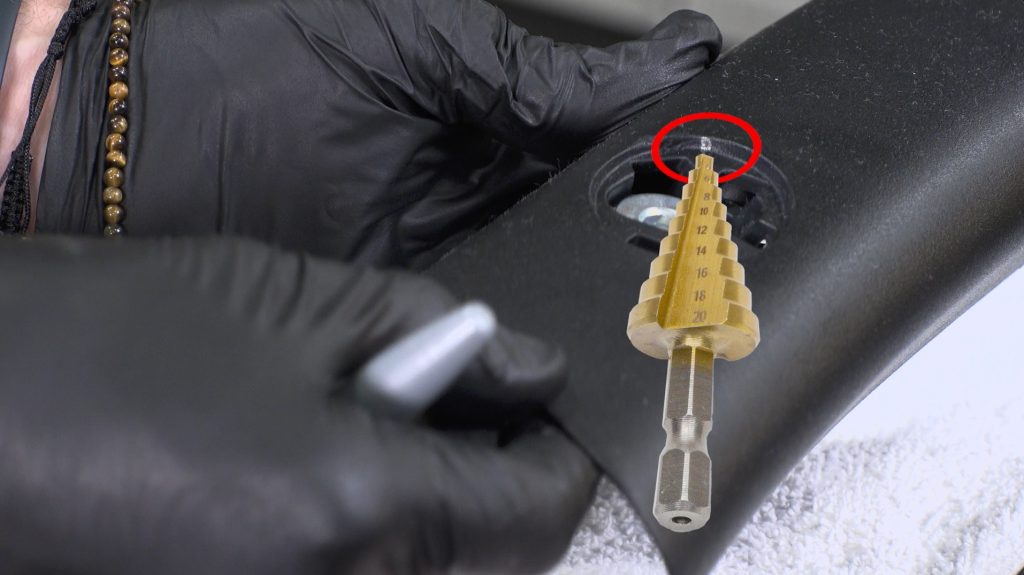
Your 16-18mm access hole will be covered by the Pod.
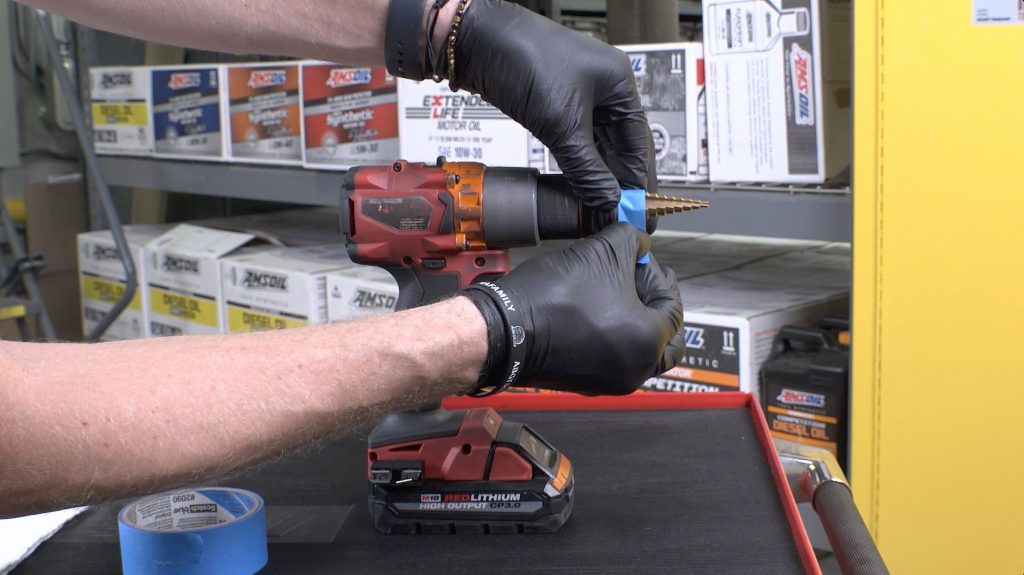
2. Put the provided drill bit into your drill.
If you have a variable speed drill, we recommend the slowest speed setting.
The plastic on the pillar is soft and the drill cuts through it like butter. Use masking tape to mark the 16mm or 18mm mark.
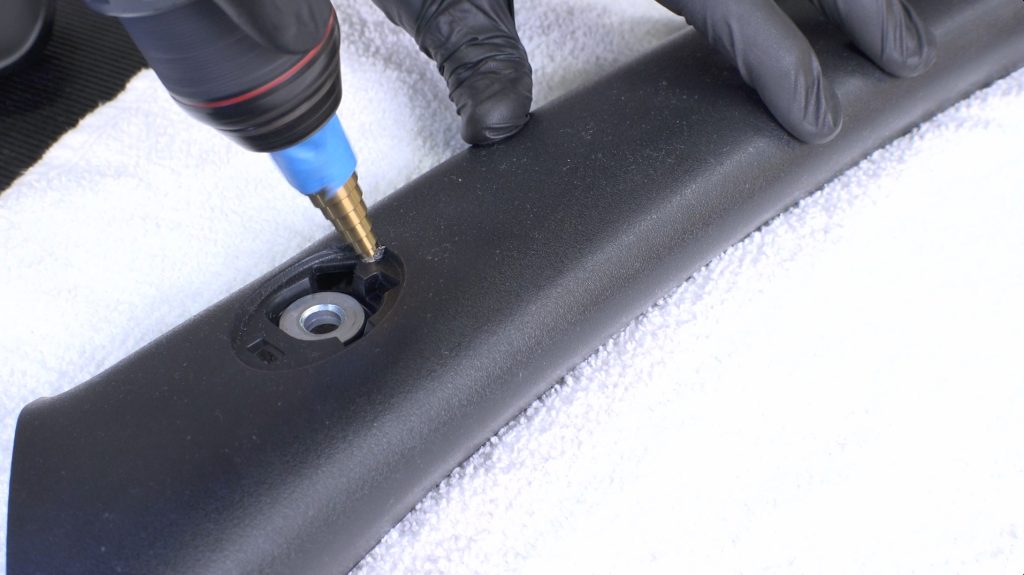
3. Drill your passthrough hole.
If you have 1 data cable to pass through, drill down to the 16mm step.
If you have 2 data cables, you may want to drill down to the 18mm step.
Start small and only enlarge if you need to.
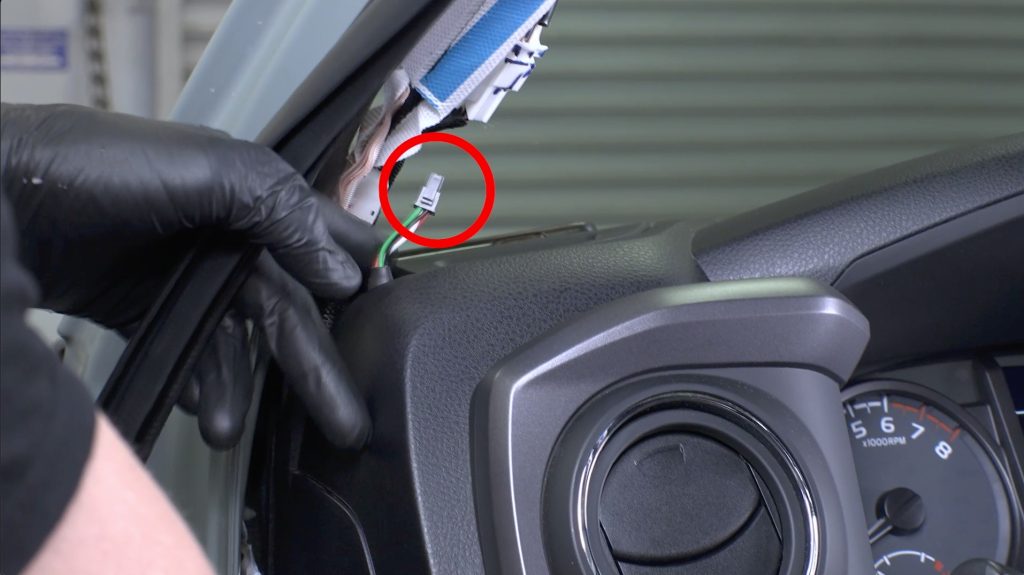
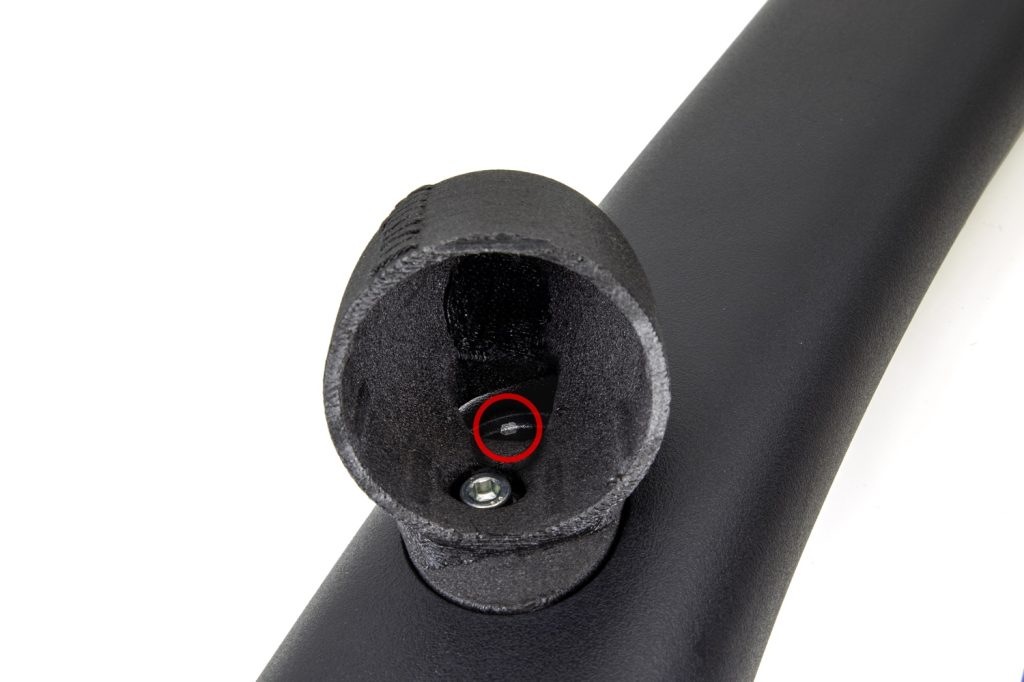
4 . Return to the truck with the A-Pillar
Run the iDash OBD-II cable that you left on your dashboard, through the hole you drilled.
Re-attach and snap the pillar back onto the truck.
Installing the Banks iDash Stealth Pod
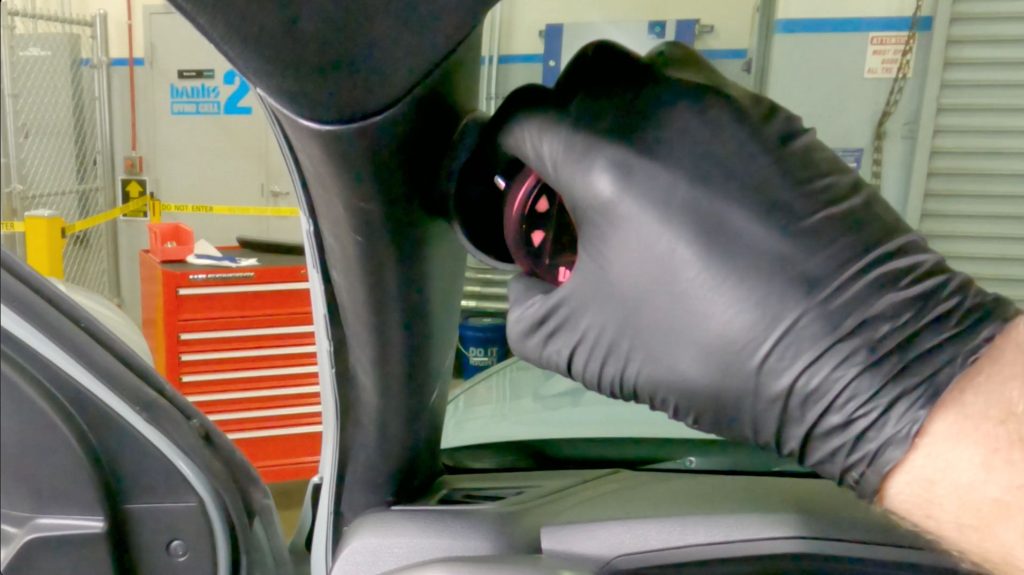
1. Run the cable(s) through the hole you made.
Then press Stealth Pod flush to the pillar.
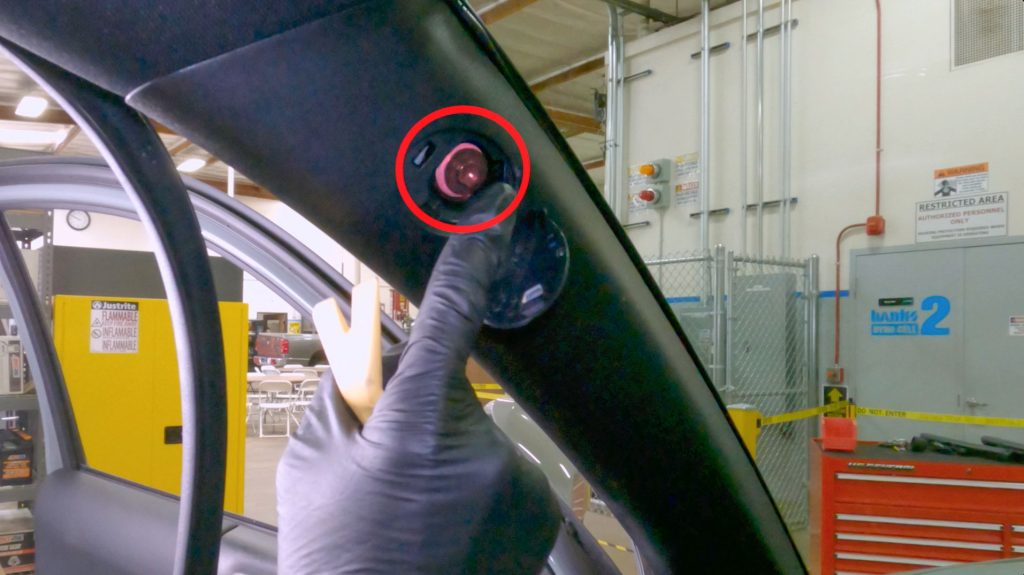
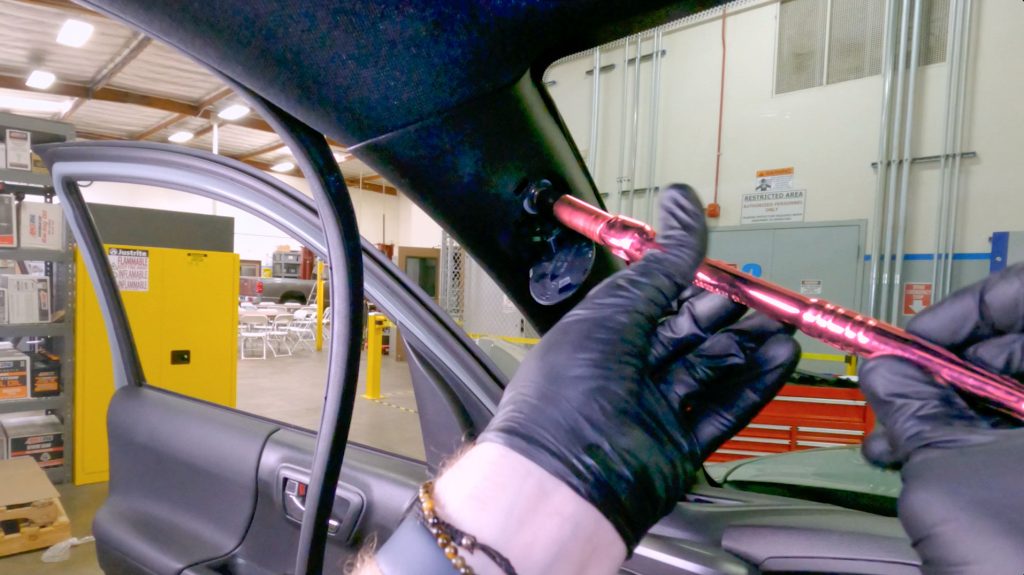
2. Insert the Banks supplied bolt into the Stealth Pod by hand, and thread it into the truck’s a-pillar.
Start by hand and then use the supplied 5mm hex key to tighten it.
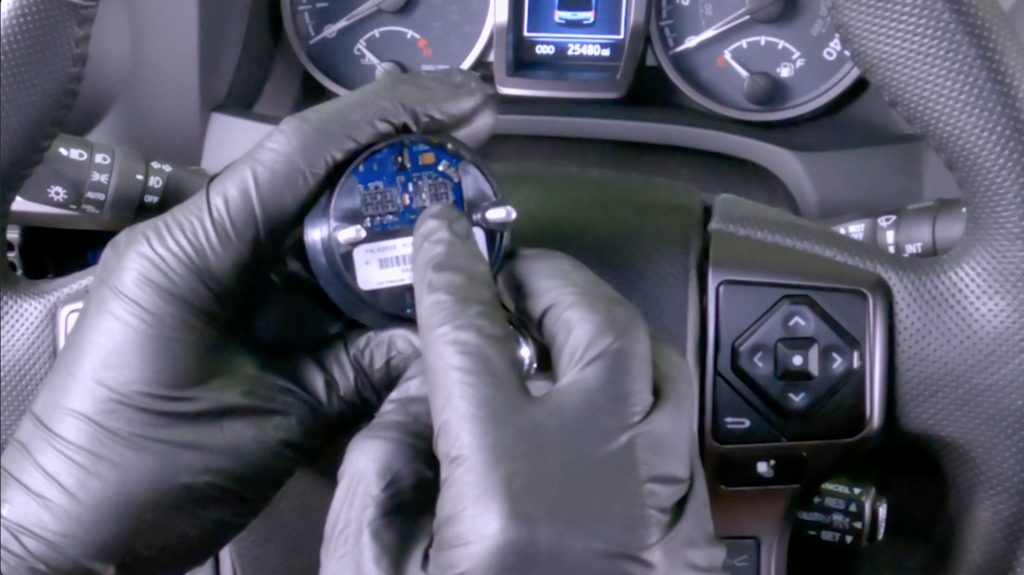
3. Attach the 4 and/or 6 pin connectors to the back of the iDash.
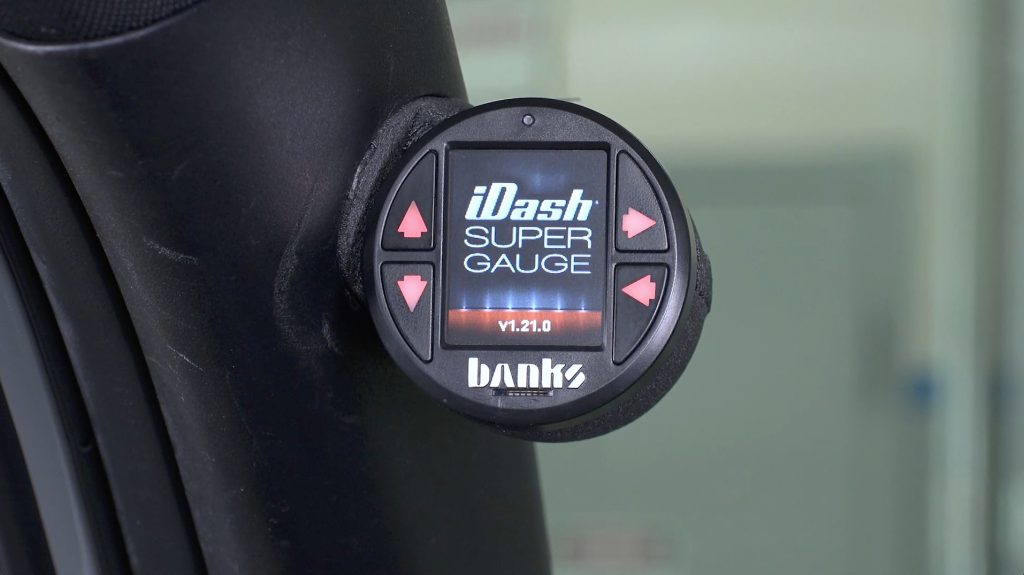
4. Press the iDash into place, taking care to route the cables back through the hole and into the pillar.
The goal is to leave just enough slack so you can pull out the iDash if needed.
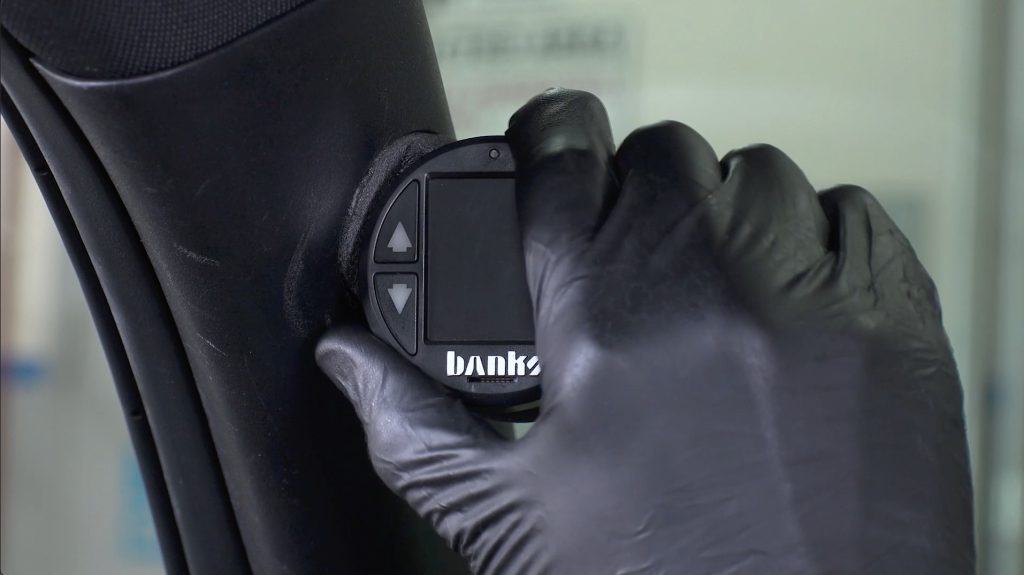
5. Clock the iDash so that its level.
6. Reconnect the lower dashboard.
7. Install the three 10mm bolts.

After installing the 3 bolts, re attach the lower left side kick panel as well.
8. Re-Install Weather Stripping
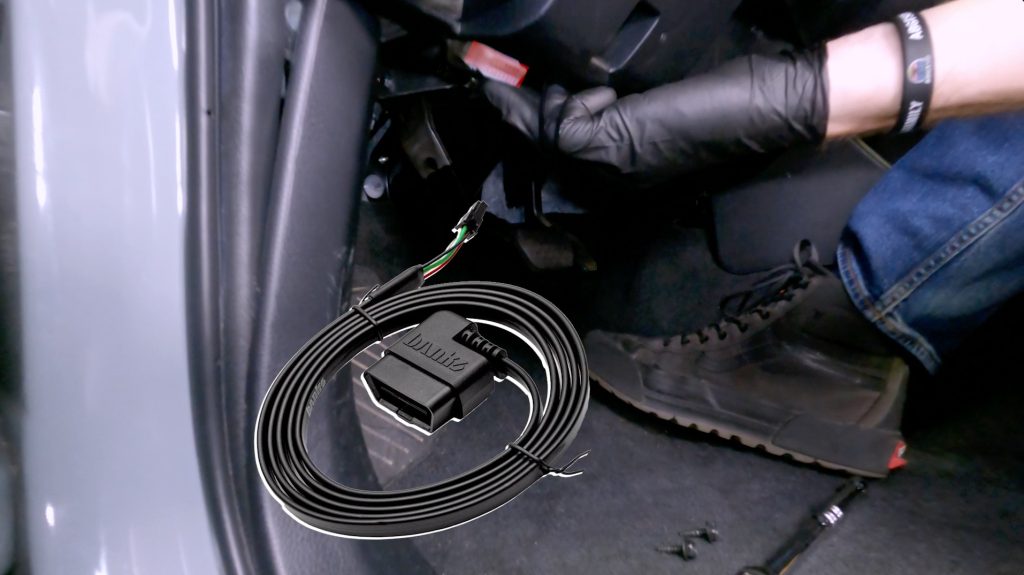
7. Plug in the OBD-II Cable.

Tidy up the extra OBD-II Cables and tuck it out of the way.
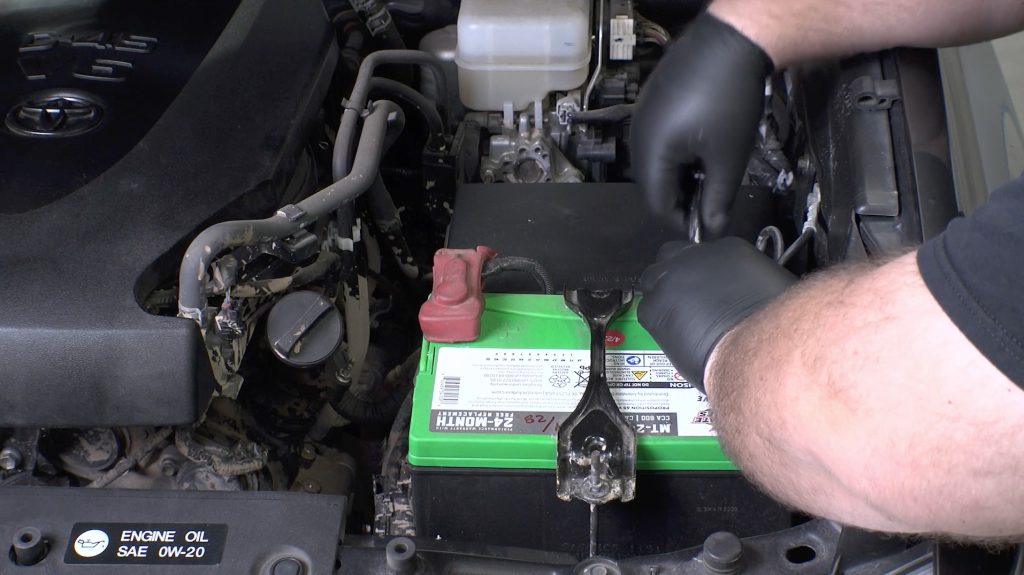
7. Re-connect battery.
8. Turn on the ignition, check that the iDash powers up, and enjoy your new Stealth Pod.