
97654 iDash 1.8 DataMonster and Super Gauge: Section 6: Data Logging
INSTALL INSTRUCTIONS
Part #s
66560, 66561, 66562, 66563, 61410, 66760
iDash 1.8 DataMonster® & Super Gauge Stand alone instrument for ALL 2008+ OBDII CAN bus vehicles
Please read through the following instructions thoroughly before starting your installation. If you have any questions please visit our Support Page.

Section 6: Data Logging
Data logging saves (*CSV files) to any Micro SD cardw as “.CSV” files at 0.1 sec intervals. Up to 100 parameters can be recorded at one time but as the number of recorded parameters are increased, the recording rate will decrease.
NOTE: Logged data will have 1 more digit than displayed, i.e. MAP=15.1 is displayed, but MAP=15.13 will be logged.
When viewing the Gauge Screen of the primary iDash, a green dot at the top of the display will flash indicating that the device is logging. When logging is turned off, this dot will not appear.
NOTE: Only the primary iDash (gauge plugged into the OBD-II port) will contain the data log. If you have multiple iDash gauges, only one of them needs to be equipped with data logging. For example, if you purchased your first gauge without data logging you can enable data logging by adding a data equipped gauge as a secondary. All data logging on iDash is referred to as Banks parameter ID’s or BID’s.
6.1 Change Parameters to be Data Logged
Every iDash ships with a preconfigured list of parameters set up for data logging. To remove parameters from being recorded:
1. Select “Data Logging” from the main “MENU” and then “Select Parameters.”
2. Select the individual parameter(s) to be removed. (Figure 6-2, A.) You can select multiple parameters in this list. The non-highlighted parameters (Figure 6-2, C) will not be recorded and will be removed from the list once you exit the screen.
3. Or select “CLEAR ALL BIDs” to remove all parameters. (Step B)
4. To set new vehicle parameters to record: select “Data Logging” from the “Menu,” then select “Select Parameters.”
5. Select “Add BIDs.” You can also select “ADD ALL BIDS” to record all parameters. (Figure 6-2, A)
6. Select a “GROUP” parameter.
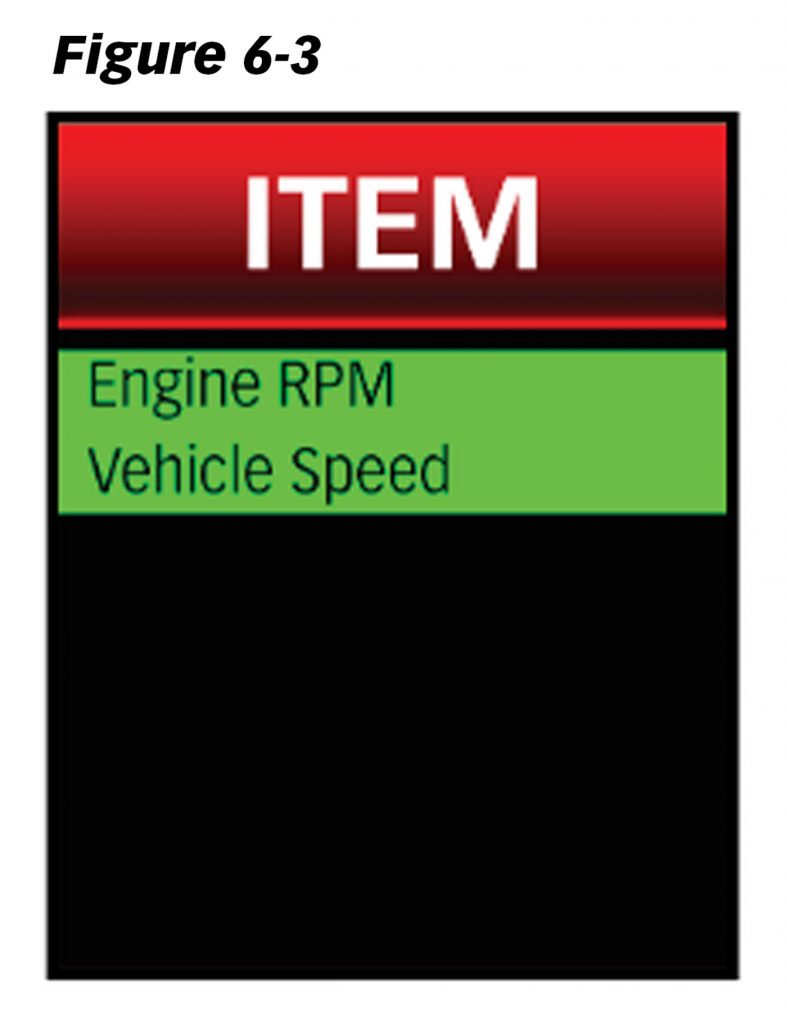
7. Select one or more “ITEM” parameters to record. The parameter will be highlighted if selected.
8. Press BACK to return to the “GROUP” menu and select more parameters from another group if desired.
9. Return to the “Datalog” menu. The screen will list all the highlighted parameters to be recorded. (Figure 6-2, A)
10. Once the parameter list for data logging is selected, return to the Gauge Screen.
6.2 Start/Stop Data Log
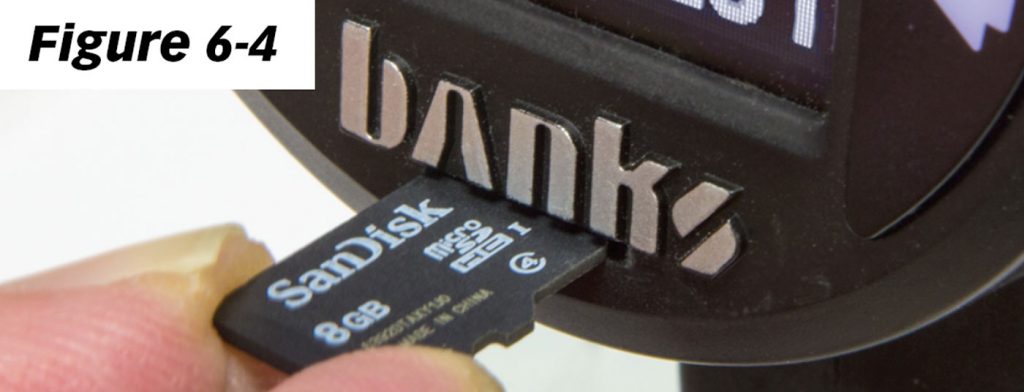
Note: A microSD card must be inserted into the card slot on the front face of the iDash to log data. Each time a data log is stopped, a new .CSV file will be saved.
If a card is not inserted, the device will display “SD card is NOT ready.“
Data Logging (Shortcut)
1. While viewing the Gauge Screen hold the DOWN button for 2 seconds to start a new data log. A banner will appear stating “Start Data Logging: Log###.csv” once started.
2. To stop the data log, while viewing the Gauge Screen hold the DOWN button for two seconds. A banner will appear stating “Stop Data Logging: Log###.csv” once stopped.
Data Logging (Menu Selection Method)
1. Select “Data Logging” from the main “MENU.”
2. Select “Start Data Log” to start recording parameters. Once started, a banner will appear “Start Data Logging: Log###.csv”
3. On the “LOGGING” menu screen, select “Stop Data Log.” A banner will appear stating “Stop Data Logging: Log###.csv” once stopped.
6.3 Auto-Log Feature
When enabled, this feature will automatically start data logging upon starting the engine. After this first log, data logging will need to be activated. If the Micro SD card is plugged in after the vehicle is started, the iDash will automatically start logging. The Parameters logged will be the ones set before the iDash went into “Sleep Mode.” To end the auto log, hold the “DOWN” button while on the Gauge Screen until the iDash states “Stop Data Logging: Log###.csv.”
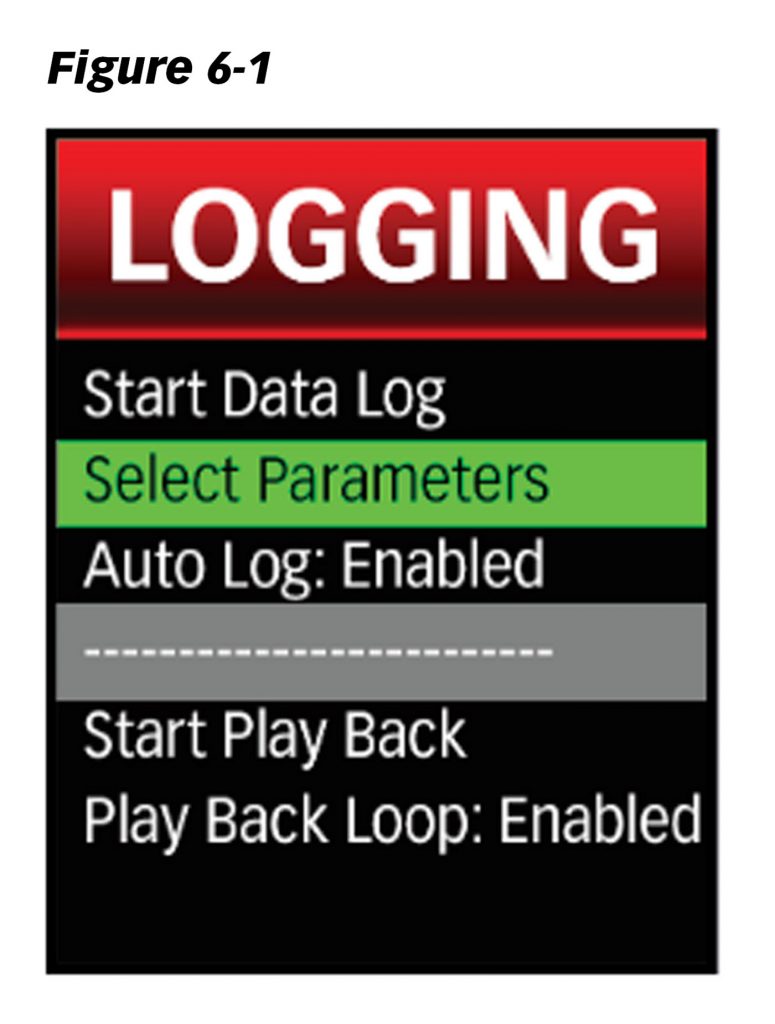
Enabling “Auto Log“
- Select “Data Logging” from the main “MENU.”
- Select “Auto Log:” to enable or disable. See Figure 6-1.
6.4 Data Plays Back on Gauges
The iDash playback feature allows you to view the recorded data on the Gauge Screen of all connected iDash’s. When viewing the Gauge Screen of the primary iDash, a blue box at the top of the display will flash indicating playback mode is on. When playback is turned off, this indicator will not appear.
1. Select “Data Logging” from the main “MENU” then select “Start Play Back” to open the list of saved data logs currently on the Micro SD card.
2. Select the desired data log file for playback.
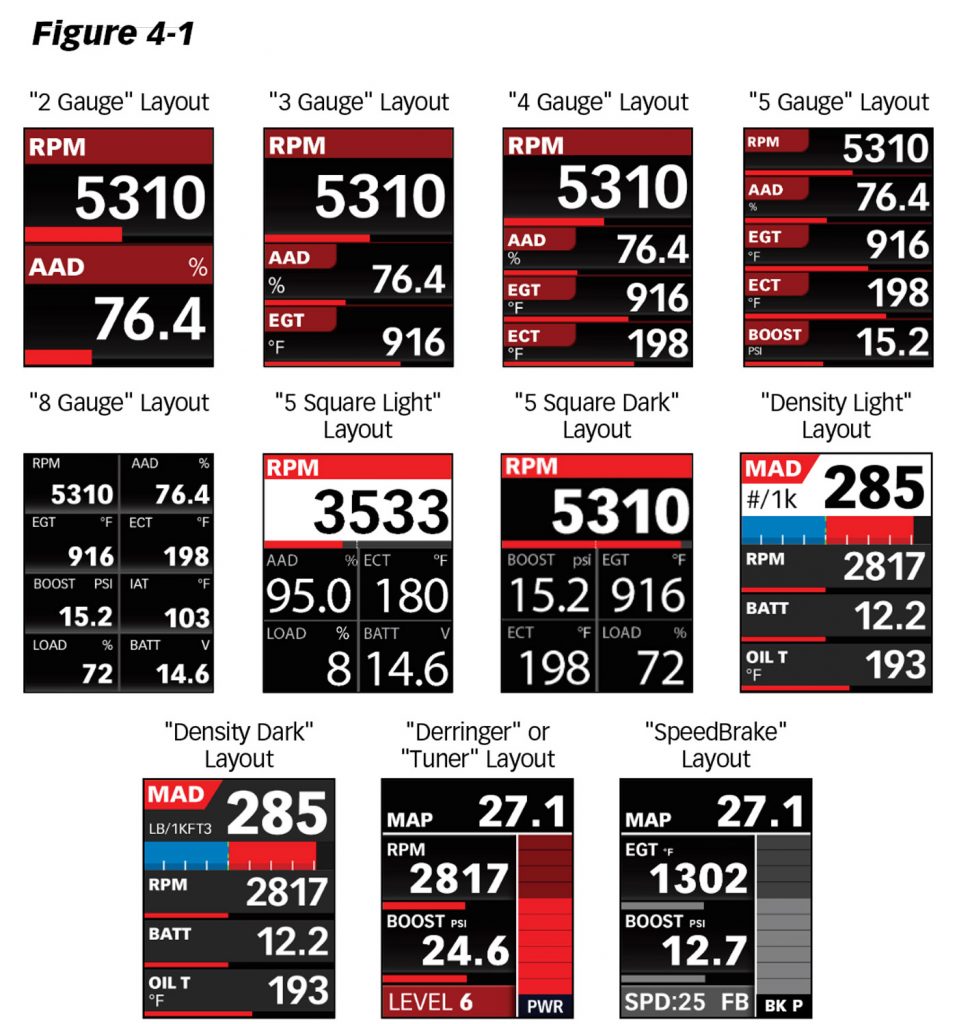
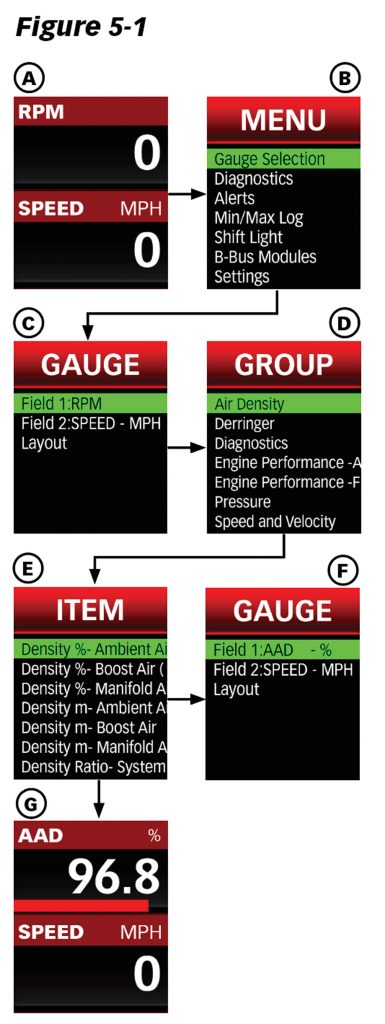
3. Configure the Gauge Screen layout (Figure 4-1) and parameters displayed (Figure 5-1) to show the parameters that were recorded.
Tip: A useful parameter to display on the Gauge Screen during playback mode is “Time Data Log.”
Note: Parameters displayed on the Gauge Screen can be changed during playback.
The data will begin playing on the iDash Gauge Screen. The blinking blue box at the top indicates that playback is active.
Note: Only parameters that were recorded on the log will be able to be shown. If a parameter shows “–” it was most likely not configured as a logged parameter at the time of the data log recording.
Navigating playback options during playback mode:
To pause data playback, press the BACK button on the iDash.
To resume data playback, press the BACK button a second time.
While data playback is paused, pressing the UP or DOWN buttons will move ahead or back one line of data per press (0.1 seconds). Holding the UP or DOWN buttons will skip five seconds at a time.
While data playback is running, pressing the UP or DOWN buttons will skip ahead or back by five seconds. Holding the UP or DOWN buttons will skip 30 seconds ahead or back.