
97778 | Banks Ram-Air Transmission Pan for 2020-2026 Ford F-250-550 6.7L Diesel with 10R140 Transmission
INSTALL INSTRUCTIONS
Part #s
35165-B
---------------- 2020-2026 Ford F-250/F-350/F-450
Please read through the following instructions thoroughly before starting your installation. If you have any questions please visit our Support Page.

Bill of Materials
| Part Number | Description | QTY |
| 35166-B | Ram-Air Transmission Pan (10R140) | 1 |
| 35150 | Ram-Air Scoop | 1 |
| 13251 | 1/8 NPT Hex Plug | 1 |
| 13278 | Magnetic Oil Plug | 1 |
| 35152 | Ram-Air Scoop Spacer | 4 |
| 91752 | M6 Hex Flange Screw | 24 |
| 13280 | Face Sealing M8 Plug | 1 |
| 35167 | Drain Extension Fitting | 1 |
| 91888 | Spring Pin | 2 |
| 90006 | Red Loctite | 1 |
| 35169 | Transmission Pan Seal | 1 |
| 91733 | Thread Protection Screws | 4 |
Optional Thread Protection Screws to be used when the Ram-Air Scoop is removed during off-roading or heavy snow conditions to protect threaded holes from debris or corrosion.


General Installation Practices

Recommended Service Items

Transmission Pan Gasket:
Ford Part # PC3Z-7F396-A
Filter Kit:
Ford Part # FT221
0) Attention: 12-24 Hours Before Install
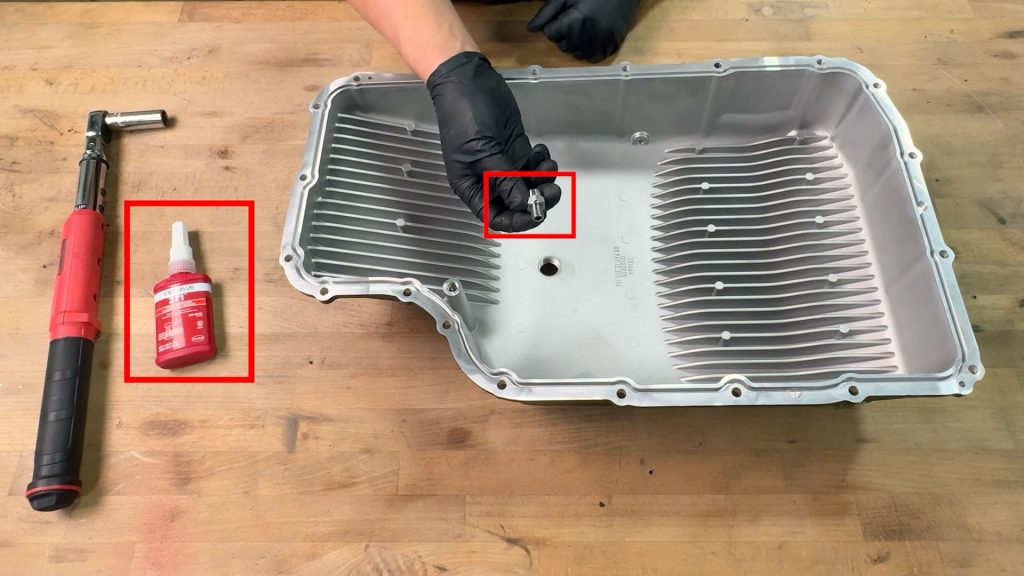
1. The day before your install, locate the 15mm Drain Extension Fitting.
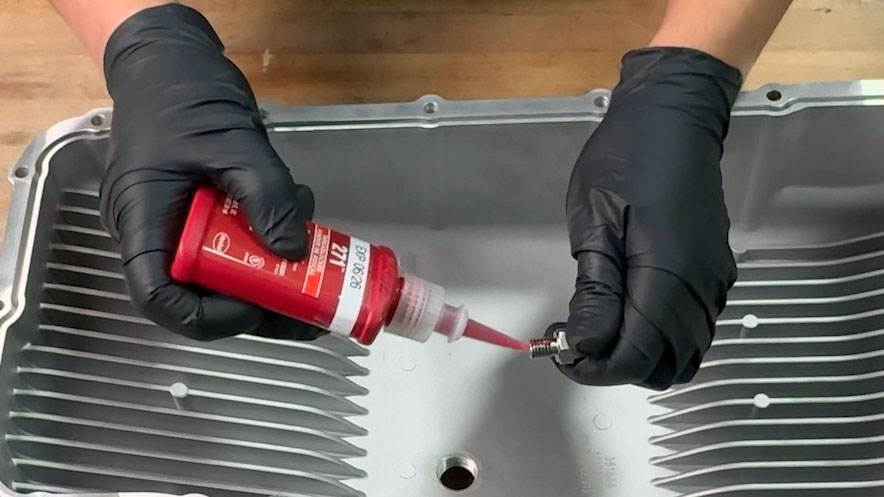
2. Apply some red Loctite to the threads before installing.
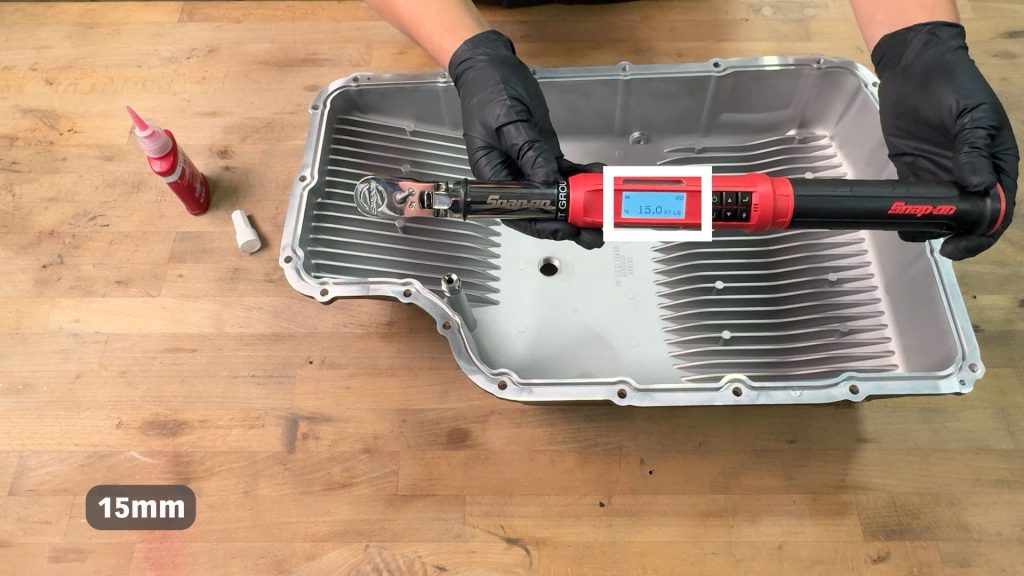
3. With a 15mm socket, torque the fitting to 15 ft-lbs.
Banks recommends allowing for a full 24 hours for the sealant to cure before installing the pan.
1) Initial Preparation
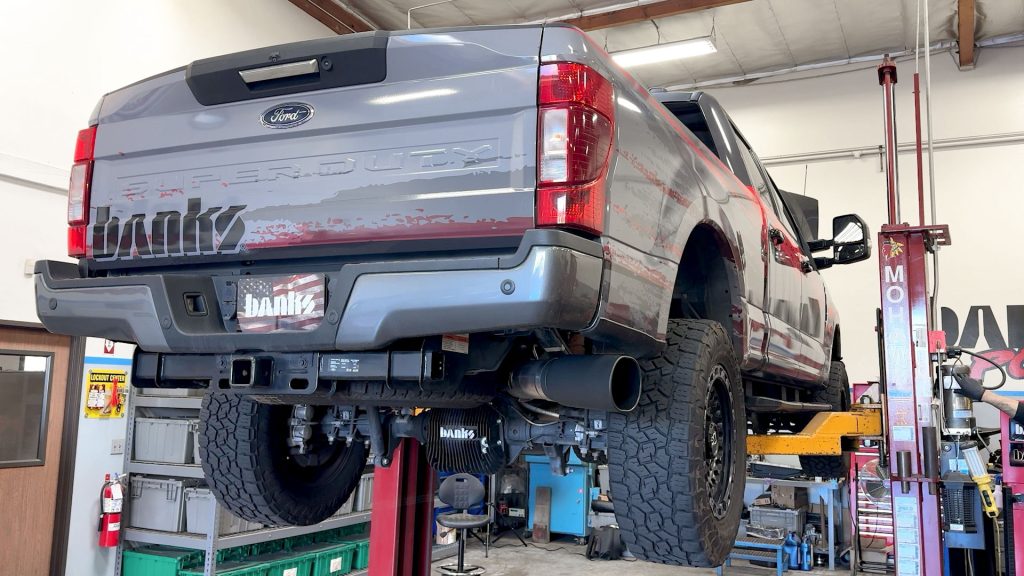
1. Raise the truck on a lift to provide ample access to the oil pan and the area you will be working with.

2. If using a lift, a support stand is also recommended.
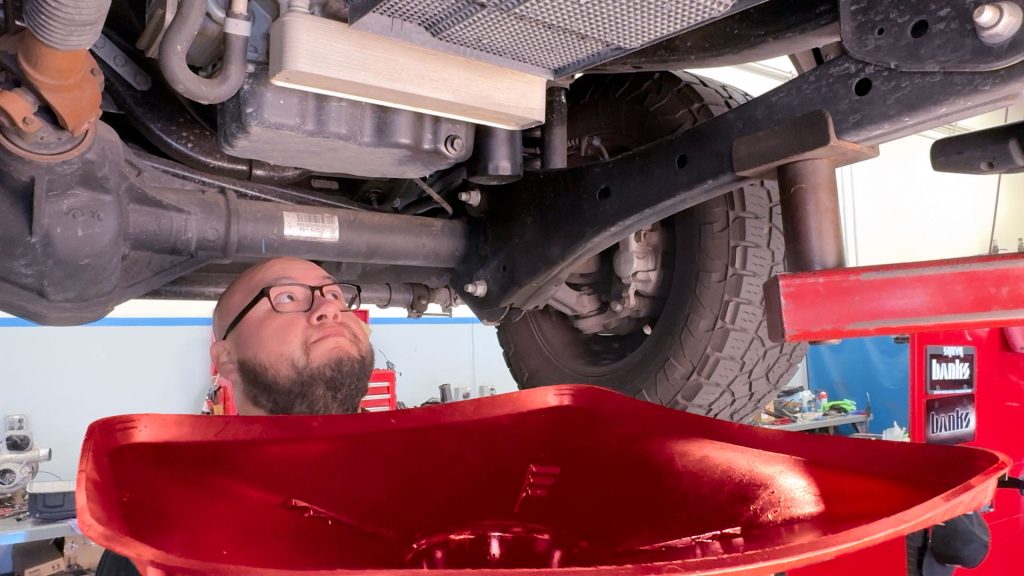
3. Bring a large drain pan over to the transmission to catch the fluid.
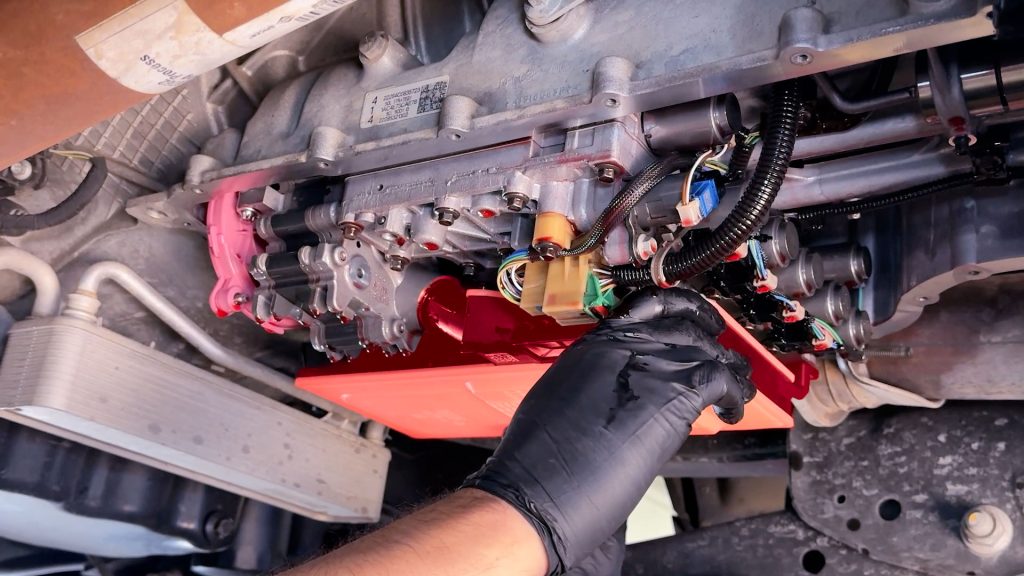
2) Remove Transmission Pan
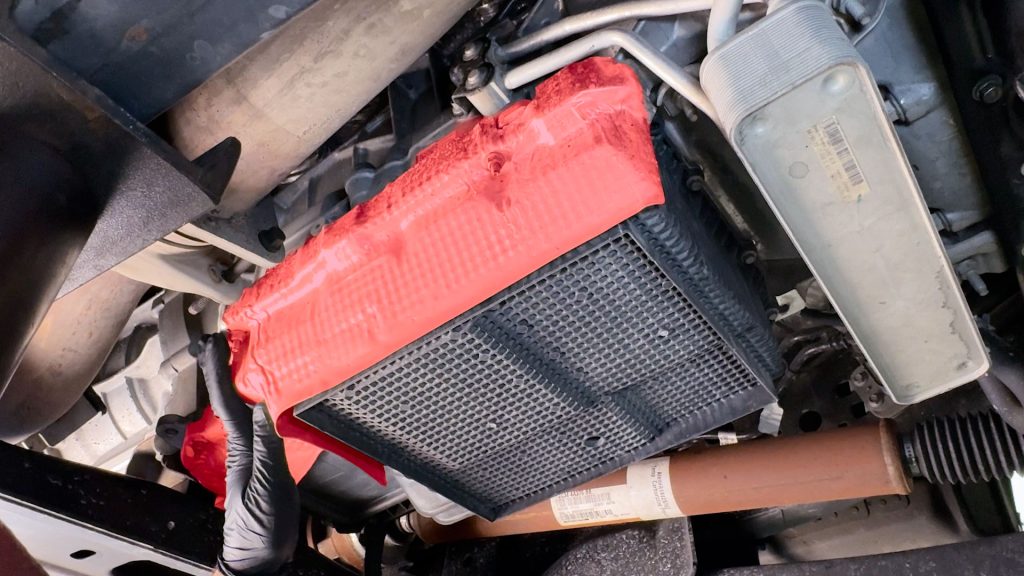
1. Start by locating the heat shield on the passenger side of the transmission
2. Remove the three 10mm bolts that hold the heat shield.

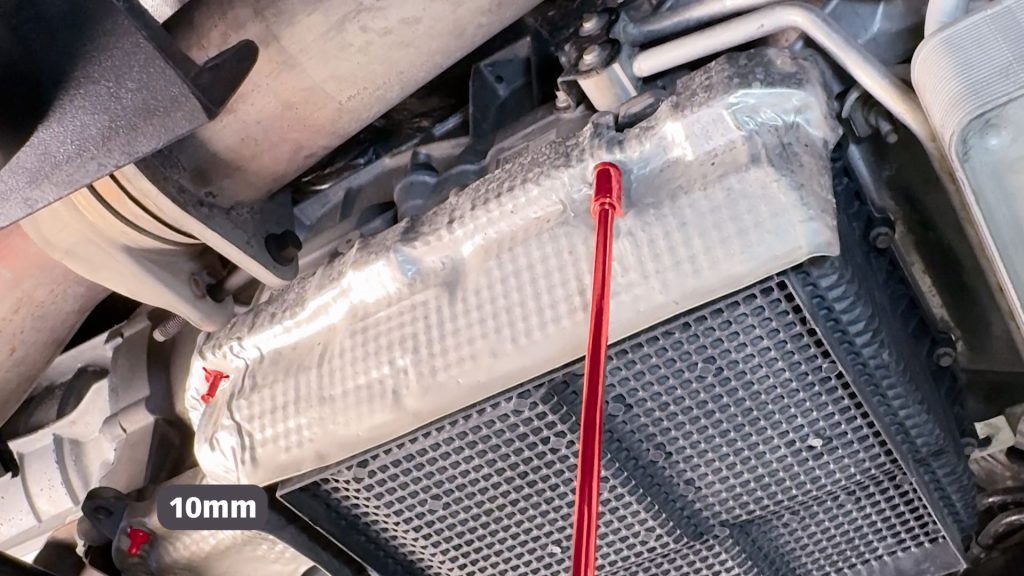
3. Take note, the factory transmission pan has five 13mm bolts….

…and fifteen 10mm bolts.
When installing the Banks Ram-Air Transmission Pan, you will be use the twenty supplied 10mm bolts.
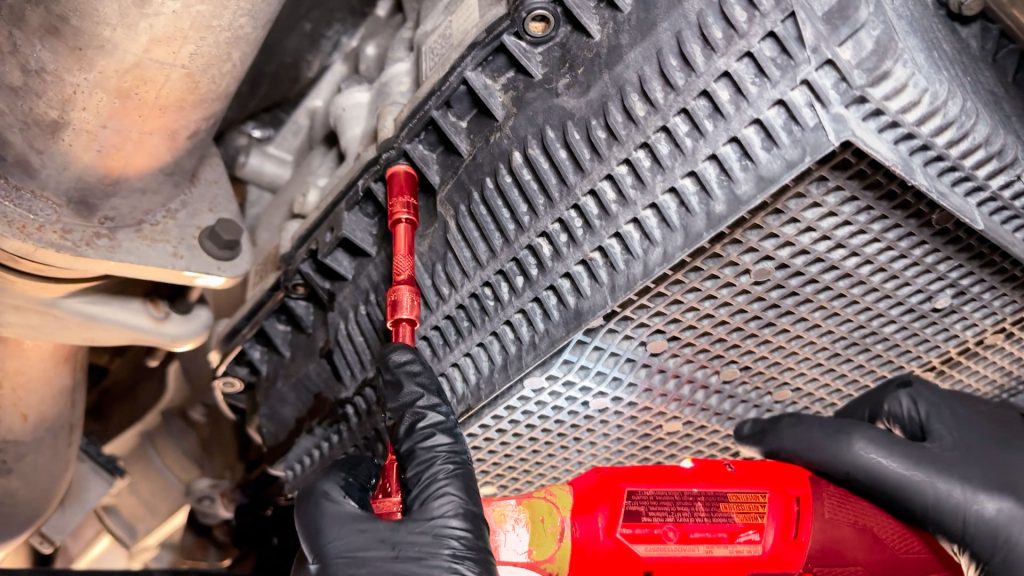
4. In no particular order, begin removing the 13 and 10mm bolts.
Support the pan as you reach the end to avoid unnecessary stress on the bolts or sudden leaks as the pan breaks free.
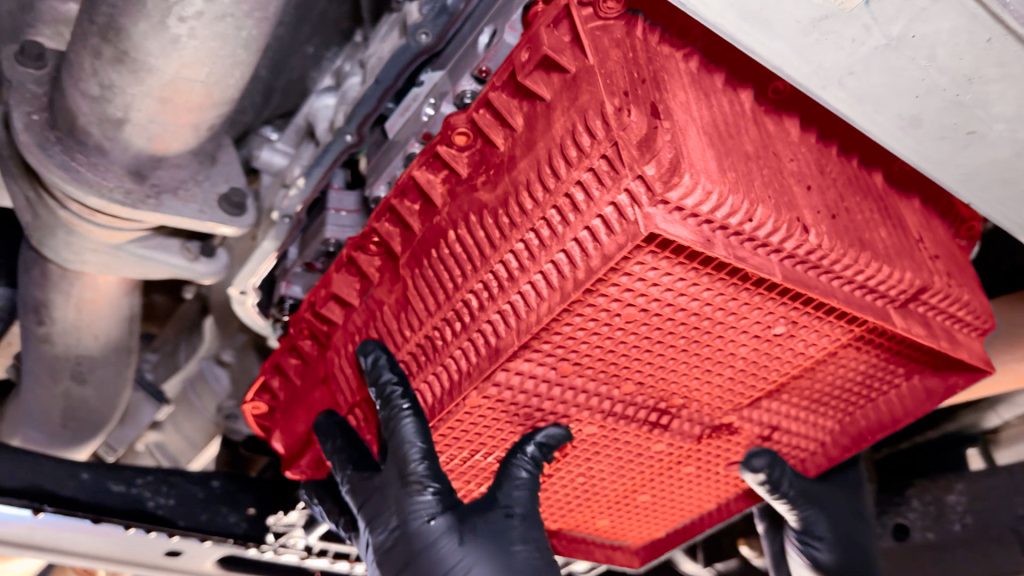
5. Carefully lower the pan from the truck. Take care as it will be full of fluid.
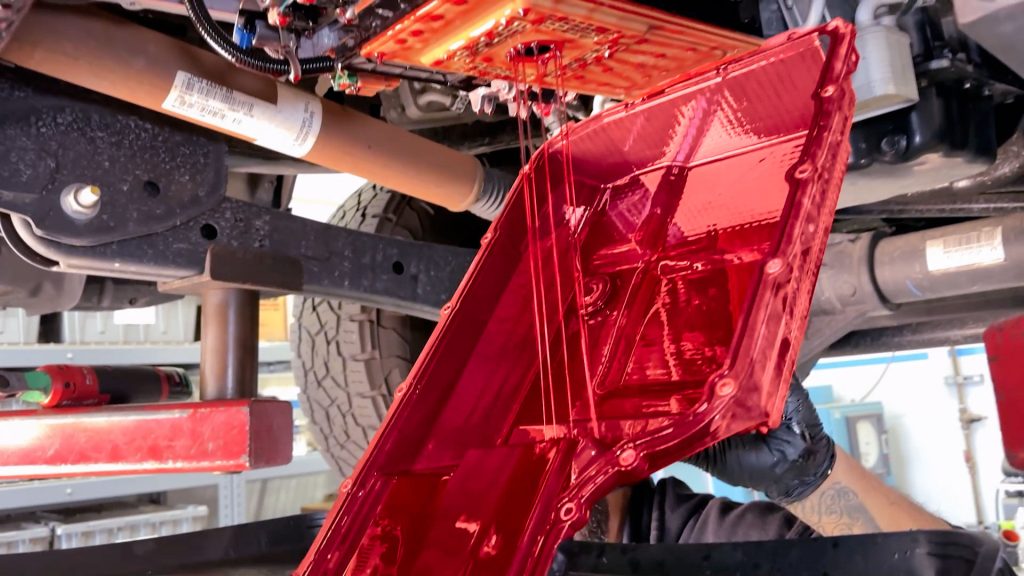
6. Additional fluid will continue to drain from the bottom of the transmission and filter. Be sure to catch all the old fluid in a proper container.
(Optional) Replace Transmission Filter

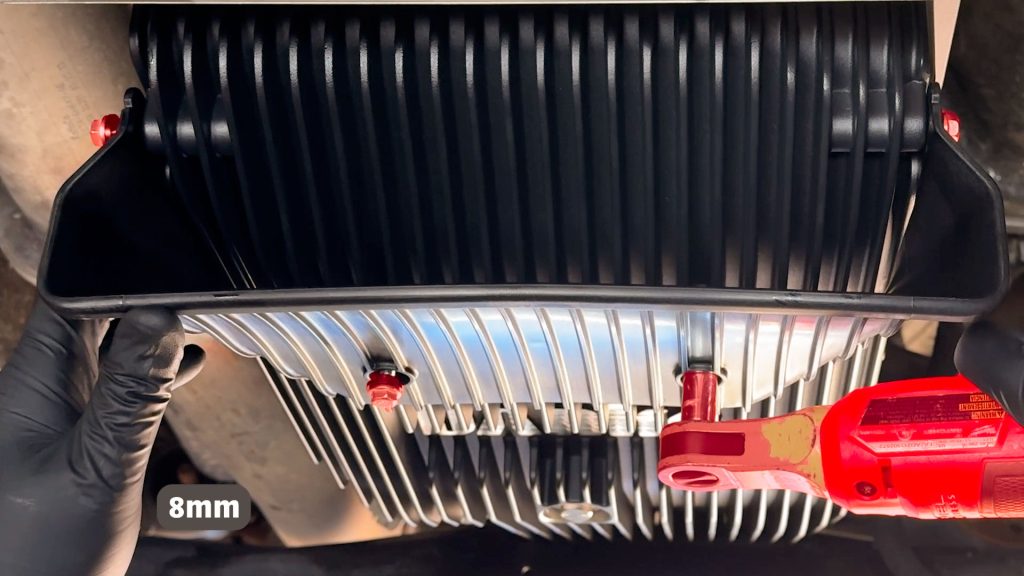
1. With an 8mm socket, remove the two bolts that secure the filter onto the transmission.

2. Wiggle the filter free from the pickup tube.
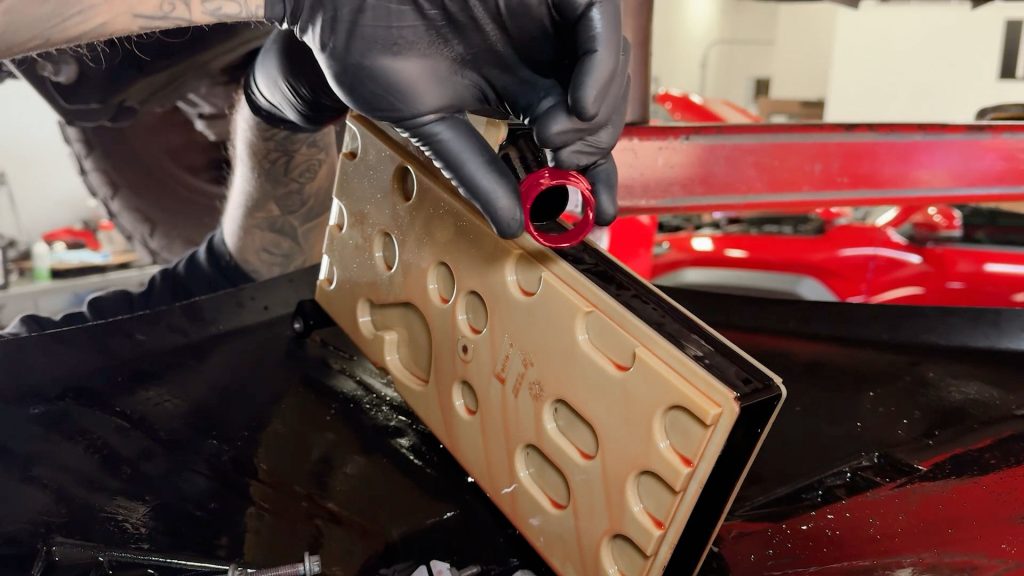
3. Take note of the transmission filter collar, as it may stick to the filter upon removal.
4. Reinstall it onto the transmission, or replace it with a new one if your filter kit contains a new one.
5. Maneuver the new filter into position.

6. Secure the filter with the factory 8mm bolts.
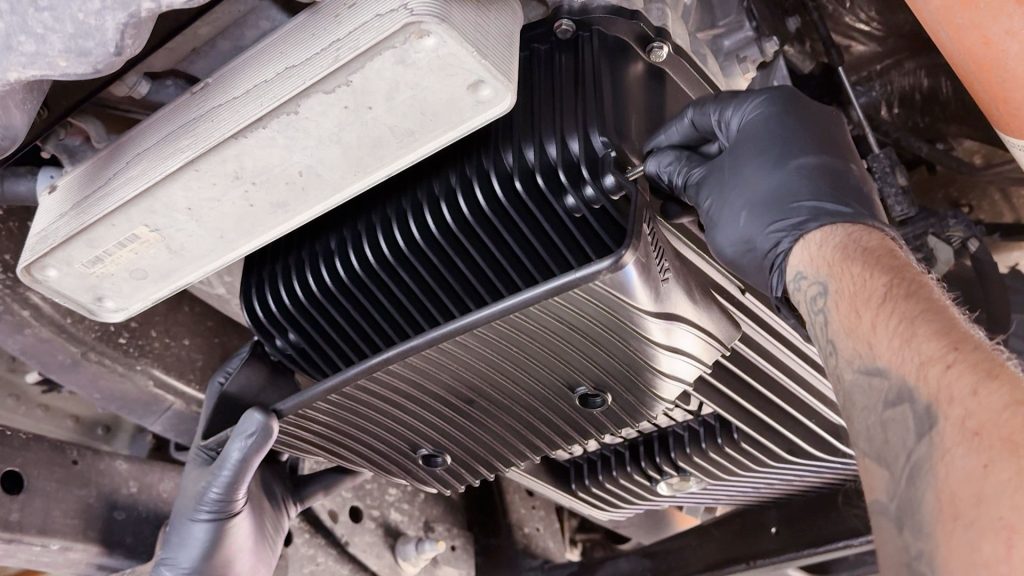
3) Ram-Air Transmission Pan Prep
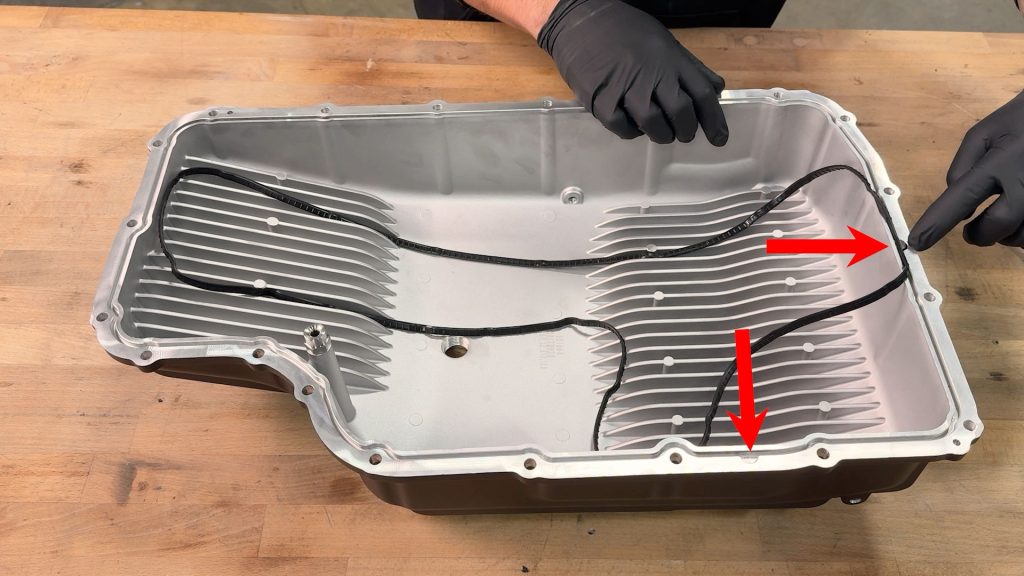
1. Take note of the two alignment tabs on the gasket and pan, this will help align the gasket into the groove

2. Take care not to stretch the gasket around the pan, it should fit right in with no extra slack by the end
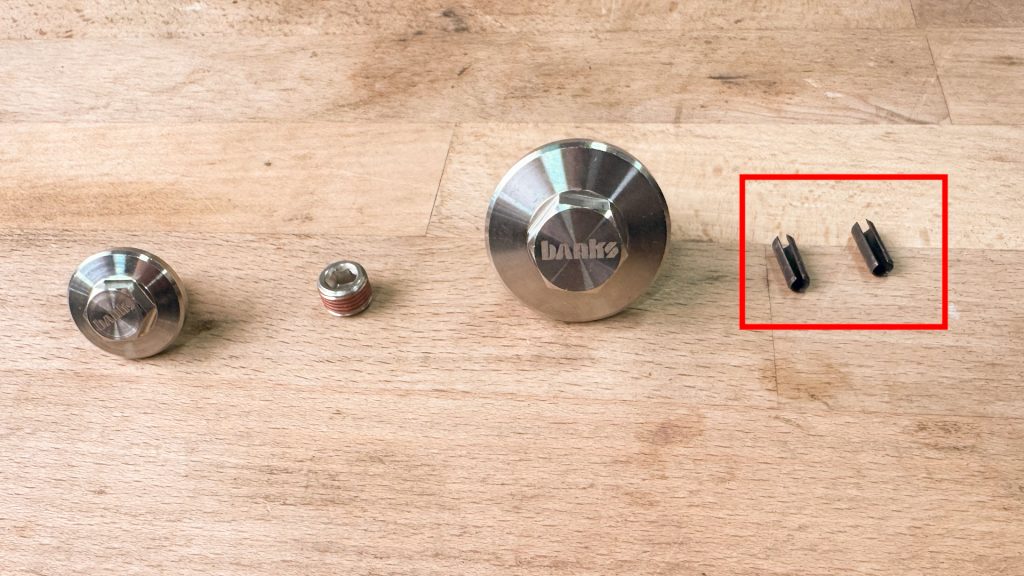
3. Locate the two small spring clip dowels.
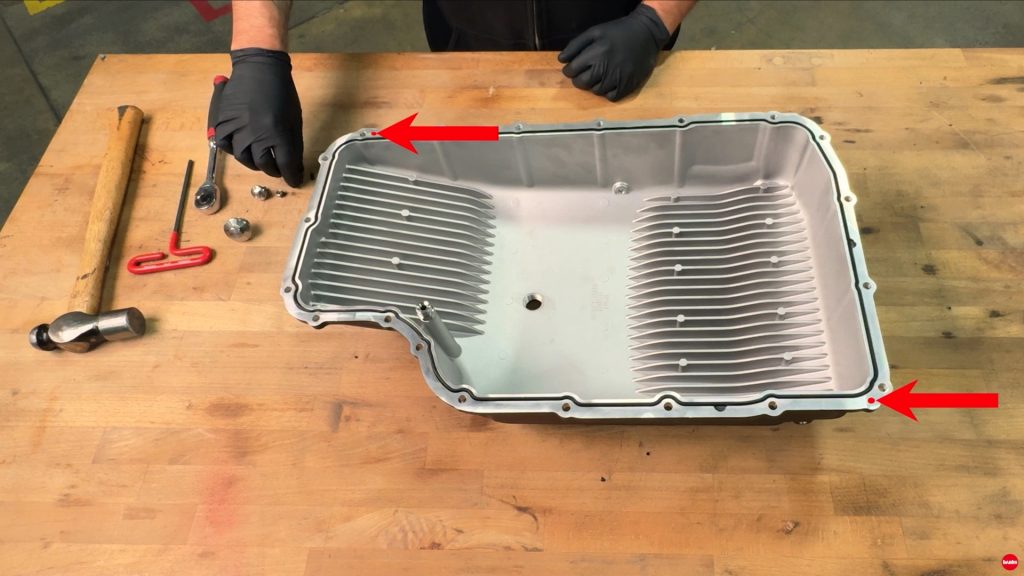
4. Insert the two small spring clip dowels into the pan.

5. Insert them by hand until they bottom out.
To avoid tearing and fraying, apply a small amount of oil to the o-rings prior to installation of the drain and filler check plug.

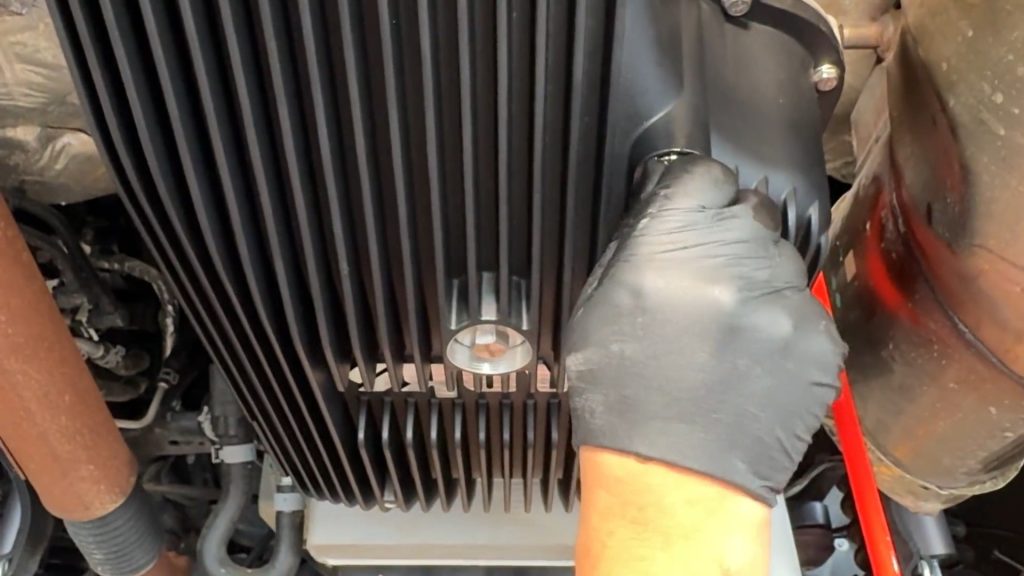
6. Locate the smaller face sealing bolt.
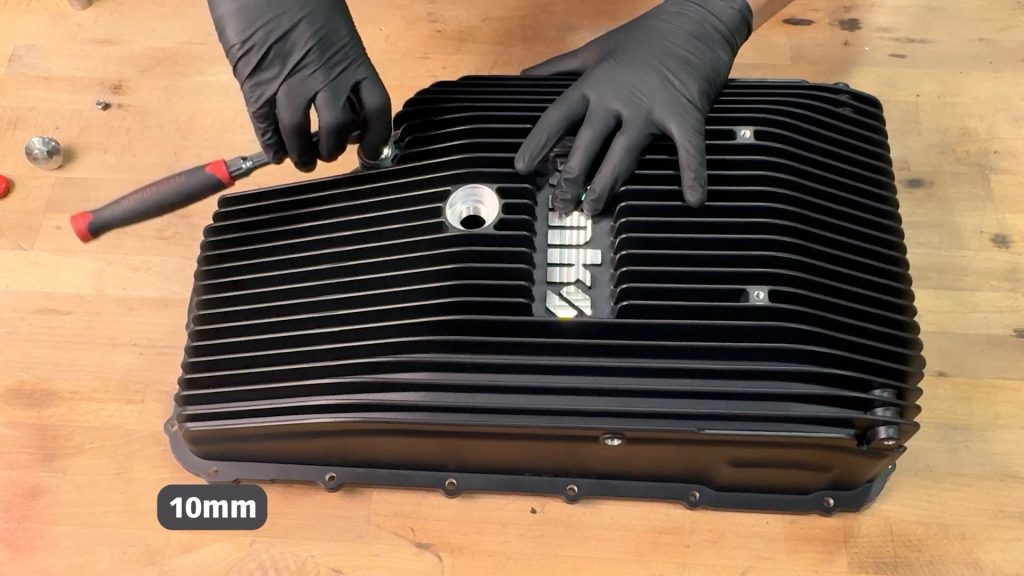
7. With a 10mm socket, snug it down by hand.
This port will be used after installation to check the correct fluid level.

8. Locate the larger Banks Magnetic Drain Plug.
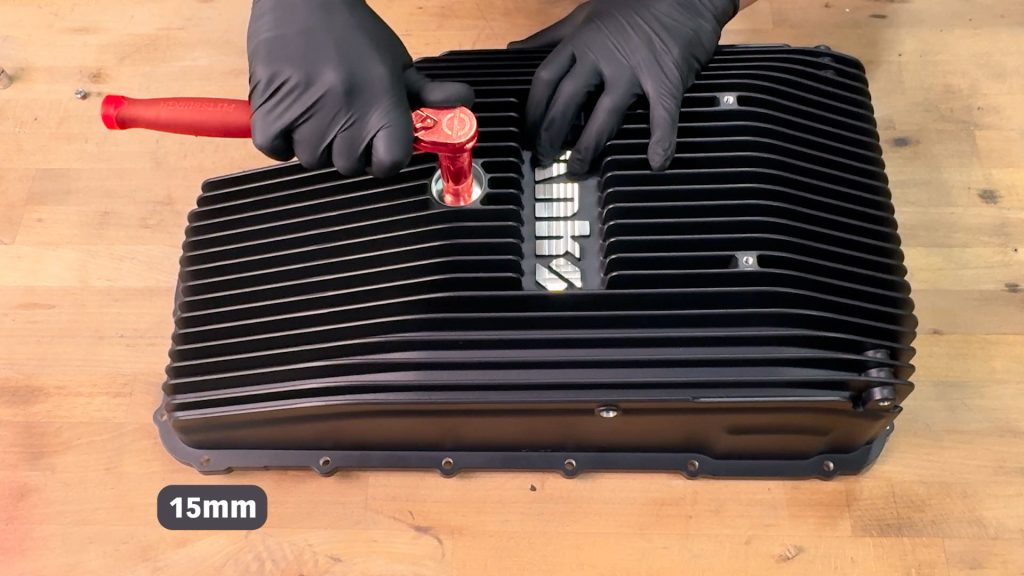
9. With a 15mm socket, snug it down by hand.
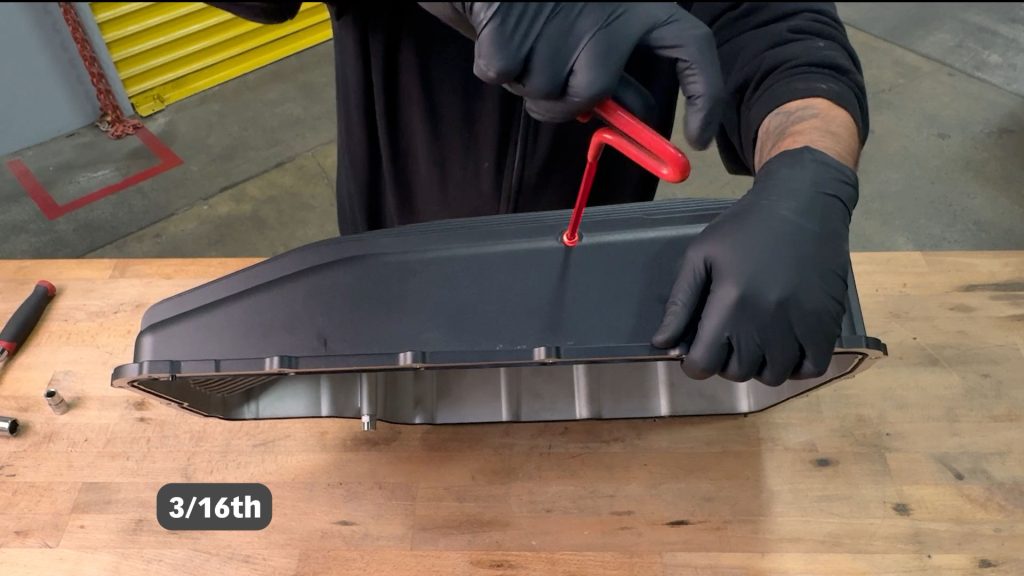
10. Locate and install the 1/4″ AN fitting. Secure it in place with a 3/16th hex key. It has sealant pre-applied.
Alternatively, if running an auxiliary temperature sensor, it can be threaded in here.
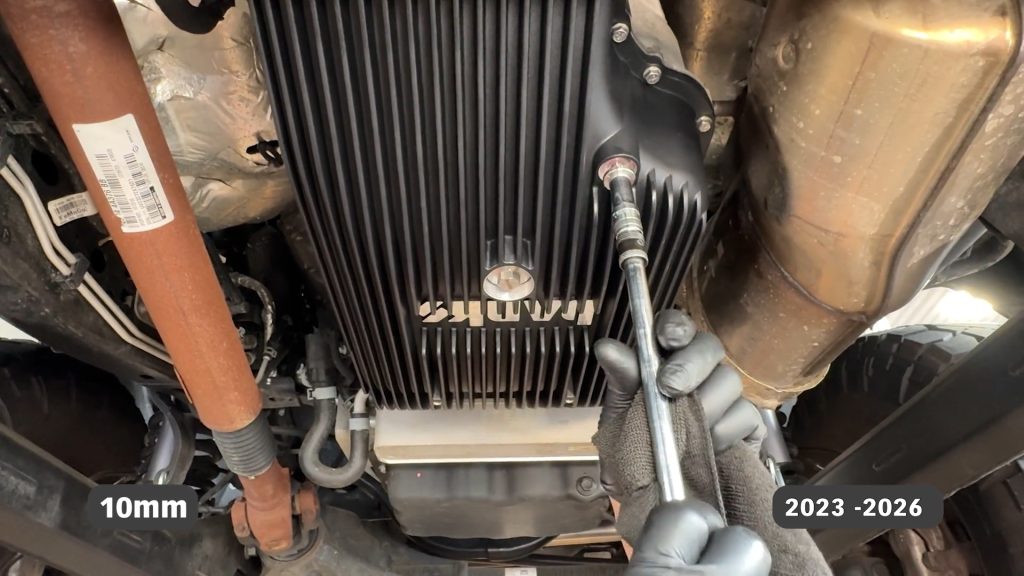
4) Transmission Pan Installation
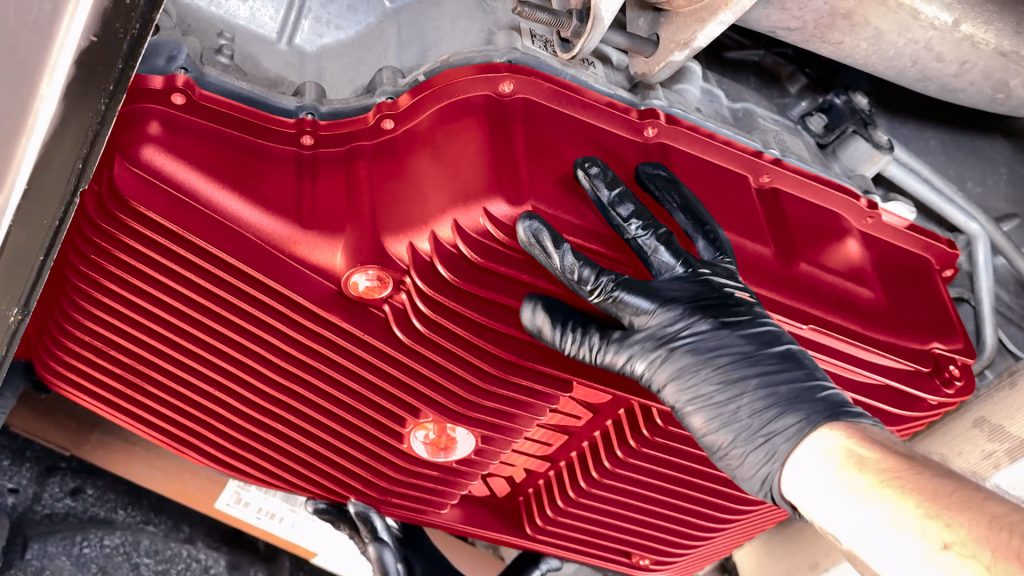
1. Bring the assembled Ram-Air Transmission Pan back to the truck.
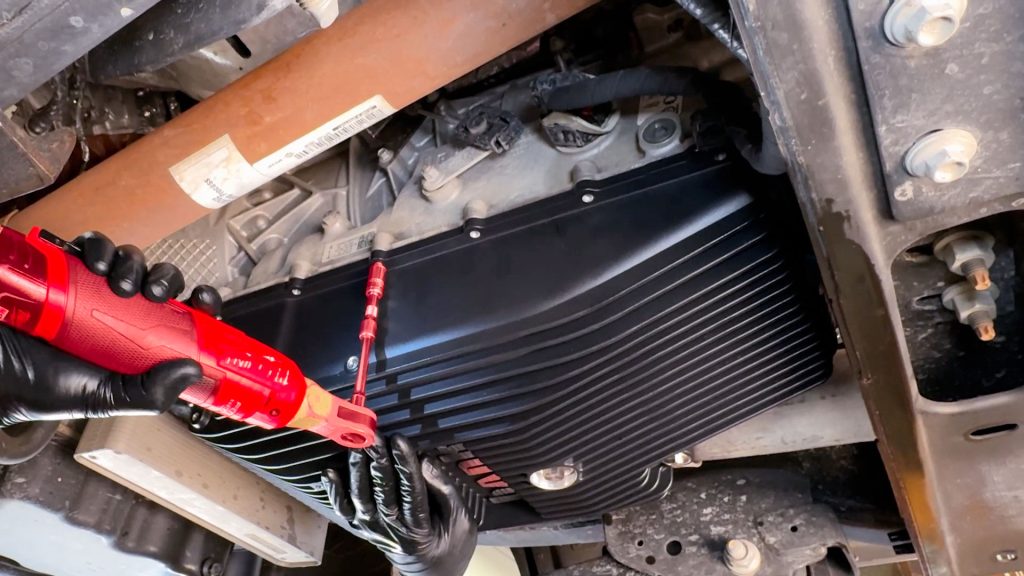
2. While supporting the bottom of the pan, install one bolt on one side.

3. And install a second bolt on the other side to keep the pan in place.
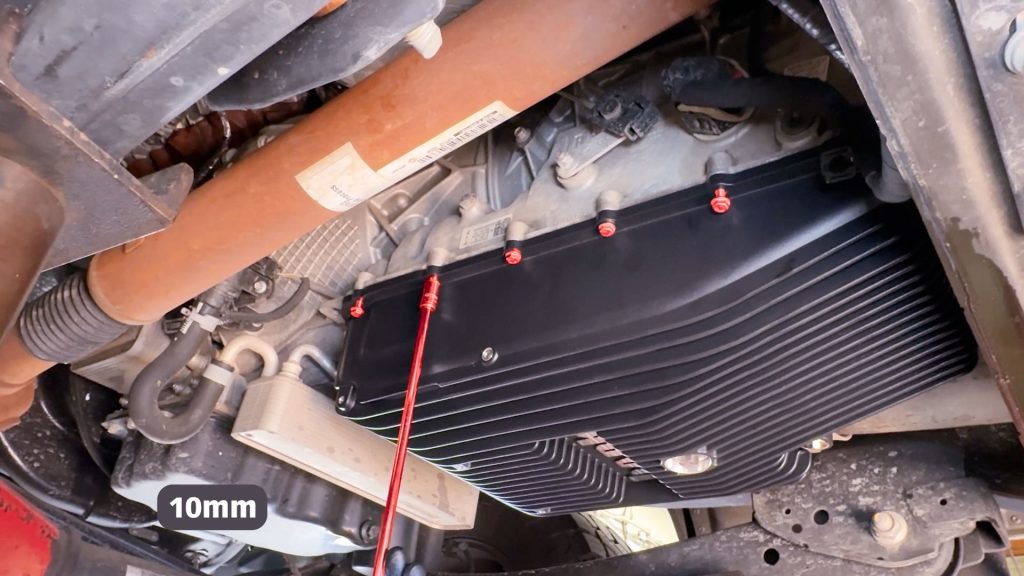
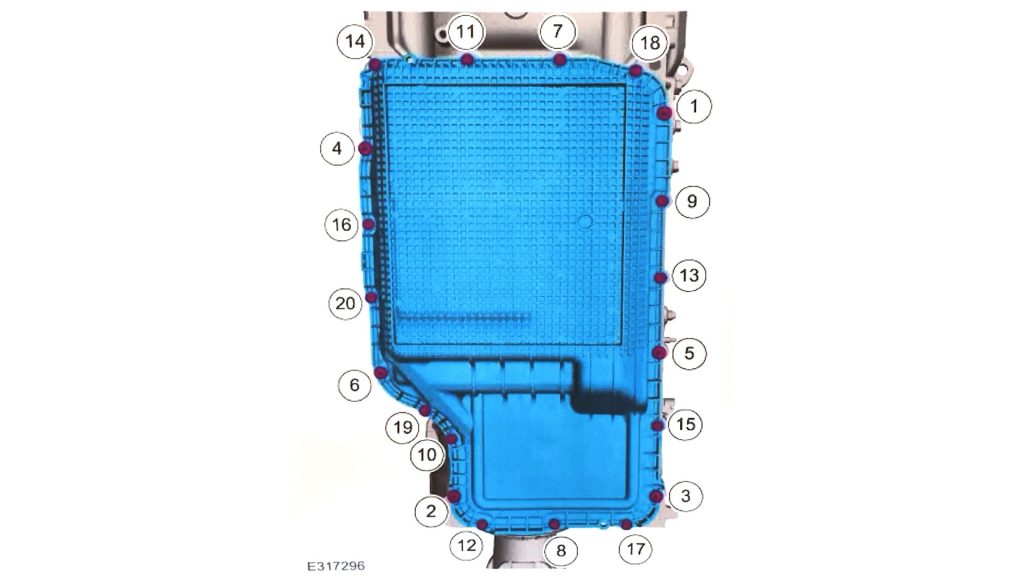
4. Next, begin installing the remaining eighteen 10mm bolts. Thread them loosely until they just seat.

5. Then torque them down to 65 in-lbs following the order in the chart bellow

6. Locate the four billet washers and 4 remaining 10mm bolts for the Ram-Air Scoop.

7. Each bolt will use a washer with the narrow end pointing towards the threaded end.
8. Raise up the Ram-Air scoop, and begin threading the bolt/washer combos to the sides and bottom by hand.

9. Secure them in place with an 8mm socket.
5) Fluid Fill
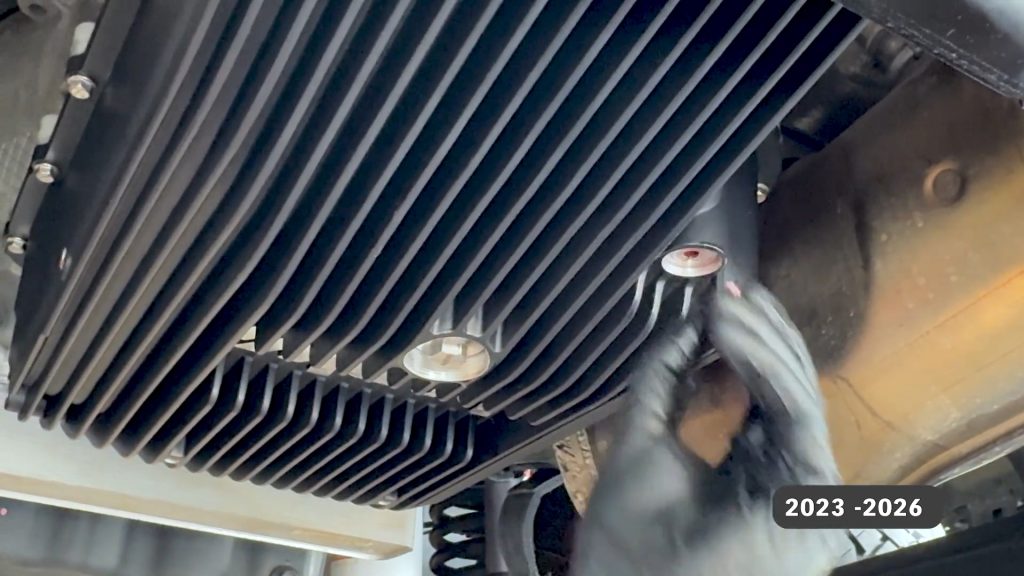
Take note that the fluid fill location is different between 2020-22, and 2023-2026 Models.
2020-2022 Fill Procedure

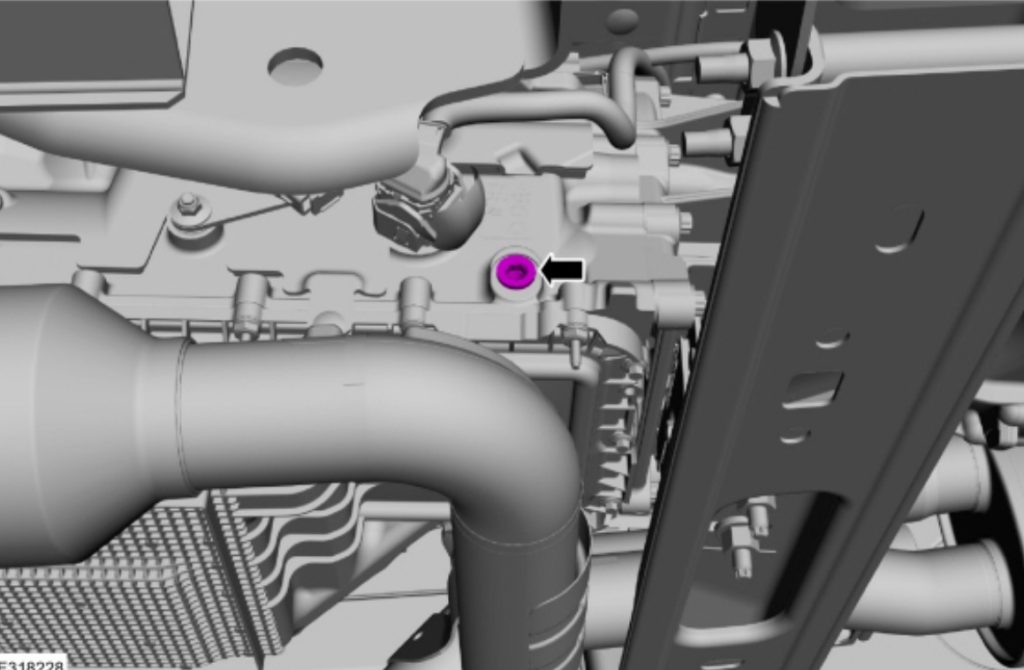
1. Locate the transmission fill plug on the rear driver side.

2. With the vehicle OFF, remove the plug with a 10mm hex.
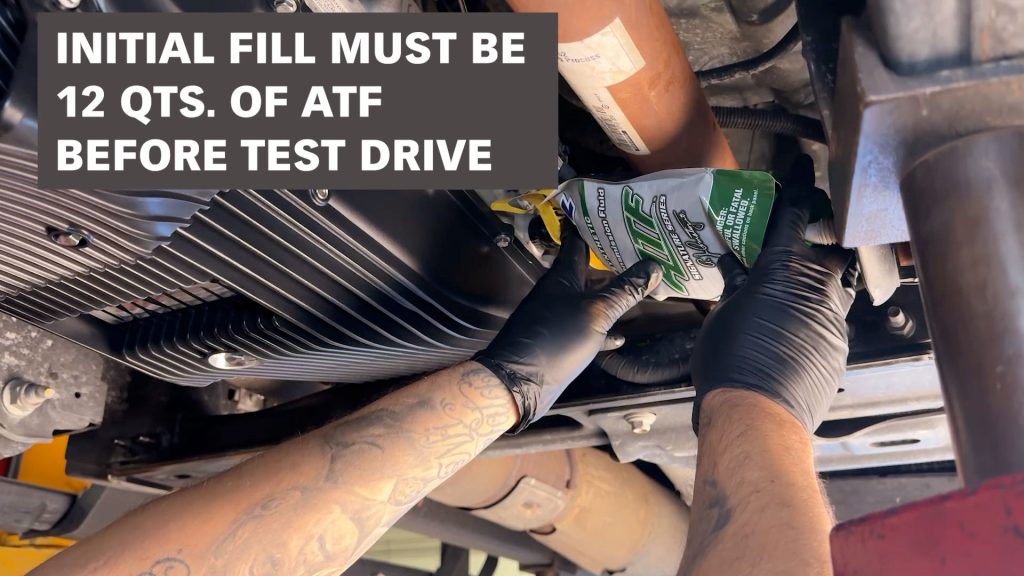
3. For the initial fill, add about 12qts of ATF via the drain plug. Then start the engine in Park, let the truck idle, and continue to add fluid until it’s level with the fluid leveling plug hole.
Reinstall the fill plug when complete.
4. Lower the truck and take it for a brief test drive.
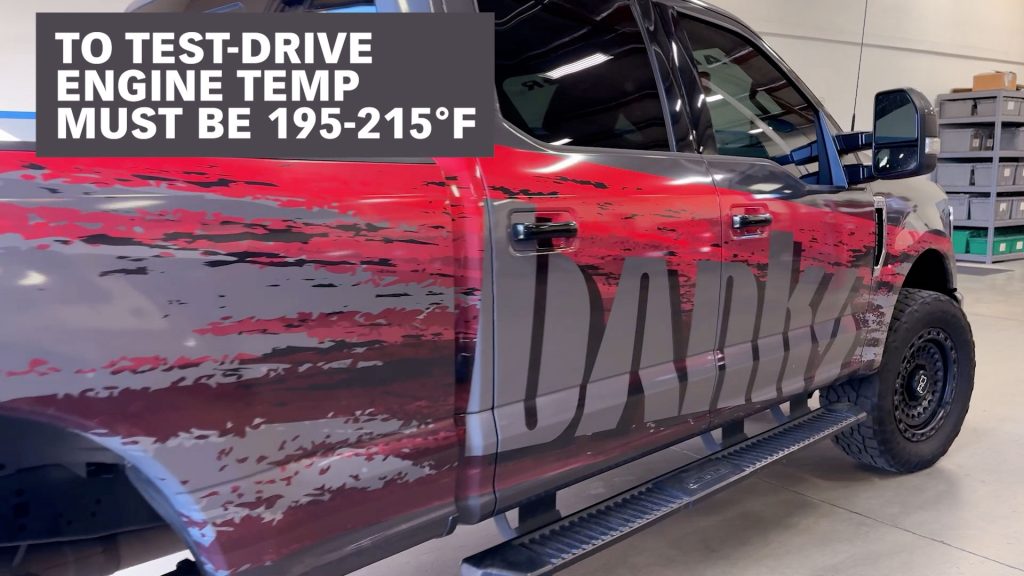
This is to work the new fluid into the transmission and raise the internal temperature to between 195-215°F.
5. After returning, raise the truck back up on the lift, but keep the engine running in park.

6. Note: Drain Plug will be HOT
Check the correct level by removing the 10mm fill check plug. The fluid and plug will be HOT. If no fluid is dripping from this port, add additional ATF via the fill plug until it does.

7. Reinstall the 10mm fill check plug when complete.
2023-2026 Fill Procedure
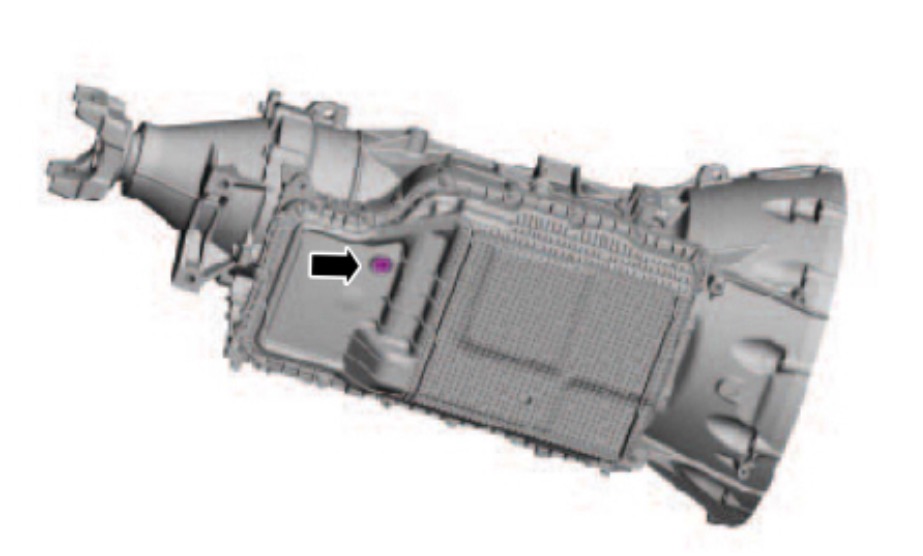
1. Remove the plug for the standpipe on the under side of the transmission pan.
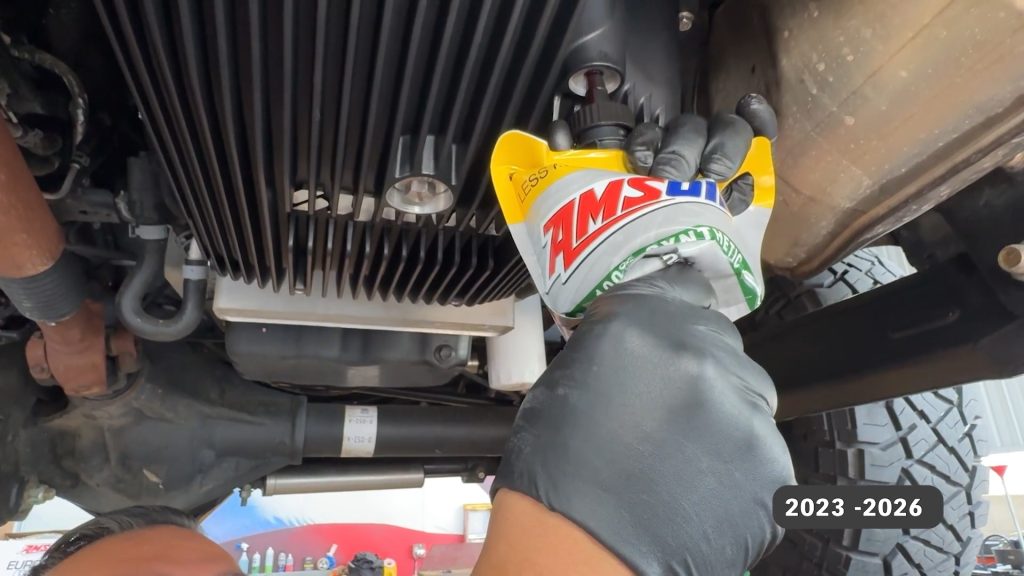
2. Press the nozzle of the ATF bag into the hole, and squeeze an initial fill of 12 quarts.
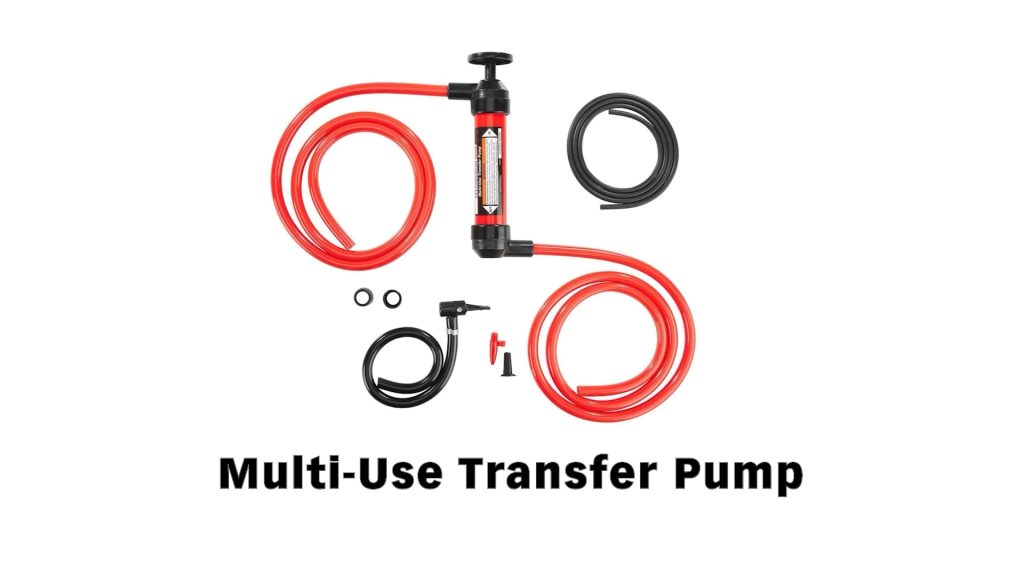
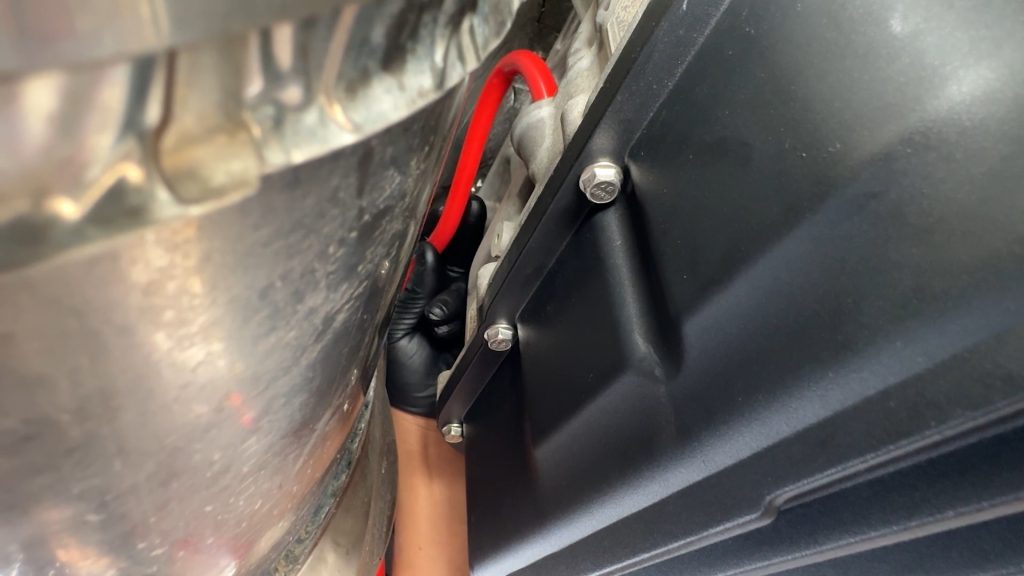
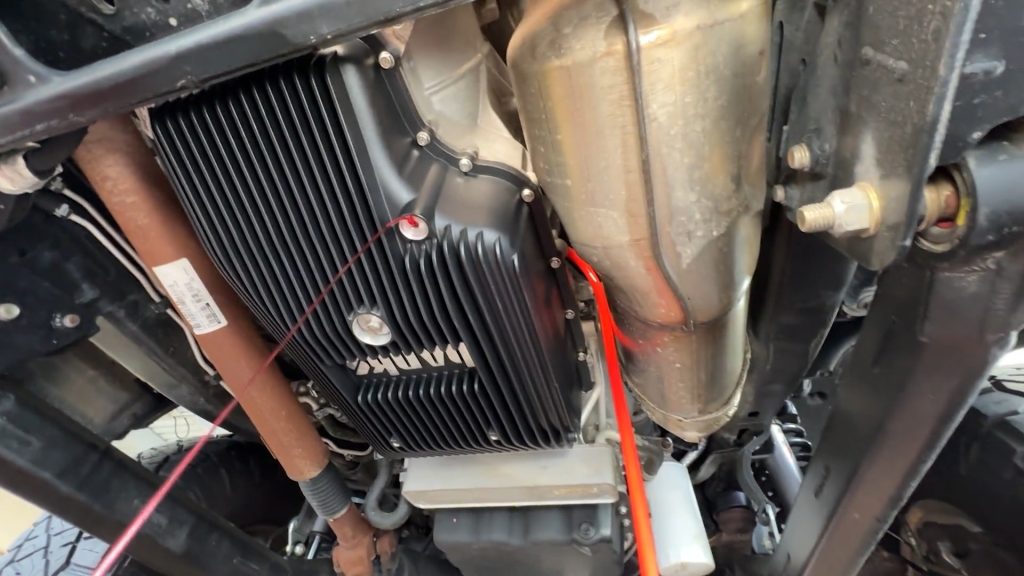
Note: As an alternative fill method, you can use a pressurized pump, and fill through a top facing port on the passenger side of the pan.
Use a box wrench to loosen and remove the upward-facing bolt on the passenger side of the transmission.
3. Continue until all 12 quarts are in the transmission pan.
4. Then start the engine in Park and let it idle. Continue adding fluid until it starts to leak through the standpipe.
5. Replace the standpipe plug.
6. Lower the truck and take it for a brief test drive.
This is to work the new fluid into the transmission and raise the internal temperature to between 195-215°F.
7. After returning, raise the truck back up on the lift, but keep the engine running in park.
Note: Drain Plug will be HOT
8. Check the correct level by removing the 10mm fill check plug. The fluid and plug will be HOT.

9. If no fluid leaks, add some more ATF 0.25qt at a time until it leaks. Then seal the standpipe with the plug.